2016 TESLA MODEL X light
[x] Cancel search: lightPage 21 of 179

Wearing Seat Belts
Using seat belts and child safety seats is the
most
effective way to protect occupants if a
collision occurs. Therefore, wearing a seat belt is required by law in most jurisdictions.
Both the driver and passenger seats are
equipped with three-point inertia reel seat
belts. Inertia reel belts are automatically
tensioned to allow occupants to move
comfortably during normal driving conditions.
To securely hold child safety seats, all
passenger seating positions are equipped with
an automatic locking retractor (ALR) that, by
pulling the seat belt beyond the length
needed for a typical adult occupant, locks the
belt into place until the seat belt is unbuckled
(see Installing Seat Belt Retained Child Seats
on page 27).
The seat belt reel automatically locks to prevent movement of occupants if Model Xexperiences a force associated with hard
acceleration, braking, cornering, or an impact in a collision.
The seat belt reminder on the
instrument panel alerts you if a seat
belt for an occupied seat is not
fastened. If the belt remains unfastened, the reminder
flashes and
an intermittent chime sounds. If all
occupants are buckled up and the
reminder stays on, re-fasten seat
belts to ensure they are correctly
latched. Also remove any heavy
objects (such as a briefcase) from an
unoccupied seat. If the reminder
light continues to stay on, contact
Tesla.
To Fasten a Belt
1. Ensure correct positioning of the seat.
2. Draw the belt out smoothly, ensuring the belt lays flat across the pelvis, chest and
mid-point of your collar bone, between
the neck and shoulder.
3. Insert the latch plate into the buckle and press together until you hear a click
indicating it is locked in place.
4. Pull the belt to check that it is securely fastened.
5. Pull the diagonal part of the belt toward the reel to remove excess slack.
To Release a Belt
Hold the belt near the buckle to prevent the
belt from retracting too quickly, then press the
button on the buckle. The belt retracts
automatically. Ensure there is no obstruction
that prevents the belt from fully retracting.
The belt should not hang loose. If a seat belt
does not fully retract, contact Tesla.
Wearing Seat Belts When Pregnant
Do not put the lap or shoulder sections of the
seat belt over the abdominal area. Wear the lap section of the belt as low as possibleacross the hips, not the waist. Position theshoulder portion of the belt between the
breasts and to the side of the abdomen.
Consult your doctor for
specific guidance.
Warning: Never place anything between
you and the seat belt to cushion the
impact in the event of an accident.
Seat Belts
Seating and Safety Restraints21
Page 35 of 179

Airbag Warning IndicatorThe airbag indicator on the
instrument panel remains lit if the airbag system is malfunctioning. The
only time this indicator should light
up is
briefly when Model X firstpowers up, in which case it turns offwithin a few seconds. If it remains lit,
contact Tesla immediately and do
not drive.
Airbag Warnings
Warning: No objects should be placed
over or near the air bag on the instrument panel, because any such objects couldcause harm if the vehicle is in a crash
severe enough to cause the air bag to
inflate.
Warning: All occupants, including the driver, should always wear their seat belts,
whether or not an airbag is also provided
at their seating position, to minimize the
risk of severe injury or death in the event
of a collision.Warning: Front seat occupants should not
place their arms over the airbag module,
as an
inflating bag can cause fractures or
other injuries.
Warning: Do not use seat covers on
Model X. Doing so could restrict
deployment of the side air bags if an
accident occurs. It can also reduce the
accuracy of the occupant detection
system.Warning: Airbags inflate with
considerable speed and force, which can
cause injury. To limit injuries, ensure that occupants are wearing seat belts and are
correctly seated, with the seat positioned as far back as possible.Warning: Do not use a child safety seat or
seat young children on a seat with an
operational airbag in front of it. Doing so
can cause injury or death if the airbag
inflates.
Warning: To ensure correct inflation of the
side airbags, maintain an unobstructed
gap between an occupant
Page 44 of 179

IndicatorDescriptionParking lights (side marker lights, tail lights, and license plate lights) are on.
See Lights on page 48.Front fog lights (optional). See Lights on page 48.
Electronic stability control systems are actively minimizing wheel spin by by
controlling brake pressure and motor power (indicator flashes). See Traction
Control on page 56. If this indicator stays illuminated, a fault is detected
(contact Tesla immediately).Smart Air Suspension
Page 47 of 179

8. Use the right steering wheel buttons to change what displays on the right side of theinstrument panel whenever a phone call is not active (see Using Left Steering Wheel Buttons
on page 37).
9. Total estimated driving distance (or energy) available. Instead of driving distance, you can display the percentage of battery energy remaining. To do so, touch Controls > Settings >
Units & Format > Energy & Charging (see Settings on page 101).
Note: When anticipating when you need to charge, use range estimates as a general guideline only.
Note: In cold weather, some of the stored energy in the Battery may not be available on your drive because the Battery is too cold. When this happens, a portion of the Battery meter isblue and the driving distance value has a
snowflake image next to it. If Model X is plugged in,
you can heat your Battery using wall power by turning on climate control using the mobile app. When the Battery warms up, the blue portion on the meter and the
snowflake image are
no longer displayed.
10. The speed limit (if available) that is currently being detected by Speed Assist (see Speed
Assist on page 91).
11. The car in front of you (if applicable).
12. Pay attention to important driving-related messages that appear at the bottom center of the instrument panel.
13. Your Model X.
14. When Autosteer is active, the driving lane is highlighted in blue (see Autosteer on page 80).
The lane may highlight in red If a front wheel passes over a lane marking and the associated
turn signal is
off (see Lane Assist on page 86).
15. Currently selected gear: Park, Reverse, Neutral, or Drive.
Instrument Panel
Driving47
Page 48 of 179

Controlling LightsTouch Controls on the bottom corner of the touchscreen to control most of the lights.In addition to the lights that you can control from the touchscreen, Model X has convenience
lights that turn on and
off automatically based on what you are doing. For example, you will
notice interior lights, marker lights, tail lights, door handle lights, and puddle lights that turn on
when you unlock Model X, when you open a door, and when you shift into Park. They turn
offautomatically after a minute or two or when you shift into a driving gear or lock Model X.
Lights
48Model X Owner
Page 49 of 179

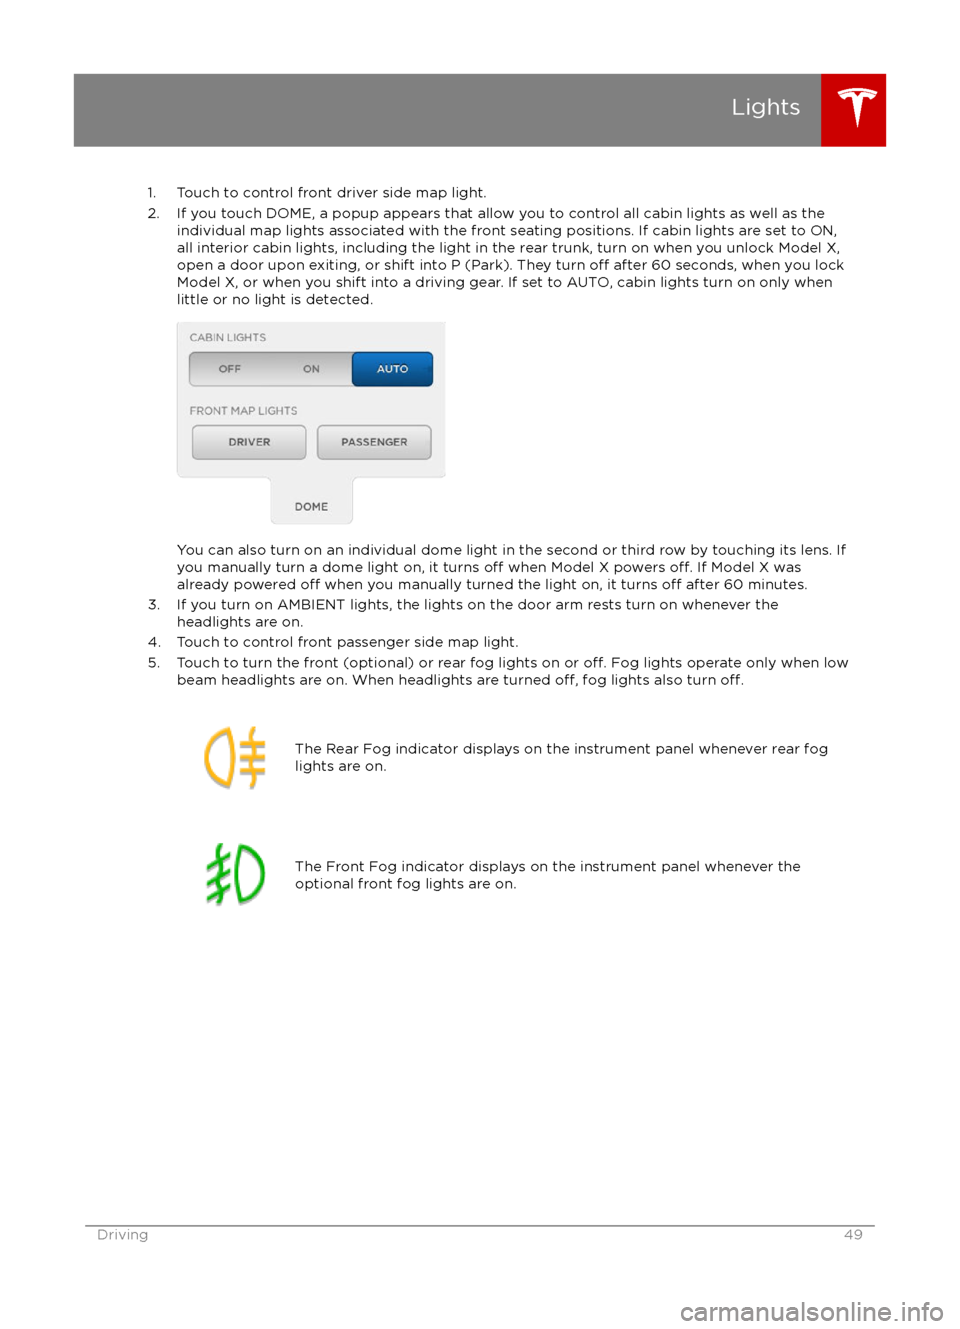
1. Touch to control front driver side map light.
2. If you touch DOME, a popup appears that allow you to control all cabin lights as well as the individual map lights associated with the front seating positions. If cabin lights are set to ON,all interior cabin lights, including the light in the rear trunk, turn on when you unlock Model X,open a door upon exiting, or shift into P (Park). They turn
off after 60 seconds, when you lock
Model X, or when you shift into a driving gear. If set to AUTO, cabin lights turn on only when
little or no light is detected.
You can also turn on an individual dome light in the second or third row by touching its lens. If
you manually turn a dome light on, it turns off when Model X powers off. If Model X was
already powered off when you manually turned the light on, it turns off after 60 minutes.
3. If you turn on AMBIENT lights, the lights on the door arm rests turn on whenever the headlights are on.
4. Touch to control front passenger side map light.
5. Touch to turn the front (optional) or rear fog lights on or
off. Fog lights operate only when low
beam headlights are on. When headlights are turned off, fog lights also turn off.
The Rear Fog indicator displays on the instrument panel whenever rear fog
lights are on.The Front Fog indicator displays on the instrument panel whenever the
optional front fog lights are on.Lights
Driving49
Page 50 of 179

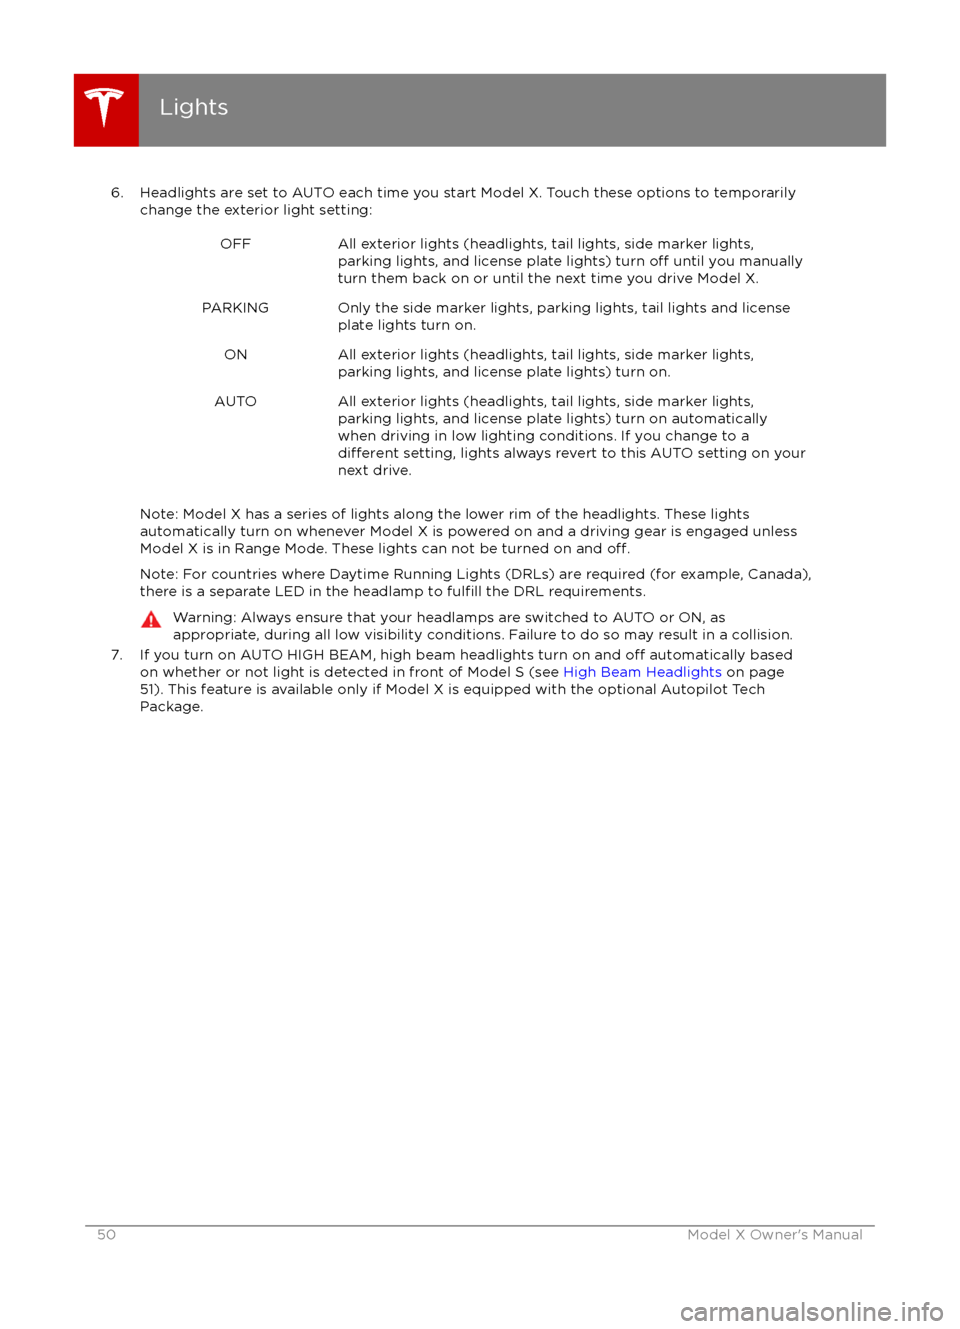
6. Headlights are set to AUTO each time you start Model X. Touch these options to temporarilychange the exterior light setting:OFFAll exterior lights (headlights, tail lights, side marker lights,parking lights, and license plate lights) turn off until you manually
turn them back on or until the next time you drive Model X.PARKINGOnly the side marker lights, parking lights, tail lights and license
plate lights turn on.ONAll exterior lights (headlights, tail lights, side marker lights,
parking lights, and license plate lights) turn on.AUTOAll exterior lights (headlights, tail lights, side marker lights,
parking lights, and license plate lights) turn on automatically when driving in low lighting conditions. If you change to a
different setting, lights always revert to this AUTO setting on your
next drive.
Note: Model X has a series of lights along the lower rim of the headlights. These lights automatically turn on whenever Model X is powered on and a driving gear is engaged unless Model X is in Range Mode. These lights can not be turned on and
off.
Note: For countries where Daytime Running Lights (DRLs) are required (for example, Canada),
there is a separate LED in the headlamp to fulfill the DRL requirements.
Warning: Always ensure that your headlamps are switched to AUTO or ON, as
appropriate, during all low visibility conditions. Failure to do so may result in a collision.
7. If you turn on AUTO HIGH BEAM, high beam headlights turn on and off automatically based
on whether or not light is detected in front of Model S (see High Beam Headlights on page
51). This feature is available only if Model X is equipped with the optional Autopilot Tech Package.
Lights
50Model X Owner
Page 51 of 179

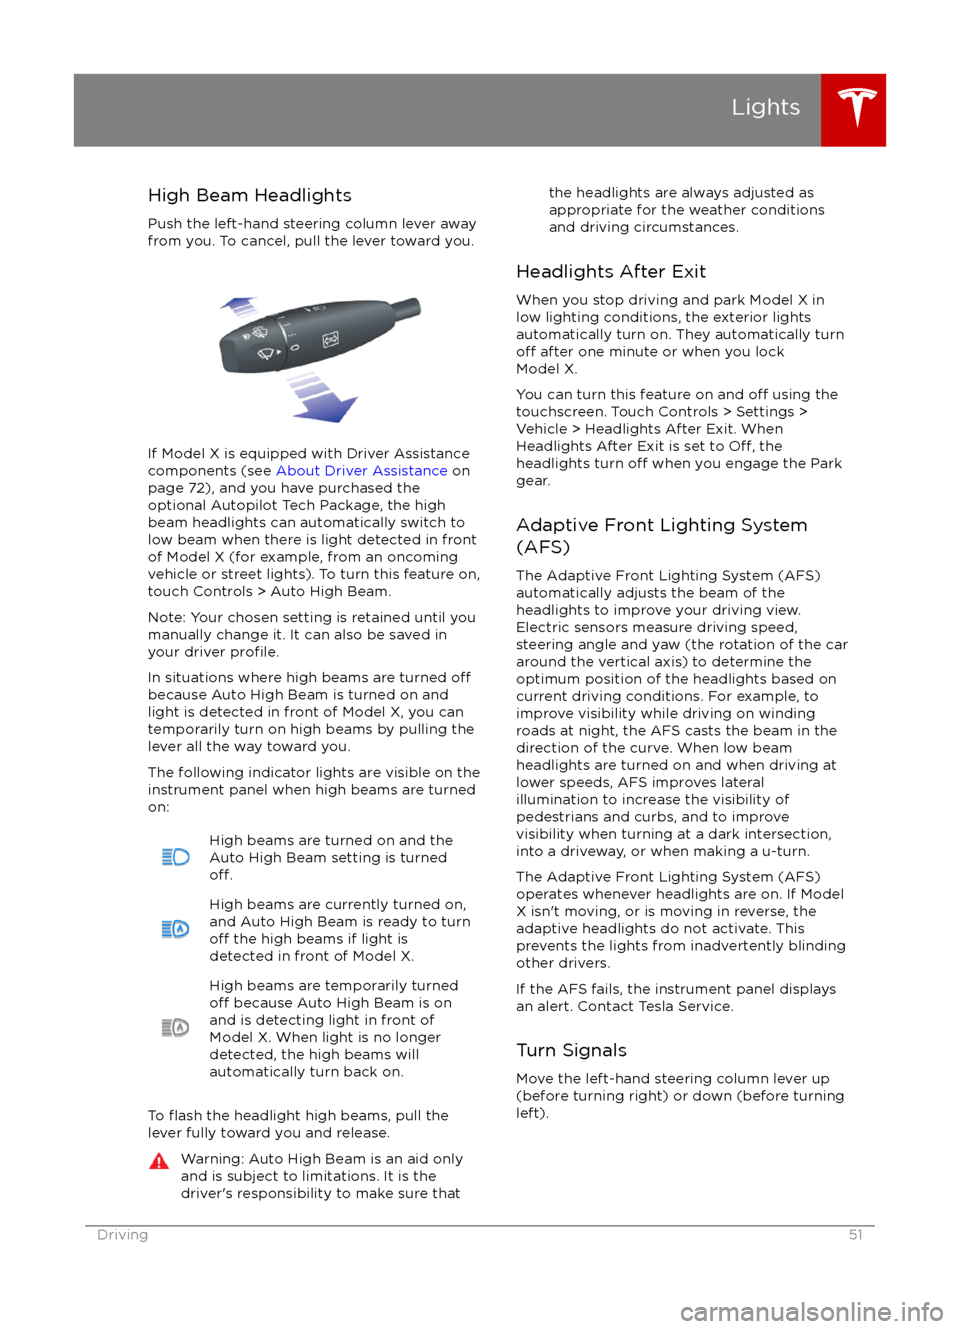
High Beam HeadlightsPush the left-hand steering column lever away
from you. To cancel, pull the lever toward you.
If Model X is equipped with Driver Assistance
components (see About Driver Assistance on
page 72), and you have purchased the
optional Autopilot Tech Package, the high
beam headlights can automatically switch to low beam when there is light detected in front
of Model X (for example, from an oncoming vehicle or street lights). To turn this feature on,touch Controls > Auto High Beam.
Note: Your chosen setting is retained until you manually change it. It can also be saved in
your driver
profile.
In situations where high beams are turned offbecause Auto High Beam is turned on and
light is detected in front of Model X, you can
temporarily turn on high beams by pulling the
lever all the way toward you.
The following indicator lights are visible on the
instrument panel when high beams are turned
on:
High beams are turned on and the
Auto High Beam setting is turned
off.
High beams are currently turned on,
and Auto High Beam is ready to turn
off the high beams if light is
detected in front of Model X.
High beams are temporarily turnedoff because Auto High Beam is on
and is detecting light in front of
Model X. When light is no longer
detected, the high beams will
automatically turn back on.
To flash the headlight high beams, pull the
lever fully toward you and release.
Warning: Auto High Beam is an aid only and is subject to limitations. It is the
driver