2016 SUBARU IMPREZA engine
[x] Cancel search: enginePage 422 of 594
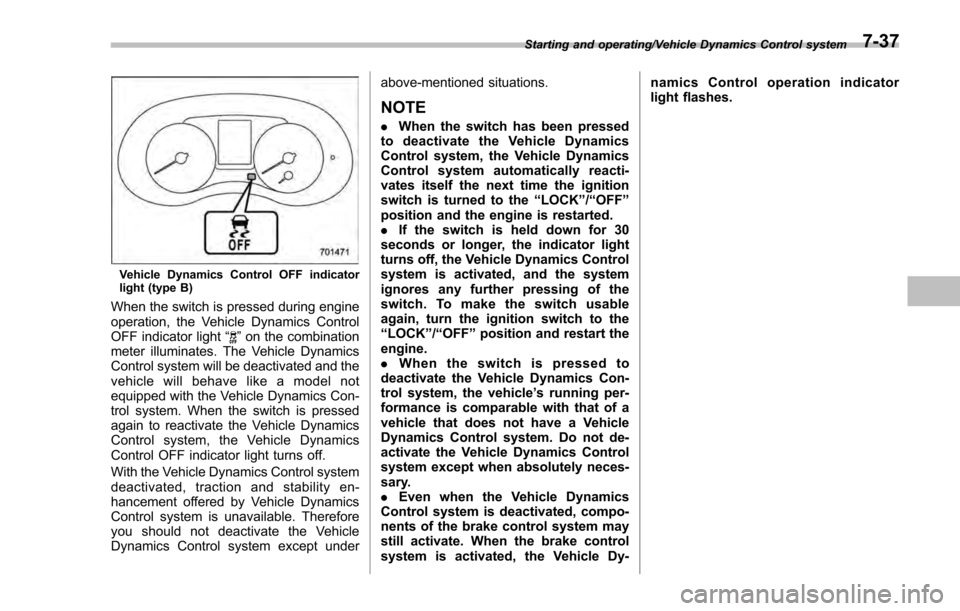
Vehicle Dynamics Control OFF indicator
light (type B)
When the switch is pressed during engine
operation, the Vehicle Dynamics Control
OFF indicator light“
”on the combination
meter illuminates. The Vehicle Dynamics
Control system will be deactivated and the
vehicle will behave like a model not
equipped with the Vehicle Dynamics Con-
trol system. When the switch is pressed
again to reactivate the Vehicle Dynamics
Control system, the Vehicle Dynamics
Control OFF indicator light turns off.
With the Vehicle Dynamics Control system
deactivated, traction and stability en-
hancement offered by Vehicle Dynamics
Control system is unavailable. Therefore
you should not deactivate the Vehicle
Dynamics Control system except under above-mentioned situations.
NOTE
.
When the switch has been pressed
to deactivate the Vehicle Dynamics
Control system, the Vehicle Dynamics
Control system automatically reacti-
vates itself the next time the ignition
switch is turned to the “LOCK”/“OFF ”
position and the engine is restarted.
. If the switch is held down for 30
seconds or longer, the indicator light
turns off, the Vehicle Dynamics Control
system is activated, and the system
ignores any further pressing of the
switch. To make the switch usable
again, turn the ignition switch to the
“LOCK ”/“OFF ”position and restart the
engine.
. When the switch is pressed to
deactivate the Vehicle Dynamics Con-
trol system, the vehicle ’s running per-
formance is comparable with that of a
vehicle that does not have a Vehicle
Dynamics Control system. Do not de-
activate the Vehicle Dynamics Control
system except when absolutely neces-
sary.
. Even when the Vehicle Dynamics
Control system is deactivated, compo-
nents of the brake control system may
still activate. When the brake control
system is activated, the Vehicle Dy- namics Control operation indicator
light flashes.
Starting and operating/Vehicle Dynamics Control system7-37
Page 425 of 594
Starting and operating/Parking your vehicle
Parking your vehicle
&Parking brake
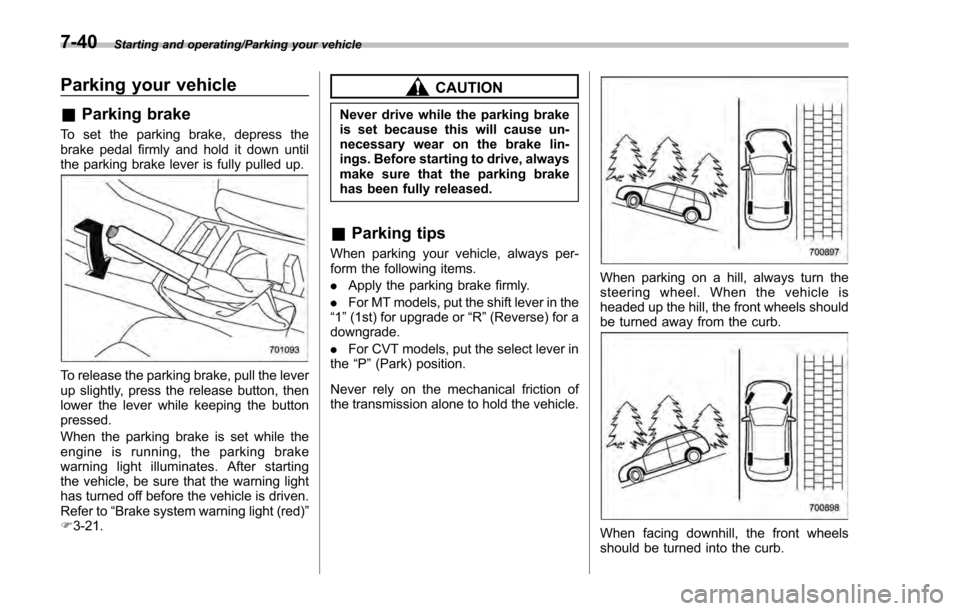
To set the parking brake, depress the
brake pedal firmly and hold it down until
the parking brake lever is fully pulled up.
To release the parking brake, pull the lever
up slightly, press the release button, then
lower the lever while keeping the button
pressed.
When the parking brake is set while the
engine is running, the parking brake
warning light illuminates. After starting
the vehicle, be sure that the warning light
has turned off before the vehicle is driven.
Refer to “Brake system warning light (red) ”
F 3-21.
CAUTION
Never drive while the parking brake
is set because this will cause un-
necessary wear on the brake lin-
ings. Before starting to drive, always
make sure that the parking brake
has been fully released.
& Parking tips
When parking your vehicle, always per-
form the following items.
. Apply the parking brake firmly.
. For MT models, put the shift lever in the
“1 ”(1st) for upgrade or “R”(Reverse) for a
downgrade.
. For CVT models, put the select lever in
the “P ”(Park) position.
Never rely on the mechanical friction of
the transmission alone to hold the vehicle.
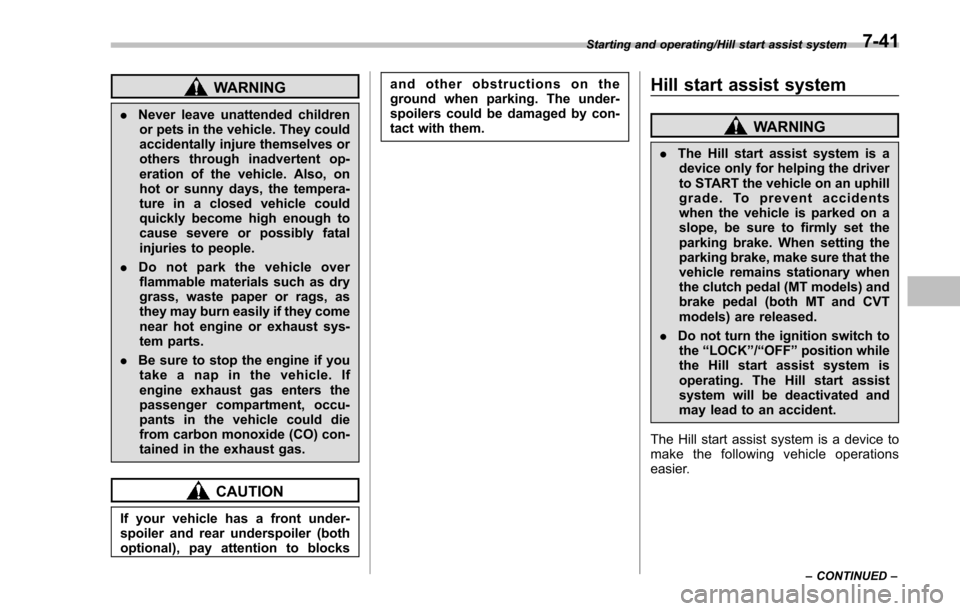
When parking on a hill, always turn the
steering wheel. When the vehicle is
headed up the hill, the front wheels should
be turned away from the curb.
When facing downhill, the front wheels
should be turned into the curb.
7-40
Page 426 of 594
WARNING
.Never leave unattended children
or pets in the vehicle. They could
accidentally injure themselves or
others through inadvertent op-
eration of the vehicle. Also, on
hot or sunny days, the tempera-
ture in a closed vehicle could
quickly become high enough to
cause severe or possibly fatal
injuries to people.
. Do not park the vehicle over
flammable materials such as dry
grass, waste paper or rags, as
they may burn easily if they come
near hot engine or exhaust sys-
tem parts.
. Be sure to stop the engine if you
take a nap in the vehicle. If
engine exhaust gas enters the
passenger compartment, occu-
pants in the vehicle could die
from carbon monoxide (CO) con-
tained in the exhaust gas.
CAUTION
If your vehicle has a front under-
spoiler and rear underspoiler (both
optional), pay attention to blocks and other obstructions on the
ground when parking. The under-
spoilers could be damaged by con-
tact with them.
Hill start assist system
WARNING
.
The Hill start assist system is a
device only for helping the driver
to START the vehicle on an uphill
grade. To prevent accidents
when the vehicle is parked on a
slope, be sure to firmly set the
parking brake. When setting the
parking brake, make sure that the
vehicle remains stationary when
the clutch pedal (MT models) and
brake pedal (both MT and CVT
models) are released.
. Do not turn the ignition switch to
the “LOCK ”/“OFF ”position while
the Hill start assist system is
operating. The Hill start assist
system will be deactivated and
may lead to an accident.
The Hill start assist system is a device to
make the following vehicle operations
easier.
Starting and operating/Hill start assist system
–CONTINUED –7-41
Page 428 of 594
Hill start assist OFF indicator light is
illuminated
When using the Hill start assist system, a
braking effect may be felt even after the
brake pedal has been released. However,
for MT models, this braking effect should
disappear once the clutch pedal is re-
leased.
NOTE
A slight jolt may be felt when the
vehicle begins to move forward after
being reversed.
&To activate/deactivate the Hill
start assist system
CAUTION
While the Hill start assist system is
deactivated, when starting on an
uphill grade, braking power is not
maintained if the brake pedal is
released. Start on an uphill grade
by using the parking brake.
You can activate/deactivate the Hill start
assist system according to the following
procedure.
NOTE
If you make an error when performing
any steps in the following procedure,
place the ignition switch in the
“LOCK ”/“OFF ”position once and then
start over again.
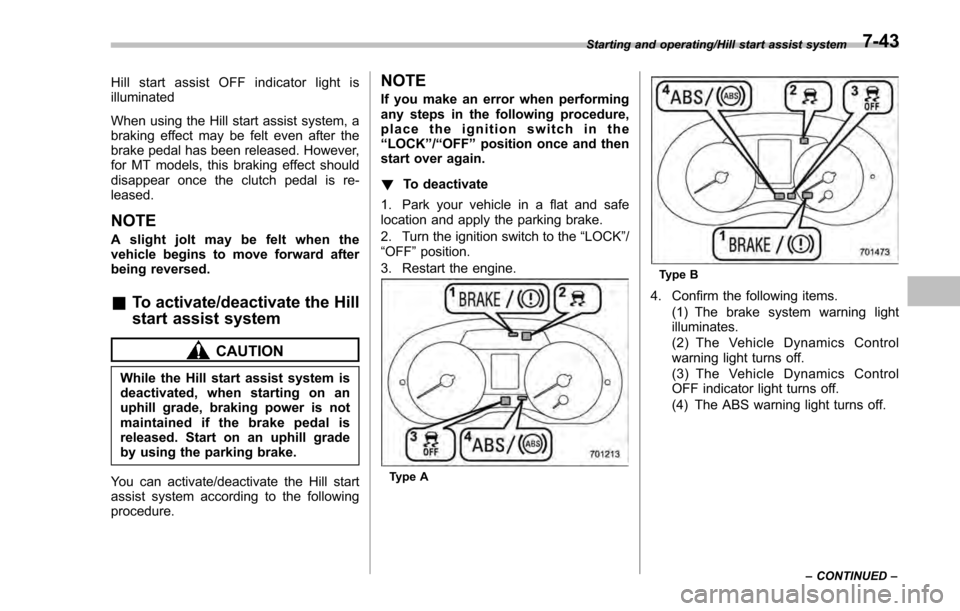
! To deactivate
1. Park your vehicle in a flat and safe
location and apply the parking brake.
2. Turn the ignition switch to the “LOCK”/
“OFF ”position.
3. Restart the engine.
Type A
Type B
4. Confirm the following items. (1) The brake system warning light
illuminates.
(2) The Vehicle Dynamics Control
warning light turns off.
(3) The Vehicle Dynamics Control
OFF indicator light turns off.
(4) The ABS warning light turns off.
Starting and operating/Hill start assist system
–CONTINUED –7-43
Page 432 of 594
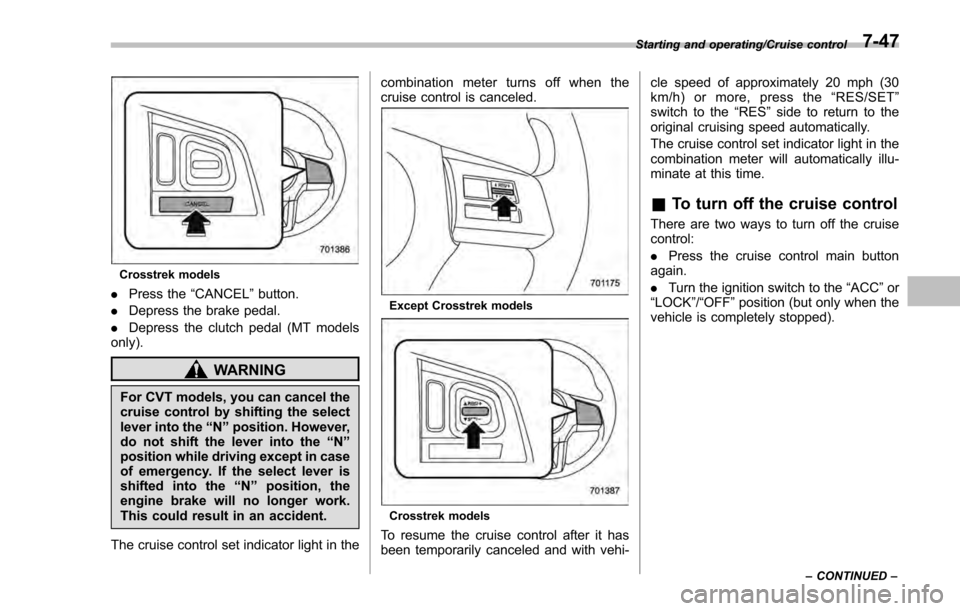
Crosstrek models
.Press the “CANCEL”button.
. Depress the brake pedal.
. Depress the clutch pedal (MT models
only).
WARNING
For CVT models, you can cancel the
cruise control by shifting the select
lever into the “N”position. However,
do not shift the lever into the “N”
position while driving except in case
of emergency. If the select lever is
shifted into the “N”position, the
engine brake will no longer work.
This could result in an accident.
The cruise control set indicator light in the combination meter turns off when the
cruise control is canceled.
Except Crosstrek models
Crosstrek models
To resume the cruise control after it has
been temporarily canceled and with vehi-cle speed of approximately 20 mph (30
km/h) or more, press the
“RES/SET ”
switch to the “RES ”side to return to the
original cruising speed automatically.
The cruise control set indicator light in the
combination meter will automatically illu-
minate at this time.
& To turn off the cruise control
There are two ways to turn off the cruise
control:
. Press the cruise control main button
again.
. Turn the ignition switch to the “ACC”or
“ LOCK ”/“OFF ”position (but only when the
vehicle is completely stopped).
Starting and operating/Cruise control
–CONTINUED –7-47
Page 442 of 594
nation meter, and the BSD/RCTA is
deactivated.
Press the switch again to activate the
BSD/RCTA. The BSD/RCTA OFF indica-
tor will disappear.
NOTE
.In the following cases, the system
may not operate properly due to
blocked radar waves. Press the BSD/
RCTA OFF switch to deactivate the
system.
–When towing a trailer
– When a bicycle carrier or other
item is fitted to the rear of the
vehicle
– When using a chassis dynam-
ometer or free roller device, etc.
– When running the engine and
makingthewheelsrotatewhile
lifting up the vehicle
. If the ignition switch is turned to the
“LOCK ”/“OFF ”position, the last known
status of the system is maintained. For
example, if the ignition switch is turned
to the “LOCK ”/“OFF ”position with the
BSD/RCTA deactivated, the BSD/RCTA
will remain deactivated the next time
the ignition switch is turned to the
“ON ”position.
. If the vehicle battery is disconnected
due to situations such as battery terminal or fuse replacement, after the
battery is reconnected, the BSD/RCTA
will be activated.
&
Certification for the BSD/
RCTA
FCC ID: OAYSRR2A
CAUTION
FCC WARNING
Changes or modifications not ex-
pressly approved by the party re-
sponsible for compliance could void
the user ’s authority to operate the
equipment.
This device complies with part 15 of the
FCC Rules. Operation is subject to the
following two conditions: (1) This device
may not cause harmful interference, and
(2) this device must accept any interfer-
ence received, including interference that
may cause undesired operation.
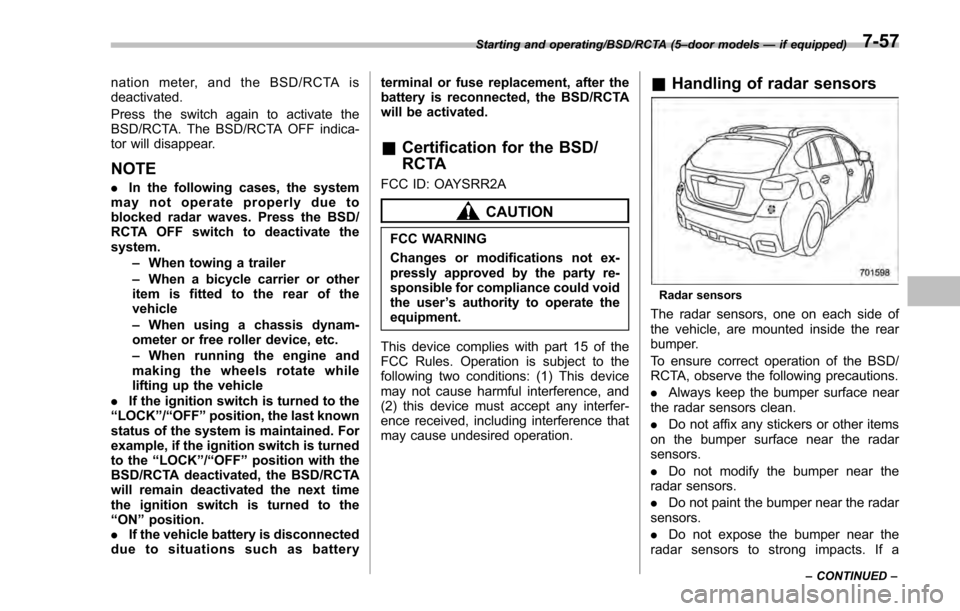
& Handling of radar sensors
Radar sensors
The radar sensors, one on each side of
the vehicle, are mounted inside the rear
bumper.
To ensure correct operation of the BSD/
RCTA, observe the following precautions.
. Always keep the bumper surface near
the radar sensors clean.
. Do not affix any stickers or other items
on the bumper surface near the radar
sensors.
. Do not modify the bumper near the
radar sensors.
. Do not paint the bumper near the radar
sensors.
. Do not expose the bumper near the
radar sensors to strong impacts. If a
Starting and operating/BSD/RCTA (5 –door models —if equipped)
–CONTINUED –7-57
Page 444 of 594

New vehicle break-in driving–the first
1,000 miles (1,600 km) ..................................... 8-2
Fuel economy hints ............................................ 8-2
Engine exhaust gas (carbon monoxide) ............ 8-2
Catalytic converter .............................................. 8-3
Periodic inspections ........................................... 8-4
Driving in foreign countries ............................... 8-4
Driving tips for AWD models .............................. 8-4
Off road driving ................................................... 8-6
Except Crosstrek models. .................................... 8-6
Crosstrek models ................................................ 8-6
Winter driving...................................................... 8-8Operation during cold weather ............................. 8-8
Driving on snowy and icy roads .......................... 8-9
Corrosion protection .......................................... 8-10
Snow tires ......................................................... 8-10
Tire chains ......................................................... 8-11
Rocking the vehicle ............................................ 8-11
Loading your vehicle ......................................... 8-12Vehicle capacity weight ...................................... 8-13
GVWR and GAWR (Gross Vehicle Weight Rating and Gross Axle Weight Rating) ........................ 8-13
Roof rail (if equipped) ........................................ 8-14
Roof molding and crossbar (5-door models —if
equipped) ........................................................ 8-15
Trailer hitch (Crosstrek models —dealer
option) ............................................................. 8-16
Connecting a trailer ........................................... 8-17
If not towing a trailer .......................................... 8-18
Trailer towing (Crosstrek models) .................... 8-18Warranties and maintenance.............................. 8-19
Maximum load limits .......................................... 8-19
Trailer Hitches ................................................... 8-22
Connecting a trailer ........................................... 8-23
Trailer towing tips .............................................. 8-24
Driving tips
8
Page 445 of 594
Driving tips/New vehicle break–in driving –the first 1,000 miles (1,600 km)
New vehicle break-in driving
– the first 1,000 miles (1,600
km)
The performance and long life of your
vehicle are dependent on how you handle
and care for your vehicle while it is new.
Follow these instructions during the first
1,000 miles (1,600 km):
. Do not race the engine. And do not
allow engine speed to exceed 4,000 rpm
except in an emergency.
. Do not drive at one constant engine or
vehicle speed for a long time, either fast or
slow.
. Avoid starting suddenly and rapid
acceleration, except in an emergency.
. Avoid hard braking, except in an
emergency.
The same break-in procedures should be
applied to an overhauled engine, newly
mounted engine or when brake pads or
brake linings are replaced with new ones.
Fuel economy hints
The following suggestions will help to save
fuel.
. Select the proper gear position for the
speed and road conditions.
. Avoid sudden acceleration or decelera-
tion. Always accelerate gently until you
reach the desired speed. Then try to
maintain that speed for as long as
possible.
. Do not pump the accelerator and avoid
racing the engine.
. Avoid unnecessary engine idling.
. Keep the engine properly tuned.
. Keep the tires inflated to the correct
pressure shown on the tire placard, which
is located under the door latch on the
driver ’s side. Low pressure will increase
tire wear and fuel consumption.
. Use the air conditioner only when
necessary.
. Keep the front and rear wheels in
proper alignment.
. Avoid carrying unnecessary luggage or
cargo.
Engine exhaust gas (carbon
monoxide)
WARNING
. Never inhale engine exhaust gas.
Engine exhaust gas contains
carbon monoxide, a colorless
and odorless gas which is dan-
gerous, or even lethal, if inhaled.
. Always properly maintain the en-
gine exhaust system to prevent
engine exhaust gas from enter-
ing the vehicle.
. Never run the engine in a closed
space, such as a garage, except
for the brief time needed to drive
the vehicle in or out of it.
. Avoid remaining in a parked
vehicle for a lengthy time while
the engine is running. If that is
unavoidable, then use the venti-
lation fan to force fresh air into
the vehicle.
. Always keep the front ventilator
inlet grille free from snow, leaves
or other obstructions to ensure
that the ventilation system al-
ways works properly.
. If at any time you suspect that
8-2