2016 Peugeot 508 RXH scr
[x] Cancel search: scrPage 222 of 364
220
508_en_Chap07_info-pratiques_ed01-2016
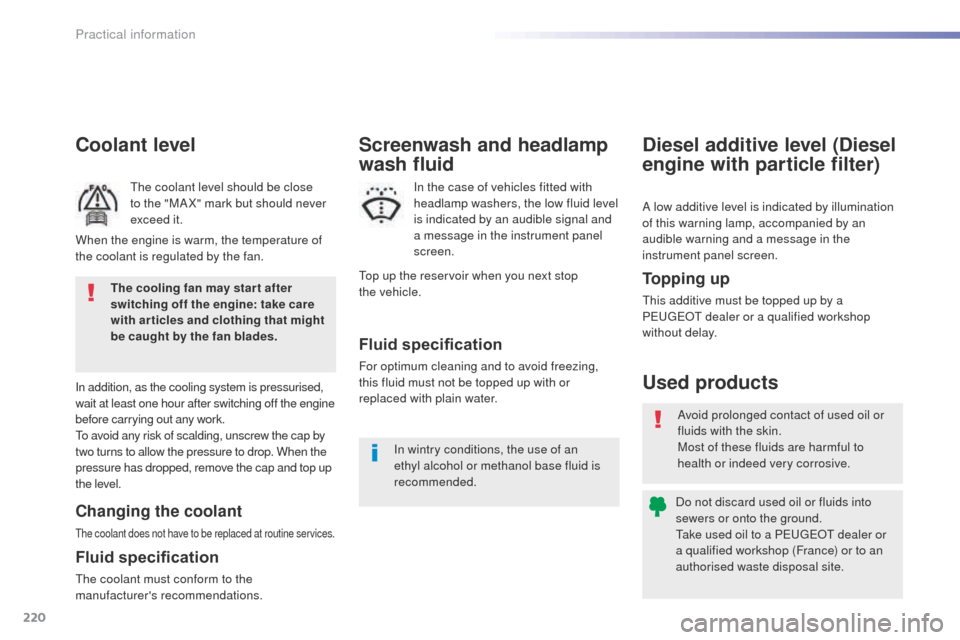
Coolant level
the coolant level should be close
to the "MA X" mark but should never
exceed it.
In addition, as the cooling system is pressurised,
wait at least one hour after switching off the engine
before carrying out any work.
to a
void any risk of scalding, unscrew the cap by
two turns to allow the pressure to drop. When the
pressure has dropped, remove the cap and top up
the level.
Changing the coolant
the coolant does not have to be replaced at routine services.
Fluid specification
the coolant must conform to the
manufacturer's recommendations.
Fluid specification
For optimum cleaning and to avoid freezing,
this fluid must not be topped up with or
replaced with plain water.
Screenwash and headlamp
wash fluid
In the case of vehicles fitted with
headlamp washers, the low fluid level
is indicated by an audible signal and
a message in the instrument panel
screen.
Avoid prolonged contact of used oil or
fluids with the skin.
Most of these fluids are harmful to
health or indeed very corrosive.
Do not discard used oil or fluids into
sewers or onto the ground.
ta
ke used oil to a P
e
uge
Ot
dealer or
a qualified workshop (France) or to an
authorised waste disposal site.
Used products
A low additive level is indicated by illumination
of this warning lamp, accompanied by an
audible warning and a message in the
instrument panel screen.
Diesel additive level (Diesel
engine with particle filter)
When the engine is warm, the temperature of
the coolant is regulated by the fan.
to
p up the reservoir when you next stop
the
vehicle.
In wintry conditions, the use of an
ethyl alcohol or methanol base fluid is
recommended.
The cooling fan may star t after
switching off the engine: take care
with articles and clothing that might
be caught by the fan blades.
To p p i n g u p
this additive must be topped up by a
Pe
ugeOt dealer or a qualified workshop
without delay.
Practical information
Page 223 of 364
221
508_en_Chap07_info-pratiques_ed01-2016
Checks
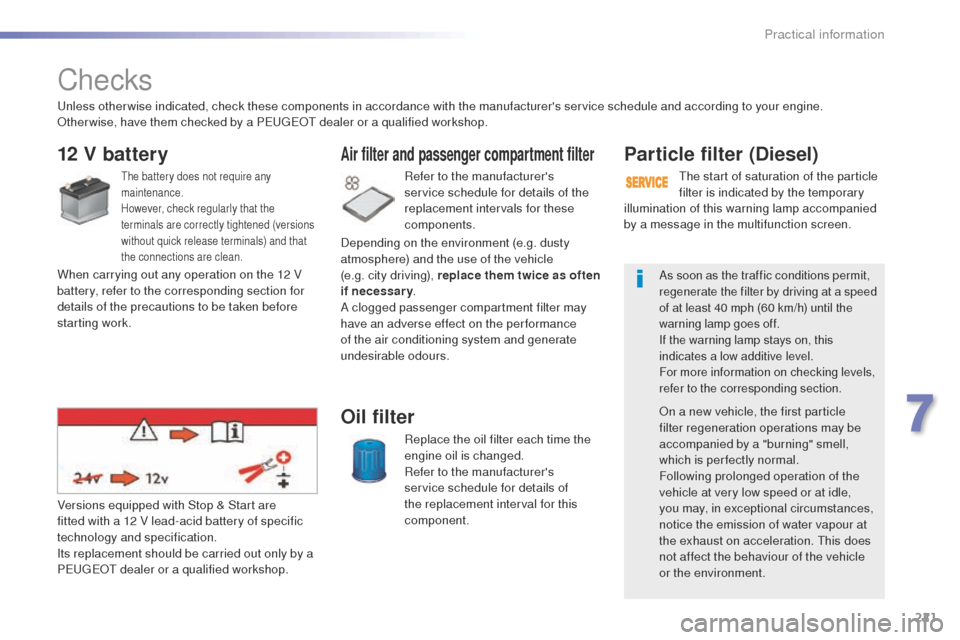
12 V battery
the battery does not require any
maintenance.
However, check regularly that the
terminals are correctly tightened (versions
without quick release terminals) and that
the connections are clean.Refer to the manufacturer's
service schedule for details of the
replacement intervals for these
components.
Air filter and passenger compartment filter
Replace the oil filter each time the
engine oil is changed.
Refer to the manufacturer's
service schedule for details of
the replacement interval for this
component.
Oil filter
Versions equipped with Stop & Start are
fitted with a 12 V lead-acid battery of specific
technology and specification.
Its replacement should be carried out only by a
P
e
uge
Ot
dealer or a qualified workshop.
Particle filter (Diesel)
the start of saturation of the particle
filter is indicated by the temporary
As soon as the traffic conditions permit,
regenerate the filter by driving at a speed
of at least 40 mph (60 km/h) until the
warning lamp goes off.
If the warning lamp stays on, this
indicates a low additive level.
For more information on checking levels,
refer to the corresponding section.
On a new vehicle, the first particle
filter regeneration operations may be
accompanied by a "burning" smell,
which is per fectly normal.
Following prolonged operation of the
vehicle at very low speed or at idle,
you may, in exceptional circumstances,
notice the emission of water vapour at
the exhaust on acceleration.
t
h
is does
not affect the behaviour of the vehicle
or the environment.
un
less otherwise indicated, check these components in accordance with the manufacturer's service schedule and according to your engine.
Other wise, have them checked by a P
e
uge
Ot
dealer or a qualified workshop.
When carrying out any operation on the 12 V
battery, refer to the corresponding section for
details of the precautions to be taken before
starting work. Depending on the environment (e.g. dusty
atmosphere) and the use of the vehicle
(e.g.
city driving), replace them twice as often
if necessary .
A clogged passenger compartment filter may
have an adverse effect on the per formance
of the air conditioning system and generate
undesirable odours. illumination of this warning lamp accompanied
by a message in the multifunction screen.
7
Practical information
Page 225 of 364
223
508_en_Chap07_info-pratiques_ed01-2016
AdBlue® additive and SCR system
for BlueHDi Diesel engines
to assure respect for the environment and
conformity with the new
eu ro 6 emissions
standard, without adversely affecting the
per formance or fuel consumption of Diesel
engines, P
e
uge
Ot
has taken the decision to
equip its vehicles with an effective system that
associates SCR (Selective Catalytic Reduction)
with a particle filter (FAP) for the treatment of
exhaust gases.
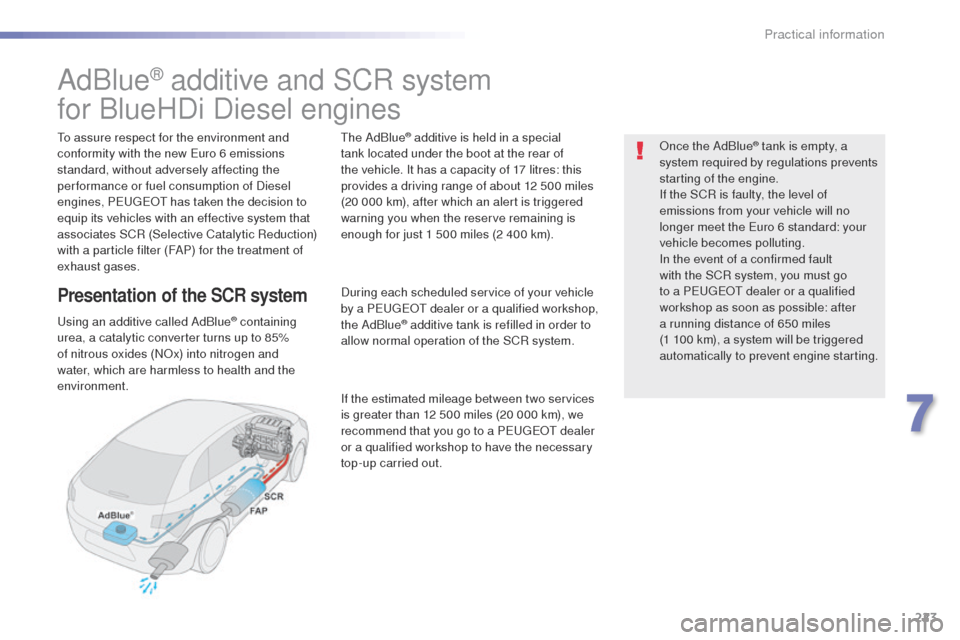
Presentation of the SCR system
using an additive called AdBlue® containing
urea, a catalytic converter turns up to 85%
of nitrous oxides (NOx) into nitrogen and
water, which are harmless to health and the
environment.
th
e AdBlue
® additive is held in a special
tank located under the boot at the rear of
the vehicle. It has a capacity of 17 litres: this
provides a driving range of about 12 500 miles
(20 000 km), after which an alert is triggered
warning you when the reserve remaining is
enough for just 1 500 miles (2 400 km).
During each scheduled service of your vehicle
by a P
e
uge
Ot
dealer or a qualified workshop,
the AdBlue
® additive tank is refilled in order to
allow normal operation of the SCR system.
If the estimated mileage between two services
is greater than 12 500 miles (20 000 km), we
recommend that you go to a P
e
uge
Ot
dealer
or a qualified workshop to have the necessary
top-up carried out. Once the AdBlue
® tank is empty, a
s
ystem required by regulations prevents
starting of the engine.
If the SCR is faulty, the level of
emissions from your vehicle will no
longer meet the
e
u
ro 6 standard: your
vehicle becomes polluting.
In the event of a confirmed fault
with the SCR system, you must go
to a P
e
uge
Ot
dealer or a qualified
workshop as soon as possible: after
a running distance of 650 miles
(1 100 km), a system will be triggered
automatically to prevent engine starting.
7
Practical information
Page 226 of 364
224
508_en_Chap07_info-pratiques_ed01-2016
Topping-up the AdBlue® additive
Filling the AdBlue® tank is an operation
included in every routine service on your
vehicle by a P
e
uge
Ot
dealer or a qualified
workshop.
Nevertheless, given the capacity of the tank,
it may be necessary to top-up the additive
between services, more particularly if an alert
(warning lamps and a message) signals the
requirement.
You can go to a P
e
uge
Ot
dealer or a qualified
workshop.
If you envisage topping-up yourself, please
read the following warnings carefully.Precautions in use
Keep AdBlue® out of the reach of
children, in its original bottle.
Never transfer AdBlue
® to another
container: it would lose its purity.
us
e only AdBlue
® additive that meets the
ISO
22241 standard.th
e AdBlue® additive is an urea-based
solution.
th
is liquid is non-flammable,
colourless and odourless (kept in a cool area).
In the event of contact with the skin, wash
the affected area with soap and water. In the
event of contact with the eyes, wash (irrigate)
the eyes with large amounts of water or with
an eye wash solution for at least 15 minutes.
If a burning sensation or irritation persists, get
medical attention.
If swallowed, immediately wash out the mouth
with clean water and then drink plenty of water.
In certain conditions (high ambient
temperature, for example), the risk of release
of ammonia cannot be excluded: do not inhale
the product. Ammonia vapour has an irritant
effect on mucous membranes (eyes, nose and
throat). Never dilute the additive with water.
Never pour the additive into the Diesel
fuel tank.
th
e supply in a non-drip bottle simplifies
topping-up. You can obtain 1.89 litre (half a
u
S
g
allon) bottles from a P
e
uge
Ot
dealer or a
qualified workshop.
Never top-up from an AdBlue
®
dispenser reserved for heavy goods
vehicles.
Freezing of the AdBlue
® additive
th
e AdBlue
® additive freezes at
temperatures below around -11°C.
th
e SCR system includes a heater
for the AdBlue
® tank, allowing you to
continue driving in very cold conditions.
Practical information
Page 232 of 364
230
508_en_Chap08_en-cas-de-pannes_ed01-2016
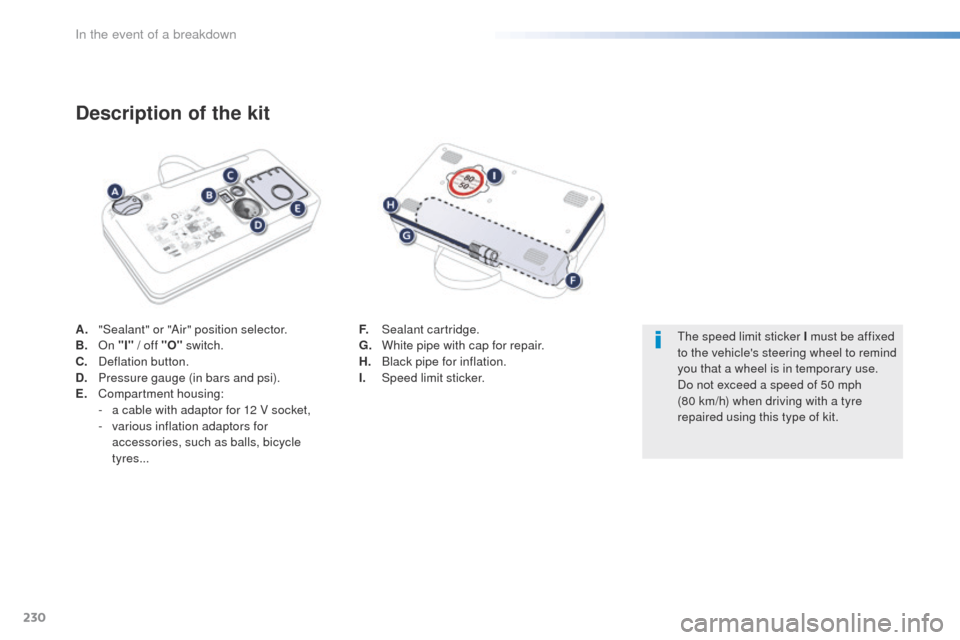
A. "Sealant" or "Air" position selector.
B. On "I" / off "O" switch.
C.
D
eflation button.
D.
P
ressure gauge (in bars and psi).
E.
C
ompartment housing:
-
a c
able with adaptor for 12 V socket,
-
v
arious inflation adaptors for
accessories, such as balls, bicycle
tyres...
Description of the kit
F. Sealant cartridge.
G. W hite pipe with cap for repair.
H.
B
lack pipe for inflation.
I.
Spe
ed limit sticker.th e speed limit sticker I must be affixed
to the vehicle's steering wheel to remind
you that a wheel is in temporary use.
Do not exceed a speed of 50 mph
(80
km/h) when driving with a tyre
repaired using this type of kit.
In the event of a breakdown
Page 233 of 364
231
508_en_Chap08_en-cas-de-pannes_ed01-2016
Repair procedure
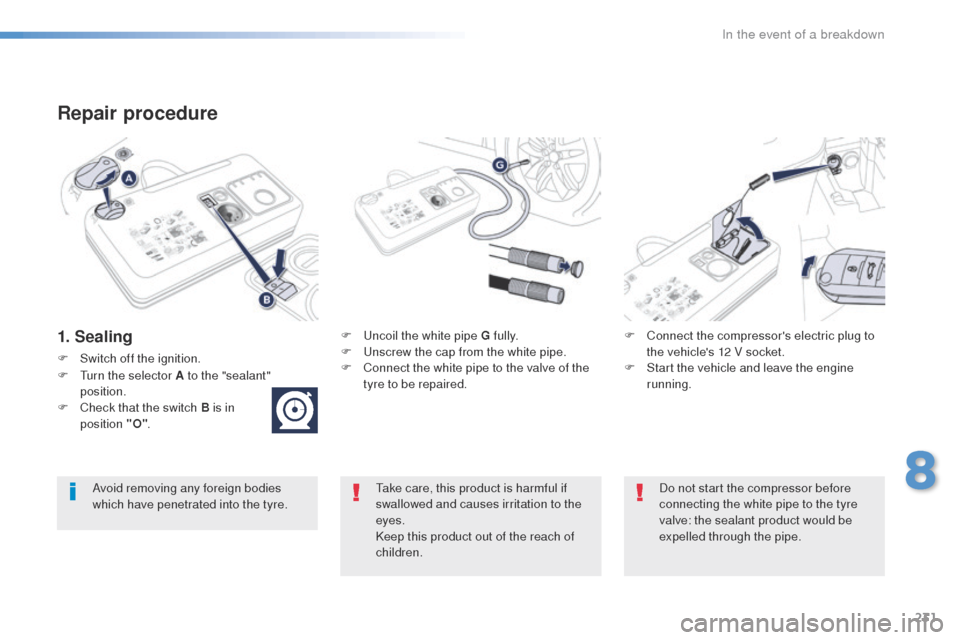
1. SealingF uncoil the white pipe G fully.
F un screw the cap from the white pipe.
F
C
onnect the white pipe to the valve of the
tyre to be repaired. F
C onnect the compressor's electric plug to
the vehicle's 12 V socket.
F
S
tart the vehicle and leave the engine
running.
ta
ke care, this product is harmful if
swallowed and causes irritation to the
eyes.
Keep this product out of the reach of
children.
Avoid removing any foreign bodies
which have penetrated into the tyre.
Do not start the compressor before
connecting the white pipe to the tyre
valve: the sealant product would be
expelled through the pipe.
F
S
witch off the ignition.
F
t
u
rn the selector A to the "sealant"
position.
F
C
heck that the switch B is in
position "O" .
8
In the event of a breakdown
Page 234 of 364
232
508_en_Chap08_en-cas-de-pannes_ed01-2016
If after around 5 to 7 minutes the
pressure is not attained, this indicates
that the tyre is not repairable; contact
a P
e
uge
Ot
dealer or a qualified
workshop for assistance.
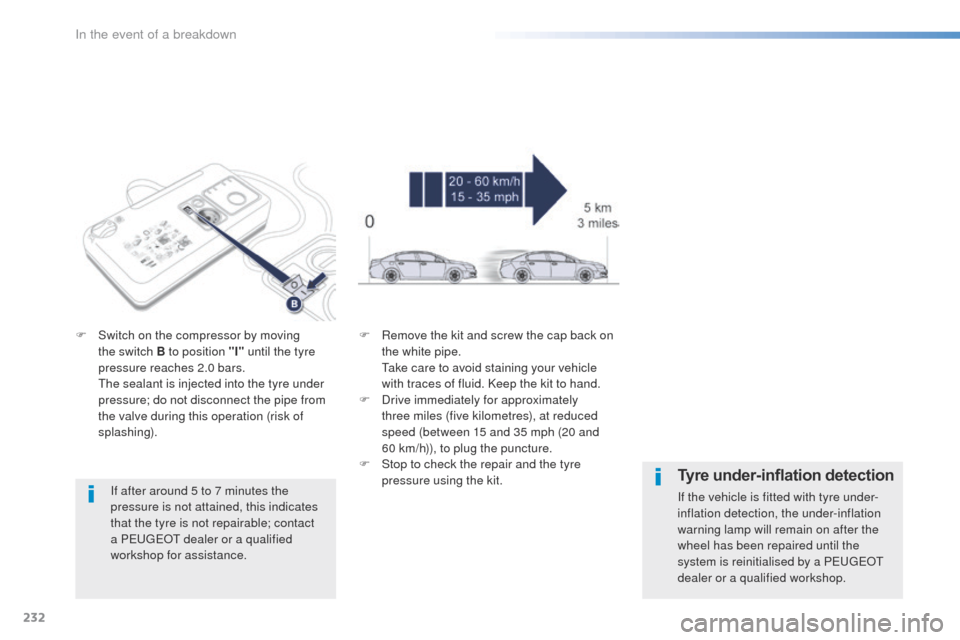
F
S
witch on the compressor by moving
the switch B to position "I" until the tyre
pressure reaches 2.0 bars.
t
h
e sealant is injected into the tyre under
pressure; do not disconnect the pipe from
the valve during this operation (risk of
splashing). F
R
emove the kit and screw the cap back on
the white pipe.
t
a
ke care to avoid staining your vehicle
with traces of fluid. Keep the kit to hand.
F
D
rive immediately for approximately
three miles (five kilometres), at reduced
speed (between 15 and 35 mph (20 and
60 km/h)), to plug the puncture.
F
S
top to check the repair and the tyre
pressure using the kit.Tyre under-inflation detection
If the vehicle is fitted with tyre under-
inflation detection, the under-inflation
warning lamp will remain on after the
wheel has been repaired until the
system is reinitialised by a P
e
uge
Ot
dealer or a qualified workshop.
In the event of a breakdown
Page 236 of 364
234
508_en_Chap08_en-cas-de-pannes_ed01-2016
Removing the cartridge
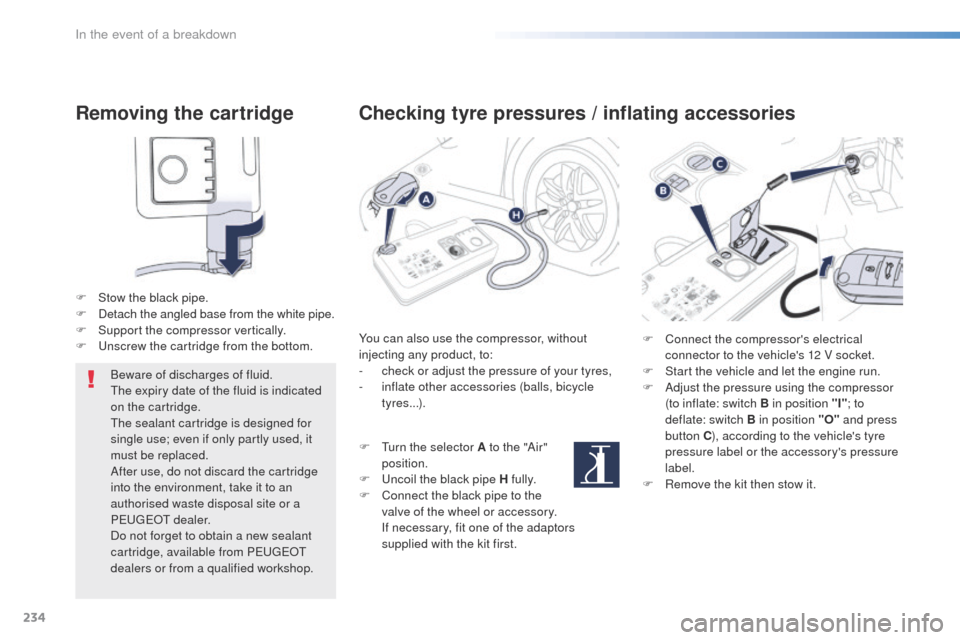
F Stow the black pipe.
F D etach the angled base from the white pipe.
F
S
upport the compressor vertically.
F
u
n
screw the cartridge from the bottom.
Beware of discharges of fluid.
th
e expiry date of the fluid is indicated
on the cartridge.
th
e sealant cartridge is designed for
single use; even if only partly used, it
must be replaced.
After use, do not discard the cartridge
into the environment, take it to an
authorised waste disposal site or a
P
e
uge
Ot d
ealer.
Do not forget to obtain a new sealant
cartridge, available from P
e
uge
Ot
dealers or from a qualified workshop.
Checking tyre pressures / inflating accessories
You can also use the compressor, without
injecting any product, to:
-
c
heck or adjust the pressure of your tyres,
-
i
nflate other accessories (balls, bicycle
tyres...).
F
t
u
rn the selector A to the "Air"
position.
F
u
n
coil the black pipe H fully.
F
C
onnect the black pipe to the
valve of the wheel or accessory.
I
f necessary, fit one of the adaptors
supplied with the kit first. F
C onnect the compressor's electrical
connector to the vehicle's 12 V socket.
F
S
tart the vehicle and let the engine run.
F
A
djust the pressure using the compressor
(to inflate: switch B in position "I" ; to
deflate: switch B in position "O" and press
button C ), according to the vehicle's tyre
pressure label or the accessory's pressure
label.
F
R
emove the kit then stow it.
In the event of a breakdown