Page 81 of 371

79
508_en_Chap03_ergonomie-et-confort_ed01-2016
Massage function
this function provides the driver with a back
massage. It only operates when the engine is
running as well as in S
tO
P mode of the Stop &
Start system.
Activation
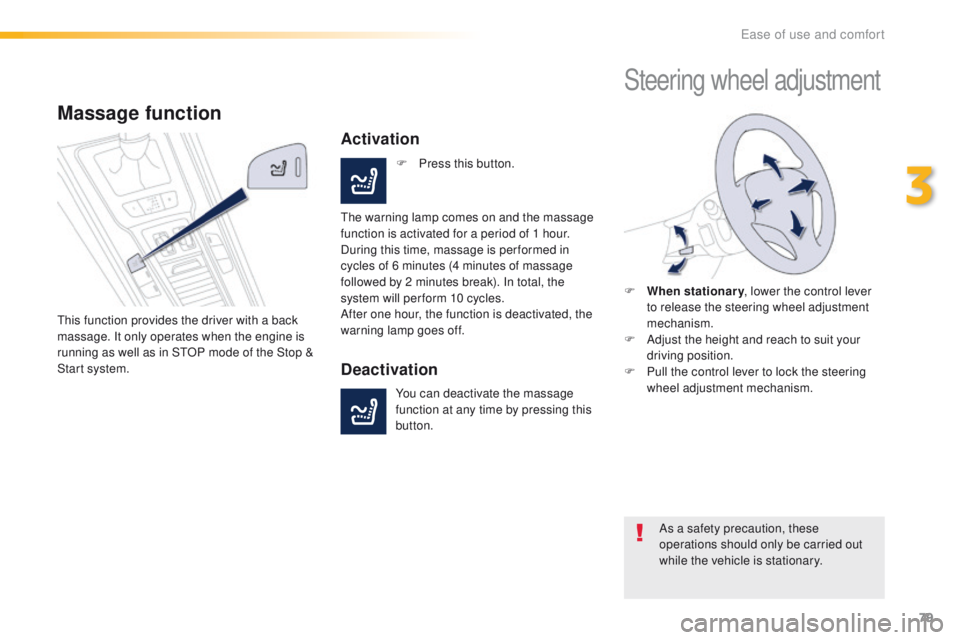
F Press this button.
th
e warning lamp comes on and the massage
function is activated for a period of 1 hour.
During this time, massage is per formed in
cycles of 6 minutes (4 minutes of massage
followed by 2 minutes break). In total, the
system will per form 10 cycles.
After one hour, the function is deactivated, the
warning lamp goes off.
Deactivation
You can deactivate the massage
function at any time by pressing this
button.
Steering wheel adjustment
F When stationary , lower the control lever
to release the steering wheel adjustment
mechanism.
F
A
djust the height and reach to suit your
driving position.
F
P
ull the control lever to lock the steering
wheel adjustment mechanism.
As a safety precaution, these
operations should only be carried out
while the vehicle is stationary.
3
ease of use and comfort
Page 109 of 371
107
508_en_Chap03_ergonomie-et-confort_ed01-2016
Centre console
Front armrest
the height and longitudinal position of the
armrest cover can be adjusted for greater
comfort.
Storage
A storage space is arranged below the armrest
lid. It gives access to a 12 V socket (maximum
power: 120 Watts) as well as a u
S
B port and a
Jack auxiliary socket.
F
P
ress the opening control.
F
Ra
ise the cover fully.
Longitudinal adjustment
F Slide the cover fully for wards or rear wards.
3
ease of use and comfort
Page 128 of 371

126
508_en_Chap04_eclairage-et-visibilite_ed01-2016
Manual adjustment of
halogen headlampsAutomatic adjustment of
"full-LED" headlamps
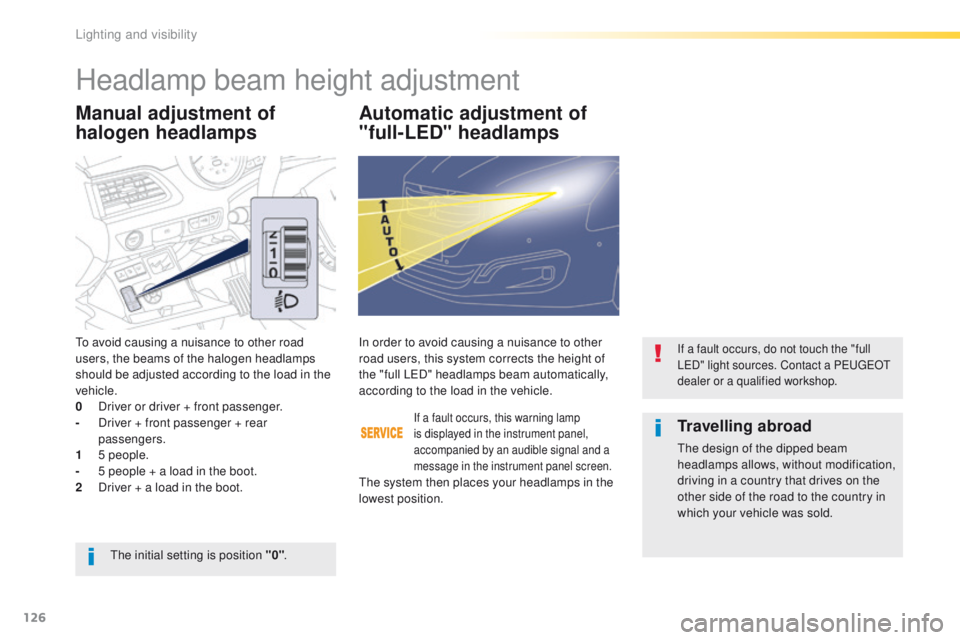
to avoid causing a nuisance to other road
users, the beams of the halogen headlamps
should be adjusted according to the load in the
vehicle.
0
D
river or driver + front passenger.
-
D
river + front passenger + rear
passengers.
1
5
people.
-
5 p
eople + a load in the boot.
2
D
river + a load in the boot.
If a fault occurs, this warning lamp
is displayed in the instrument panel,
accompanied by an audible signal and a
message in the instrument panel screen.
In order to avoid causing a nuisance to other
road users, this system corrects the height of
the "full L e
D
" headlamps beam automatically,
according to the load in the vehicle.If a fault occurs, do not touch the "full
LeD " light sources. Contact a Pe ugeOt
dealer or a qualified workshop.
the initial setting is position "0" .
Travelling abroad
the design of the dipped beam
headlamps allows, without modification,
driving in a country that drives on the
other side of the road to the country in
which your vehicle was sold.
th
e system then places your headlamps in the
lowest position.
Headlamp beam height adjustment
Lighting and visibility
Page 139 of 371

137
508_en_Chap05_securite_ed01-2016
Front seat belt height adjustment
F to adjust the anchorage point, squeeze the control and slide it until you find a notch.
From approximately 12 mph
(20
km/h), the warning lamp(s) flash
for two
minutes accompanied by an
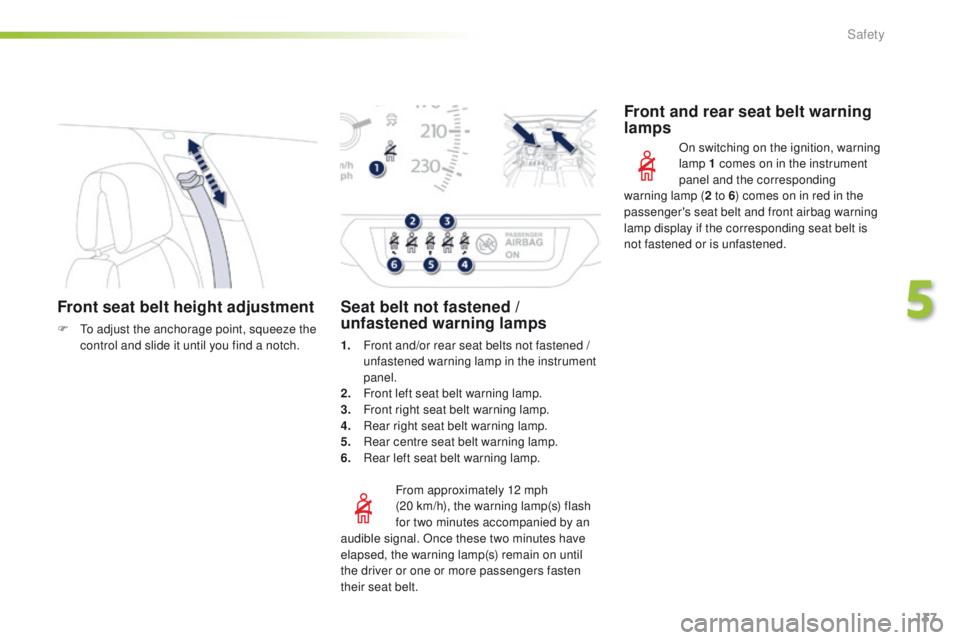
Seat belt not fastened /
unfastened warning lamps
1. Front and/or rear seat belts not fastened / unfastened warning lamp in the instrument
panel.
2.
F
ront left seat belt warning lamp.
3.
F
ront right seat belt warning lamp.
4.
R
ear right seat belt warning lamp.
5.
R
ear centre seat belt warning lamp.
6.
R
ear left seat belt warning lamp.
Front and rear seat belt warning
lamps
On switching on the ignition, warning
lamp 1 comes on in the instrument
panel and the corresponding
audible signal. Once these two minutes have
elapsed, the warning lamp(s) remain on until
the driver or one or more passengers fasten
their seat belt. warning lamp (
2 to 6) comes on in red in the
passenger's seat belt and front airbag warning
lamp display if the corresponding seat belt is
not fastened or is unfastened.
5
Safety
Page 152 of 371
150
508_en_Chap05_securite_ed01-2016
Installing child seats attached using the seat beltIn accordance with european regulations, this table indicates the options for installing child seats secured using a seat belt and universally approved
(a) in accordance with the weight of the child and the seat in the vehicle.
Weight of the child and indicative age
Seat Under 13 kg
(groups 0 (b) a n d 0 +)
up t
o approx 1 yearFrom 9 to 18 kg
(g r o u p 1)
1 to 3 years approx From 15 to 25 kg
(group 2)
3 to 6 years approx From 22 to 36 kg
(group 3)
6 to 10 years approx
Front passenger seat (c)
with height adjuster U (R)
U (R)U (R)U (R)
Front passenger seat (c)
without height adjuster U
UUU
Saloon
Outer rear seats UUUU
Centre rear seat XXXX
SW and non-hybrid RHX
Outer rear seats UUUU
Centre rear seat XXXX
Safety
Page 156 of 371

154
508_en_Chap05_securite_ed01-2016
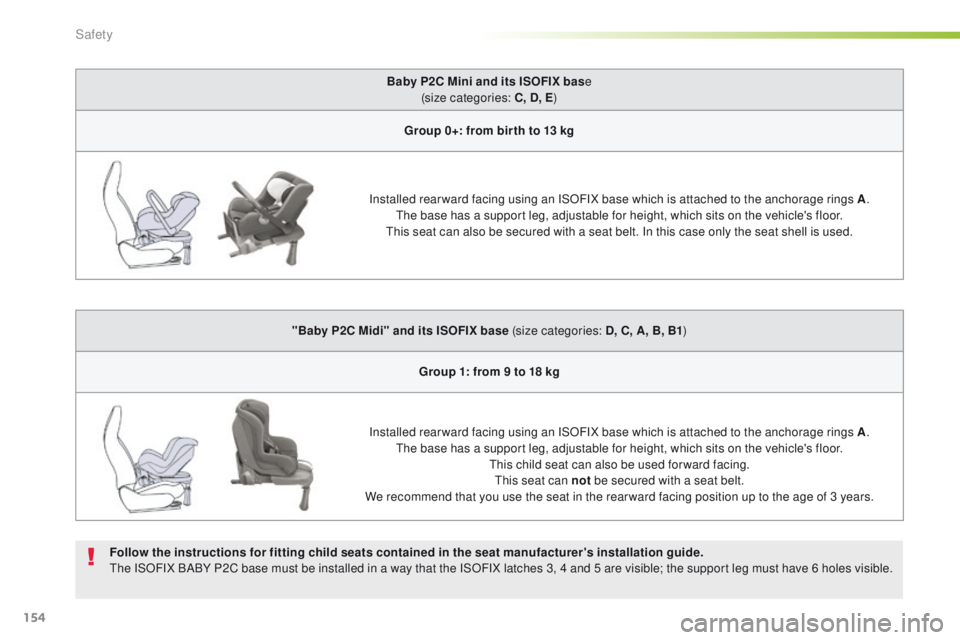
Baby P2C Mini and its ISOFIX base
(size categories: C, D, E )
Group 0+: from bir th to 13 kg
Installed rear ward facing using an ISOFIX base which is attached to the anchorage rings A .
th
e base has a support leg, adjustable for height, which sits on the vehicle's floor.
th
is seat can also be secured with a seat belt. In this case only the seat shell is used.
"Baby P2C Midi" and its ISOFIX base (size categories: D, C, A, B, B1 )
Group 1: from 9 to 18 kg
Installed rear ward facing using an ISOFIX base which is attached to the anchorage rings A .
th
e base has a support leg, adjustable for height, which sits on the vehicle's floor.
th
is child seat can also be used for ward facing.
th
is seat can not be secured with a seat belt.
We recommend that you use the seat in the rear ward facing position up to the age of 3 years.
Follow the instructions for fitting child seats contained in the seat manufacturer's installation guide.
th
e ISOFIX BABY P2C base must be installed in a way that the ISOFIX latches 3, 4 and 5 are visible; the support leg must have 6 holes visible.
Safety
Page 162 of 371

160
508_en_Chap06_conduite_ed01-2016
When towing
Distribution of loads
F Distribute the load in the trailer so that the heaviest items are as close as possible to
the axle and the nose weight approaches
the maximum permitted without
exceeding
it.
Air density decreases with altitude, thus
reducing engine performance. Above
1
000 metres, the maximum towed load must
be reduced by 10
% for every 1 000 metres of
altitude.
Side wind
F take into account the increased sensitivity to side wind.
Cooling
towing a trailer on a slope increases the
temperature of the coolant.
As the fan is electrically controlled, its cooling
capacity is not dependent on the engine speed.
F
t
o l
ower the engine speed, reduce your
speed.
th
e maximum towed load on a long incline
depends on the gradient and the ambient
temperature.
In all cases, keep a check on the coolant
temperature.
F
I
f the warning lamp and the
STOP warning lamp come on,
stop the vehicle and switch off
the engine as soon as possible.
Braking
towing a trailer increases the braking distance.to a void overheating of the brakes, the use of
engine braking is recommended.
Ty r e s
F Check the tyre pressures of the towing vehicle and of the trailer, observing the
recommended pressures.
Lighting
F Check the electrical lighting and signalling on the trailer and the hadlamp beam height
of your vehicle.
For more information on adjusting the
headlamp beam height, refer to the
corresponding section.
th
e rear parking sensors will be
deactivated automatically if a genuine
P
e
uge
Ot
towbar is used.
For more information on weights (and
the towed loads which apply to your
vehicle) refer to the corresponding
section.
Driving
Page 186 of 371
184
508_en_Chap06_conduite_ed01-2016
Head-up display
System which projects various information onto
a smoked blade in the driver's field of vision,
so that they do not have to take their eyes off
the road.1.
H
ead-up display on.
2.
H
ead-up display off (long press).
3.
Br
ightness adjustment.
4.
D
isplay height adjustment.Buttons
Once the system has been activated, the
following information is grouped together in the
head-up display:
A.
t
h
e speed of your vehicle.
B.
C
ruise control/speed limiter information.
C.
N
avigation information (depending on
ve r s i o n).
Displays during operation
For more information on the navigation
system, refer to the "Audio equipment
and telematics" section.
this system operates when the engine is running and
the settings are stored when the ignition is switched off.
Driving