2016 PEUGEOT 5008 run flat
[x] Cancel search: run flatPage 5 of 364

.
5008_en_Chap00a_sommaire_ed01-2015
Direction indicators 135
Hazard warning lamps 1 35
H or n
13 5
ESC system
1
36
Front seat belts
1
39
Airbags
1
43
Safety
Driving recommendations 1 47
Starting-switching off the engine 1 48
Electric parking brake
1
51
Hill start assist
1
55
Head-up display
1
58
Distance alert
1
60
Speed limiter
1
63
Cruise control
1
66
Manual gearbox
1
69
Electronic gearbox
1
70
Automatic gearbox
1
75
Gear shift indicator
1
79
Stop & Start
1
80
Tyre under-inflation detection
1
83
Parking sensors
1
85
Reversing camera
1
87
Parking space sensors
1
88
Driving
Emergency or assistance 2 70
PEUGEOT Connect Navigation (RT6) 2 73
PEUGEOT Connect Sound (RD5)
3
29
Audio equipment and telematics
Alphabetical index
Fuel tank 1 91
Misfuel prevention (Diesel) 1 94
Running out of fuel (Diesel)
1
95
Opening the bonnet
1
96
Underbonnet - petrol engines
1
97
Underbonnet - Diesel engines
1
98
Checking levels
1
99
Checks
20
2
AdBlue
® additive and SCR system
(BlueHDi Diesel) 20 4
Checks
Tool kit 2 12
Temporary puncture repair kit 2 14
Changing a wheel
2
23
Snow chains
2
30
Changing a bulb
2
31
Changing a fuse
2
37
12 V battery
2
44
Energy economy mode
2
47
Changing a wiper blade
2
48
Towing the vehicle
2
48
Towbar with quickly detachable towball
250
Towing a trailer
2
52
Fitting roof bars
2
54
Very cold climate screen
2
55
Accessories
2
56
Practical information
Petrol engines 2 58
Petrol weights 2 59
Diesel engines
2
61
Diesel weights
26
3
Dimensions
2
67
Identification markings
2
68
Technical data
Contents
Page 180 of 364
178
5008_en_Chap08_conduite_ed01-2015
Stopping the vehicle
Before switching off the engine, you can
engage position P or N to place the gearbox in
neutral.
In both cases, apply the parking brake to
immobilise the vehicle, unless it is programmed
to automatic mode.
Operating fault
When the ignition is on, the lighting
of this warning lamp, accompanied
by an audible signal and a
message in the multifunction
screen, indicates a gearbox
malfunction.
In this case, the gearbox switches to back-up
mode and is locked in 3rd gear. You may feel
a substantial knock when changing from P
to R and from N to R . This will not cause any
damage to the gearbox.
Do not exceed 60 mph (100 km/h), local speed
restrictions permitting.
Have it checked by a PEUGEOT dealer or a
qualified workshop.
This warning lamp may also come on if a door
is opened.Invalid value during manual
operation
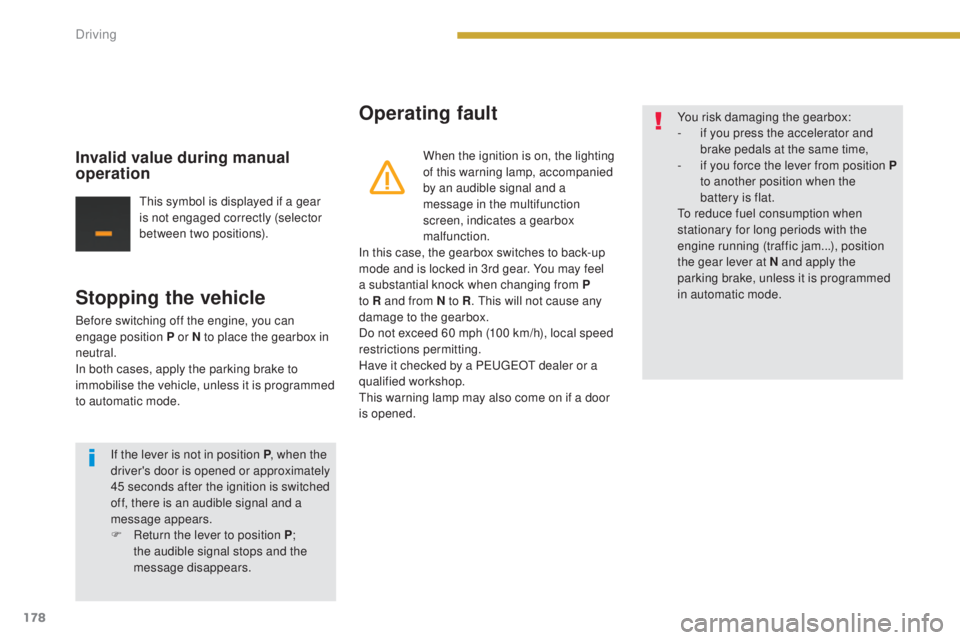
This symbol is displayed if a gear
is not engaged correctly (selector
between two positions). You risk damaging the gearbox:
-
i
f you press the accelerator and
brake pedals at the same time,
-
i
f you force the lever from position P
to another position when the
battery is flat.
To reduce fuel consumption when
stationary for long periods with the
engine running (traffic jam...), position
the gear lever at N and apply the
parking brake, unless it is programmed
in automatic mode.
If the lever is not in position P , when the
driver's door is opened or approximately
45 seconds after the ignition is switched
off, there is an audible signal and a
message appears.
F
R
eturn the lever to position P ;
the audible signal stops and the
message disappears.
Driving
Page 220 of 364
218
5008_en_Chap10_infos-pratiques_ed01-2015
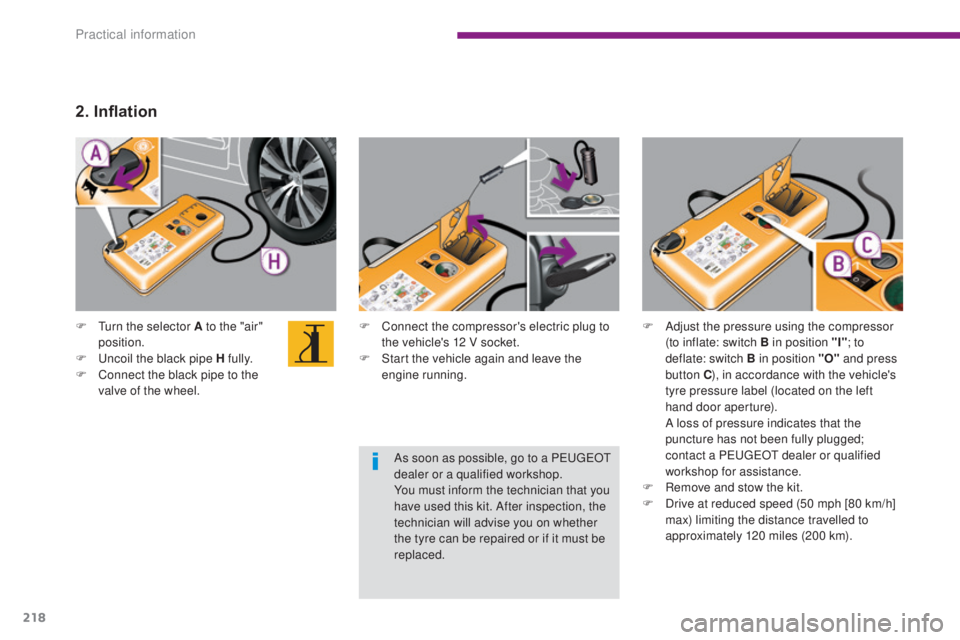
F Connect the compressor's electric plug to the vehicle's 12 V socket.
F
S
tart the vehicle again and leave the
engine running.
F
T
urn the selector A to the "air"
position.
F
U
ncoil the black pipe H fully.
F
C
onnect the black pipe to the
valve of the wheel.
2. Inflation
F Adjust the pressure using the compressor (to inflate: switch B in position "I" ; to
deflate: switch B
in position "O" and press
button C ), in accordance with the vehicle's
tyre pressure label (located on the left
hand door aperture).
A l
oss of pressure indicates that the
puncture has not been fully plugged;
contact a PEUGEOT dealer or qualified
workshop for assistance.
F
R
emove and stow the kit.
F
D
rive at reduced speed (50 mph [80 km/h]
max) limiting the distance travelled to
approximately 120 miles (200 km).
As soon as possible, go to a PEUGEOT
dealer or a qualified workshop.
You must inform the technician that you
have used this kit. After inspection, the
technician will advise you on whether
the tyre can be repaired or if it must be
replaced.
Practical information
Page 221 of 364
219
5008_en_Chap10_infos-pratiques_ed01-2015
Removing the cartridge
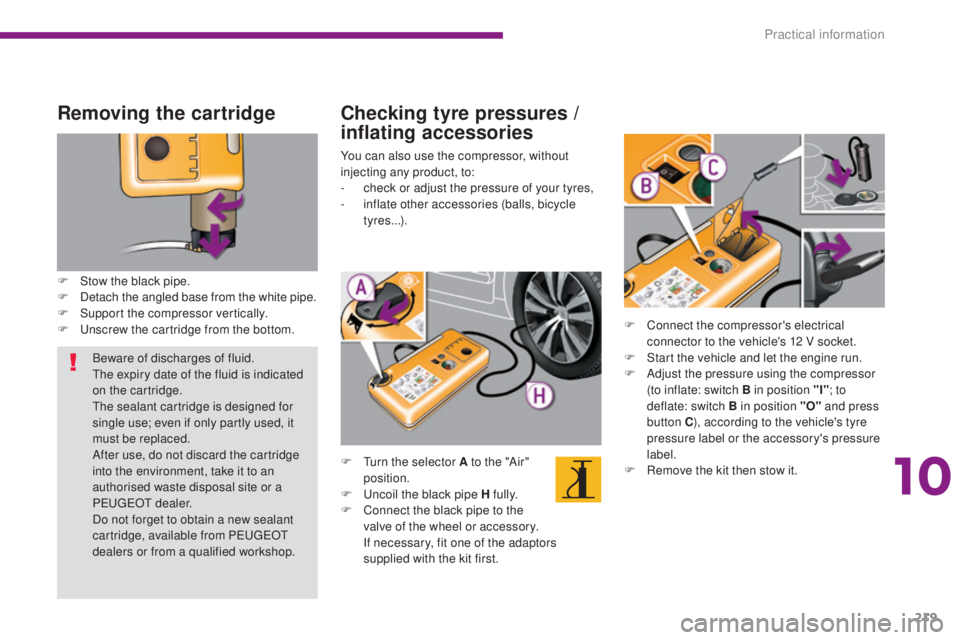
F Stow the black pipe.
F D etach the angled base from the white pipe.
F
S
upport the compressor vertically.
F
U
nscrew the cartridge from the bottom.
Checking tyre pressures /
inflating accessories
You can also use the compressor, without
injecting any product, to:
-
c
heck or adjust the pressure of your tyres,
-
i
nflate other accessories (balls, bicycle
tyres...).
F
T
urn the selector A to the "Air"
position.
F
U
ncoil the black pipe H fully.
F
C
onnect the black pipe to the
valve of the wheel or accessory.
I
f necessary, fit one of the adaptors
supplied with the kit first. F
C
onnect the compressor's electrical
connector to the vehicle's 12 V socket.
F
S
tart the vehicle and let the engine run.
F
A
djust the pressure using the compressor
(to inflate: switch B in position "I" ; to
deflate: switch B in position "O" and press
button C ), according to the vehicle's tyre
pressure label or the accessory's pressure
label.
F
R
emove the kit then stow it.
Beware of discharges of fluid.
The expiry date of the fluid is indicated
on the cartridge.
The sealant cartridge is designed for
single use; even if only partly used, it
must be replaced.
After use, do not discard the cartridge
into the environment, take it to an
authorised waste disposal site or a
PEUGEOT dealer.
Do not forget to obtain a new sealant
cartridge, available from PEUGEOT
dealers or from a qualified workshop.
10
Practical information
Page 224 of 364
222
5008_en_Chap10_infos-pratiques_ed01-2015
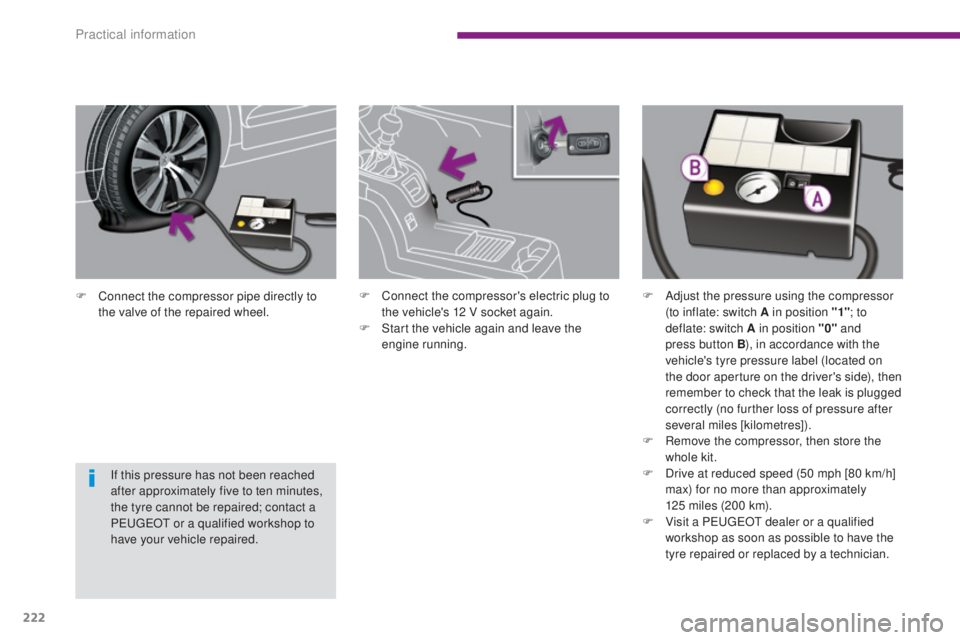
F Connect the compressor pipe directly to the valve of the repaired wheel.
If this pressure has not been reached
after approximately five to ten minutes,
the tyre cannot be repaired; contact a
PEUGEOT or a qualified workshop to
have your vehicle repaired. F
C onnect the compressor's electric plug to
the vehicle's 12 V socket again.
F
S
tart the vehicle again and leave the
engine running. F
A djust the pressure using the compressor
(to inflate: switch A in position "1" ; to
deflate: switch A
in position "0" and
press button B ), in accordance with the
vehicle's tyre pressure label (located on
the door aperture on the driver's side), then
remember to check that the leak is plugged
correctly (no further loss of pressure after
several miles [kilometres]).
F
R
emove the compressor, then store the
whole kit.
F
D
rive at reduced speed (50 mph [80 km/h]
max) for no more than approximately
125
miles (200 km).
F
V
isit a PEUGEOT dealer or a qualified
workshop as soon as possible to have the
tyre repaired or replaced by a technician.
Practical information
Page 232 of 364
230
5008_en_Chap10_infos-pratiques_ed01-2015
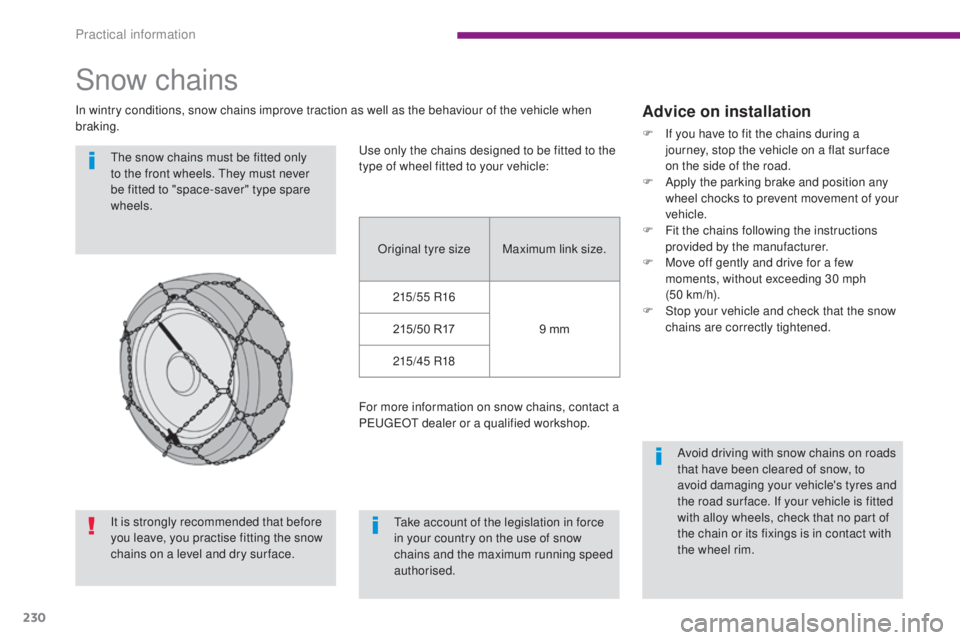
Snow chains
In wintry conditions, snow chains improve traction as well as the behaviour of the vehicle when
braking.The snow chains must be fitted only
to the front wheels. They must never
be fitted to "space-saver" type spare
wheels.
Take account of the legislation in force
in your country on the use of snow
chains and the maximum running speed
authorised.Advice on installation
F If you have to fit the chains during a journey, stop the vehicle on a flat sur face
on the side of the road.
F
A
pply the parking brake and position any
wheel chocks to prevent movement of your
vehicle.
F
F
it the chains following the instructions
provided by the manufacturer.
F
M
ove off gently and drive for a few
moments, without exceeding 30 mph
(50 km/h).
F
S
top your vehicle and check that the snow
chains are correctly tightened.
Avoid driving with snow chains on roads
that have been cleared of snow, to
avoid damaging your vehicle's tyres and
the road sur face. If your vehicle is fitted
with alloy wheels, check that no part of
the chain or its fixings is in contact with
the wheel rim.
Use only the chains designed to be fitted to the
type of wheel fitted to your vehicle:
Original tyre size Maximum link size.
215/55 R16 9 mm
215/50 R17
215/45 R18
For more information on snow chains, contact a
PEUGEOT dealer or a qualified workshop.
It is strongly recommended that before
you leave, you practise fitting the snow
chains on a level and dry sur face.
Practical information
Page 247 of 364
245
5008_en_Chap10_infos-pratiques_ed01-2015
Starting using another
battery
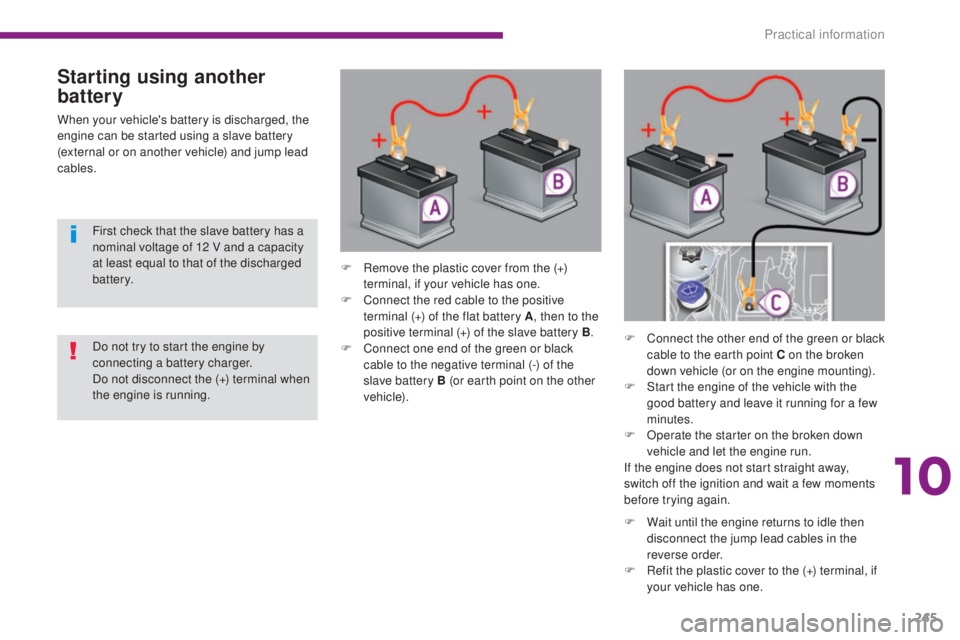
When your vehicle's battery is discharged, the
engine can be started using a slave battery
(external or on another vehicle) and jump lead
cables.F
R
emove the plastic cover from the (+)
terminal, if your vehicle has one.
F
C
onnect the red cable to the positive
terminal (+) of the flat battery A , then to the
positive terminal (+) of the slave battery B.
F
C
onnect one end of the green or black
cable to the negative terminal (-) of the
slave battery B (or earth point on the other
vehicle). F
C
onnect the other end of the green or black
cable to the earth point C on the broken
down vehicle (or on the engine mounting).
F
S
tart the engine of the vehicle with the
good battery and leave it running for a few
minutes.
F
O
perate the starter on the broken down
vehicle and let the engine run.
If the engine does not start straight away,
switch off the ignition and wait a few moments
before trying again.
Do not try to start the engine by
connecting a battery charger.
Do not disconnect the (+) terminal when
the engine is running. First check that the slave battery has a
nominal voltage of 12 V and a capacity
at least equal to that of the discharged
battery.
F
W
ait until the engine returns to idle then
disconnect the jump lead cables in the
reverse order.
F
R
efit the plastic cover to the (+) terminal, if
your vehicle has one.
10
Practical information
Page 249 of 364
247
5008_en_Chap10_infos-pratiques_ed01-2015
Exiting economy mode
These functions are reactivated automatically
next time the vehicle is driven.
To restore the use of these functions
immediately, start the engine and let it run for at
least 5 minutes.
Load reduction modeEnergy economy mode
Switching to economy mode
Once this time has elapsed, a message
appears in the screen indicating that the
vehicle has switched to economy mode and the
active functions are put on standby.
System which manages the use of certain
functions according to the level of charge
remaining in the battery.
When the vehicle is being driven, the load
reduction function temporarily deactivates
certain functions, such as the air conditioning,
the heated rear screen...
The deactivated functions are reactivated
automatically as soon as conditions permit.
System which manages the duration of use of certain functions to conserve a sufficient level of
charge in the battery.
After the engine has stopped, you can still use functions such as the audio and telematics
system,
windscreen wipers, dipped beam headlamps, courtesy lamps, etc. for a maximum
combined duration of thirty minutes.
This period may be greatly reduced if the battery is not fully charged.
If the telephone is being used at this
time, the call will be maintained for
5 minutes with the hands-free kit of your
P
E
UGEOT
C
onnect Sound (RD5) or
P
E
UGEOT
C
onnect Navigation (RNEG). Let the engine run for the duration
specified to ensure that the battery
charge is sufficient.
Do not repeatedly and continuously
restart the engine in order to charge the
battery.
A flat battery prevents the engine
from starting (refer to the "Battery"
paragraph).
10
Practical information