2016 NISSAN MURANO HYBRID fuel
[x] Cancel search: fuelPage 113 of 443
The vehicle information display is located to the
left of the speedometer. It displays such items as:● Vehicle settings
● Trip computer information
● Drive system warnings and settings
● Forward Emergency Braking system (if so
equipped)
● Predictive Forward Collision warning system
(if so equipped)
● Blind Spot Warning system (if so equipped)
● Rear Cross Traffic Alert system (if so
equipped) ●
Cruise control system information
● Intelligent Cruise Control system information
(if so equipped)
● NISSAN Intelligent Key® operation informa-
tion
● Indicators and warnings
● Tire Pressure information
The display will be interrupted when a text mes-
sage or phone call is received. Phone calls can
be answered or rejected through the steering
wheel controls. Text messages can also be oper-
ated using the steering wheel controls (models
with Navigation) .HOW TO USE THE VEHICLE
INFORMATION DISPLAY
The vehicle information display can be changed
using the buttons
and OK located on the
steering wheel.
1. OK — change or select an item in the vehicle information display
2.
— go back or forward through
the vehicle information menu items or to
change from one display screen to the next
(i.e. trip, TPMS, Fuel economy)
3.
— scroll up or down the vehicle infor-
mation menu items.
LIC2205LIC3010
VEHICLE INFORMATION DISPLAY
2-14Instruments and controls
Page 114 of 443
The OK,andbuttons also
control audio and control panel functions. For
additional information, refer to “Steering wheel
switch for audio control” in the “Display screen,
heater, air conditioner, audio and phone systems”
section of this manual.
STARTUP DISPLAY
When the vehicle in placed in the ON or ACC
position the screens that display in the vehicle
information display include:
● Active system status
● Audio
● Navigation (if so equipped)
● Drive Computer
● Fuel Economy
● Driving Aids
● Tire Pressures
● Energy Flow
● Warning Review
● Settings
Warnings will only display if there are any pres-
ent. For additional information on warnings and
indicators, refer to “Vehicle information display
warnings and indicators” in this section. To control what items display in the vehicle infor-
mation display, refer to “Main menu selection” in
this section.
SETTINGS
The setting mode allows you to change the infor-
mation displayed in the vehicle information dis-
play:
● Driver Assistance
● Customize Display
● Vehicle Settings
● Maintenance
● Clock
● TPMS Settings
● Unit/Language
● Key-Linked Settings
● Factory Reset
Instruments and controls2-15
Page 119 of 443
Clock
Menu itemResult
Clock When selected, the following message appears: “Go to the settings menu on the center display to set clock”. For addi-
tional information, refer to “Audio system” in the “Display screen, heater, air conditioner, audio, and phone systems” section
of this manual (models without navigation) or the separate Navigation Owner’s Manual (if so equipped) (models with navi-
gation)
TPMS Settings
The TPMS settings menu allows the user to
change the tire pressure units displayed in the
vehicle information display
Menu item Result
TPMS Settings Displays various TPMS Settings
Tire Pressure Unit Allows the user to select the tire pressure units that will display in the vehicle information display
Unit/Language
The Unit/Language menu allows the user to
change the units and language shown in the
vehicle information display
Menu item Result
Mileage/Fuel Allows user to select different mileage display units
Tire Pressures Allows user to select different pressure display units
Temperature Allows user to select different temperature display units
Language Allows user to select different languages
2-20Instruments and controls
Page 122 of 443
12. Engine start operation for Intelligent Key sys-tem (if I-Key battery level is low)
13. Key ID incorrect
14. Release Parking Brake
15. Low Fuel
16. Low Washer Fluid
17. Door/Liftgate Open
18. I-Key System Error: See Owner’s Manual
19. Loose Fuel Cap
20. Tire Pressure Low — Add Air
21. Low Oil Pressure — Stop Vehicle
22. All Wheel Drive (AWD) Error: See Owner’s Manual (if so equipped)
23. All Wheel Drive (AWD) High Temp. Stop vehicle (if so equipped)
24. All Wheel Drive (AWD) Tire Size Incorrect: See Owner’s Manual (if so equipped)
25. Shipping Mode On Push Storage Fuse
26. Power will turn off to save the battery
27. Power turned off to save the battery
28. Reminder — Turn OFF headlights
29. Low Outside Temperature 30. Cruise indicator (if so equipped)
31. Transmission Shift Position indicator
32. CVT Error: See Owner’s Manual
33. BSW/RCTA system malfunction: See Own-
er’s Manual (if so equipped)
34. FEB/PFCW system malfunction: See Own- er’s Manual (if so equipped)
35. Intelligent Cruise Control (ICC) indicator (if so equipped)
Shutting Down
This warning appears when the Hybrid System
has been turned off. This warning also may ap-
pear when the ignition is turned off, however, this
is not a malfunction of the system.
HV System Warm up Please Wait In Park
This warning appears when the Hybrid System
has not reached full operating temperature.
When the warning turns off, the vehicle can be
driven.
Hybrid System Overheated
This warning appears when the temperature of
the Hybrid System is too high. Stop the vehicle in
a safe location as soon as possible. Avoid quick
starting or abrupt acceleration. When the warn-
ing turns off, the vehicle can be driven. If the warning appears again soon after it turns
off, have the vehicle checked by a NISSAN
dealer.
Do not drive the vehicle with the warning
on. Doing so could cause a Hybrid System
malfunction.
WARNING
If you continue to drive the vehicle while
the warning is displayed, the hybrid sys-
tem may become temporarily inoperative
and the system cannot provide power to
the wheels. This can result in reduced or
zero vehicle speed. The reduced speed or
zero speed may be lower than other traf-
fic, which could increase the chance of a
collision. If the vehicle cannot maintain a
safe driving speed, pull to the side of the
road in a safe area. If this occurs, place the
shift lever in the P (Park) position and the
ignition in the READY to drive position
with the vehicle stopped until the display
turns off. The Hybrid system overheat
warning and the SHIFT “P” warning mes-
sages will be alternately displayed. For
additional information, refer to the “Shift
to Park” warning in this section.
Instruments and controls2-23
Page 124 of 443
Low Fuel
This warning illuminates when the fuel level in the
fuel tank is getting low. Refuel as soon as it is
convenient, preferably before the fuel gauge
reaches 0 (Empty) .There will be a small re-
serve of fuel in the tank when the fuel
gauge needle reaches 0 (Empty) .
Low Washer Fluid
This warning illuminates when the windshield-
washer fluid is at a low level. Add windshield-
washer fluid as necessary. For additional informa-
tion, refer to “Windshield-washer fluid” in the
“Maintenance and do-it-yourself” section of this
manual.
Door/Liftgate Open
This warning illuminates when a door has been
opened when the engine is running.
I-Key System Error: See Owner’s Manual
After the ignition switch is pushed to the ON
position, this light comes on for a period of time
and then turns off.
The I-Key System Error message warns of a
malfunction with the Intelligent Key system. If the
light comes on while the engine is stopped, it may
be impossible to start the engine. If the light comes on while the engine is running,
you can drive the vehicle. However in these
cases, contact a NISSAN dealer for repair as
soon as possible.
Loose Fuel Cap
This warning appears when the fuel-filler cap is
not tightened correctly after the vehicle has been
refueled. For additional information, refer to
“Fuel-filler cap” in the “Pre-driving checks and
adjustments” section of this manual.
Tire Pressure Low - Add Air
This warning appears when the low tire pressure
warning light in the meter illuminates and low tire
pressure is detected. The warning appears each
time the ignition switch is placed in the ON
position as long as the low tire pressure warning
light remains illuminated. If this warning appears,
stop the vehicle and adjust the tire pressures of
all four tires to the recommended COLD tire
pressure shown on the Tire and Loading Informa-
tion label. For additional information, refer to
“Low tire pressure warning light” in this section
and “Tire Pressure Monitoring System (TPMS)”
in the “Starting and driving” section of this
manual.
Low Oil Pressure Stop Vehicle
This warning appears in message area of the
vehicle information display if low oil pressure isdetected. This gauge is not designed to indicate
low oil level.
The low oil pressure warning is
not designed to indicate a low oil level. Use
the dipstick to check the oil level. For additional
information, refer to “Engine oil” in the “Mainte-
nance and do-it-yourself” section of this manual.
All-Wheel Drive (AWD) Error: See Owner’s
Manual (if so equipped)
This warning appears when the all-wheel drive
system is not functioning properly while the en-
gine is running.
All-Wheel Drive (AWD) High Temp. Stop
vehicle (if so equipped)
This warning may appear while trying to free a
stuck vehicle due to increased oil temperature.
The driving mode may change to 2-Wheel Drive
(2WD) . If this warning is displayed, stop the
vehicle with the engine idling, as soon as it is safe
to do so. Then if the warning turns off, you can
continue driving.
All-Wheel Drive (AWD) Tire Size Incorrect:
See Owner’s Manual (if so equipped)
This warning may appear if there is a large differ-
ence between the diameters of the front and rear
wheels. Pull off the road in a safe area, with the
engine idling. Check that all the tire sizes are the
same, that the tire pressure is correct and that the
tires are not excessively worn.
Instruments and controls2-25
Page 168 of 443
3 Pre-driving checks and adjustments
Keys .............................................3-2NISSAN Intelligent Key® . .......................3-2
NISSAN Vehicle Immobilizer System keys .........3-3
Doors ............................................3-4
Locking with key ................................3-4
Locking with inside lock knob ....................3-5
Locking with power door lock switch . . . ..........3-6
Automatic door locks ...........................3-6
Child safety rear door lock .......................3-6
NISSAN Intelligent Key® ...........................3-7
Operating range ................................3-8
Door locks/unlocks precaution ...................3-8
NISSAN Intelligent Key® Operation ..............3-9
How to use the remote keyless entry
function ...................................... 3-12
Warning signals ............................... 3-16
Troubleshooting guide ......................... 3-16
Remote Engine Start .............................. 3-18
Remote engine start operating range . . . .........3-18
Remote starting the vehicle .....................3-18
Extending engine run time ......................3-19
Canceling a remote start .......................3-19
Conditions the remote start will not work .........3-19 Hood
........................................... 3-20
Liftgate .......................................... 3-21
Operating the power liftgate ....................3-21
Power liftgate main switch ......................3-24
Liftgate release ................................ 3-25
Liftgate position setting ........................ 3-26
Fuel-filler door ................................... 3-26
Opener operation .............................. 3-26
Fuel-filler cap ................................. 3-26
Steering wheel ................................... 3-29
Manual operation (if so equipped) ...............3-29
Automatic operation (if so equipped)............. 3-29
Sun visors ....................................... 3-30
Vanity mirrors ................................. 3-31
Card holder ................................... 3-31
Mirrors .......................................... 3-32
Automatic Anti-glare rearview mirror .............3-32
Outside mirrors............................... 3-32
Automatic drive
positioner......................... 3-34
Memory Storage Function (Key-Link) ............3-34
Memory storage function (Switch) ...............3-35
Entry/exit function ............................. 3-35
System operation .............................. 3-36
Page 193 of 443
3. Push the liftgate up to open.
NOTE:
If you had to open the liftgate using this
procedure, have your vehicle checked as
soon as possible. It is recommended that
you visit a NISSAN dealer for this service.
LIFTGATE POSITION SETTING
The liftgate can be set to open to a specific height
by performing the following: 1. Open the liftgate using the request switch or the Intelligent Key.
2. Pull the liftgate down to the desired position and hold the liftgate (the liftgate will have
some resistance when being manually ad-
justed) .
3. While holding the liftgate in position, push and hold the liftgate switch
located
on the liftgate for approximately 5 seconds
or until two beeps are heard.
The liftgate will open to the selected position
setting. To change the position of the liftgate,
repeat Steps 1-3 for setting the position of the
liftgate.
OPENER OPERATION
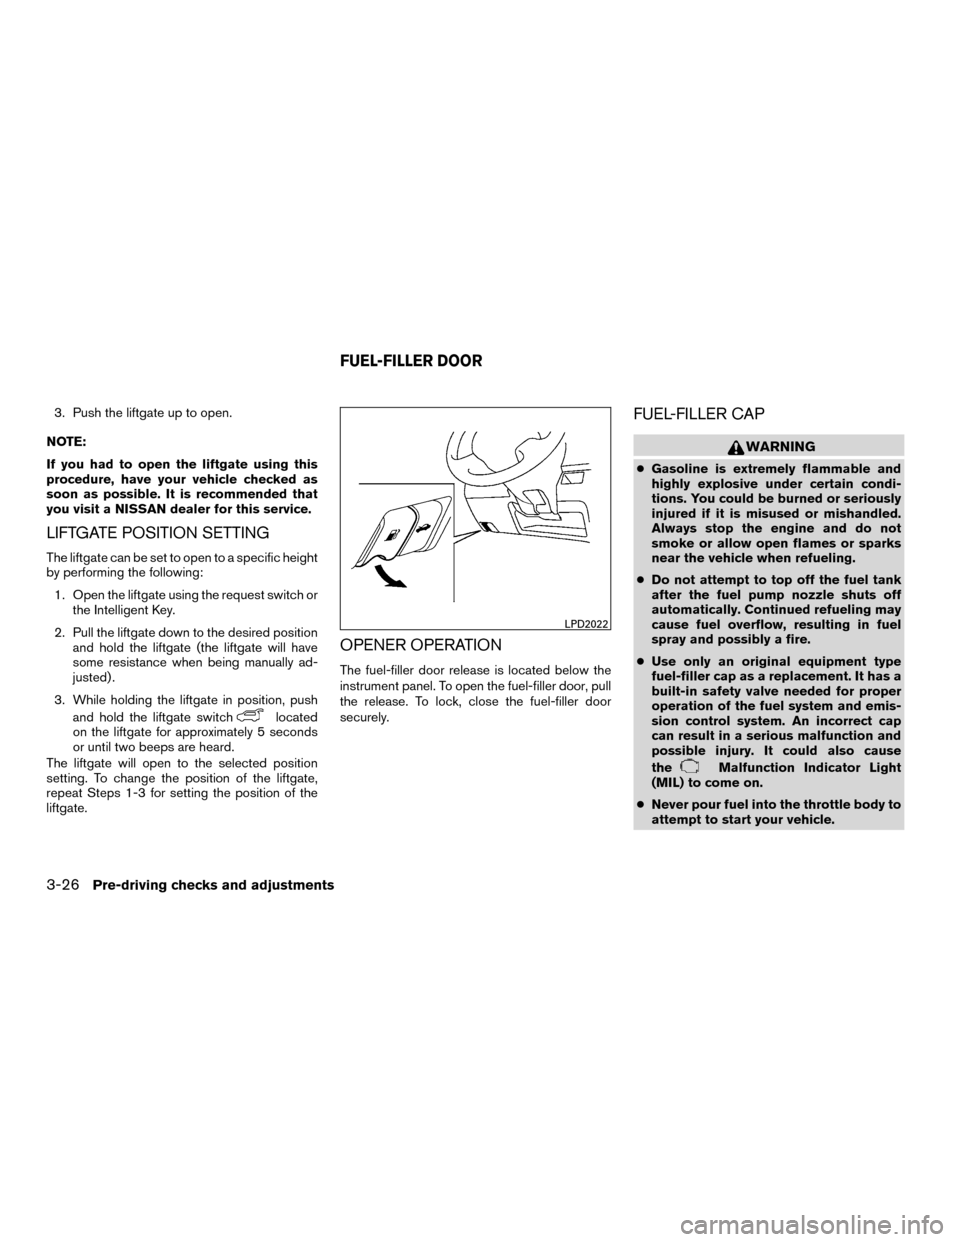
The fuel-filler door release is located below the
instrument panel. To open the fuel-filler door, pull
the release. To lock, close the fuel-filler door
securely.
FUEL-FILLER CAP
WARNING
● Gasoline is extremely flammable and
highly explosive under certain condi-
tions. You could be burned or seriously
injured if it is misused or mishandled.
Always stop the engine and do not
smoke or allow open flames or sparks
near the vehicle when refueling.
● Do not attempt to top off the fuel tank
after the fuel pump nozzle shuts off
automatically. Continued refueling may
cause fuel overflow, resulting in fuel
spray and possibly a fire.
● Use only an original equipment type
fuel-filler cap as a replacement. It has a
built-in safety valve needed for proper
operation of the fuel system and emis-
sion control system. An incorrect cap
can result in a serious malfunction and
possible injury. It could also cause
the
Malfunction Indicator Light
(MIL) to come on.
● Never pour fuel into the throttle body to
attempt to start your vehicle.
LPD2022
FUEL-FILLER DOOR
3-26Pre-driving checks and adjustments
Page 194 of 443
●Do not fill a portable fuel container in
the vehicle or trailer. Static electricity
can cause an explosion of flammable
liquid, vapor or gas in any vehicle or
trailer. To reduce the risk of serious
injury or death when filling portable fuel
containers:
– Always place the container on the ground when filling.
– Do not use electronic devices when filling.
– Keep the pump nozzle in contact with the container while you are fill-
ing it.
– Use only approved portable fuel con- tainers for flammable liquid.
CAUTION
●Do not use E-15 or E-85 fuel in your
vehicle. For additional information, re-
fer to “Fuel recommendation” in the
“Technical and consumer information”
section of this manual. ●
The LOOSE FUEL CAP warning will ap-
pear if the fuel-filler cap is not properly
tightened. It may take a few driving trips
for the message to be displayed. Failure
to tighten the fuel-filler cap properly
after the LOOSE FUEL CAP warning ap-
pears may cause the
Malfunction
Indicator Light (MIL) to illuminate.
● Failure to tighten the fuel-filler cap
properly may cause the
Malfunc-
tion Indicator Light (MIL) to illuminate.
If the
light illuminates because
the fuel-filler cap is loose or missing,
tighten or install the cap and continue
to drive the vehicle. The
light
should turn off after a few driving trips.
If the
light does not turn off after a
few driving trips, have the vehicle in-
spected. It is recommended you visit a
NISSAN dealer for this service.
● For additional information, refer to
“Malfunction Indicator Light (MIL)” in
the “Instruments and controls” section
of this manual.
● If fuel is spilled on the vehicle body,
flush it away with water to avoid paint
damage. NOTE:
Changing ignition switch status during the
refueling process may cause a delay in fuel
gauge response.
Pre-driving checks and adjustments3-27