2016 MITSUBISHI OUTLANDER weight
[x] Cancel search: weightPage 40 of 464
Making a cargo area 4-14 Seat and restraint systems
4
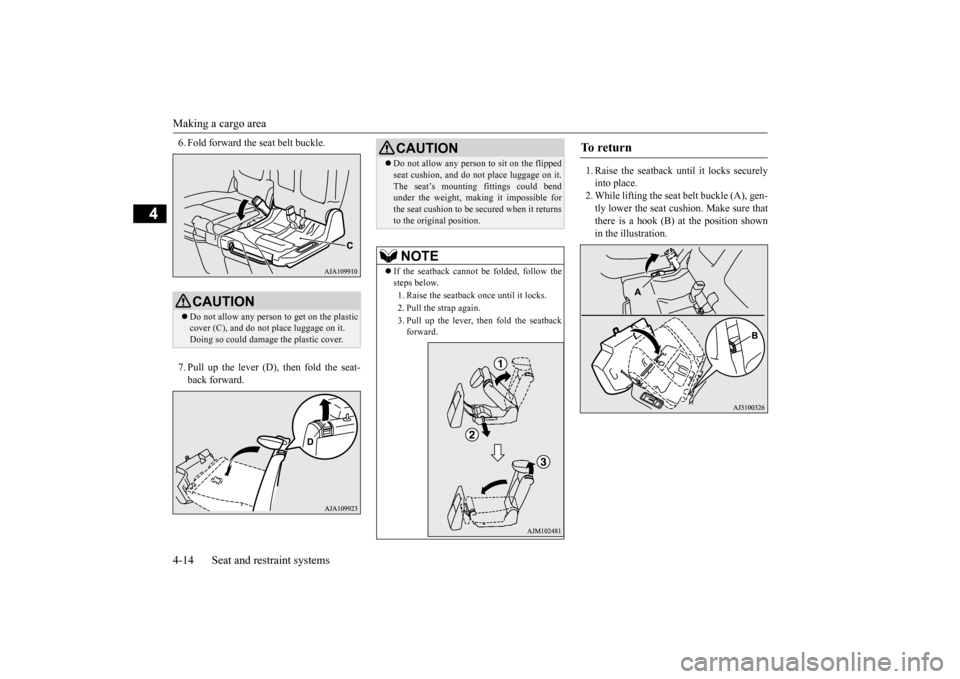
6. Fold forward the seat belt buckle. 7. Pull up the lever (D), then fold the seat- back forward.
1. Raise the seatback until it locks securely into place. 2. While lifting the seat
belt buckle (A), gen-
tly lower the seat cushion. Make sure thatthere is a hook (B) at the position shown in the illustration.
CAUTION Do not allow any person
to get on the plastic
cover (C), and do not
place luggage on it.
Doing so could damage
the plastic cover.
CAUTIONDo not allow any person to sit on the flipped seat cushion, and do no
t place luggage on it.
The seat’s mounting
fittings could bend
under the weight, maki
ng it impossible for
the seat cushion to be secured when it returns to the original position.NOTE
If the seatback cannot be folded, follow the steps below. 1. Raise the seatback once until it locks.2. Pull the strap again. 3. Pull up the lever, then fold the seatback forward.
To r e t u r n
BK0223400US.book 14 ページ 2015年2月13日 金曜日 午後12時15分
Page 52 of 464
Child restraint systems 4-26 Seat and restraint systems
4
N00408701147
This warning light tells you if there is a prob- lem involving the SRS airbags and/or the seat belt pre-tensioner sy
stem. Refer to “SRS
warning light/display” on page 4-39.
N00408900126
In the event of an accident, the seat belt force limiter system will help reduce the force applied to the driver and front seat passenger.
N00407101740
When transporting infants or small childrenin your vehicle, an appropriate child restraintsystem must always be
used. This is required
by law in the U.S. and Canada. Child restraint systems specifically designedfor infants and small children are offered by several manufacturers
. Choose only a child
restraint system with a label certifying that itcomplies with Federal Motor Vehicle Safety Standard 213 (FMVSS 213) or Motor Vehicle Restraint Systems and Booster Seats SafetyRegulations (RSSR). Look for the manufac- turer’s statement of compliance on the box and child restraint system itself.
The child restraint syst
em should be appropri-
ate for your child’s weight and height, andshould properly fit your
vehicle’s seat.
For detailed information, refer to the instruc- tion manual accompanying the child restraintsystem. All children should be
properly restrained in
a restraint device that offers the maximumprotection for their size and age. Be sure to check local, state, or provincial requirements for child si
ze and age that may
vary from the recommendations listed below. Children less than 1 year old and who weigh 22 pounds (10 kg) or less MUST ride in a rear-facing ch
ild safety seat that
MUST ONLY be used in the second row seat. Children older than 1 year of age and who weigh less than 40 pounds (18 kg) or who are less than 40 inches (100 cm) tall must be in a forward-facing restraint used onlyin the rear seat.
Children who weigh more than 40 pounds (18 kg) or who are more than 40 inches(100 cm) tall, regard
less of age, should
use a suitable child seat or a booster seat in the rear seat until
the vehicle’s lap-and-
shoulder belt fits
them properly.
SRS warning Force limiter system Child restraint systems
Guidelines for child restraint system selection
WA R N I N G All children must be seated in the rear seat, and properly restrained.Accident statistics show that children of all sizes and ages are
safer when properly
restrained in the rear seat, rather than inthe front seat. Be sure to select a child restraint system that is appropriate not only for the child’s size and age but also for your vehicle. Some child restraint systems may not fityour vehicle properly.
BK0223400US.book 26 ページ 2015年2月13日 金曜日 午後12時15分
Page 54 of 464
Child restraint systems 4-28 Seat and restraint systems
4
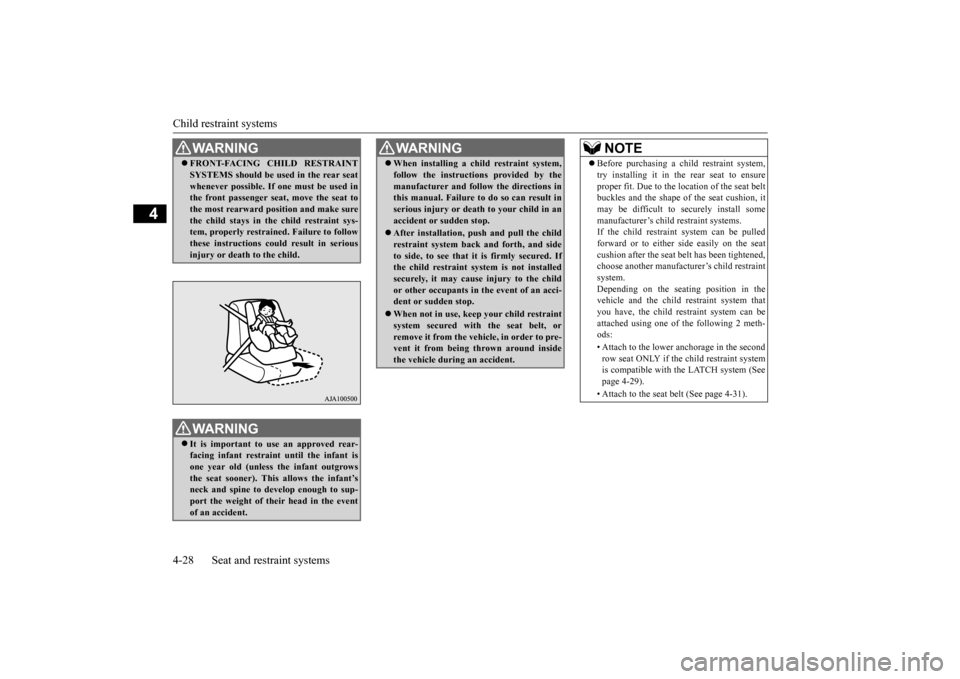
WA R N I N G FRONT-FACING CHILD RESTRAINT SYSTEMS should be used in the rear seatwhenever possible. If one must be used inthe front passenger se
at, move the seat to
the most rearward po
sition and make sure
the child stays in the child restraint sys-tem, properly restrained. Failure to follow these instructions could result in serious injury or death to the child.WA R N I N G It is important to use an approved rear- facing infant restraint until the infant is one year old (unless
the infant outgrows
the seat sooner). This allows the infant’s neck and spine to de
velop enough to sup-
port the weight of their head in the eventof an accident.
When installing a child restraint system, follow the instructions provided by themanufacturer and follow the directions inthis manual. Failure to do so can result in serious injury or deat
h to your child in an
accident or
sudden stop.
After installation, push and pull the child restraint system back and forth, and sideto side, to see that it is firmly secured. If the child restraint system is not installed securely, it may cause injury to the childor other occupants in
the event of an acci-
dent or sudden stop. When not in use, keep your child restraint system secured with the seat belt, or remove it from the vehi
cle, in order to pre-
vent it from being
thrown around inside
the vehicle during an accident.WA R N I N G
NOTE
Before purchasing a child restraint system, try installing it in the rear seat to ensureproper fit. Due to the location of the seat beltbuckles and the shape of the seat cushion, it may be difficult to securely install some manufacturer’s child restraint systems.If the child restraint system can be pulled forward or to either side easily on the seat cushion after the seat
belt has been tightened,
choose another manufactu
rer’s child restraint
system. Depending on the seating position in thevehicle and the child restraint system that you have, the child restraint system can be attached using one of
the following 2 meth-
ods: • Attach to the lower anchorage in the second row seat ONLY if the child restraint system is compatible with the LATCH system (See page 4-29). • Attach to the seat belt (See page 4-31).
BK0223400US.book 28 ページ 2015年2月13日 金曜日 午後12時15分
Page 58 of 464
Child restraint systems 4-32 Seat and restraint systems
4
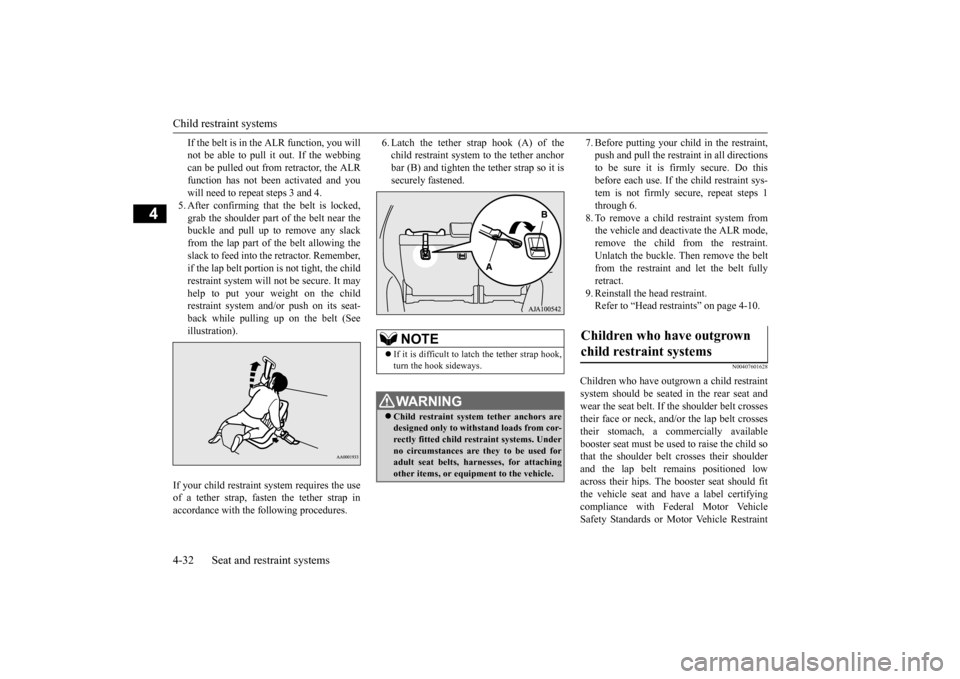
If the belt is in the ALR function, you will not be able to pull it out. If the webbingcan be pulled out from retractor, the ALR function has not been activated and you will need to repeat steps 3 and 4.5. After confirming that the belt is locked, grab the shoulder part of the belt near the buckle and pull up to remove any slackfrom the lap part of the belt allowing the slack to feed into the retractor. Remember, if the lap belt portion is not tight, the child restraint system will
not be secure. It may
help to put your weight on the childrestraint system and/or push on its seat- back while pulling up on the belt (See illustration).
6. Latch the tether strap hook (A) of the child restraint system to the tether anchorbar (B) and tighten the tether strap so it is securely fastened.
7. Before putting your child in the restraint, push and pull the restraint in all directionsto be sure it is firmly secure. Do this before each use. If
the child restraint sys-
tem is not firmly se
cure, repeat steps 1
through 6. 8. To remove a child restraint system from the vehicle and deactivate the ALR mode,remove the child from the restraint. Unlatch the buckle. Then remove the belt from the restraint and let the belt fully retract. 9. Reinstall the head restraint.Refer to “Head restraints” on page 4-10.
N00407601628
Children who have outgrown a child restraint system should be
seated in the rear seat and
wear the seat belt. If the shoulder belt crossestheir face or neck, and/or the lap belt crosses their stomach, a commercially available booster seat must be used
to raise the child so
that the shoulder belt
crosses their shoulder
and the lap belt re
mains positioned low
across their hips. The
booster seat should fit
the vehicle seat and ha
ve a label certifying
compliance with Federal Motor Vehicle Safety Standards or Motor Vehicle Restraint
If your child restraint system requires the use of a tether strap, fasten the tether strap inaccordance with the following procedures.
NOTE
If it is difficult to
latch the tether strap hook,
turn the hook sideways.WA R N I N G Child restraint system tether anchors are designed only to with
stand loads from cor-
rectly fitted child restraint systems. Underno circumstances are they to be used for adult seat belts, harnesses, for attaching other items, or equipment to the vehicle.
Children who have outgrown child restraint systems
BK0223400US.book 32 ページ 2015年2月13日 金曜日 午後12時15分
Page 112 of 464
Child safety locks for rear door 5-36 Features and controls
5
N00509401298
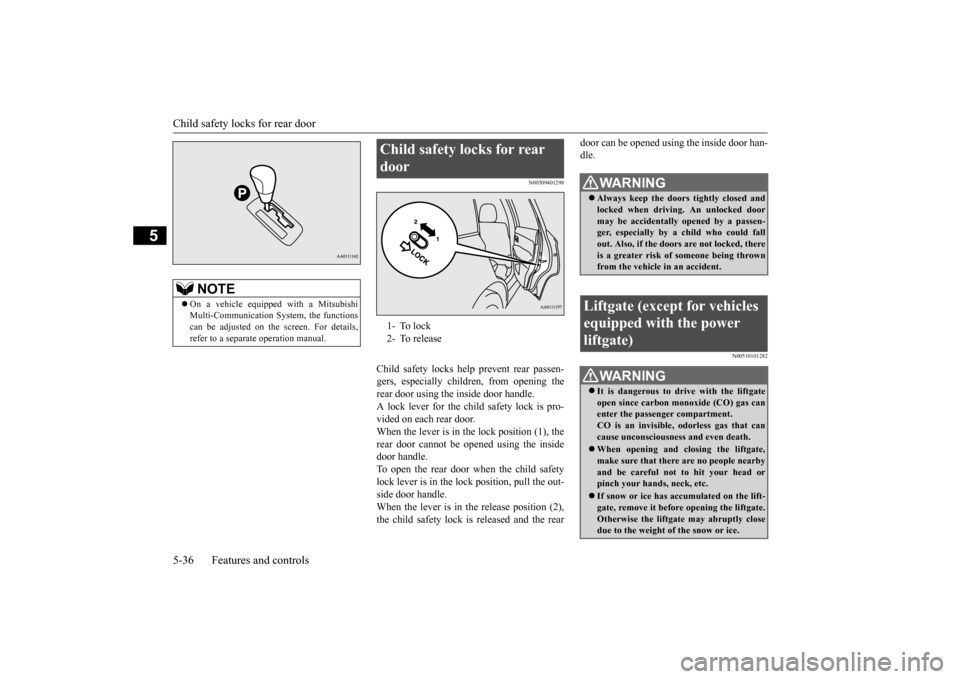
Child safety locks help
prevent rear passen-
gers, especially children, from opening therear door using the inside door handle. A lock lever for the child safety lock is pro- vided on each rear door.When the lever is in the lock position (1), the rear door cannot be opened using the inside door handle.To open the rear door when the child safety lock lever is in the lock position, pull the out- side door handle.When the lever is in the release position (2), the child safety lock is released and the rear
door can be opened using the inside door han- dle.
N00510101282
NOTE
On a vehicle equippe
d with a Mitsubishi
Multi-Communication System, the functionscan be adjusted on the screen. For details, refer to a separa
te operation manual.
Child safety locks for rear door 1- To lock 2- To release
WA R N I N G Always keep the door
s tightly closed and
locked when driving. An unlocked door may be accidentally
opened by a passen-
ger, especially by
a child who could fall
out. Also, if the doors are not locked, there is a greater risk of someone being thrown from the vehicle
in an accident.
Liftgate (except for vehicles equipped with the power liftgate)
WA R N I N G It is dangerous to drive with the liftgate open since carbon mo
noxide (CO) gas can
enter the passenger compartment. CO is an invisible, odorless gas that cancause unconsciousness and even death. When opening and cl
osing the liftgate,
make sure that there are no people nearbyand be careful not to hit your head or pinch your hands, neck, etc. If snow or ice has ac
cumulated on the lift-
gate, remove it before
opening the liftgate.
Otherwise the liftgate may abruptly closedue to the weight of the snow or ice.
BK0223400US.book 36 ページ 2015年2月13日 金曜日 午後12時15分
Page 113 of 464
Liftgate (except for
vehicles equipped w
ith the power liftgate)
Features and controls 5-37
5
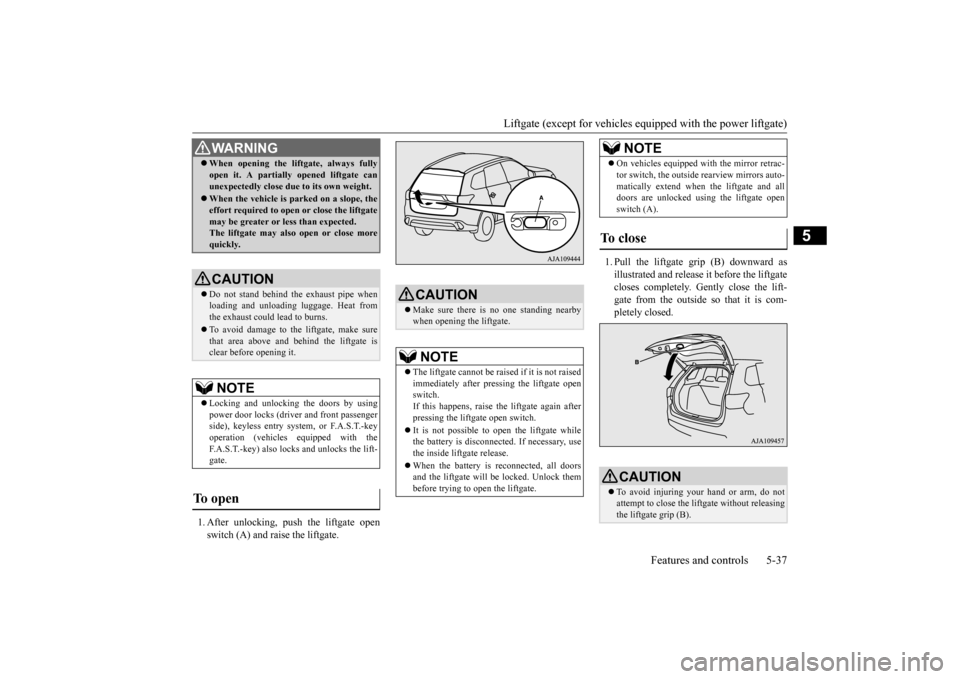
1. After unlocking, push the liftgate open switch (A) and raise the liftgate.
1. Pull the liftgate grip (B) downward as illustrated and release it before the liftgate closes completely. Gently close the lift- gate from the outside so that it is com-pletely closed.
When opening the lift
gate, always fully
open it. A partially opened liftgate canunexpectedly close due to its own weight. When the vehicle is parked on a slope, the effort required to open or close the liftgatemay be greater or less than expected. The liftgate may also open or close more quickly.CAUTION Do not stand behind the exhaust pipe when loading and unloading
luggage. Heat from
the exhaust could lead to burns. To avoid damage to the liftgate, make sure that area above and behind the liftgate is clear before opening it.NOTE
Locking and unlocking the doors by using power door locks (driver and front passenger side), keyless entry system, or F.A.S.T.-keyoperation (vehicles
equipped with the
F.A.S.T.-key) also locks and unlocks the lift- gate.
To open
WA R N I N G
CAUTION Make sure there is
no one standing nearby
when opening the liftgate.NOTE
The liftgate cannot be rais
ed if it is not raised
immediately after pressing the liftgate open switch.If this happens, raise th
e liftgate again after
pressing the liftgate open switch. It is not possible to open the liftgate while the battery is disconnected. If necessary, use the inside liftgate release. When the battery is reconnected, all doors and the liftgate will be locked. Unlock thembefore trying to open the liftgate.
On vehicles equipped wi
th the mirror retrac-
tor switch, the outside rearview mirrors auto-matically extend when
the liftgate and all
doors are unlocked using the liftgate open switch (A).
To close
CAUTION To avoid injuring your hand or arm, do not attempt to close the lift
gate without releasing
the liftgate grip (B).NOTE
BK0223400US.book 37 ページ 2015年2月13日 金曜日 午後12時15分
Page 119 of 464
Power liftgate (if so equipped) Features and controls 5-43
5
After the power liftgate has opened automati- cally, if it is detected that the power liftgate is dropping due to factors such as accumulated snow, the power liftgate will close automati-cally. A warning buzzer w
ill sound continuously
while the drop prevention mechanism is oper-ating.
If the engine is starte
d while the power lift-
gate is operating, th
e power liftgate may
intermittently move or stop moving to pre- vent the power liftgate from moving abruptly.Approximately 10 seconds after the power liftgate has fully closed
or opened, power lift-
gate operation wi
ll again resume.
N00576300030
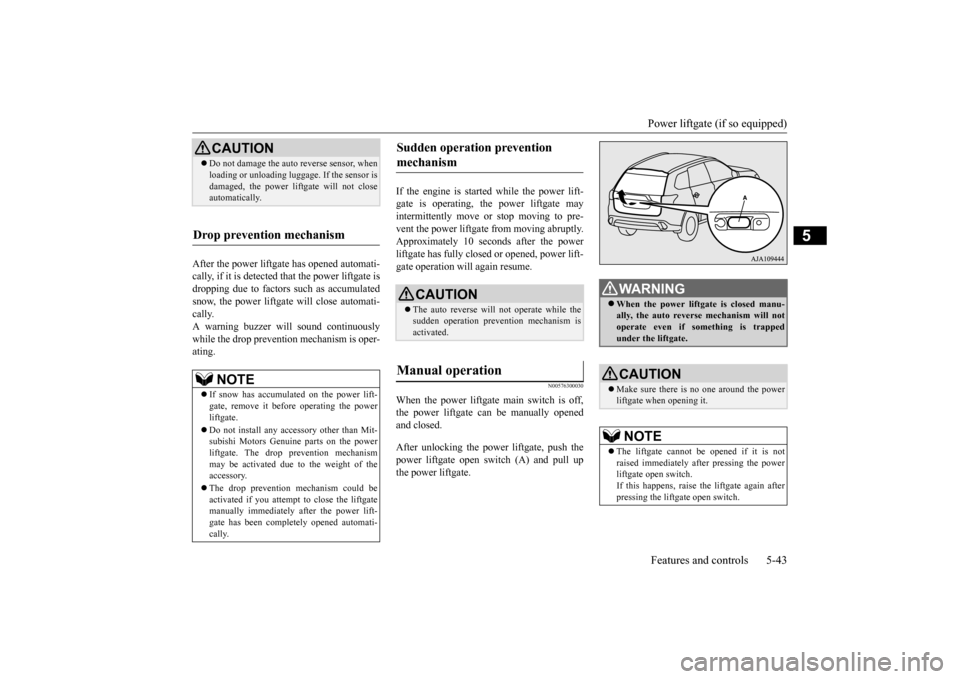
When the power liftgate main switch is off, the power liftgate can be manually openedand closed. After unlocking the power
liftgate, push the
power liftgate open
switch (A) and pull up
the power liftgate.
CAUTION Do not damage the auto reverse sensor, when loading or unloading luggage. If the sensor isdamaged, the power lift
gate will not close
automatically.
Drop prevention mechanism
NOTE
If snow has accumulate
d on the power lift-
gate, remove it befo
re operating the power
liftgate. Do not install any acce
ssory other than Mit-
subishi Motors Genui
ne parts on the power
liftgate. The drop prevention mechanismmay be activated due to the weight of theaccessory. The drop prevention mechanism could be activated if you attempt to close the liftgate manually immediately af
ter the power lift-
gate has been comple
tely opened automati-
cally.
Sudden operation prevention mechanism
CAUTION The auto reverse will not operate while the sudden operation prevention mechanism is activated.
Manual operation
WA R N I N G When the power liftgate is closed manu- ally, the auto reverse mechanism will notoperate even if so
mething is trapped
under the liftgate.CAUTION Make sure there is no one around the power liftgate when opening it.NOTE
The liftgate cannot be opened if it is not raised immediately after pressing the powerliftgate open switch. If this happens, raise the liftgate again after pressing the liftgate open switch.
BK0223400US.book 43 ページ 2015年2月13日 金曜日 午後12時15分
Page 182 of 464
Adaptive Cruise Control System (ACC) (if so equipped) 5-106 Features and controls
5
N00581500027
There are two ways to increase the set speed. The set speed will increase by 1 mph (1 km/h) every time you push up the “RES +” switch while the ACC is activated. If youhold the switch pushed up, the set speed increases in 5 mph (5 km/h) increments.
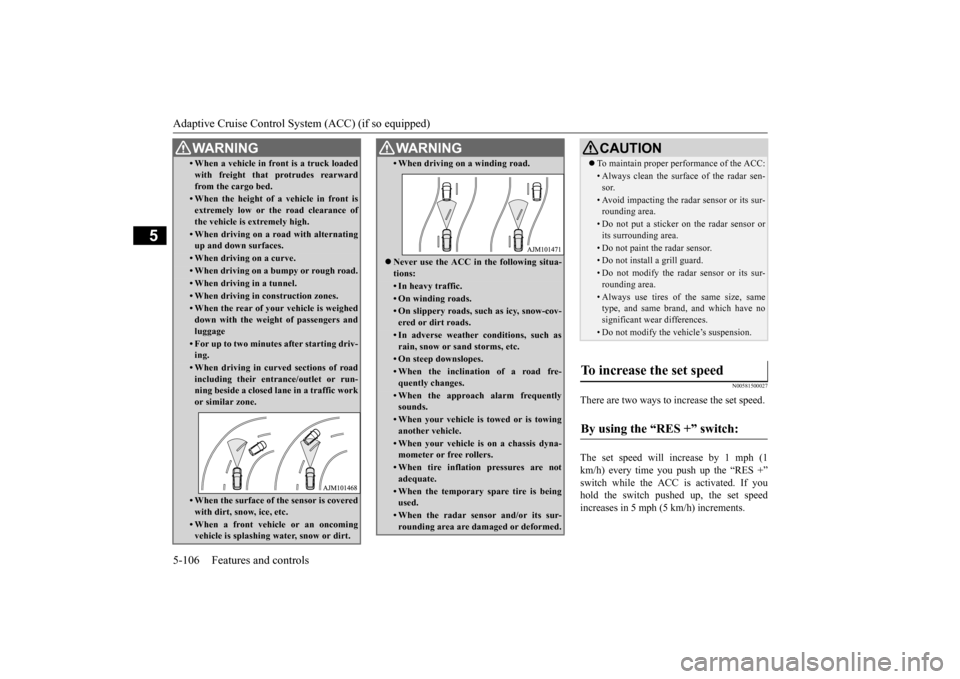
• When a vehicle in front is a truck loaded with freight that protrudes rearwardfrom the cargo bed.• When the height of a vehicle in front isextremely low or the road clearance ofthe vehicle is extremely high.• When driving on a r
oad with alternating
up and down surfaces.• When driving on a curve.• When driving on a bumpy or rough road.• When driving in a tunnel.• When driving in construction zones.• When the rear of your vehicle is weigheddown with the weight of passengers andluggage• For up to two minutes after starting driv-ing.• When driving in curved sections of roadincluding their entrance/outlet or run- ning beside a closed lane in a traffic work or similar zone.• When the surface of th
e sensor is covered
with dirt, snow, ice, etc.• When a front vehicle or an oncomingvehicle is splashing wa
ter, snow or dirt.
WA R N I N G
• When driving on
a winding road.
Never use the ACC in the following situa- tions:• In heavy traffic.• On winding roads.• On slippery roads, such as icy, snow-cov-ered or dirt roads.• In adverse weather conditions, such asrain, snow or sand storms, etc.• On steep downslopes.• When the inclination of a road fre-quently changes.• When the approach alarm frequentlysounds.• When your vehicle is towed or is towinganother vehicle.• When your vehicle is on a chassis dyna-mometer or free rollers.• When tire inflation pressures are notadequate.• When the temporary sp
are tire is being
used.• When the radar sensor and/or its sur-rounding area are damaged or deformed.WA R N I N G
CAUTION To maintain proper performance of the ACC:• Always clean the surface of the radar sen- sor.• Avoid impacting the radar sensor or its sur-rounding area.• Do not put a sticker on the radar sensor orits surrounding area.• Do not paint the radar sensor.• Do not install a grill guard.• Do not modify the radar sensor or its sur- rounding area.• Always use tires of the same size, sametype, and same brand, and which have no significant wear differences.• Do not modify the vehicle’s suspension.
To increase the set speed
By using the “RES +” switch:
BK0223400US.book 106 ページ 2015年2月13日 金曜日 午後12時15分