2016 MERCEDES-BENZ SL ROADSTER parking brake
[x] Cancel search: parking brakePage 170 of 333
Deactivating Distance Pilot DISTRONIC
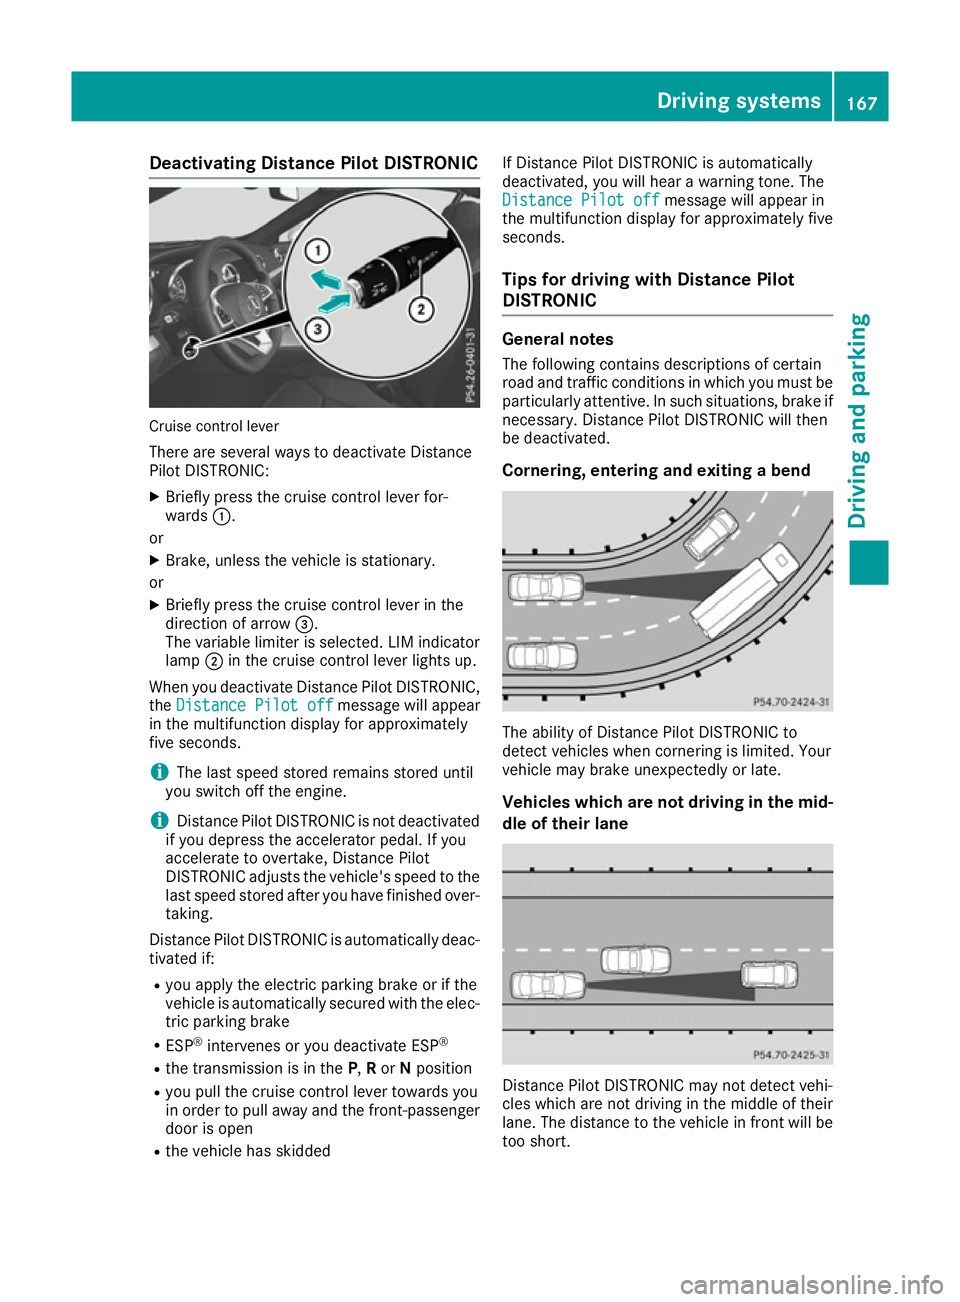
Cruise control lever
There are several ways to deactivate Distance
Pilot DISTRONIC:
X Briefly press the cruise control lever for-
wards :.
or
X Brake, unless the vehicle is stationary.
or X Briefly press the cruise control lever in the
direction of arrow =.
The variable limiter is selected. LIM indicator lamp ;in the cruise control lever lights up.
When you deactivate Distance Pilot DISTRONIC,
the Distance Pilot off
Distance Pilot off message will appear
in the multifunction display for approximately
five seconds.
i The last speed stored remains stored until
you switch off the engine.
i Distance Pilot DISTRONIC is not deactivated
if you depress the accelerator pedal. If you
accelerate to overtake, Distance Pilot
DISTRONIC adjusts the vehicle's speed to the last speed stored after you have finished over-
taking.
Distance Pilot DISTRONIC is automatically deac- tivated if:
R you apply the electric parking brake or if the
vehicle is automatically secured with the elec-
tric parking brake
R ESP ®
intervenes or you deactivate ESP ®
R the transmission is in the P,Ror Nposition
R you pull the cruise control lever towards you
in order to pull away and the front-passenger
door is open
R the vehicle has skidded If Distance Pilot DISTRONIC is automatically
deactivated, you will hear a warning tone. The
Distance Pilot off
Distance Pilot off message will appear in
the multifunction display for approximately five
seconds.
Tips for driving with Distance Pilot
DISTRONIC General notes
The following contains descriptions of certain
road and traffic conditions in which you must be particularly attentive. In such situations, brake if
necessary. Distance Pilot DISTRONIC will then
be deactivated.
Cornering, entering and exiting a bend The ability of Distance Pilot DISTRONIC to
detect vehicles when cornering is limited. Your
vehicle may brake unexpectedly or late.
Vehicles which are not driving in the mid-
dle of their lane Distance Pilot DISTRONIC may not detect vehi-
cles which are not driving in the middle of their
lane. The distance to the vehicle in front will be
too short. Driving syste
ms
167Driving an d parking Z
Page 171 of 333
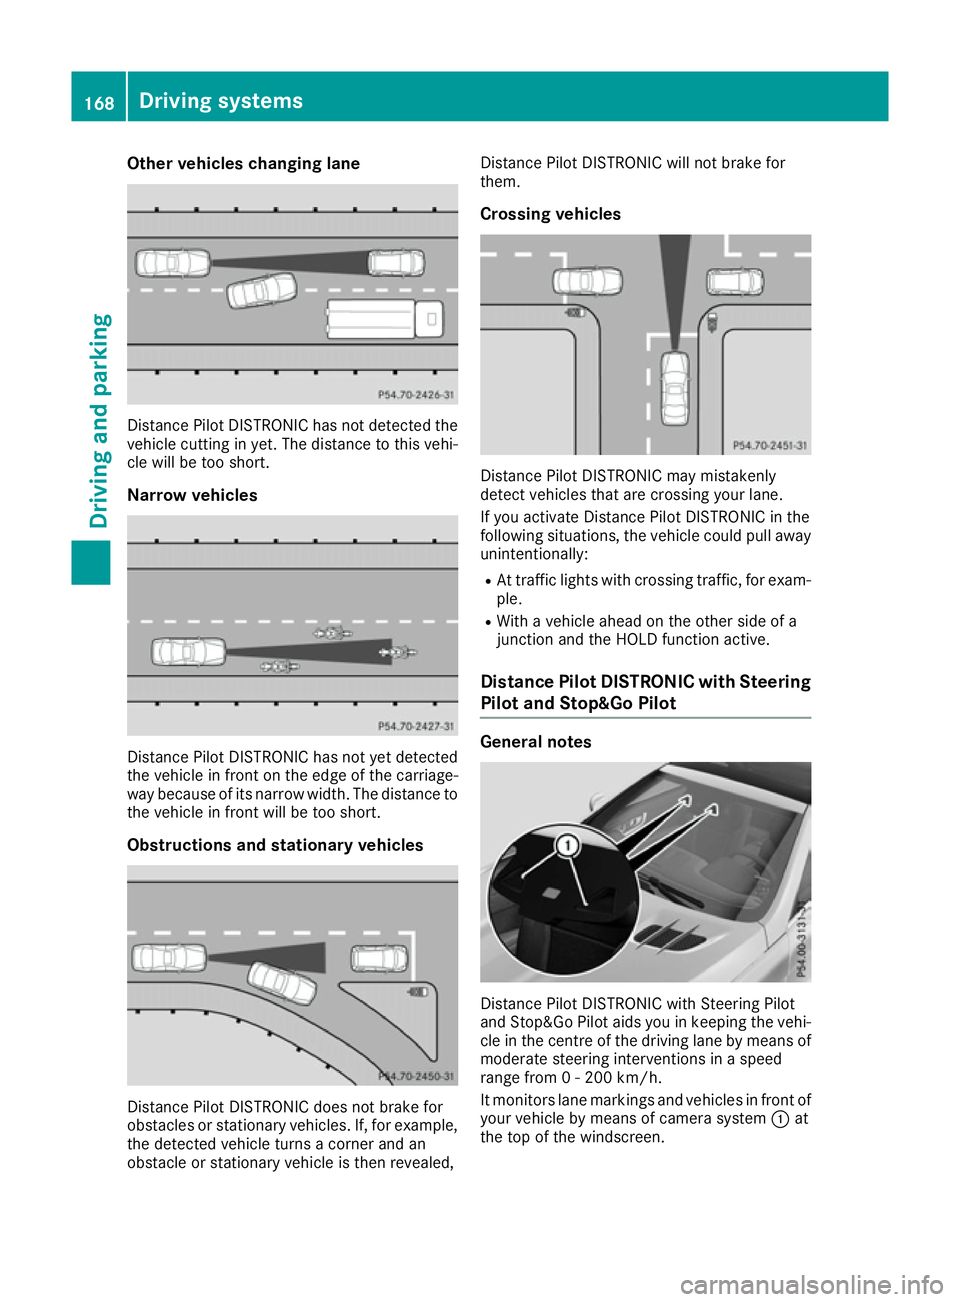
Other vehicles changing lane
Distance Pilot DISTRONIC has not detected the
vehicle cutting in yet. The distance to this vehi-
cle will be too short.
Narrow vehicles Distance Pilot DISTRONIC has not yet detected
the vehicle in front on the edge of the carriage-
way because of its narrow width. The distance to the vehicle in front will be too short.
Obstructions and stationary vehicles Distance Pilot DISTRONIC does not brake for
obstacles or stationary vehicles. If, for example,
the detected vehicle turns a corner and an
obstacle or stationary vehicle is then revealed, Distance Pilot DISTRONIC will not brake for
them.
Crossing vehicles Distance Pilot DISTRONIC may mistakenly
detect vehicles that are crossing your lane.
If you activate Distance Pilot DISTRONIC in the
following situations, the vehicle could pull away
unintentionally:
R At traffic lights with crossing traffic, for exam-
ple.
R With a vehicle ahead on the other side of a
junction and the HOLD function active.
Distance Pilot DISTRONIC with Steering
Pilot and Stop&Go Pilot General notes
Distance Pilot DISTRONIC with Steering Pilot
and Stop&Go Pilot aids you in keeping the vehi-
cle in the centre of the driving lane by means of
moderate steering interventions in a speed
range from 0 - 200 km/h.
It monitors lane markings and vehicles in front of your vehicle by means of camera system :at
the top of the windscreen. 168
Driving systemsDriving and parking
Page 173 of 333
still not started to steer and have not taken hold
of the steering wheel after five seconds at the
latest, a warning tone also sounds to remind you to take control of the vehicle. Steering Pilot and
Stop&Go Pilot then switch to passive mode. Dis-
tance Pilot DISTRONIC remains active.
Activating Steering Pilot and Stop&Go
Pilot
X Activate Distance Pilot DISTRONIC with
Steering Pilot and Stop&Go Pilot function
using the on-board computer (Y page 207).
The Steering
Steering Pilot Piloton
onmessage appears in
the multifunctional display. The Steering Pilot and Stop&Go Pilot are switched on.
Information in the multifunction display If Steering Pilot and Stop&Go Pilot are activated
but not ready for a steering intervention, steer-
ing wheel symbol :appears in grey. If the sys-
tem provides you with support by means of
steering interventions, symbol :is shown in
green.
Deactivating Steering Pilot and Stop&Go
PilotX Deactivate Distance Pilot DISTRONIC with
Steering Pilot and Stop&Go Pilot function
using the on-board computer (Y page 207).
The Steering Pilot off
Steering Pilot off message appears
in the multifunction display. Steering Pilot and Stop&Go Pilot are deactivated.
When the Distance Pilot is deactivated or not
available, Steering Pilot and Stop&Go Pilot are
deactivated automatically. Speed limiter
General notes The limiter brakes automatically so that you do
not exceed the set speed. On long and steep
downhill gradients, especially if the vehicle is
laden, you must select a lower gear in good time.
By doing so, you will make use of the braking effect of the engine. This relieves the load on the
brake system and prevents the brakes from
overheating and wearing too quickly.
You can set a variable or permanent limit speed:
R variable for maximum permissible speeds,
e.g. in built-up areas
R permanent for long-term speed restrictions,
e.g. when driving with winter tyres fitted
(Y page 172)
i The speed indicated in the speedometer
may differ slightly from the speed stored.
Important safety notes If you fail to adapt your driving style, the limiter
can neither reduce the risk of an accident nor
override the laws of physics. The limiter cannot take into account road, weather or traffic con-
ditions. The limiter is only an aid. You are
responsible for the distance to the vehicle in
front, for vehicle speed and for braking in good
time.
If there is a change of drivers, advise the new
driver of the speed stored.
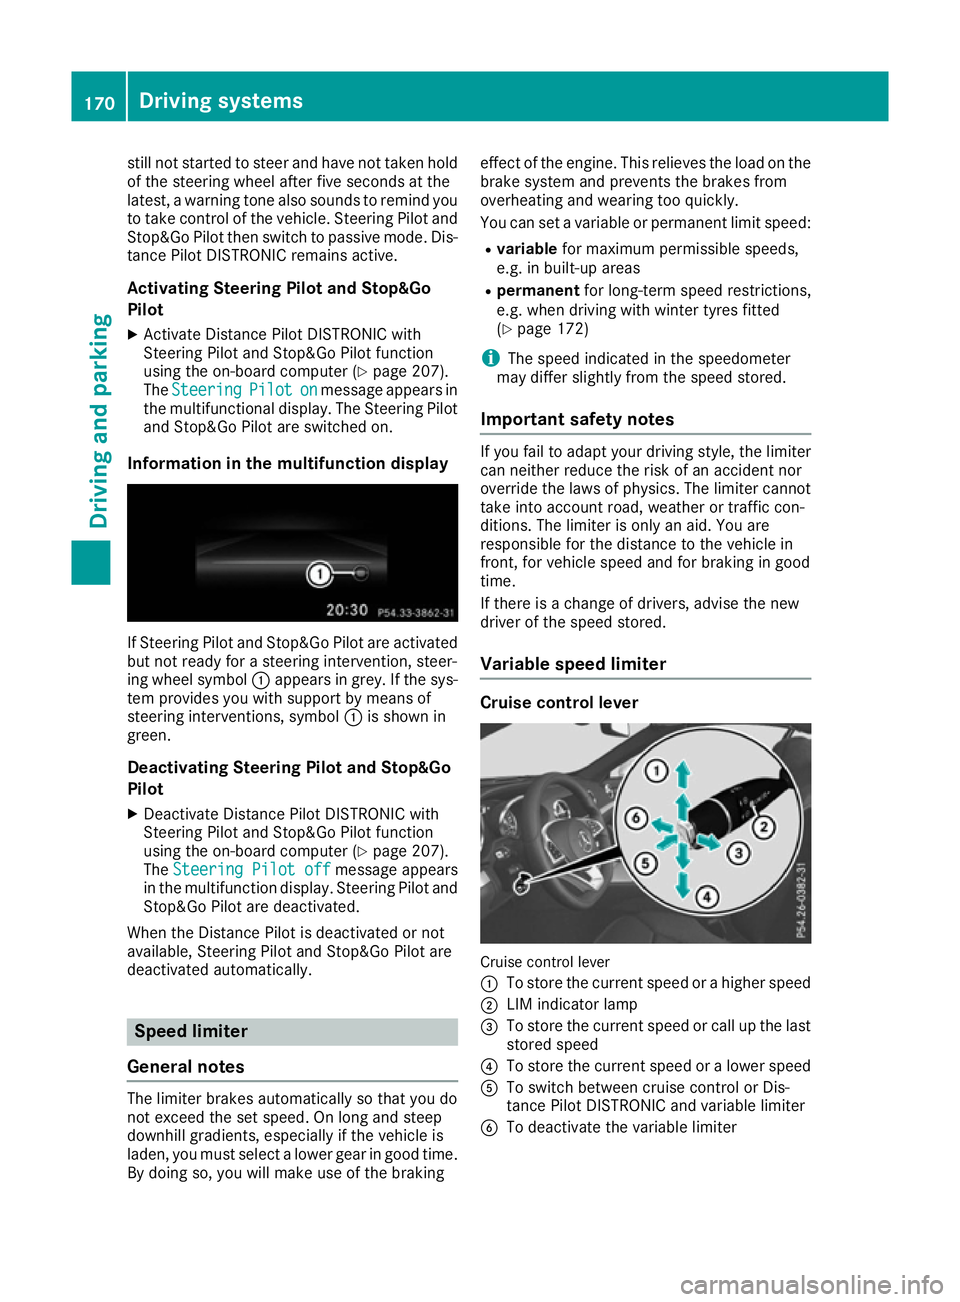
Variable speed limiter Cruise control lever
Cruise control lever
:
To store the current speed or a higher speed
; LIM indicator lamp
= To store the current speed or call up the last
stored speed
? To store the current speed or a lower speed
A To switch between cruise control or Dis-
tance Pilot DISTRONIC and variable limiter
B To deactivate the variable limiter 170
Driving systemsDriving and parking
Page 175 of 333
Switching off the speed limiter
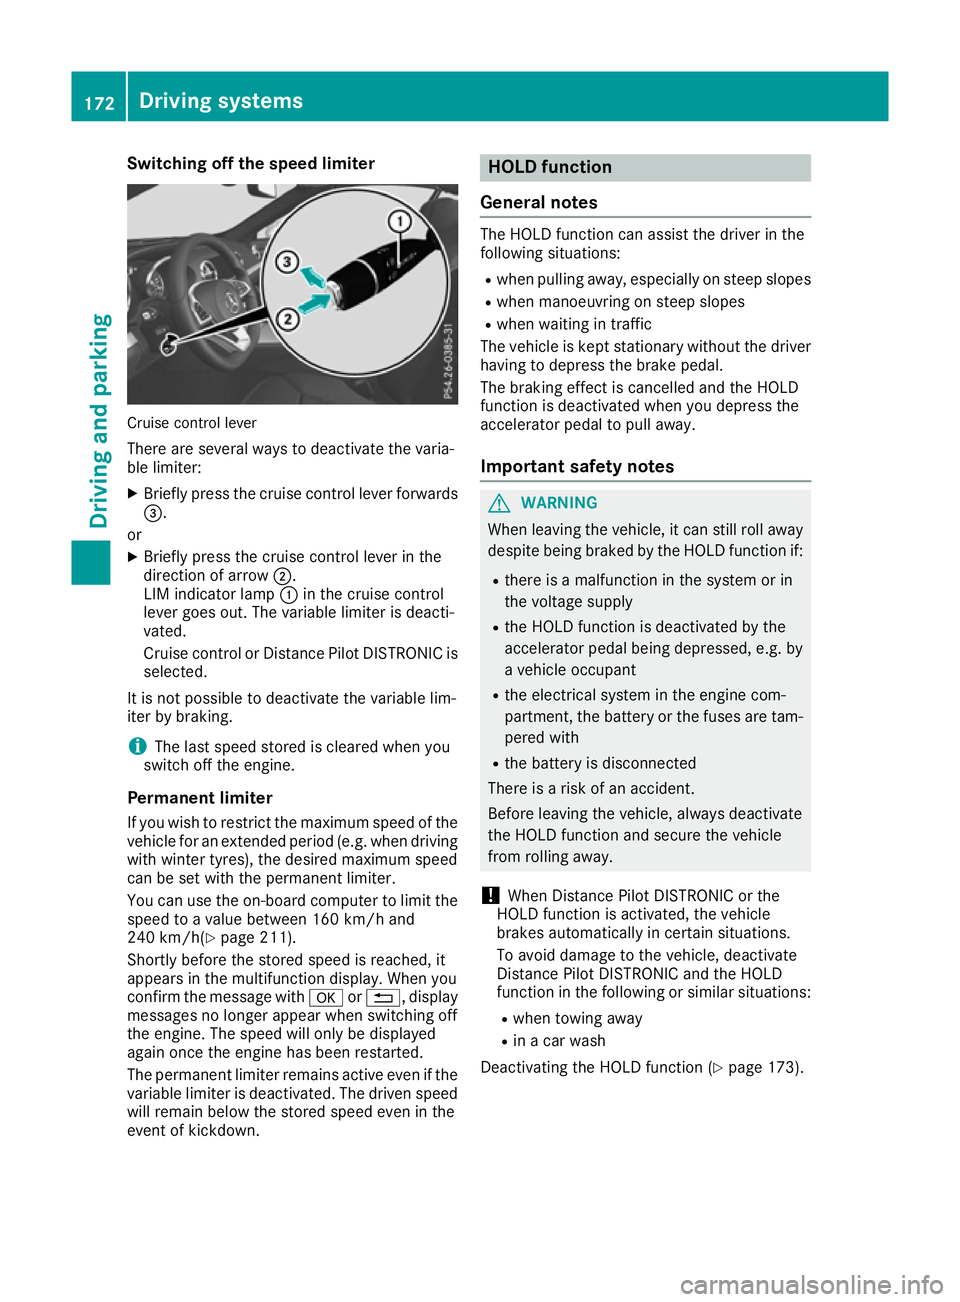
Cruise control lever
There are several ways to deactivate the varia-
ble limiter:
X Briefly press the cruise control lever forwards
=.
or
X Briefly press the cruise control lever in the
direction of arrow ;.
LIM indicator lamp :in the cruise control
lever goes out. The variable limiter is deacti-
vated.
Cruise control or Distance Pilot DISTRONIC is
selected.
It is not possible to deactivate the variable lim-
iter by braking.
i The last speed stored is cleared when you
switch off the engine.
Permanent limiter If you wish to restrict the maximum speed of the
vehicle for an extended period (e.g. when driving
with winter tyres), the desired maximum speed
can be set with the permanent limiter.
You can use the on-board computer to limit the speed to a value between 160 km/h and
240 km/h(Y page 211).
Shortly before the stored speed is reached, it
appears in the multifunction display. When you
confirm the message with aor%, display
messages no longer appear when switching off
the engine. The speed will only be displayed
again once the engine has been restarted.
The permanent limiter remains active even if the variable limiter is deactivated. The driven speed
will remain below the stored speed even in the
event of kickdown. HOLD function
General notes The HOLD function can assist the driver in the
following situations:
R when pulling away, especially on steep slopes
R when manoeuvring on steep slopes
R when waiting in traffic
The vehicle is kept stationary without the driver
having to depress the brake pedal.
The braking effect is cancelled and the HOLD
function is deactivated when you depress the
accelerator pedal to pull away.
Important safety notes G
WARNING
When leaving the vehicle, it can still roll away despite being braked by the HOLD function if:
R there is a malfunction in the system or in
the voltage supply
R the HOLD function is deactivated by the
accelerator pedal being depressed, e.g. by
a vehicle occupant
R the electrical system in the engine com-
partment, the battery or the fuses are tam-
pered with
R the battery is disconnected
There is a risk of an accident.
Before leaving the vehicle, always deactivate
the HOLD function and secure the vehicle
from rolling away.
! When Distance Pilot DISTRONIC or the
HOLD function is activated, the vehicle
brakes automatically in certain situations.
To avoid damage to the vehicle, deactivate
Distance Pilot DISTRONIC and the HOLD
function in the following or similar situations:
R when towing away
R in a car wash
Deactivating the HOLD function (Y page 173).172
Driving systemsDriving and parking
Page 176 of 333
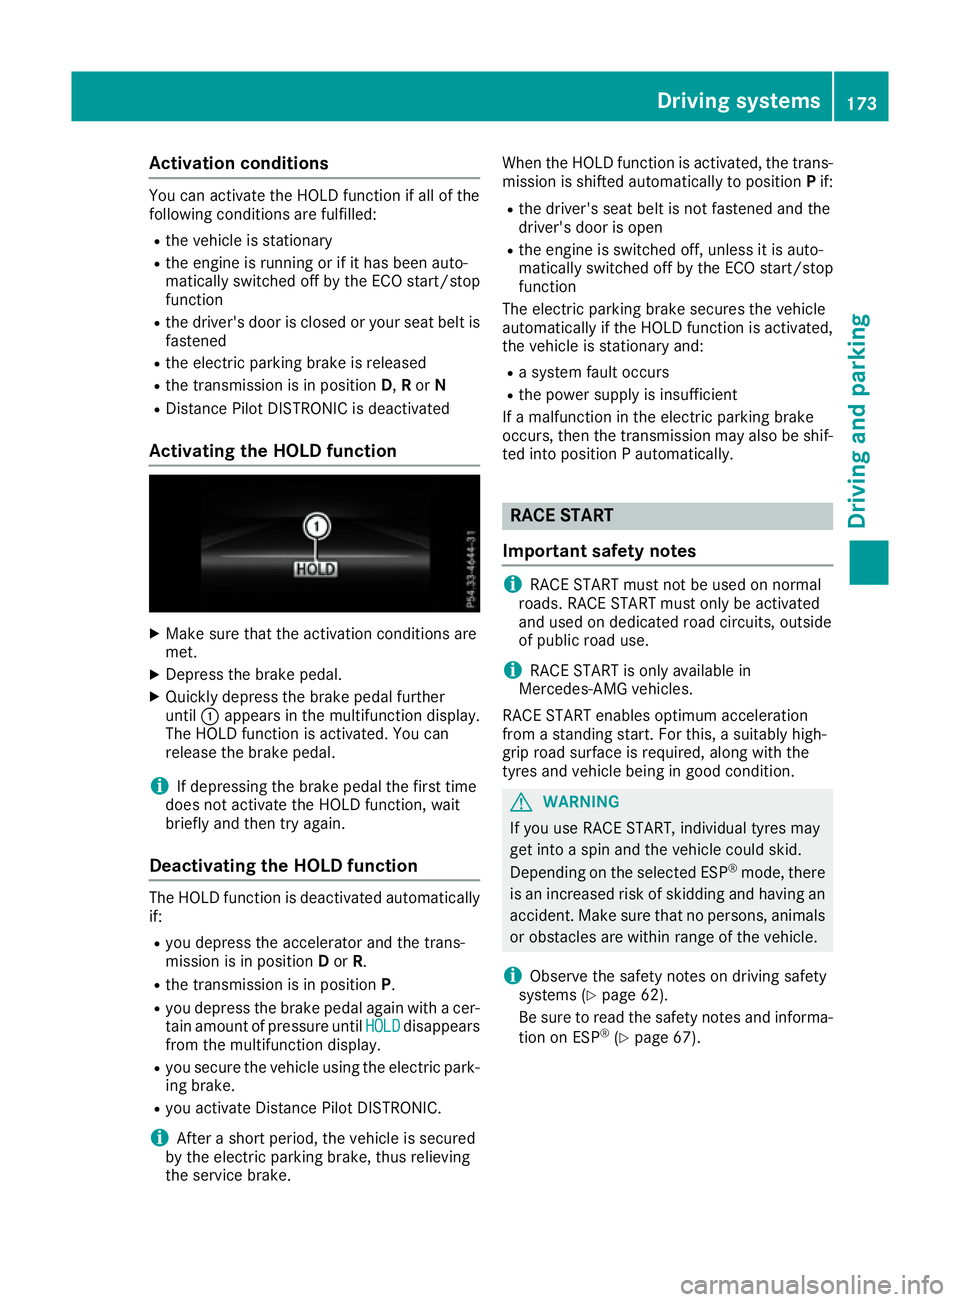
Activation conditions
You can activate the HOLD function if all of the
following conditions are fulfilled:
R the vehicle is stationary
R the engine is running or if it has been auto-
matically switched off by the ECO start/stop
function
R the driver's door is closed or your seat belt is
fastened
R the electric parking brake is released
R the transmission is in position D,Ror N
R Distance Pilot DISTRONIC is deactivated
Activating the HOLD function X
Make sure that the activation conditions are
met.
X Depress the brake pedal.
X Quickly depress the brake pedal further
until :appears in the multifunction display.
The HOLD function is activated. You can
release the brake pedal.
i If depressing the brake pedal the first time
does not activate the HOLD function, wait
briefly and then try again.
Deactivating the HOLD function The HOLD function is deactivated automatically
if:
R you depress the accelerator and the trans-
mission is in position Dor R.
R the transmission is in position P.
R you depress the brake pedal again with a cer-
tain amount of pressure until HOLD HOLDdisappears
from the multifunction display.
R you secure the vehicle using the electric park-
ing brake.
R you activate Distance Pilot DISTRONIC.
i After a short period, the vehicle is secured
by the electric parking brake, thus relieving
the service brake. When the HOLD function is activated, the trans-
mission is shifted automatically to position Pif:
R the driver's seat belt is not fastened and the
driver's door is open
R the engine is switched off, unless it is auto-
matically switched off by the ECO start/stop
function
The electric parking brake secures the vehicle
automatically if the HOLD function is activated,
the vehicle is stationary and:
R a system fault occurs
R the power supply is insufficient
If a malfunction in the electric parking brake
occurs, then the transmission may also be shif-
ted into position P automatically. RACE START
Important safety notes i
RACE START must not be used on normal
roads. RACE START must only be activated
and used on dedicated road circuits, outside
of public road use.
i RACE START is only available in
Mercedes‑ AMG vehicles.
RACE START enables optimum acceleration
from a standing start. For this, a suitably high-
grip road surface is required, along with the
tyres and vehicle being in good condition. G
WARNING
If you use RACE START, individual tyres may
get into a spin and the vehicle could skid.
Depending on the selected ESP ®
mode, there
is an increased risk of skidding and having an accident. Make sure that no persons, animals
or obstacles are within range of the vehicle.
i Observe the safety notes on driving safety
systems (Y page 62).
Be sure to read the safety notes and informa-
tion on ESP ®
(Y page 67). Driving systems
173Driving and parking Z
Page 178 of 333
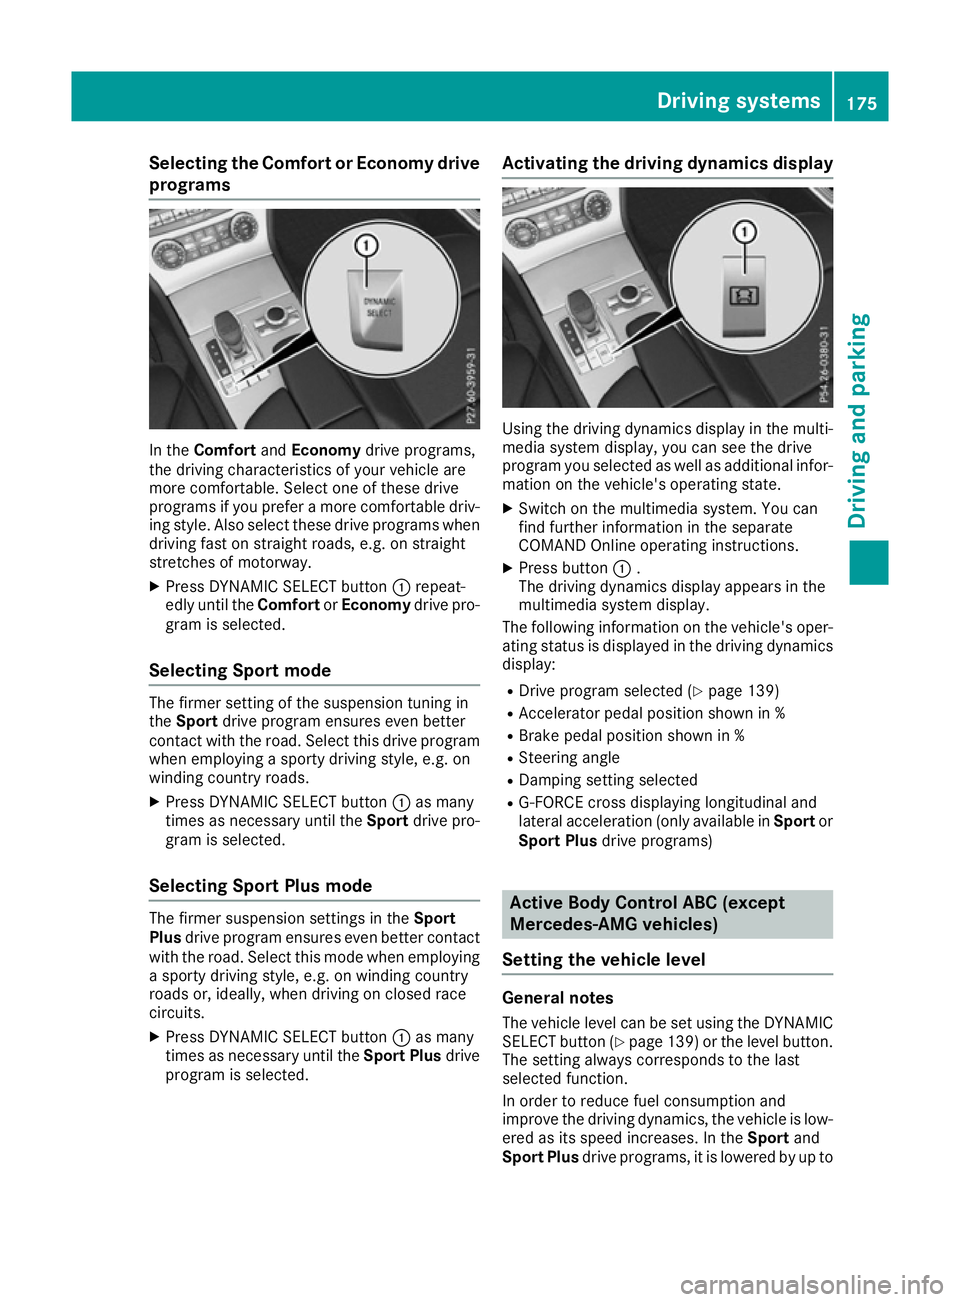
Selecting the Comfort or Economy drive
programs In the
Comfort andEconomy drive programs,
the driving characteristics of your vehicle are
more comfortable. Select one of these drive
programs if you prefer a more comfortable driv- ing style. Also select these drive programs when
driving fast on straight roads, e.g. on straight
stretches of motorway.
X Press DYNAMIC SELECT button :repeat-
edly until the ComfortorEconomy drive pro-
gram is selected.
Selecting Sport mode The firmer setting of the suspension tuning in
the Sport drive program ensures even better
contact with the road. Select this drive program when employing a sporty driving style, e.g. on
winding country roads.
X Press DYNAMIC SELECT button :as many
times as necessary until the Sportdrive pro-
gram is selected.
Selecting Sport Plus mode The firmer suspension settings in the
Sport
Plus drive program ensures even better contact
with the road. Select this mode when employing
a sporty driving style, e.g. on winding country
roads or, ideally, when driving on closed race
circuits.
X Press DYNAMIC SELECT button :as many
times as necessary until the Sport Plusdrive
program is selected. Activating the driving dynamics display
Using the driving dynamics display in the multi-
media system display, you can see the drive
program you selected as well as additional infor- mation on the vehicle's operating state.
X Switch on the multimedia system. You can
find further information in the separate
COMAND Online operating instructions.
X Press button :.
The driving dynamics display appears in the
multimedia system display.
The following information on the vehicle's oper- ating status is displayed in the driving dynamics
display:
R Drive program selected (Y page 139)
R Accelerator pedal position shown in %
R Brake pedal position shown in %
R Steering angle
R Damping setting selected
R G-FORCE cross displaying longitudinal and
lateral acceleration (only available in Sportor
Sport Plus drive programs) Active Body Control ABC (except
Mercedes-AMG vehicles)
Setting the vehicle level General notes
The vehicle level can be set using the DYNAMIC
SELECT button (Y page 139) or the level button.
The setting always corresponds to the last
selected function.
In order to reduce fuel consumption and
improve the driving dynamics, the vehicle is low- ered as its speed increases. In the Sportand
Sport Plus drive programs, it is lowered by up to Driving systems
175Driving and parking Z
Page 181 of 333

X
Switch on the multimedia system. You can
find further information in the separate
COMAND Online operating instructions.
X Press button :.
The driving dynamics display appears in the
multimedia system display.
The following information on the vehicle's oper- ating status is displayed in the driving dynamics display:
R Drive program selected (Y page 139)
R Accelerator pedal position shown in %
R Brake pedal position shown in %
R Steering angle
R Activity of the ABC spring struts
R Vehicle level display (Y page 175)
R Level settings animation
R G-FORCE cross displaying longitudinal and
lateral acceleration (only available in Sportor
Sport Plus drive programs) Active Body Control ABC (Mercedes-
AMG vehicles)
Setting the vehicle level General notes
The vehicle level can be set using the DYNAMIC SELECT controller (Y page 140) or the on-board
computer (Y page 178). The setting always cor-
responds to the last selected function.
In order to reduce fuel consumption and
improve the driving dynamics, the vehicle is low-
ered as its speed increases. In the Sportand
Sport Plus drive programs it is lowered by up to
13 mm, and in the Comfortdrive program by up
to 5 mm compared to the normal vehicle level.
As the speed is reduced, the vehicle is raised to
the set vehicle height.
If the ignition is switched off for less than four
hours, the previously selected drive program is
activated when the engine is next started. If the
ignition is switched off for more than four hours,
the Comfort drive program is activated when
the engine is next started.
Select the normal level for normal road surfaces and the raised level for driving with snow chains
or on particularly poor road surfaces. Important safety notes
The vehicle is slightly lowered when the engine
is switched off. G
WARNING
People's limbs may become trapped if they
are located underneath the vehicle or
between the vehicle body and the tyres when the vehicle is lowering. There is a danger of
injury.
When lowering the vehicle, make sure no one
is underneath the vehicle or in the immediate vicinity of the wheel arches.
! If you have selected the normal level and
switched the engine off, the vehicle is low-
ered. The vehicle is automatically lowered by approximately 10 mm. Make sure when park- ing that you position your vehicle so that it
does not make contact with the kerb as the
vehicle is lowered. Your vehicle could other-
wise be damaged.
Setting the raised level X
Make sure that the engine is running or that it
has been switched off by the ECO start/stop
function.
X Make sure that a speed of 120 km/h is not
exceeded.
X If symbol ; ;is not shown: press=
or ; on the steering wheel to select the
Assist. Assist. menu.
X Press the 9or: button to select
Vehicle level
Vehicle level.
X Press the abutton.
The following message appears: :Vehicle
Vehicle
level Raise with OK
level Raise with OK.
X Press the abutton.
If the engine has been switched off by the ECO
start/stop function, it is now restarted. 178
Driving systemsDriving and parking
Page 183 of 333

mode if you prefer a more comfortable driving
style.
X Make sure that the engine is running or that it
has been switched off by the ECO start/stop function.
X If indicator lamp ;
; is lit: press button :.
Indicator lamp ;goes out. The comfortable
suspension setting is selected.
The AMG Ride Control COMFORT AMG Ride Control COMFORT message
appears in the multifunction display.
Activating the driving dynamics display in the COMAND display Using the driving dynamics display in the multi-
media system display, you can see the drive
program you selected as well as additional infor-
mation on the vehicle's operating status.
X Switch on COMAND Online. You can find fur-
ther information in the separate COMAND
Online operating instructions.
The following information on the vehicle's oper- ating status is displayed in the driving dynamics display:
R Drive program selected (Y page 140)
R Accelerator pedal position shown in %
R Brake pedal position shown in %
R Steering angle
R Vehicle level display (Y page 178)
R Activity of the ABC spring struts
R Level settings animation
R G-FORCE cross to display longitudinal and lat-
eral acceleration (only available in Sport,
Sport Plus andRACE drive programs)
R Overrun mode animation PARKTRONIC
Important safety notes PARKTRONIC is an electronic parking aid with
ultrasonic sensors. It monitors the area around
your vehicle using six sensors in the front
bumper and six sensors in the rear bumper.
PARKTRONIC indicates visually and audibly the
distance between your vehicle and an object.
PARKTRONIC is only an aid. It is not a substitute
for your attention to the immediate surround-
ings. The responsibility for safe manoeuvring
and parking remains with you. Make sure that there are no persons, animals or objects in
range while manoeuvring and parking.
! When parking, pay particular attention to
objects above or below the sensors, such as
flower pots or trailer drawbars. PARKTRONIC
does not detect such objects when they are in the immediate vicinity of the vehicle. You
could damage the vehicle or the objects.
The sensors may not detect snow and objects
which absorb ultrasonic sources.
Ultrasonic sources, such as an automatic car wash, a lorry's compressed-air brakes or a
pneumatic drill, could cause PARKTRONIC to
malfunction.
PARKTRONIC may not function correctly on
uneven terrain.
PARKTRONIC is activated automatically when
you:
R switch on the ignition
R shift the transmission to position D,Ror N
R release the electric parking brake
PARKTRONIC is deactivated at speeds above
18 km/h. It is reactivated at lower speeds.
Range of the sensors General notes
PARKTRONIC does not take into account obsta- cles located:
R below the detection range, e.g. persons, ani-
mals or objects
R above the detection range, e.g. overhanging
loads, tail sections or loading ramps of goods vehicles :
Example: sensors in the front bumper, left-
hand side
The sensors must be free of dirt, ice and slush.
Otherwise, they may not function correctly. 180
Driving systemsDriving and parking