2016 MERCEDES-BENZ S-COUPE ESP
[x] Cancel search: ESPPage 306 of 410
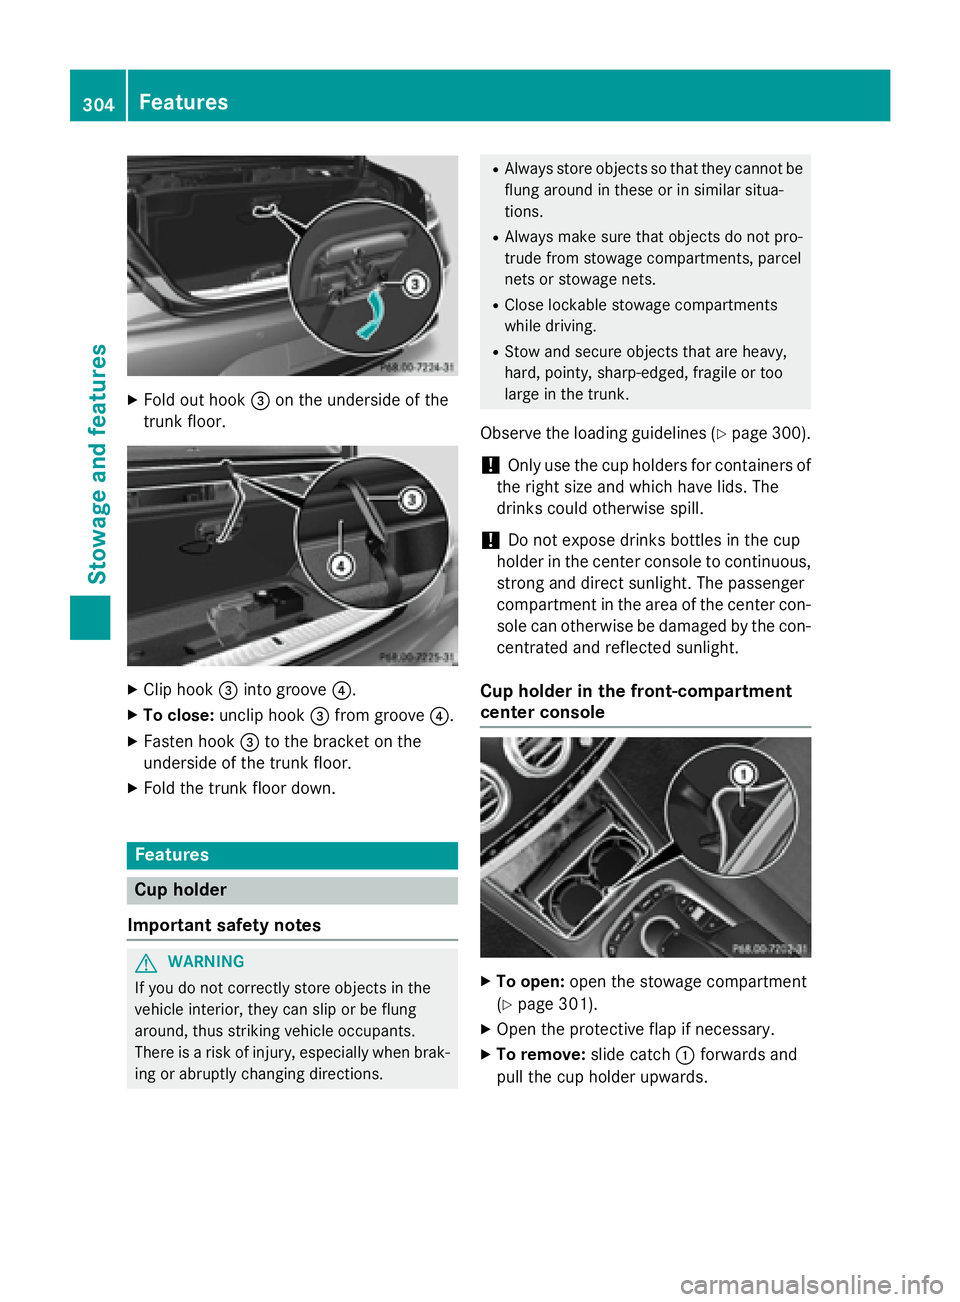
XFold out hook=on the underside of the
trunk floor.
XClip hook =into groove ?.
XTo close:unclip hook =from groove ?.
XFasten hook =to the bracket on the
underside of the trunk floor.
XFold the trunk floor down.
Features
Cup holder
Important safety notes
GWARNING
If you do not correctly store objects in the
vehicle interior, they can slip or be flung
around, thus striking vehicle occupants.
There is a risk of injury, especially when brak- ing or abruptly changing directions.
RAlways store objects so that they cannot be
flung around in these or in similar situa-
tions.
RAlways make sure that objects do not pro-
trude from stowage compartments, parcel
nets or stowage nets.
RClose lockable stowage compartments
while driving.
RStow and secure objects that are heavy,
hard, pointy, sharp-edged, fragile or too
large in the trunk.
Observe the loading guidelines (Ypage 300).
!Only use the cup holders for containers of
the right size and which have lids. The
drinks could otherwise spill.
!Do not expose drinks bottles in the cup
holder in the center console to continuous,
strong and direct sunlight. The passenger
compartment in the area of the center con- sole can otherwise be damaged by the con-
centrated and reflected sunlight.
Cup holder in the front-compartment
center console
XTo open: open the stowage compartment
(
Ypage 301).
XOpen the protective flap if necessary.
XTo remove: slide catch:forwards and
pull the cup holder upwards.
304Features
Stowage and features
Page 311 of 410

This is indicated by the flashing indicator
lamps in the button. The cooling function will
automatically switch back on as soon as there
is sufficient voltage.
Caring for the coolbox
If you do not need to use the coolbox for an
extended period you should switch it off,
defrost it and clean it. After doing so, leave
the lid open for a time.
Removing and installing the coolbox
You can remove the coolbox for maintenance
purposes.
XTo remove: switch off the coolbox.
XPull plug;down and out.
XUnscrew both screws =.
XPull out the coolbox.
XClose flap:.
XTo install: swing flap:to the side until it
is locked in place by the magnets.
XInsert the coolbox.
XTighten both screws =.
XConnect plug;.
mbrace
General notes
The mbrace system is only available in the
USA.
You must have a license agreement to acti-
vate the mbrace service. Make sure that your system is activated and operational. To log in,
press the
ïMB Info call button. If any of
the steps mentioned are not carried out, the
system may not be activated.
If you have questions about the activation,
contact one of the following telephone hot-
lines:
Mercedes-Benz Customer Assistance Center
at 1-800-FOR-MERCedes (1-800-367-6372)
or 1-866-990-9007
Shortly after successfully registering with the
mbrace service, a user ID and password will
be sent to you by mail. You can use this pass-
word to log onto the mbrace area under "Own-
ers Online" at http://www.mbusa.com.
The system is available if:
Rit has been activated and is operational
Rthe corresponding mobile phone network is
available for transmitting data to the Cus-
tomer Center
Ra service subscription is available
Rthe starter battery is sufficiently charged
Determining the location of the vehicle on a
map is only possible if:
RGPS reception is available.
Rthe vehicle position can be forwarded to
the Customer Assistance Center.
The mbrace system
To adjust the volume during a call, proceed as
follows:
XPress the WorX button on the mul-
tifunction steering wheel.
or
XUse the COMAND volume control.
The system offers various services, e.g.:
RAutomatic and manual emergency call
RRoadside Assistance call
RMB Info call
You can find information and a description of
all available features under "Owners Online"
at http://www.mbusa.com.
Features309
Stowage and features
Z
Page 313 of 410
All important information on the emergency is
transmitted, for example:
Rcurrent location of the vehicle (as deter-
mined by the GPS system)
Rvehicle identification number
Rinformation on the severity of the accident
Shortly after the emergency call has been ini- tiated, a voice connection is automatically
established between the Customer Assis-
tance Center and the vehicle occupants.
RIf the vehicle occupants respond, the
Mercedes-Benz Customer Assistance Cen-
ter attempts to get more information on the
emergency.
RIf there is no response from the vehicle
occupants, an ambulance is immediately
sent to the vehicle.
If no voice connection can be established to
the Mercedes-Benz Customer Assistance
Center, the system has been unable to initiate
an emergency call.
This can occur, for example, if the relevant
mobile phone network is not available. The
indicator lamp in the SOS button flashes con- tinuously.
The Call Failed
message appears in the
multifunction display and must be confirmed.
In this case, summon assistance by other
means.
Making an emergency call
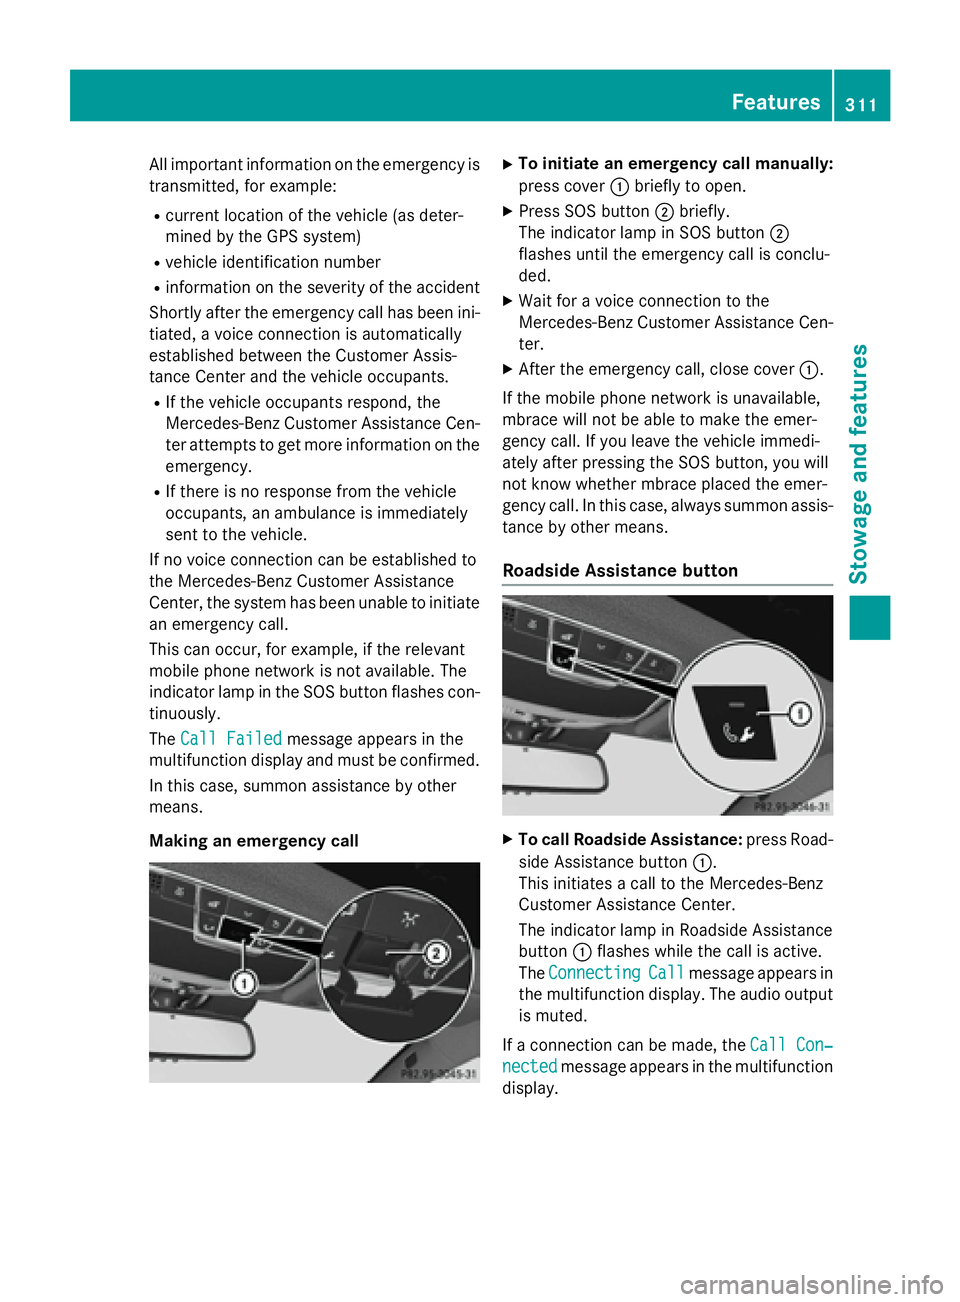
XTo initiate an emergency call manually:
press cover :briefly to open.
XPress SOS button ;briefly.
The indicator lamp in SOS button ;
flashes until the emergency call is conclu-
ded.
XWait for a voice connection to the
Mercedes-Benz Customer Assistance Cen-
ter.
XAfter the emergency call, close cover :.
If the mobile phone network is unavailable,
mbrace will not be able to make the emer-
gency call. If you leave the vehicle immedi-
ately after pressing the SOS button, you will
not know whether mbrace placed the emer-
gency call. In this case, always summon assis-
tance by other means.
Roadside Assistance button
XTo call Roadside Assistance: press Road-
side Assistance button :.
This initiates a call to the Mercedes-Benz
Customer Assistance Center.
The indicator lamp in Roadside Assistance
button :flashes while the call is active.
The Connecting
Callmessage appears in
the multifunction display. The audio output is muted.
If a connection can be made, the Call Con‐
nectedmessage appears in the multifunction
display.
Features311
Stowag ean d features
Z
Page 314 of 410
If a mobile phone network and GPS reception
are available, the system transfers data to the
Mercedes-Benz Customer Assistance Center,
for example:
Rcurrent location of the vehicle
Rvehicle identification number
The COMAND display indicates that a call is
active. During the call, you can change to the
navigation menu by pressing the NAVI button
on COMAND, for example.
Voice output is not available in this case.
A voice connection is established between
the Mercedes-Benz Customer Assistance
Center and the vehicle occupants.
From the remote malfunction diagnosis, the
Mercedes-Benz Customer Assistance Center
can ascertain the nature of the problem
(
Ypage 315).
The Mercedes-Benz Customer Assistance
Center either sends a qualified Mercedes-
Benz technician or makes arrangements for
your vehicle to be transported to the nearest
authorized Mercedes-Benz Center.
You may be charged for services such as
repair work and/or towing.
You can find more information in the separate
mbrace manual.
The system has not been able to initiate a
Roadside Assistance call, if:
Rthe indicator lamp for Roadside Assistance
call button Fis flashing continuously.
Rno voice connection to the Mercedes-Benz
Customer Assistance Center was estab-
lished.
This can occur if the relevant mobile phone
network is not available, for example.
The Call Failed
message appears in the
multifunction display.
XTo end a call: press the~button on the
multifunction steering wheel.
or
XPress the corresponding COMAND button
for ending a phone call.
MB Info call button
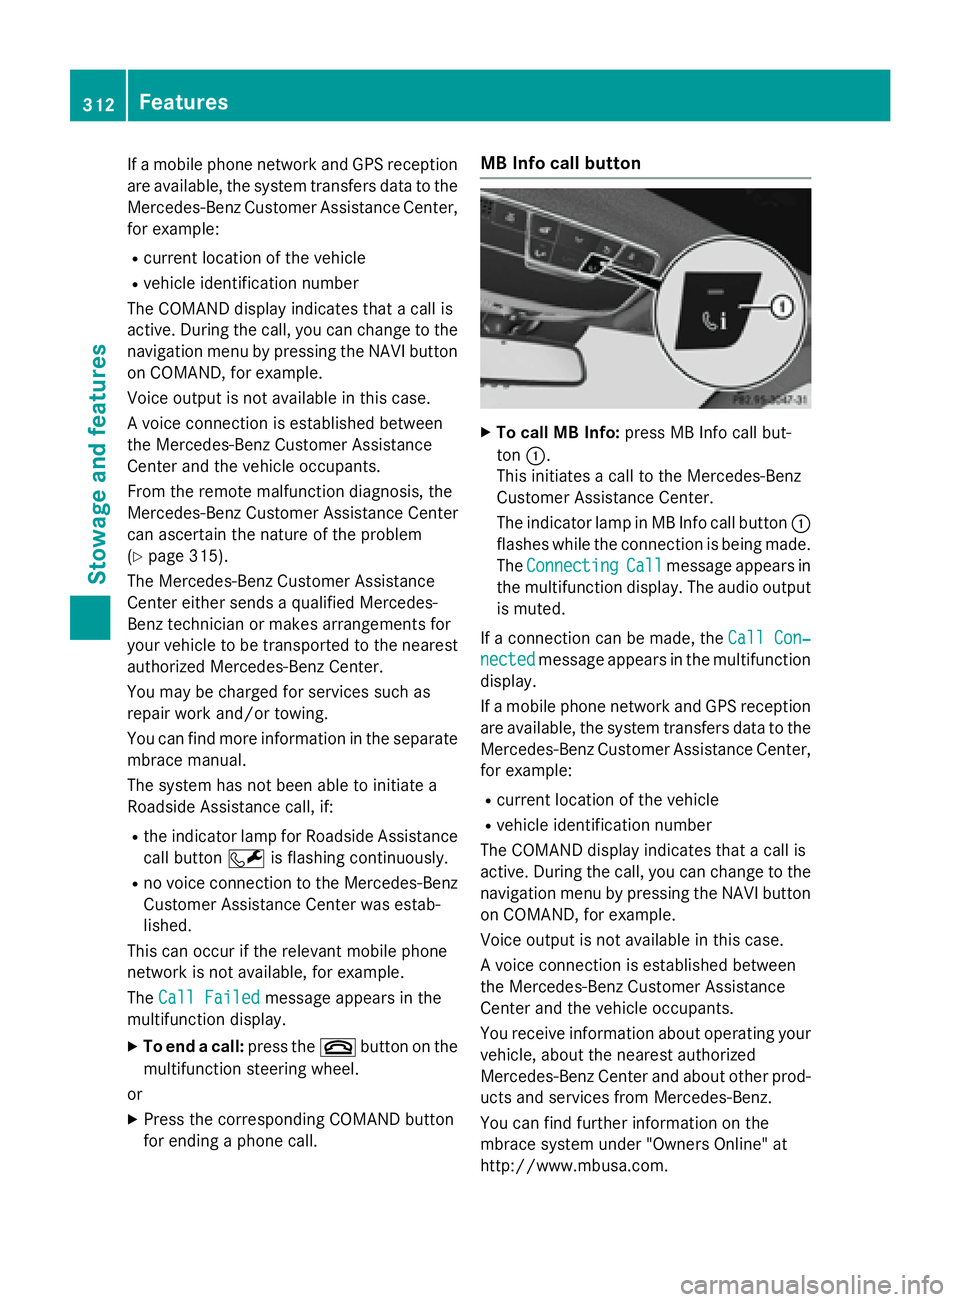
XTo call MB Info: press MB Info call but-
ton :.
This initiates a call to the Mercedes-Benz
Customer Assistance Center.
The indicator lamp in MB Info call button :
flashes while the connection is being made.
The Connecting
Callmessage appears in
the multifunction display. The audio output
is muted.
If a connection can be made, the Call Con‐
nectedmessage appears in the multifunction
display.
If a mobile phone network and GPS reception
are available, the system transfers data to the
Mercedes-Benz Customer Assistance Center,
for example:
Rcurrent location of the vehicle
Rvehicle identification number
The COMAND display indicates that a call is
active. During the call, you can change to the
navigation menu by pressing the NAVI button
on COMAND, for example.
Voice output is not available in this case.
A voice connection is established between
the Mercedes-Benz Customer Assistance
Center and the vehicle occupants.
You receive information about operating your
vehicle, about the nearest authorized
Mercedes-Benz Center and about other prod-
ucts and services from Mercedes-Benz.
You can find further information on the
mbrace system under "Owners Online" at
http://www.mbusa.com.
312Features
Stowage and features
Page 315 of 410
The system has not been able to initiate an
MB Info call, if:
Rthe indicator lamp in MB Info call button
ïis flashing continuously.
Rno voice connection to the Mercedes-Benz
Customer Assistance Center was estab-
lished.
This can occur if the relevant mobile phone
network is not available, for example.
The Call Failed
message appears in the
multifunction display.
XTo end a call: press the~button on the
multifunction steering wheel.
or
XPress the corresponding COMAND button
for ending a phone call.
Call priority
When service calls are active, e.g. Roadside
Assistance or MB Info calls, an emergency
call can still be initiated. In this case, an emer-
gency call will take priority and override all
other active calls.
The indicator lamp of the respective button
flashes until the call is ended.
An emergency call can only be terminated by the Mercedes-Benz Customer Assistance
Center.
All other calls can be ended by pressing:
Rthe ~ button on the multifunction steer-
ing wheel
Rthe corresponding button in COMAND to
end the voice call
When a call is initiated, the audio system is
muted.
The mobile phone is no longer connected to
COMAND.
However, if you want to use your mobile
phone, do so only when the vehicle is station-
ary and in a safe location.
Downloading destinations
Downloading destinations
Downloading destinations gives you access
to a database with over 15 million points of
interest (POIs). These can be downloaded on
the navigation system in your vehicle. If you
know the destination, the address can be
downloaded. Alternatively, you can obtain the
location of Points of Interest (POIs)/impor-
tant destinations in the vicinity.
Furthermore, you can download routes with
up to four way points.
You are prompted to confirm route guidance
to the address entered.
XSelect Yesby turning 3or sliding 1
the controller and confirm with 7.
The system calculates the route and sub-
sequently starts the route guidance with
the address entered.
If you select No
the address can be stored in
the address book.
The destination download function is availa-
ble if:
Rthe vehicle is equipped with a navigation
system.
Rthe relevant mobile phone network is avail- able and data transfer is possible.
Route Assistance
This service is part of the mbrace PLUS Pack-
age and cannot be purchased separately.
You can use the route assistance function
even if the vehicle is not equipped with a nav-
igation system.
Within the framework of this service, you
receive a professional and reliable form of
navigation support without having to leave
your vehicle.
The customer service representative finds a
suitable route depending on your vehicle's
current position and the desired destination.
You will then be guided live through the cur-
rent route section.
Features313
Stowage and features
Z
Page 316 of 410
Search & Send
General notes
To use "Search & Send", your vehicle must be
equipped with mbrace and a navigation sys-
tem. Additionally, an mbrace service sub-
scription must be completed.
"Search & Send" is a destination entry ser-
vice. A destination address which is found on
Google Maps
®can be transferred via mbrace
directly to your vehicle's navigation system.
Specifying and sending the destination
address
XGo to the website http://
maps.google.com and enter a destination
address into the entry field.
XTo send the destination address to the
e-mail address of your mbrace account:
click on the corresponding button on the
website.
Example:
If you select 'Send to vehicle' and then
'Mercedes-Benz', the destination address
will be sent to your vehicle.
XWhen the "Send" dialog window appears:
Enter the e-mail address you specified
when setting up your mbrace account into
the corresponding field.
XClick "Send".
Information on specific commands such as
"Address entry" or "Send" can be found on the
website.
Calling up a transmitted destination
address
XTurn the SmartKey to position 2in the igni-
tion lock (
Ypage 151).
The transmitted destination address is loa-
ded into the vehicle's navigation system. A display message appears, asking
whether navigation should be started.
XSelectYesby turning
3or sliding 1
the controller and confirm with 7.
The system calculates the route and sub-
sequently starts the route guidance with
the address entered.
If you select No
the address can be stored in
the address book.
If you have sent more than one destination
address, each individual destination must
be confirmed separately.
Destination addresses are loaded in the same
order as the order in which they were sent.
If you own multiple Mercedes-Benz vehicles
with mbrace and activated mbrace accounts:
If multiple vehicles are registered under the
same e-mail address, the destination will be
sent to all the vehicles.
Vehicle remote opening
You can use the vehicle remote opening if you
have unintentionally locked your vehicle and
a replacement SmartKey is not available.
The vehicle can be opened by the Mercedes-
Benz Customer Assistance Center.
The vehicle can be immediately opened
remotely within four days of the ignition being turned off. After this time, the remote unlock-
ing may be delayed by 15 to 60 minutes. After
30 days, the vehicle can no longer be opened
remotely.
The vehicle remote unlocking feature is avail-
able if the relevant mobile phone network is
available and a data connection is possible.
XContact the following service hotlines:
Mercedes-Benz Customer Assistance Cen-
ter at 1-800-FOR-MERCedes
(1-800-367-6372) or 1-866-990-9007
You will be asked for your password.
XReturn to your vehicle at the time agreed
upon with the Mercedes-Benz Customer
Assistance Center.
314Features
Stowage and features
Page 320 of 410
When using the integrated garage door
opener, always make sure that nobody is
within the range of movement of the garage
door.
GWARNING
Combustion engines emit poisonous exhaust
gases such as carbon monoxide. Inhaling
these exhaust gases leads to poisoning. There
is a risk of fatal injury. Therefore never leave
the engine running in enclosed spaces with-
out sufficient ventilation.
Programing
Programming buttons
Pay attention to the "Important safety notes"
(
Ypage 317).
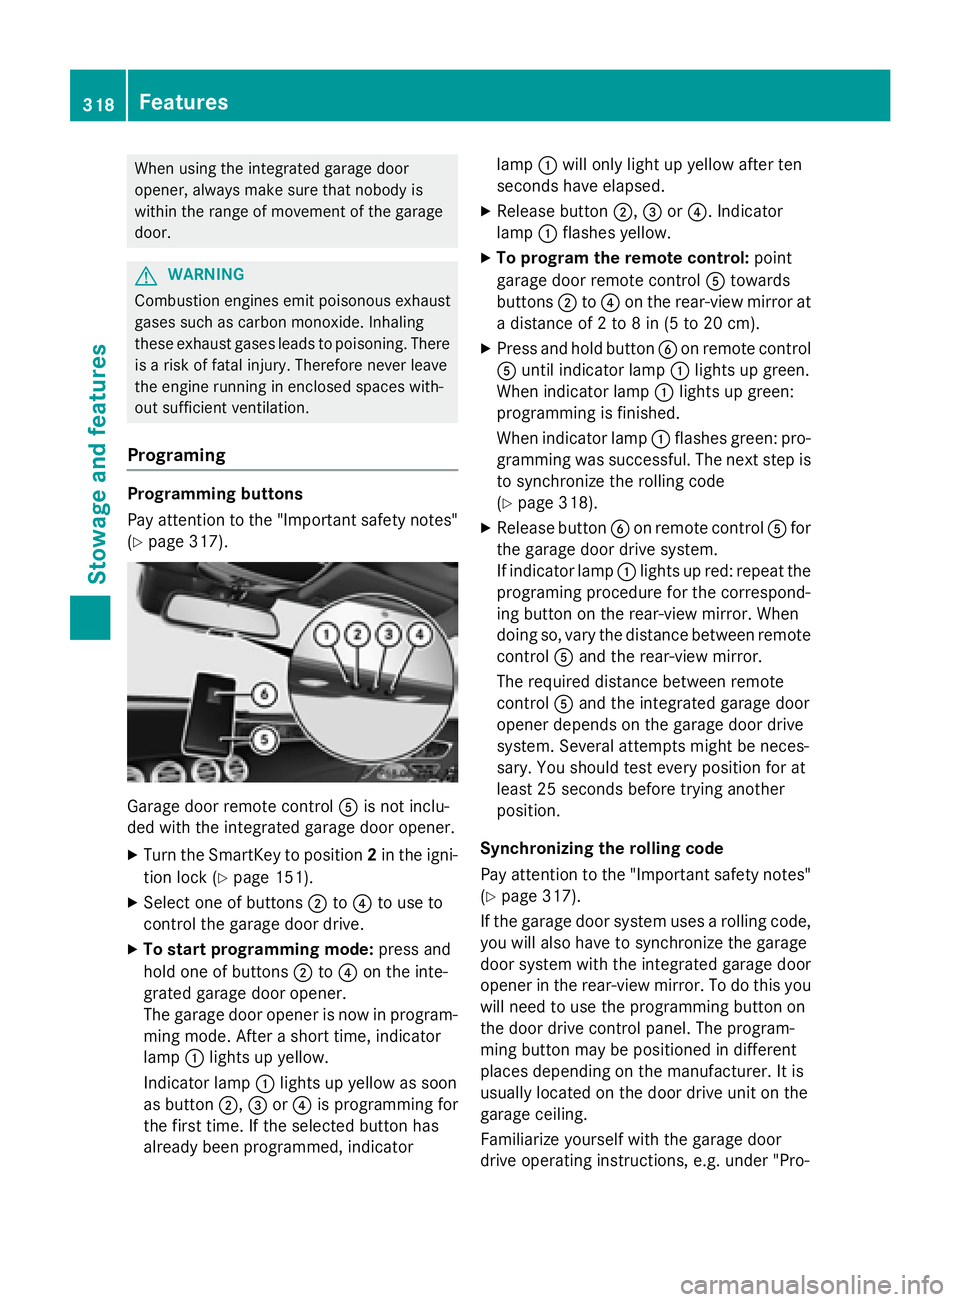
Garage door remote control Ais not inclu-
ded with the integrated garage door opener.
XTurn the SmartKey to position 2in the igni-
tion lock (
Ypage 151).
XSelect one of buttons ;to? to use to
control the garage door drive.
XTo start programming mode: press and
hold one of buttons ;to? on the inte-
grated garage door opener.
The garage door opener is now in program-
ming mode. After a short time, indicator
lamp :lights up yellow.
Indicator lamp :lights up yellow as soon
as button ;,=or? is programming for
the first time. If the selected button has
already been programmed, indicator lamp
:will only light up yellow after ten
seconds have elapsed.
XRelease button ;,=or?. Indicator
lamp :flashes yellow.
XTo program the remote control: point
garage door remote control Atowards
buttons ;to? on the rear-view mirror at
a distance of 2 to 8 in (5 to 20 cm).
XPress and hold button Bon remote control
A until indicator lamp :lights up green.
When indicator lamp :lights up green:
programming is finished.
When indicator lamp :flashes green: pro-
gramming was successful. The next step is
to synchronize the rolling code
(
Ypage 318).
XRelease button Bon remote control Afor
the garage door drive system.
If indicator lamp :lights up red: repeat the
programing procedure for the correspond-
ing button on the rear-view mirror. When
doing so, vary the distance between remote
control Aand the rear-view mirror.
The required distance between remote
control Aand the integrated garage door
opener depends on the garage door drive
system. Several attempts might be neces-
sary. You should test every position for at
least 25 seconds before trying another
position.
Synchronizing the rolling code
Pay attention to the "Important safety notes"
(
Ypage 317).
If the garage door system uses a rolling code,
you will also have to synchronize the garage
door system with the integrated garage door
opener in t
he rear-view mirror. To do this you
will need to use the programming button on
the door drive control panel. The program-
ming button may be positioned in different
places depending on the manufacturer. It is
usually located on the door drive unit on the
garage ceiling.
Familiarize yourself with the garage door
drive operating instructions, e.g. under "Pro-
318Features
Stowage and features
Page 321 of 410
gramming of additional remote controls",
before carrying out the following steps.
Your vehicle must be within reach of the
garage door or gate opener drive. Make sure
that neither your vehicle nor any persons/
objects are present within the sweep of the
door or gate.
XTurn the SmartKey to position2in the igni-
tion lock (
Ypage 151).
XGet out of the vehicle.
XPress the programming button on the door drive unit.
Usually, you now have 30 seconds to ini-
tiate the next step.
XGet into the vehicle.
XPress previously programmed button ;,
= or? on the integrated garage door
opener multiple times until the door closes.
The rolling code synchronization is then
complete.
Notes on programming the remote con-
trol
Canadian radio frequency laws require a
"break" (or interruption) of the transmission
signals after broadcasting for a few seconds. Therefore, these signals may not last long
enough for the integrated garage door
opener. The signal is not recognized during
programming. Comparable with Canadian
law, some U.S. garage door openers also fea-
ture a "break".
Proceed as follows:
Rif you live in Canada
Rif you have difficulties programming the
garage door opener (regardless of where
you live) when using the programming
steps
XPress and hold one of buttons ;to? on
the integrated garage door opener.
After a short time, indicator lamp :lights
up yellow.
XRelease the button.
Indicator lamp :flashes yellow.
XPress button Bof garage door remote
control Afor two seconds, then release it
for two seconds.
XPress button Bagain for two seconds.
XRepeat this sequence on button Bof
remote control Auntil indicator lamp :
lights up green.
When indicator lamp :lights up green:
programming is finished.
When indicator lamp :flashes green: pro-
gramming was successful. The next step is
to synchronize the rolling code.
XRelease button Bof remote control Aof
the garage door drive.
If indicator lamp :lights up red: repeat the
programming process for the correspond-
ing button on the rear-view mirror. When
doing so, vary the distance between remote
control Aand the rear-view mirror.
The required distance bet
ween remote
control Aand the integrated garage door
opener depends on the garage door drive
system. Several attempts might be neces-
sary. You should test every position for at
least 25 seconds before trying another
position.
Problems when programming
If you are experiencing problems programing
the integrated garage door opener on the
rear-view mirror, take note of the following
instructions:
RCheck the transmitter frequency used by
garage door drive remote control Aand
whether it is supported. The transmitter
frequency can usually be found on the back
of the garage door drive remote control.
The integrated garage door opener is com-
patible with devices that have units which
operate in the frequency range of 280 to
433 MHz.
RReplace the batteries in garage door
remote control A. This increases the like-
lihood that garage door remote control A
will transmit a strong and precise signal to
the integrated garage door opener.
Features319
Stowage and features
Z