2016 MERCEDES-BENZ S-COUPE buttons
[x] Cancel search: buttonsPage 8 of 410
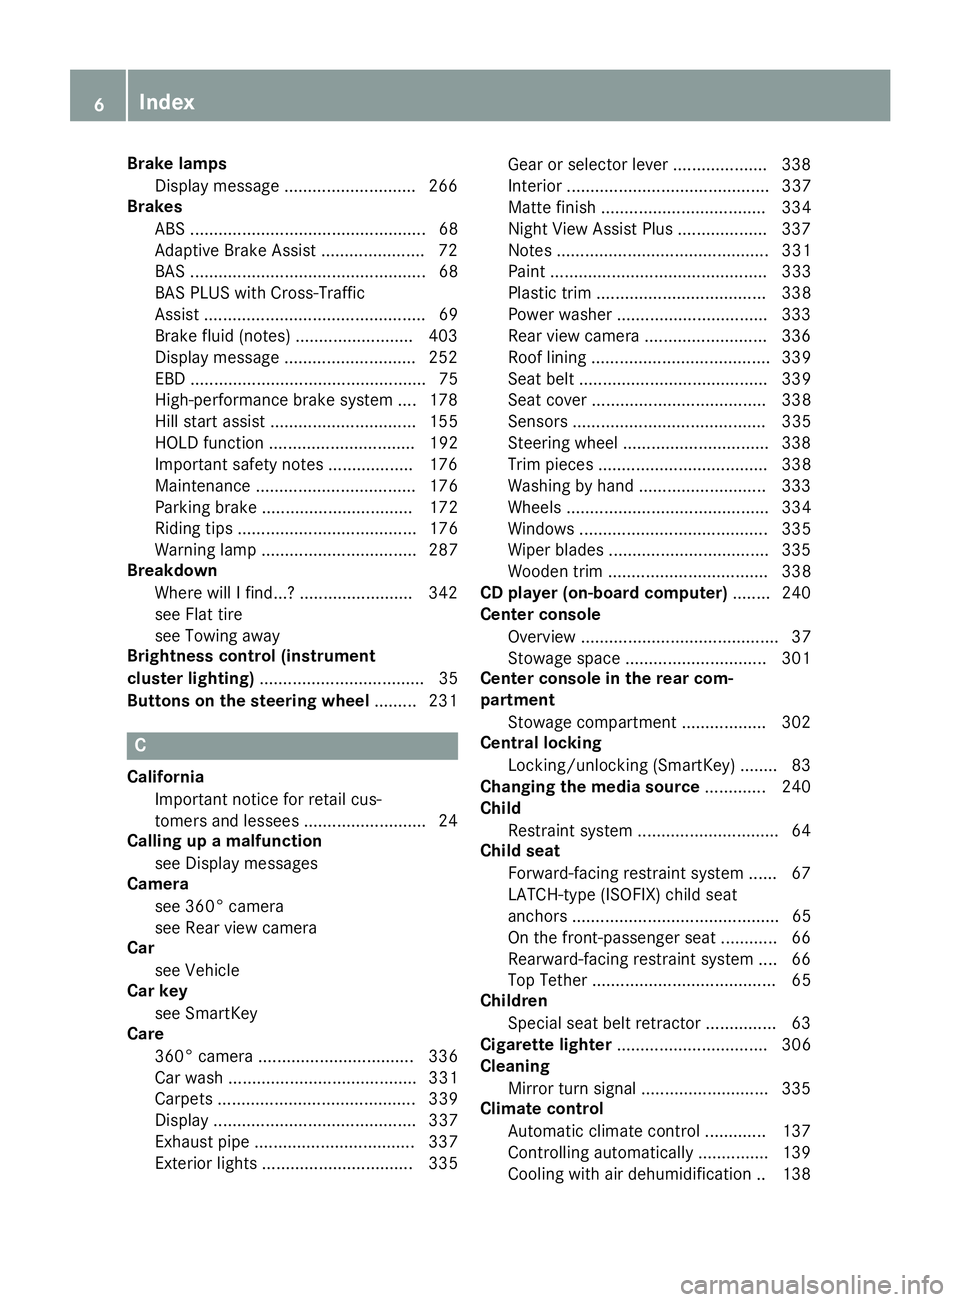
Brake lampsDisplay message ............................ 266
Brakes
ABS .................................................. 68
Adaptive Brake Assist ...................... 72
BAS .................................................. 68
BAS PLUS with Cross-Traffic
Assist ............................................... 69
Brake fluid (notes) ......................... 403
Display message ............................ 252
EBD .................................................. 75
High-performance brake system .... 178
Hill start assist ............................... 155
HOLD function ............................... 192
Important safety notes .................. 176
Maintenance .................................. 176
Parking brake ................................ 172
Riding tips ...................................... 176
Warning lamp ................................. 287
Breakdown
Where will I find...? ........................ 342
see Flat tire
see Towing away
Brightness control (instrument
cluster lighting) ................................... 35
Buttons on the steering wheel ......... 231
C
California
Important notice for retail cus-
tomers and lessees .......................... 24
Calling up a malfunction
see Display messages
Camera
see 360° camera
see Rear view camera
Car
see Vehicle
Car key
see SmartKey
Care
360° camera ................................. 336
Car wash ........................................ 331
Carpets .......................................... 339
Display ........................................... 337
Exhaust pipe .................................. 337
Exterior lights ................................ 335 Gear or selector lever .................... 338
Interior ........................................... 337
Matte finish ................................... 334
Night View Assist Plus ................... 337
Notes ............................................. 331
Paint .............................................. 333
Plastic trim .................................... 338
Power washer ................................ 333
Rear view camera .......................... 336
Roof lining ...................................... 339
Seat belt ........................................ 339
Seat cover ..................................... 338
Sensors ......................................... 335
Steering wheel ............................... 338
Trim pieces .................................... 338
Washing by hand ........................... 333
Wheels ........................................... 334
Windows ........................................ 335
Wiper blades .................................. 335
Wooden trim .................................. 338
CD player (on-board computer) ........ 240
Center console
Overview .......................................... 37
Stowage space .............................. 301
Center console in the rear com-
partment
Stowage compartment .................. 302
Central locking
Locking/unlocking (SmartKey) ........ 83
Changing the media source ............. 240
Child
Restraint system .............................. 64
Child seat
Forward-facing restraint system ...... 67
LATCH-type (ISOFIX) child seat
anchors ............................................ 65
On the front-passenger seat ............ 66
Rearward-facing restraint system .... 66
Top Tether ....................................... 65
Children
Special seat belt retractor ............... 63
Cigarette lighter ................................ 306
Cleaning
Mirror turn signal ........................... 335
Climate control
Automa
tic climate control ............. 137
Controlling automatically ............... 139
Cooling with air dehumidification .. 138
6Index
Page 20 of 410

Button overview ............................... 35
Buttons (on-board computer) ......... 231
Cleaning .........................................338
EASY ENTRY/EXIT feature ............. 116
Important safety notes .................. 114
Paddle shifters ............................... 163
Steering wheel heating .................. 115
Storing settings (memory func-
tion) ............................................... 121
Steering wheel heating
Problem (malfunction) ................... 116
Switching on/off ........................... 115
Steering wheel paddle shifters ........163
Stop&Go Pilot
see DISTRONIC PLUS
Stowage areas ................................... 300
Stowage compartments
Armrest (under) .............................3 02
Center console .............................. 301
Center console in rear compart-
ment .............................................. 302
Cup holders ................................... 304
Door ............................................... 302
Eyeglasses compartment ...............3 01
Glove box ....................................... 301
Important safety information ......... 300
Rear ............................................... 302
Rear seat backrest ......................... 302
Stowage net ................................... 303
see Stowage areas
Stowage net ....................................... 303
Stowage space
Parcel net retainers ....................... 303
Securing a load .............................. 303
Stowage well beneath the trunk
floor .................................................... 303
Summer tires
In winter ........................................ 364
Sun visor ............................................ 305
Suspension tuning
Active Body Control ABC ...............1 95
AIRMATIC ...................................... 198
SETUP (on-board computer) .......... 250
Switching air-recirculation mode
on/off ................................................. 143T
Tachometer ........................................ 230
Tail lamps
Display message ............................ 266
see Lights
Tank content
Fuel gauge ....................................... 33
Technical data
Capacities ...................................... 400
Information ....................................3 98
Tires/wheels ................................. 388
Vehicle data ................................... 406
Telephone
Accepting a call (multifunction
steering wheel) .............................. 242
Display message ............................ 283
Introduction ................................... 241
Menu (on-board computer) ............ 241
Number from the phone book ........2 42
Redialing ........................................ 243
Rejecting/ending a call ................. 242
Temperature
Coolant .......................................... 231
Engine oil (on-board computer,
Mercedes-AMG vehicles) ...............2 49
Outside temperature ......................2 31
Setting (climate control) ................ 140
Transmission oil (on-board com-
puter, Mercedes-AMG vehicles) ..... 249
Tire pressure
Calling up (on-board computer) ..... 369
Checking manually ........................ 368
Display message ............................ 279
Maximum ....................................... 368
Not reached (TIREFIT) .................... 346
Notes ............................................. 367
Reached (TIREFIT) .......................... 346
Recommended ............................... 365
Tire pressure monitor
Checking the tire pressure elec-
tronically ........................................ 370
Function/notes .............................3 69
General notes ................................ 369
Important safety notes .................. 369
Radio type approval for the tire
pressure monitor ........................... 372
Restarting ...................................... 371
18Index
Page 37 of 410
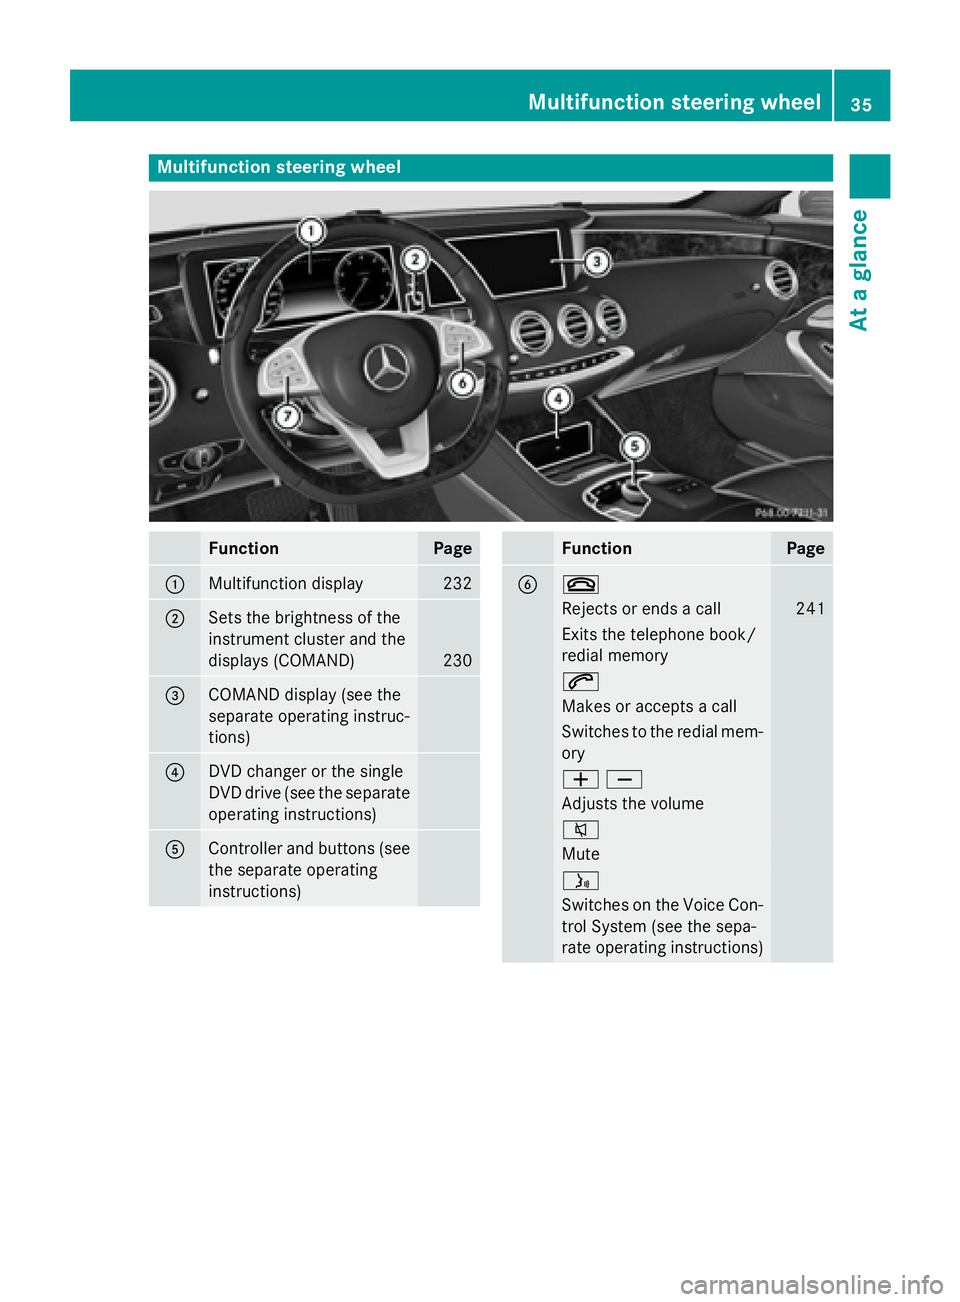
Multifunction steering wheel
FunctionPage
:Multifunction display232
;Sets the brightness of the
instrument cluster and the
displays (COMAND)
230
=COMAND display (see the
separate operating instruc-
tions)
?DVD changer or the single
DVD drive (see the separate
operating instructions)
AController and buttons (see
the separate operating
instructions)
FunctionPage
B~
Rejects or ends a call241
Exits the telephone book/
redial memory
6
Makes or accepts a call
Switches to the redial mem-
ory
WX
Adjusts the volume
8
Mute
ó
Switches on the Voice Con-
trol System (see the sepa-
rate operating instructions)
Multifunction steering wheel35
At a glance
Page 41 of 410
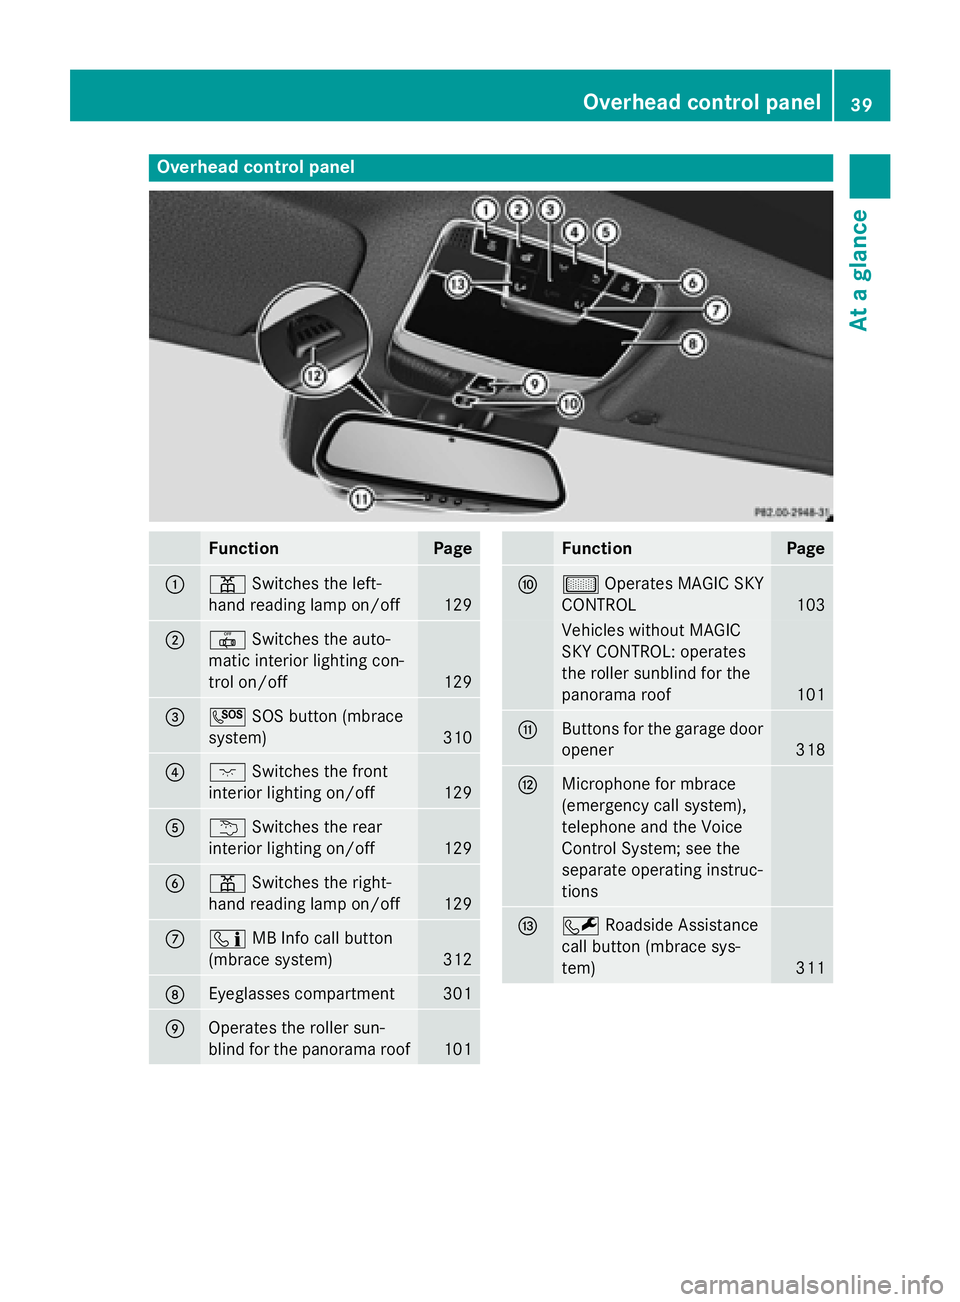
Overhead control panel
FunctionPage
:pSwitches the left-
hand reading lamp on/off
129
;| Switches the auto-
matic interior lighting con-
trol on/off
129
=G SOS button (mbrace
system)
310
?c Switches the front
interior lighting on/off
129
Au Switches the rear
interior lighting on/off
129
Bp Switches the right-
hand reading lamp on/off
129
Cï MB Info call button
(mbrace system)
312
DEyeglasses compartment301
EOperates the roller sun-
blind for the panorama roof
101
FunctionPage
Fµ Operates MAGIC SKY
CONTROL
103
Vehicles without MAGIC
SKY CONTROL: operates
the roller sunblind for the
panorama roof
101
GButtons for the garage door
opener
318
HMicrophone for mbrace
(emergency call system),
telephone and the Voice
Control System; see the
separate operating instruc-
tions
IF Roadside Assistance
call button (mbrace sys-
tem)
311
Overhead control panel39
At a glance
Page 69 of 410
Always observe the child restraint system
manufacturer's installation and operating
instructions.
Forward-facing child restraint system
If you secure a child in a forward-facing childrestraint system on the front-passenger seat,
always move the front-passenger seat as far
back as possible. Fully retract the seat cush-
ion length. The entire base of the child
restraint system must always rest on the seat
cushion of the front-passenger seat. The
backrest of the child restraint system must lie
as flat as possible against the backrest of the
front-passenger seat. The child restraint sys-
tem must not touch the roof or be subjected
to a load by the head restraint. Adjust the
angle of the seat backrest and the head
restraint position accordingly. Always make
sure that the shoulder belt strap is correctly
routed from the front-passenger seat-belt
extender to the shoulder belt guide on the
child restraint system. The shoulder belt strap
must be routed forwards from the retracted
seat-belt extender for the front-passenger
seat.
Always observe the child restraint system
manufacturer's installation and operating
instructions.
Pets in the vehicle
GWARNING
If you leave animals unattended or unsecured
in the vehicle, they could press buttons or
switches, for example.
As a result, they could:
Ractivate vehicle equipment and become
trapped, for example
Ractivate or deactivate systems, thereby
endangering other road users
Unsecured animals could also be flung around
the vehicle in the event of an accident or sud-
den steering or braking, thereby injuring vehi-
cle occupants. There is a risk of an accident
and injury.
Never leave animals unattended in the vehi-
cle. Always secure animals properly during
the journey, e.g. use a suitable animal trans-
port box.
Driving safety systems
Overview of driving safety systems
In this section, you will find information about
the following driving safety systems:
RABS ( Anti-lock Braking System)
(
Ypage 68)
RBAS ( Brake Assist System) (Ypage 68)
RBAS PLUS ( Brake Assist System PLUS) with
Cross-Traffic Assist (
Ypage 69)
RCOLLISION PREVENTION ASSIST PLUS
(distance warning function and Adaptive
Brake Assist) (
Ypage 70)
RESP®( E lectronic StabilityProgram)
(
Ypage 73)
REBD ( Electronic Brake force Distribution)
(
Ypage 75)
RADAPTIVE BRAKE (Ypage 75)
RPRE-SAFE®Brake (Ypage 75)
RSTEER CONTROL (Ypage 77)
Important safety notes
If you fail to adapt your driving style or if you
are inattentive, the driving safety systems can
neither reduce the risk of an accident nor
override the laws of physics. Driving safety
systems are merely aids designed to assist
driving. You are responsible for maintaining
the distance to the vehicle in front, for vehicle
speed, for braking in good time, and for stay-
ing in lane. Always adapt your driving style to
suit the prevailing road and weather condi-
tions and maintain a safe distance from the
vehicle in front. Drive carefully.
Driving safety systems67
Safety
Z
Page 86 of 410
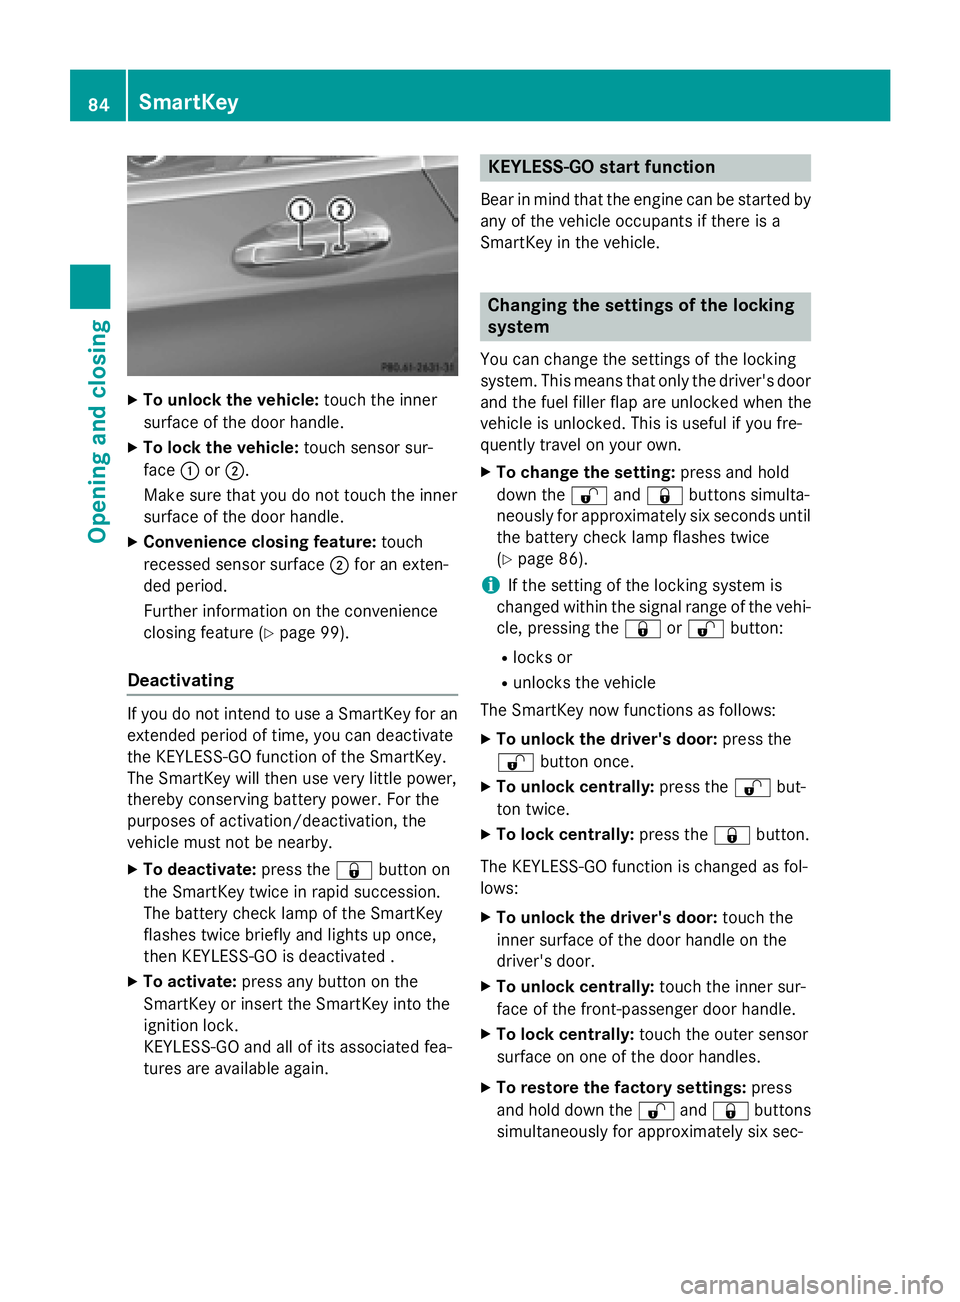
XTo unlock the vehicle:touch the inner
surface of the door handle.
XTo lock the vehicle: touch sensor sur-
face :or;.
Make sure that you do not touch the inner
surface of the door handle.
XConvenience closing feature: touch
recessed sensor surface ;for an exten-
ded period.
Further information on the convenience
closing feature (
Ypage 99).
Deactivating
If you do not intend to use a SmartKey for an
extended period of time, you can deactivate
the KEYLESS-GO function of the SmartKey.
The SmartKey will then use very little power,
thereby conserving battery power. For the
purposes of activation/deactivation, the
vehicle must not be nearby.
XTo deactivate: press the&button on
the SmartKey twice in rapid succession.
The battery check lamp of the SmartKey
flashes twice briefly and lights up once,
then KEYLESS-GO is deactivated .
XTo activate: press any button on the
SmartKey or insert the SmartKey into the
ignition lock.
KEYLESS-GO and all of its associated fea-
tures are available again.
KEYLESS-GO start function
Bear in mind that the engine can be started by
any of the vehicle occupants if there is a
SmartKey in the vehicle.
Changing the settings of the locking
system
You can change the settings of the locking
system. This means that only the driver's door
and the fuel filler flap are unlocked when the
vehicle is unlocked. This is useful if you fre-
quently travel on your own.
XTo change the setting: press and hold
down the %and& buttons simulta-
neously for approximately six seconds until
the battery check lamp flashes twice
(
Ypage 86).
iIf the setting of the locking system is
changed within the signal range of the vehi-
cle, pressing the &or% button:
Rlocks or
Runlocks the vehicle
The SmartKey now functions as follows:
XTo unlock the driver's door: press the
% button once.
XTo unlock centrally: press the%but-
ton twice.
XTo lock centrally: press the&button.
The KEYLESS-GO function is changed as fol-
lows:
XTo unlock the driver's door: touch the
inner surface of the door handle on the
driver's door.
XTo unlock centrally: touch the inner sur-
face of the front-passenger door handle.
XTo lock centrally: touch the outer sensor
surface on one of the door handles.
XTo restore the factory settings: press
and hold down the %and& buttons
simultaneously for app
roximately six sec-
84SmartKey
Opening and closing
Page 88 of 410
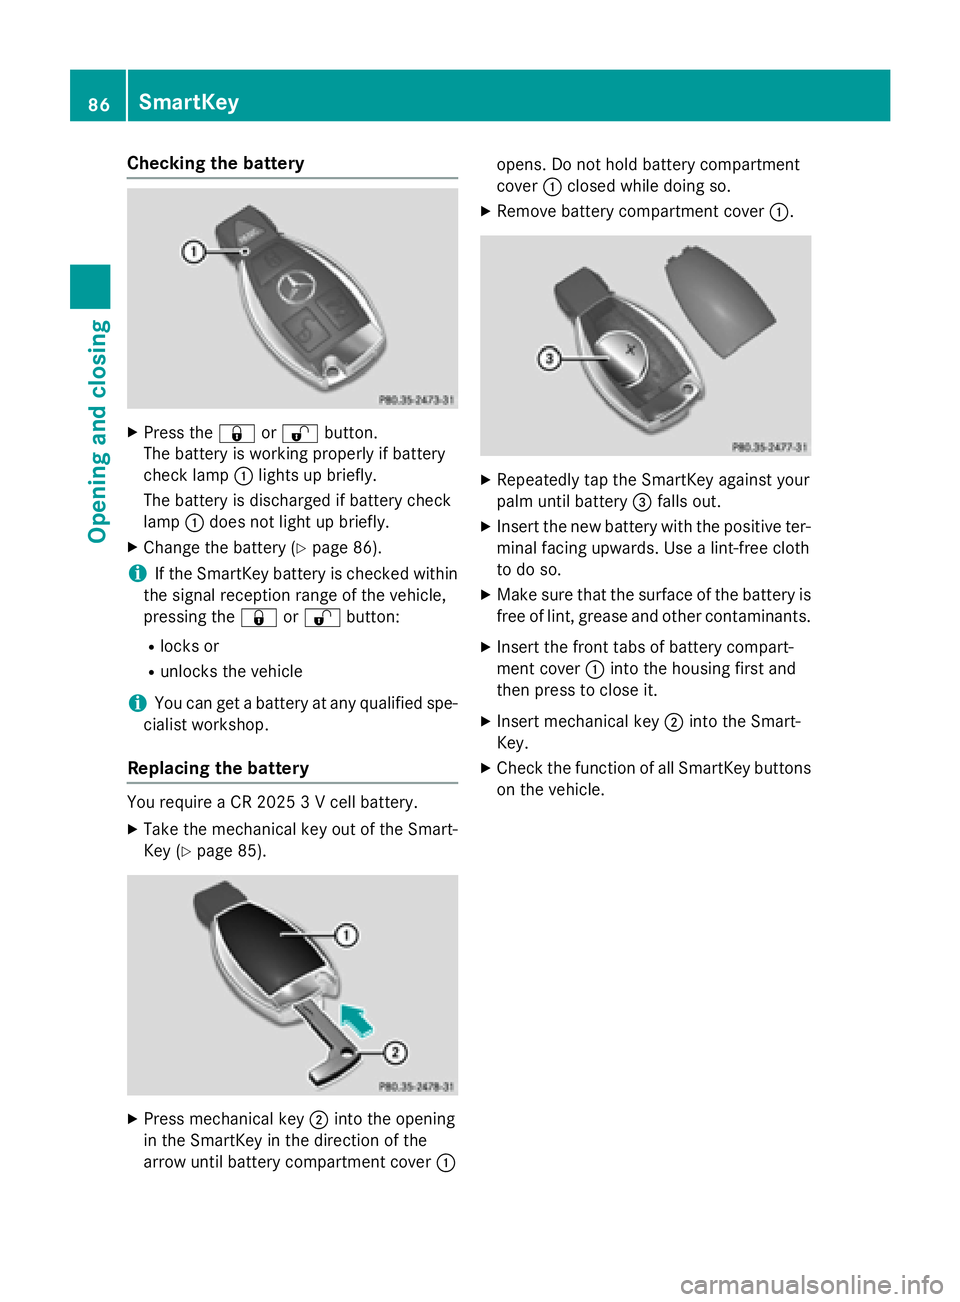
Checking the battery
XPress the&or% button.
The battery is working properly if battery
check lamp :lights up briefly.
The battery is discharged if battery check
lamp :does not light up briefly.
XChange the battery (Ypage 86).
iIf the SmartKey battery is checked within
the signal reception range of the vehicle,
pressing the &or% button:
Rlocks or
Runlocks the vehicle
iYou can get a battery at any qualified spe-
cialist workshop.
Replacing the battery
You require a CR 2025 3 V cell battery.
XTake the mechanical key out of the Smart-
Key (
Ypage 85).
XPress mechanical key ;into the opening
in the SmartKey in the direction of the
arrow until battery compartment cover :opens. Do not hold battery compartment
cover
:closed while doing so.
XRemove battery compartment cover :.
XRepeatedly tap the SmartKey against your
palm until battery=falls out.
XInsert the new battery with the positive ter-
minal facing upwards. Use a lint-free cloth
to do so.
XMake sure that the surface of the battery is
free of lint, grease and other contaminants.
XInsert the front tabs of battery compart-
ment cover :into the housing first and
then press to close it.
XInsert mechanical key ;into the Smart-
Key.
XCheck the function of all SmartKey buttons
on the vehicle.
86SmartKey
Opening and closing
Page 91 of 410
Doors
Important safet ynotes
GWARNING
If children are lef tunsupervised in th evehicle,
they could:
Rope nth edoors ,thus endangerin gother
people or road users.
Rget out and disrup ttraffic .
Roperat eth evehicle' sequipment.
Additionally, children could set th evehicle in
motion if, fo rexample, they:
Rrelease th eparking brake .
Rshiftingth eautomatic transmissio nout of
par kposition P
RStart theengine.
There is aris kof an acciden tand injury.
Whe nleavin gth evehicle, always take th e
SmartKey wit hyou and loc kth evehicle. Never
leav echildren or animals unattended in th e
vehicle. Always keep th eSmartKey out of
reach of children .
You should preferably plac eluggage or load s
in th etrunk .Observ eth eloadin gguidelines
(
Ypage 300).
Unlockin gan dopening doors from
th einside
i
Whe n adoo ris opened, th esid ewindow
on that sid eopens slightly. Whe nth edoo r
is closed, th esid ewindow close sagain .
!The sid ewindows will no topen/close if
th ebattery is discharged or if th esid ewin -
dows hav eiced up. It will then no tbe pos -
sible to close th edoor. Do no tattempt to
forc eth edoo rclosed. You could otherwise
damage th edoo ror th esid ewindow.
You can ope n adoo rfrom insid eth evehicle
eve nif it has been locked. If th evehicle has
been locke dwit hth eSmartKey or wit hKEY-
LESS-GO ,opening adoo rfrom th einsid ewill trigger th
eanti-thef talar msystem. Switc hof f
th ealar m (
Ypage 78).
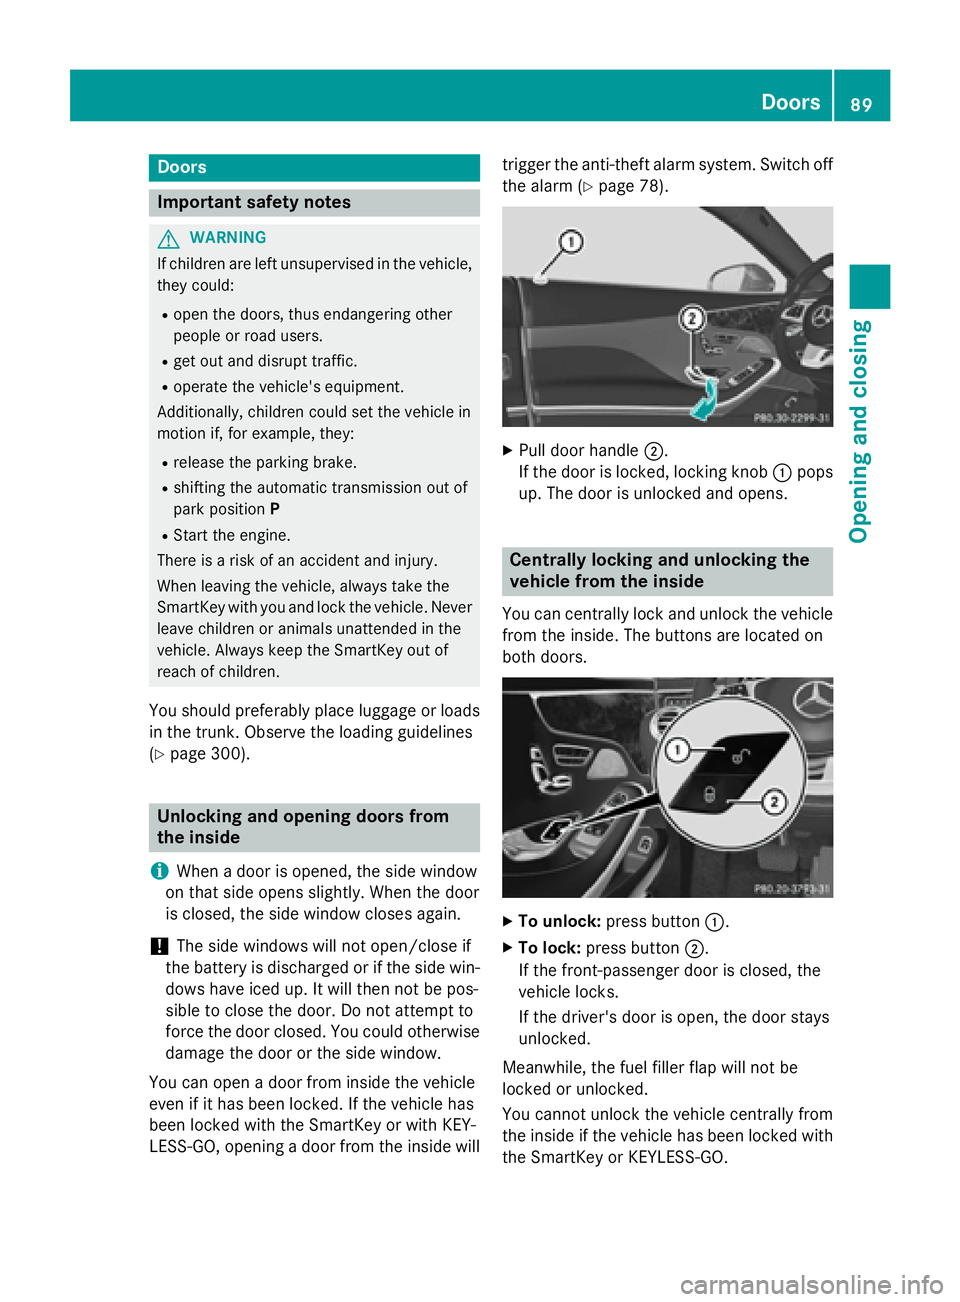
XPull doo rhandle ;.
If th edoo ris locked, locking knob :pop s
up. The doo ris unlocke dand opens .
Centrally locking an dunlocking th e
vehicle from th einside
You can centrall yloc kand unloc kth evehicle
from th einside. The buttons are located on
bot hdoors .
XTo unlock :press butto n:.
XTo lock :press butto n;.
If th efront-passenger doo ris closed, th e
vehicle locks .
If th edriver's doo ris open, th edoo rstays
unlocked.
Meanwhile, th efue lfiller flap will no tbe
locke dor unlocked.
You canno tunloc kth evehicle centrall yfrom
th einsid eif th evehicle has been locke dwit h
th eSmartKey or KEYLESS-GO .
Doors89
Opening and closing
Z