2016 MERCEDES-BENZ S-Class SEDAN light
[x] Cancel search: lightPage 316 of 438
Warning/
indicator
lampNSignal type
Possible causes/consequences and M
Solutions
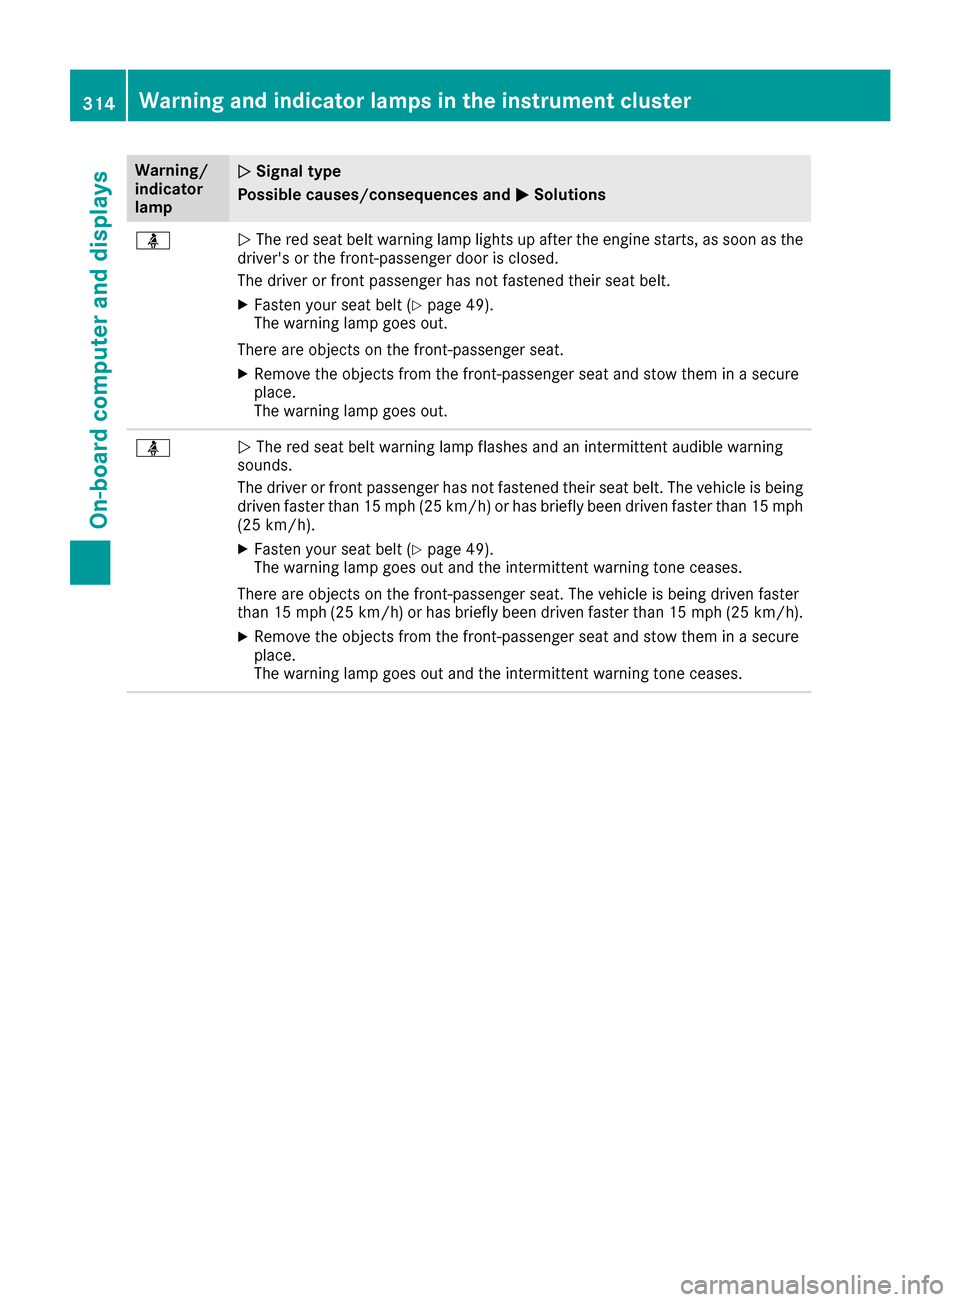
üNThe red seat belt warning lamp lights up after the engine starts, as soon as the
driver's or the front-passenger door is closed.
The driver or front passenger has not fastened their seat belt.
XFasten your seat belt (Ypage 49).
The warning lamp goes out.
There are objects on the front-passenger seat.
XRemove the objects from the front-passenger seat and stow them in a secure
place.
The warning lamp goes out.
üN The red seat belt warning lamp flashes and an intermittent audible warning
sounds.
The driver or front passenger has not fastened their seat belt. The vehicle is being driven faster than 15 mph (25 km/h) or has briefly been driven faster than 15 mph
(25 km/h).
XFasten your seat belt (Ypage 49).
The warning lamp goes out and the intermittent warning tone ceases.
There are objects on the front-passenger seat. The vehicle is being driven faster
than 15 mph (25 km/h) or has briefly been driven faster than 15 mph (25 km/h).
XRemove the objects from the front-passenger seat and stow them in a secure
place.
The warning lamp goes out and the intermittent warning tone ceases.
314Warning and indicator lamps in the instrument cluster
On-board computer and displays
Page 322 of 438

Engine
Warning/
indicator
lampNSignal type
Possible causes/consequences and M
Solutions
;NThe yellow Check Engine warning lamp lights up while the engine is running.
There may be a malfunction, for example:
Rin the engine management
Rin the fuel injection system
Rin the exhaust system
Rin the ignition system
Rin the fuel system
The emission limit values may be exceeded and the engine may be in emergency
mode.
XVisit a qualified specialist workshop immediately.
iIn some states, you must immediately visit a qualified specialist workshop as
soon as the yellow Check Engine warning lamp lights up. This is due to the legal
requirements in effect in these states. If in doubt, check whether such legal
regulations apply in the state in which you are currently driving.
8N The yellow reserve fuel warning lamp lights up while the engine is running.
The fuel level has dropped into the reserve range.
XRefuel at the nearest gas station.
8N The yellow reserve fuel warning lamp flashes while the vehicle is in motion.
In addition, the ;Check Engine warning lamp may light up.
The fuel filler cap is not closed correctly or the fuel system is leaking.
XCheck that the fuel filler cap is correctly closed.
XIf the fuel filler cap is not correctly closed: close the fuel filler cap.
XIf the fuel filler cap is closed:visit a qualified specialist workshop.
?NThe red coolant warning lamp comes on while the engine is running. The coolant
temperature gauge is at the beginning of the cold range.
The temperature sensor for the coolant temperature gage is defective.
The coolant temperature is no longer being monitored. There is a risk of engine
damage if the coolant temperature is too high.
XPull over and stop the vehicle safely and switch off the engine, paying attention
to road and traffic conditions. Do not continue driving under any circumstances.
XSecure the vehicle against rolling away (Ypage 189).
XConsult a qualified specialist workshop.
320Warning and indicator lamps in the instrument cluster
On-board computer and displays
Page 324 of 438
Warning/
indicator
lampNSignal type
Possible causes/consequences and M
Solutions
XAt coolant temperatures below 257‡(125 †), you can continue driving to the
nearest qualified specialist workshop.
XAvoid heavy loads on the engine as you do so, e.g. driving in mountainous terrain
and stop-start traffic.
Driving systems
Warning/
indicator
lampNSignal type
Possible causes/consequences and M
Solutions
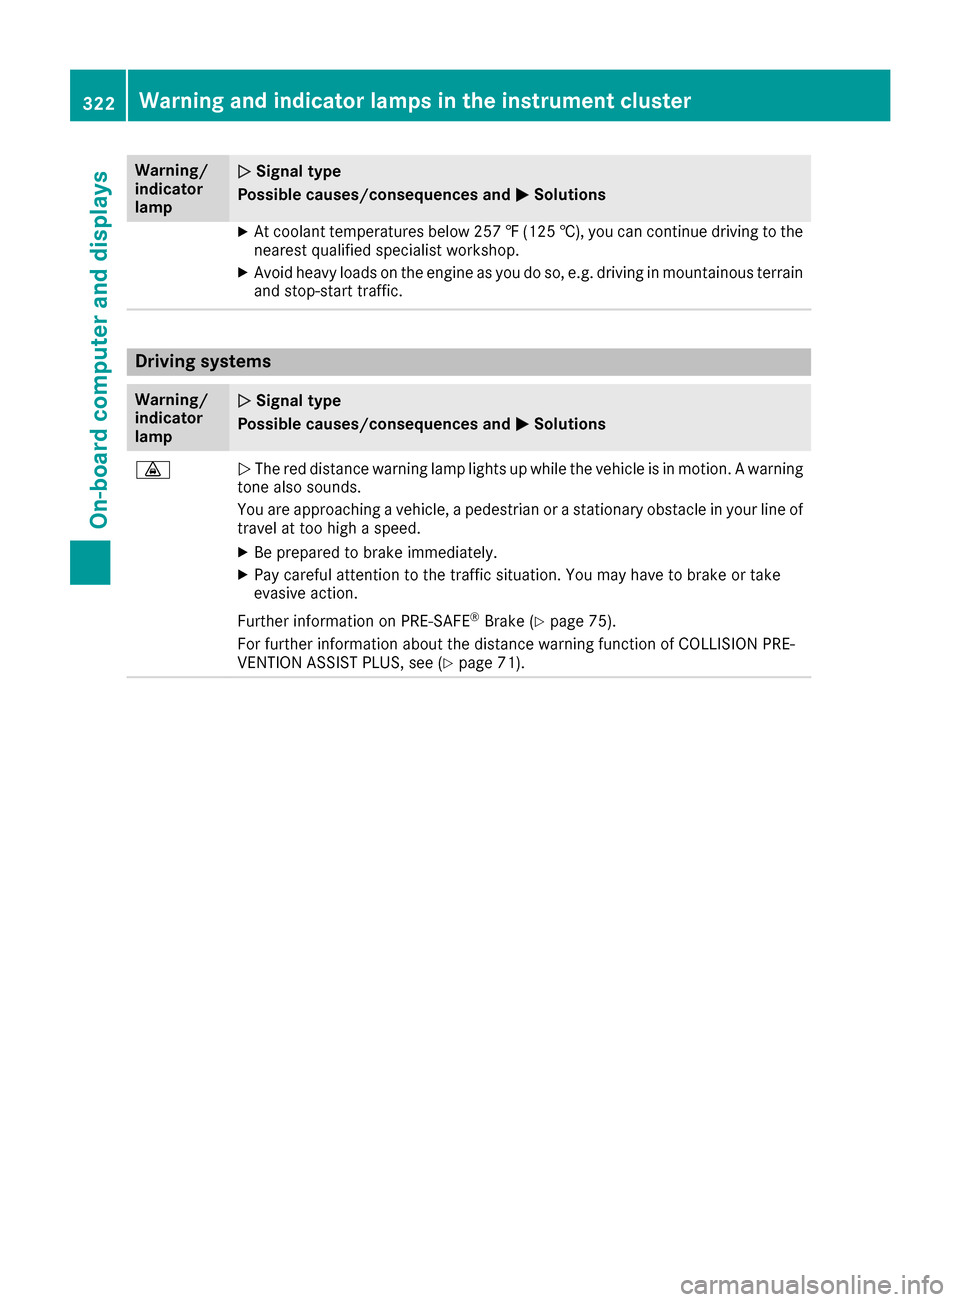
·NThe red distance warning lamp lights up while the vehicle is in motion. A warning
tone also sounds.
You are approaching a vehicle, a pedestrian or a stationary obstacle in your line of travel at too high a speed.
XBe prepared to brake immediately.
XPay careful attention to the traffic situation. You may have to brake or take
evasive action.
Further information on PRE ‑SAFE
®Brake (Ypage 75).
For further information about the distance warning function of COLLISION PRE-
VENTION ASSIST PLUS, see (
Ypage 71).
322Warning and indicator lamps in the instrument cluster
On-board computer and displays
Page 331 of 438
Stowage nets
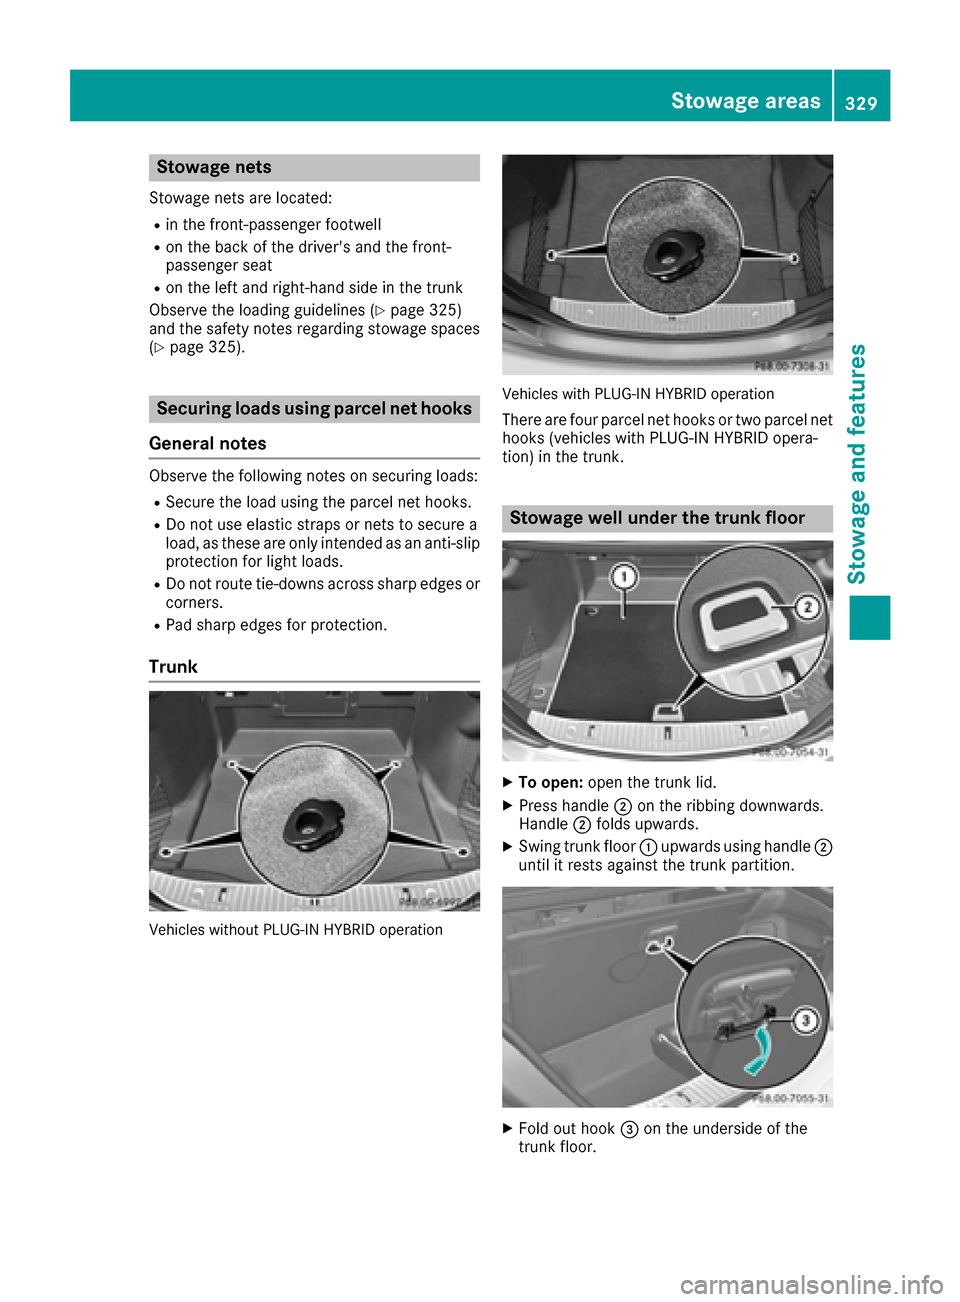
Stowage nets are located:
Rin the front-passenger footwell
Ron the back of the driver's and the front-
passenger seat
Ron the left and right-hand side in the trunk
Observe the loading guidelines (
Ypage 325)
and the safety notes regarding stowage spaces
(
Ypage 325).
Securing loads using parcel net hooks
General notes
Observe the following notes on securing loads:
RSecure the load using the parcel net hooks.
RDo not use elastic straps or nets to secure a
load, as these are only intended as an anti-slip
protection for light loads.
RDo not route tie-downs across sharp edges or
corners.
RPad sharp edges for protection.
Trunk
Vehicles without PLUG-IN HYBRID operation
Vehicles with PLUG-IN HYBRID operation
There are four parcel net hooks or two parcel net
hooks (vehicles with PLUG-IN HYBRID opera-
tion) in the trunk.
Stowage well under the trunk floor
XTo open: open the trunk lid.
XPress handle ;on the ribbing downwards.
Handle ;folds upwards.
XSwing trunk floor :upwards using handle ;
until it rests against the trunk partition.
XFold out hook =on the underside of the
trunk floor.
Stowage areas329
Stowage and features
Z
Page 332 of 438

XCliphook =into groove ?.
XTo close:uncliphook =from groove ?.
XFasten hook =to the bracket on the under-
side of the trunk floor.
XFold the trunk floor down.
Roof carrier
Important safety notes
GWAR NING
When you load the roof, the center of gravity
of the veh iclerises and the driving character-
istics change. Ifyou exceed the maximum roof
load, the driving characteristics, as wellas
steering and braking, will begreatly impaired.
There isa risk of an acc ident.
Never exceed the maximum roof load and
adjust your driving style.
You willfind information on the maximum roof
load inthe "Technical data" section
(
Ypage 433).
!Mercedes-Benz recommends that you only
use roof carriers that have been tested and
approved for Mercedes-Benz veh icles. This
helps to avoid damage to the veh icle.
Position the load on the roof carrier insuch a
way that the veh icle willnot sustain damage
even when it is inmotion.
Ensure that, dependin g on the vehicle's
equipm ent, you can raise the panorama roof
wit h power tilt/ sliding panel fully and open
the trunk lidfully when the roof carrier is
installed.
!To avoid damaging or scratching the covers,
do not use metallic or hard objects to open
them.
An incorrectly secured roof carrier or roof load
may become detached from the vehicle. You
must therefore ensure that you observe the roof carrier manufacturer's installation instructions.
Vehicles with a panorama roofwith power
tilt/sliding panel: the pan
orama roof with
power tilt/sliding panel cannot be opened if a
roof carrier isinstalled. The panorama roof with
power tilt/sliding panel can still be raised to
allow ventilation of the vehicle interior.
If the panorama roof with power tilt/sliding
panel makes contact with a roof carrier
approved byMercedes-Benz, the sunroof will
lower slightly but remain raised at the rear.
Attaching the roof carrier
XFold covers :upwards in the direction of the
arrow.
XOnly secure the roof carrier to the anchorage
points under covers :.
XObserve the manufacturer's installation
instructions.
Features
Cup holder
Important safety notes
GWARNING
If objects in the passenger compartment are
stowed incorrectly, they can slide or be
thrown around and hit vehicle occupants. In
addition, cupholders, open stowage spaces
and mobile phone brackets cannot always
330Features
Stowage and features
Page 333 of 438
retain all objects they contain. There is a riskof injury, particularly in the event of sudden
braking or a sudden change in direction.
RAlways stow objects so that they cannot be
thrown around in such situations.
RAlways make sure that objects do not pro-
trude from stowage spaces, parcel nets or
stowage nets.
RClose the lockable stowage spaces before
starting a journey.
RAlways stow and secure heavy, hard, poin-
ted, sharp-edged, fragile or bulky objects in
the trunk.
Observe the loading guidelines (
Ypage 325).
Mercedes-Maybach vehicles equipped with
champagne glasses: for your own safety, when
using champagne glasses, please observe the
following:
Rdo not use the champagne glasses while the
vehicle is in motion
Rdo not use champagne glasses made of
breakable glass, and store them in the trunk if
possible
!Only use the cup holders for containers of
the right size and which have lids. The drinks
could otherwise spill.
!Do not expose drinks bottles in the cup
holder in the center console to continuous,
strong and direct sunlight. The passenger
compartment in the area of the center con-
sole can otherwise be damaged by the con-
centrated and reflected sunlight.
Cup holder in the front-compartment
center console
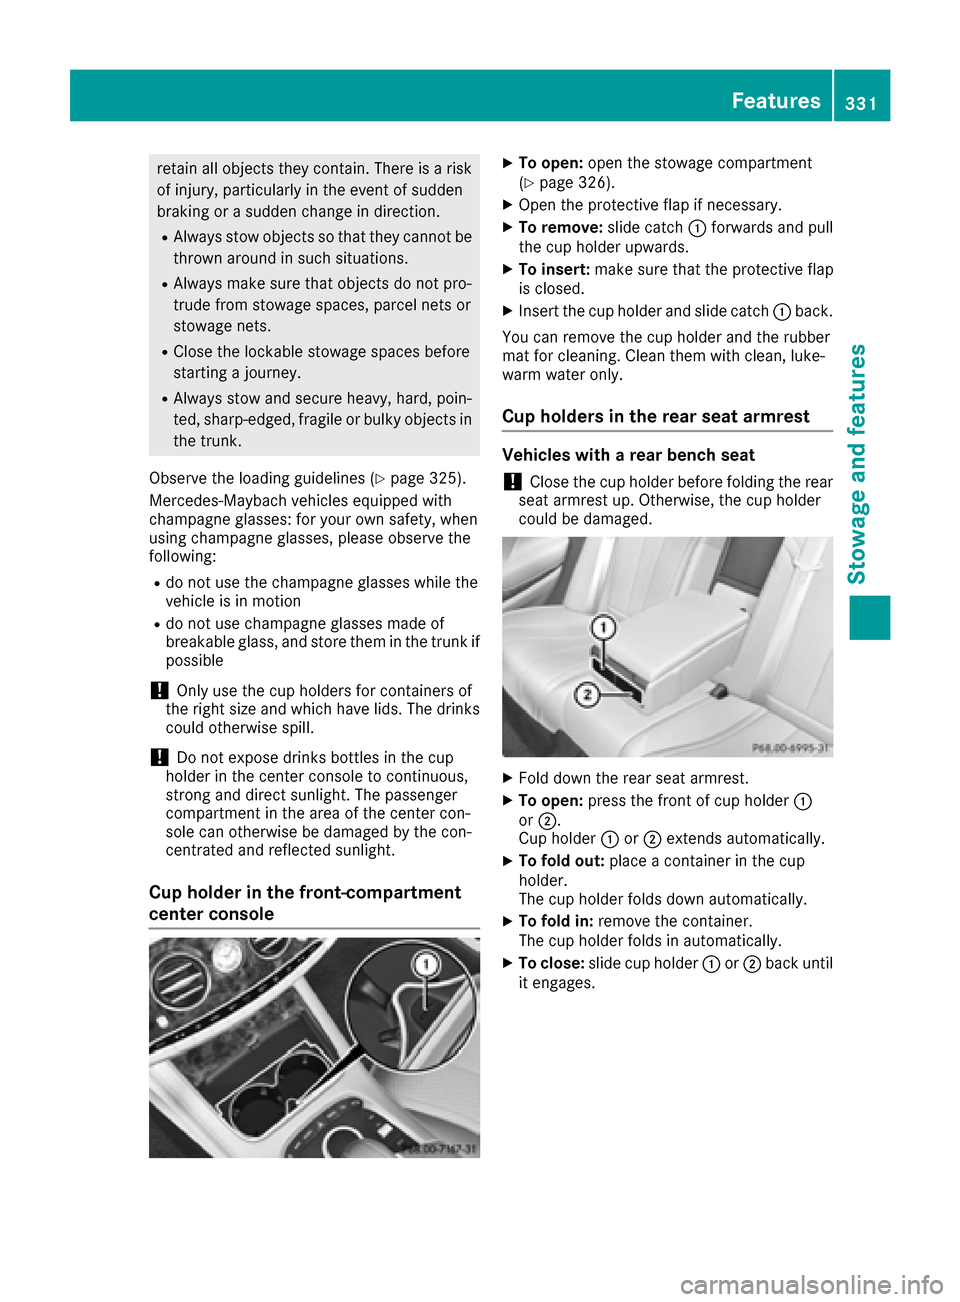
XTo open: open the stowage compartment
(Ypage 326).
XOpen the protective flap if necessary.
XTo remove: slide catch:forwards and pull
the cup holder upwards.
XTo insert: make sure that the protective flap
is closed.
XInsert the cup holder and slide catch :back.
You can remove the cup holder and the rubber
mat for cleaning. Clean them with clean, luke-
warm water only.
Cup holders in the rear seat armrest
Vehicles with a rear bench seat
!Close the cup holder before folding the rear
seat armrest up. Otherwise, the cup holder
could be damaged.
XFold down the rear seat armrest.
XTo open: press the front of cup holder :
or ;.
Cup holder :or; extends automatically.
XTo fold out: place a container in the cup
holder.
The cup holder folds down automatically.
XTo fold in: remove the container.
The cup holder folds in automatically.
XTo close: slide cup holder :or; back until
it engages.
Features331
Stowage and features
Z
Page 334 of 438
Vehicles with electrically adjustable rear
bench seats
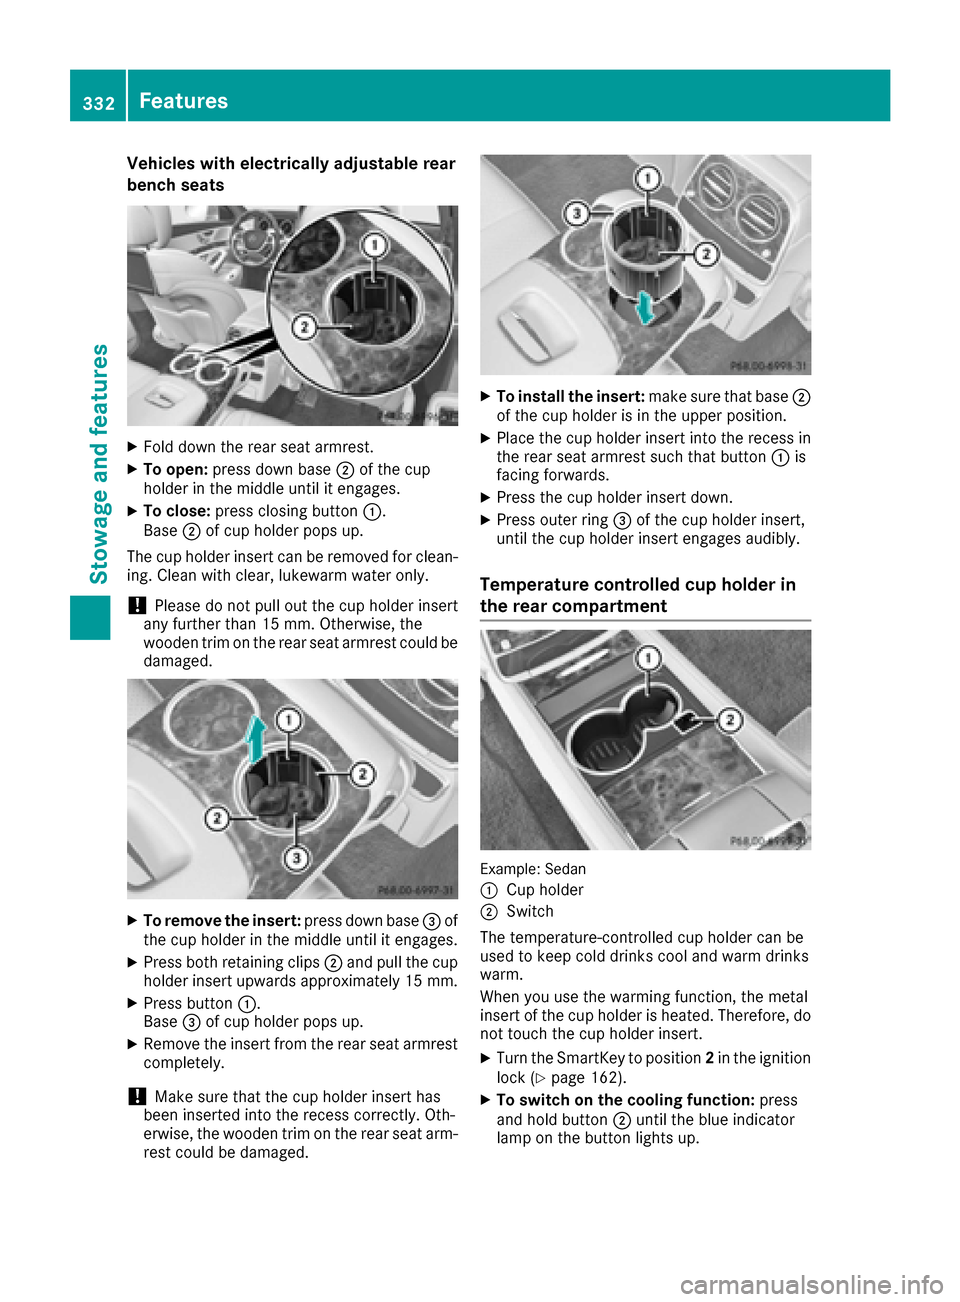
XFold down the rear seat armrest.
XTo open:press down base ;of the cup
holder in the middle until it engages.
XTo close: press closing button :.
Base ;of cup holder pops up.
The cup holder insert can be removed for clean-
ing. Clean with clear, lukewarm water only.
!Please do not pull out the cup holder insert
any further than 15 mm. Otherwise, the
wooden trim on the rear seat armrest could be
damaged.
XTo remove the insert: press down base=of
the cup holder in the middle until it engages.
XPress both retaining clips ;and pull the cup
holder insert upwards approximately 15 mm.
XPress button :.
Base =of cup holder pops up.
XRemove the insert from the rear seat armrest
completely.
!Make sure that the cup holder insert has
been inserted into the recess correctly. Oth-
erwise, the wooden trim on the rear seat arm-
rest could be damaged.
XTo install the insert: make sure that base;
of the cup holder is in the upper position.
XPlace the cup holder insert into the recess in
the rear seat armrest such that button :is
facing forwards.
XPress the cup holder insert down.
XPress outer ring =of the cup holder insert,
until the cup holder insert engages audibly.
Temperature controlled cup holder in
the rear compartment
Example: Sedan
:
Cup holder
;Switch
The temperature-controlled cup holder can be
used to keep cold drinks cool and warm drinks
warm.
When you use the warming function, the metal
insert of the cup holder is heated. Therefore, do
not touch the cup holder insert.
XTurn the SmartKey to position 2in the ignition
lock (Ypage 162).
XTo switch on the cooling function: press
and hold button ;until the blue indicator
lamp on the button lights up.
332Features
Stowage and features
Page 335 of 438
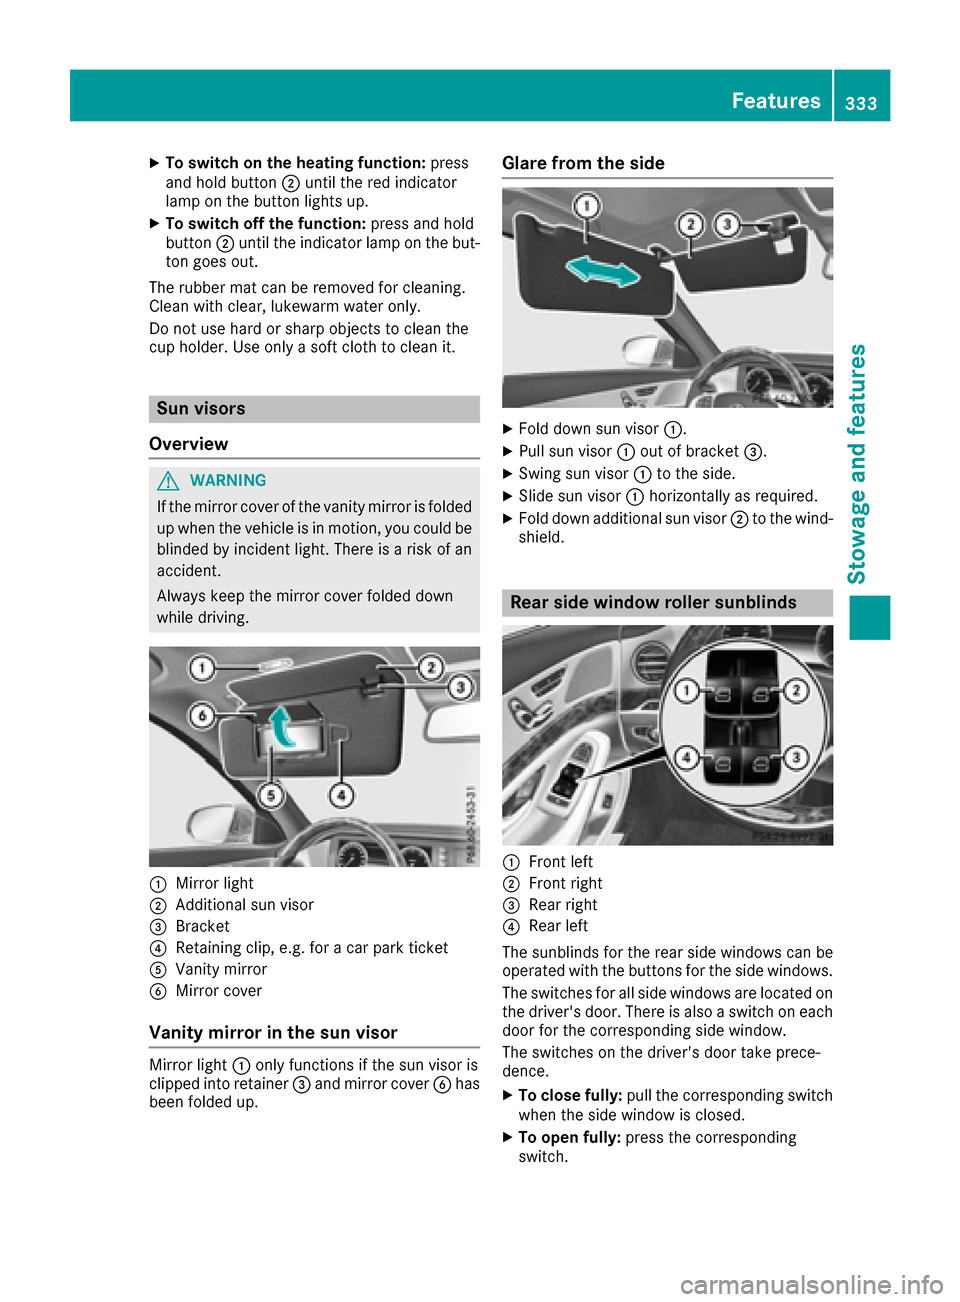
XTo switch on the heating function:press
and hold button ;until the red indicator
lamp on the button lights up.
XTo switch off the function: press and hold
button ;until the indicator lamp on the but-
ton goes out.
The rubber mat can be removed for cleaning.
Clean with clear, lukewarm water only.
Do not use hard or sharp objects to clean the
cup holder. Use only a soft cloth to clean it.
Sun visors
Overview
GWARNING
If the mirror cover of the vanity mirror is folded
up when the vehicle is in motion, you could be
blinded by incident light. There is a risk of an
accident.
Always keep the mirror cover folded down
while driving.
:Mirror light
;Additional sun visor
=Bracket
?Retaining clip, e.g. for a car park ticket
AVanity mirror
BMirror cover
Vanity mirror in the sun visor
Mirror light :only functions if the sun visor is
clipped into retainer =and mirror cover Bhas
been folded up.
Glare from the side
XFold down sun visor :.
XPull sun visor:out of bracket =.
XSwing sun visor :to the side.
XSlide sun visor :horizontally as required.
XFold down additional sun visor ;to the wind-
shield.
Rear side window roller sunblinds
:Front left
;Front right
=Rear right
?Rear left
The sunblinds for the rear side windows can be
operated with the buttons for the side windows.
The switches for all side windows are located on
the driver's door. There is also a switch on each
door for the corresponding side window.
The switches on the driver's door take prece-
dence.
XTo close fully: pull the corresponding switch
when the side window is closed.
XTo open fully: press the corresponding
switch.
Features333
Stowag ean d features
Z