2016 MERCEDES-BENZ S-Class SEDAN light
[x] Cancel search: lightPage 261 of 438

Head-up display
General notes
The head-up display projects information from
the navigation system and the driver assistance
system above the dashboard into the driver's
field of vision. The head-up display allows the
driver to see all of the information without hav-
ing to take their eyes off the road.
A requirement for the display of the contents is
that the following functions are available in the
vehicle and are switched on:
RCruise control
RDISTRONIC PLUS
RTraffic Sign Assist
RNavigation
Important safety notes
The head-up display is only an aid and is not a
substitute for attentive driving.
Speed limits and overtaking restrictions are not
always correctly displayed. Traffic signs always
have priority over the Traffic Sign Assist display.
The visibility of the head-up display is influenced
by the following conditions:
Rthe driver's seat position
Rthe positioning of the display image
Rthe general ambient light
Rsunglasses with polarization filters
Rwet roads
Rblocking of sunlight by objects on the display
cover
In the event of extreme sunlight, sections of the
display may fade. This can be reversed by
switching the head-up display off and on again.
iVehicles with the head-up display are equip-
ped with a special windshield. Should repairs
be necessary, have the windshield replaced at
a qualified specialist workshop.
Displays and operation
Switching the head-up display on/off
XPress button :.
When the head-up display is switched on, the display appears in the driver's field of vision.
Displays and operation259
On-board computer and displays
Z
Page 266 of 438
Route guidance active
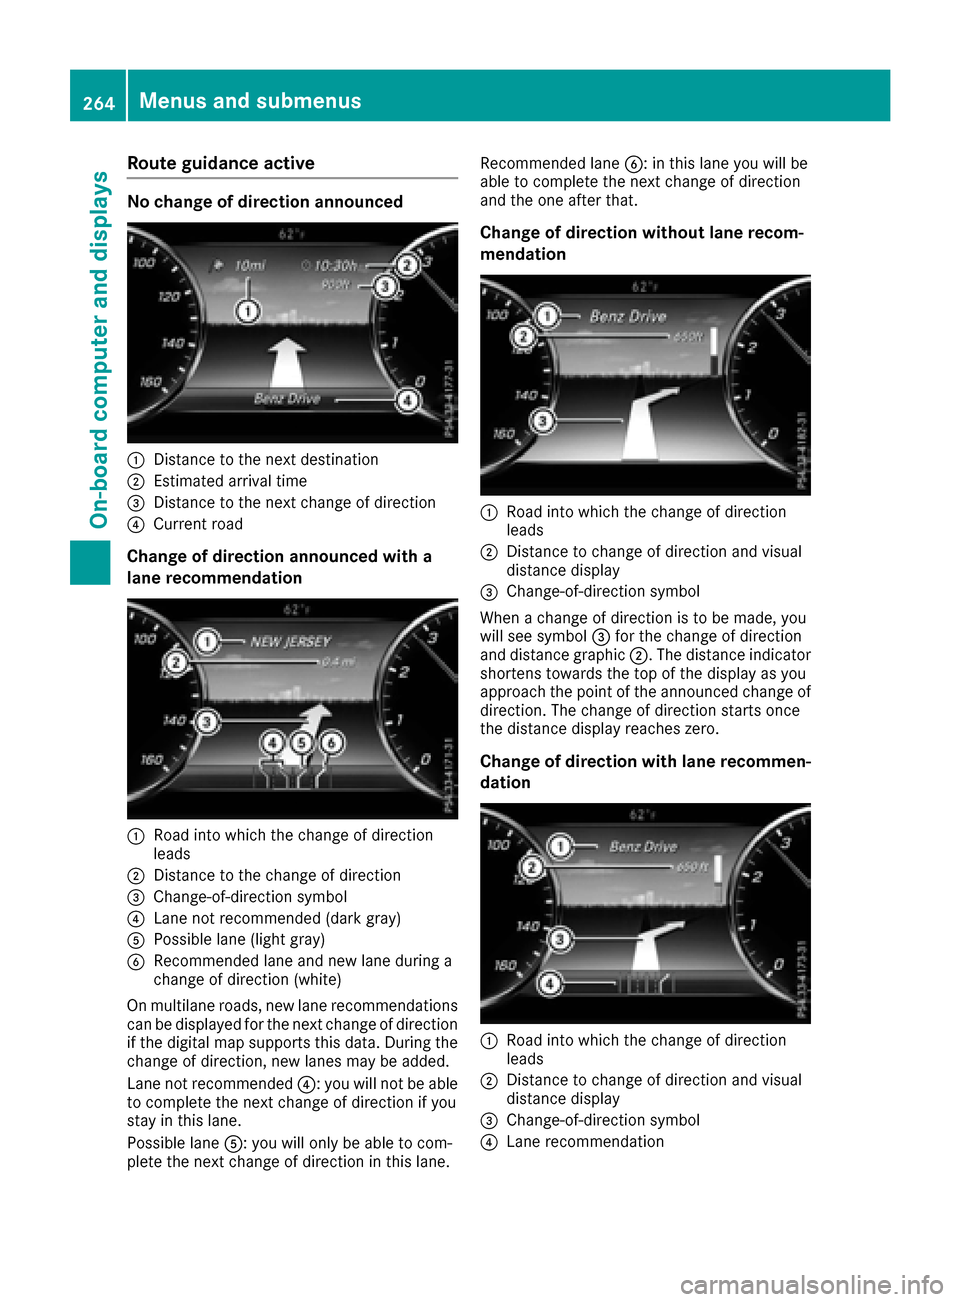
No change of direction announced
:Distance to the next destination
;Estimated arrival time
=Distance to the next change of direction
?Current road
Change of direction announced with a
lane recommendation
:Road into which the change of direction
leads
;Distance to the change of direction
=Change-of-direction symbol
?Lane not recommended (dark gray)
APossible lane (light gray)
BRecommended lane and new lane during a
change of direction (white)
On multilane roads, new lane recommendations
can be displayed for the next change of direction if the digital map supports this data. During the
change of direction, new lanes may be added.
Lane not recommended ?: you will not be able
to complete the next change of direction if you
stay in this lane.
Possible lane A: you will only be able to com-
plete the next change of direction in this lane. Recommended lane
B: in this lane you will be
able to complete the next change of direction
and the one after that.
Change of direction without lane recom-
mendation
:Road into which the change of direction
leads
;Distance to change of direction and visual
distance display
=Change-of-direction symbol
When a change of direction is to be made, you
will see symbol =for the change of direction
and distance graphic ;. The distance indicator
shortens towards the top of the display as you
approach the point of the announced change of
direction. The change of direction starts once
the distance display reaches zero.
Change of direction with lane recommen-
dation
:Road into which the change of direction
leads
;Distance to change of direction and visual
distance display
=Change-of-direction symbol
?Lane recommendation
264Menus and submenus
On-board computer and displays
Page 270 of 438
XPress the6button on the steering wheel
to accept an incoming call.
Rejecting or ending a call
XPress the ~button on the steering wheel
to reject or end a call.
Selecting an entry in the phone book
XPress the òbutton on the steering wheel
to open the menu list.
XPress :or9 on the steering wheel to
select the Telephonemenu.
XConfirm by pressing aon the steering
wheel.
XPress the :,9ora button to
switch to the phone book.
XPress :or9 to select the names one
after the other.
or
XTo start rapid scrolling: press and hold
the : or9 button for longer than one
second.
The names in the phone book are displayed
quickly one after the other.
If you press and hold the :or9 button
for longer than five seconds, the name
appears with the next or previous letter initial
letter in the alphabet.
Rapid scrolling stops when you release the
button or reach the end of the list.
XIf only one telephone number is stored for
a name: press the 6ora button to
start dialing.
or
XIf there is more than one telephone num-
ber for a particular name: press the6or
a button to display the numbers.
XPress :or9 to select the number you
want to dial.
XPress the 6ora button to start dialing.
or
XTo exit the telephone book: press the~
or % button.
Redialing
The on-board computer saves the last names or
numbers dialed in the redial memory.
XPress the òbutton on the steering wheel
to open the menu list.
XPress :or9 on the steering wheel to
select the Telephonemenu.
XConfirm by pressing aon the steering
wheel.
XPress the 6button to switch to the redial
memory.
XPress the :or9 button to select the
desired name or number.
XPress the 6ora button to start dialing.
or
XTo exit the redial memory: press the~
or % button.
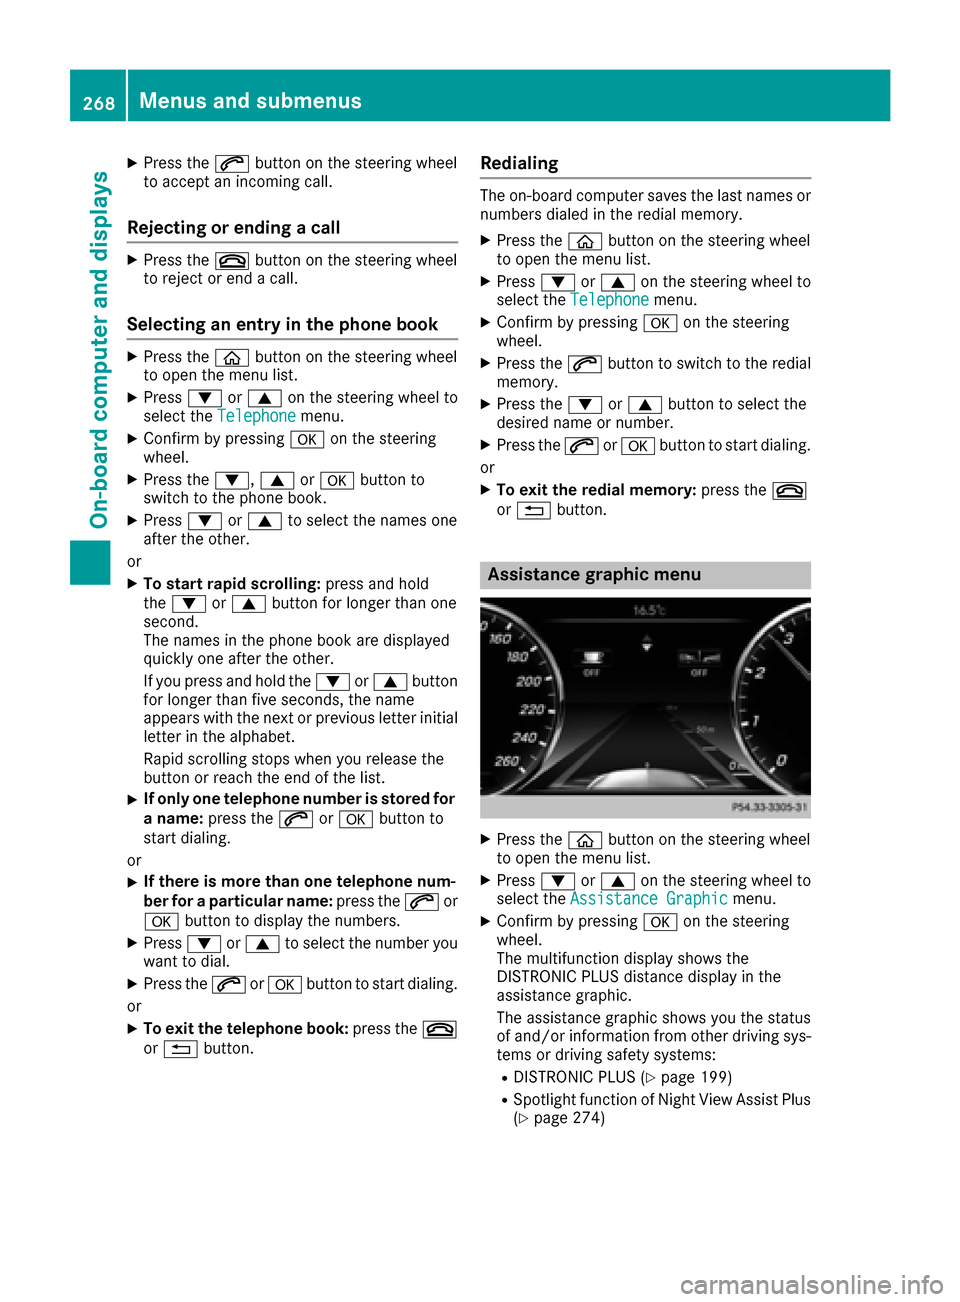
Assistance graphic menu
XPress the òbutton on the steering wheel
to open the menu list.
XPress :or9 on the steering wheel to
select the Assistance Graphicmenu.
XConfirm by pressing aon the steering
wheel.
The multifunction display shows the
DISTRONIC PLUS distance display in the
assistance graphic.
The assistance graphic shows you the status
of and/or information from other driving sys-
tems or driving safety systems:
RDISTRONIC PLUS (Ypage 199)
RSpotlight function of Night View Assist Plus
(Ypage 274)
268Menus and submenus
On-board computer and displays
Page 271 of 438
RDistance warning and the autonomous
braking function COLLISION PREVENTION
ASSIST PLUS (
Ypage 71)
RPRE-SAFE®Brake (Ypage 75)
RActive Blind Spot Assist (Ypage 234)
RATTENTION ASSIST (Ypage 228)
RActive Lane Keeping Assist (Ypage 237)
XPress:to display the ATTENTION ASSIST
assessment.
Service menu
Introduction
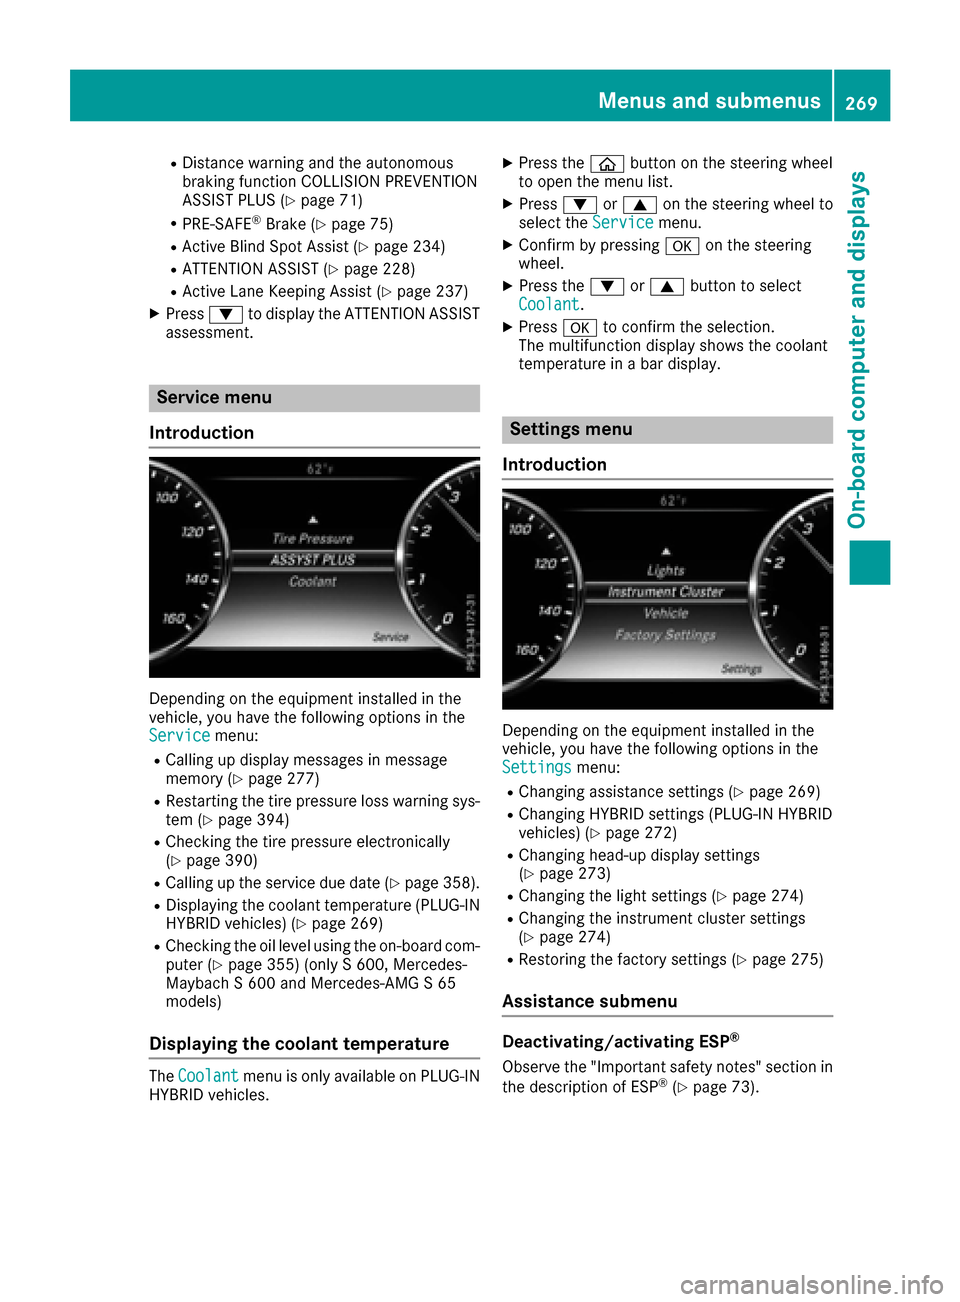
Depending on the equipment installed in the
vehicle, you have the following options in the
Service
menu:
RCalling up display messages in message
memory (Ypage 277)
RRestarting the tire pressure loss warning sys-
tem (Ypage 394)
RChecking the tire pressure electronically
(Ypage 390)
RCalling up the service due date (Ypage 358).
RDisplaying the coolant temperature (PLUG-IN
HYBRID vehicles) (Ypage 269)
RChecking the oil level using the on-board com-
puter (Ypage 355) (only S 600, Mercedes-
Maybach S 600 and Mercedes-AMG S 65
models)
Displaying the coolant temperature
The Coolantmenu is only available on PLUG ‑IN
HYBRID vehicles.
XPress the òbutton on the steering wheel
to open the menu list.
XPress :or9 on the steering wheel to
select the Servicemenu.
XConfirm by pressing aon the steering
wheel.
XPress the :or9 button to select
Coolant.
XPress ato confirm the selection.
The multifunction display shows the coolant
temperature in a bar display.
Settings menu
Introduction
Depending on the equipment installed in the
vehicle, you have the following options in the
Settings
menu:
RChanging assistance settings (Ypage 269)
RChanging HYBRID settings (PLUG-IN HYBRID
vehicles) (Ypage 272)
RChanging head-up display settings
(Ypage 273)
RChanging the light settings (Ypage 274)
RChanging the instrument cluster settings
(Ypage 274)
RRestoring the factory settings (Ypage 275)
Assistance submenu
Deactivating/activating ESP®
Observe the "Important safety notes" section in
the description of ESP®(Ypage 73).
Menus and submenus269
On-board computer and displays
Z
Page 272 of 438
GWARNING
If you deactivate ESP
®, ESP®no longer sta-
bilizes the vehicle. There is an increased risk
of skidding and an accident.
Only deactivate ESP
®in the situations descri-
bed in the following.
It may be best to deactivate ESP
®in the follow-
ing situations:
Rwhen using snow chains
Rin deep snow
Ron sand or gravel
For further information about ESP®, see
(Ypage 73).
XStart the engine.
XPress the òbutton on the steering wheel
to open the menu list.
XPress :or9 on the steering wheel to
select the Settingsmenu.
XConfirm by pressing aon the steering
wheel.
XUse : or9 to select the DriveAssistsubmenu.
XPressato confirm your selection.
XPress the :or9 button to select ESP.
XPressato confirm.
The current selection appears.
XTo activate/deactivate: press theabut-
ton again.
ESP
®is deactivated if the åwarning lamp in
the instrument cluster lights up continuously
when the engine is running.
If the ÷ warning lamp lights up continuously,
ESP
®is not available due to a malfunction.
Observe the information on warning lamps
(
Ypage 317).
Observe the information on display messages
(
Ypage 278).
Automatic activation of Night View Assist
Plus
XPress òon the steering wheel to open the
menu list.
XPress :or9 on the steering wheel to
select the Settingsmenu.
XConfirm by pressing aon the steering
wheel.
XUse : or9 to select the DriveAssistsubmenu.
XPressato confirm your selection.
XPress the :or9 button to select
Night View Assist.
XPress ato confirm.
The current selection appears.
XTo activate/deactivate: press theabut-
ton again.
If Night View Assist Plus automatic activation is switched on, the night vision image is automat-
ically shown in the multifunction display if an
object is detected.
For further information about Night View Assist
Plus (
Ypage 232).
Activating/deactivating Traffic Sign
Assist
Under certain conditions, the Traffic SignAssistfunction allows you to choose if traffic
signs and messages should be displayed in the
lower part of the speedometer.
XPress the òbutton on the steering wheel
to open the menu list.
XPress :or9 on the steering wheel to
select the Settingsmenu.
XConfirm by pressing aon the steering
wheel.
XUse : or9 to select the DriveAssistsubmenu.
XPressato confirm your selection.
XPress the :or9 button to select
Traffic Sign Assist.
XPress ato confirm.
The current selection appears.
XTo activate/deactivate: press theabut-
ton again.
Traffic signs and messages appear in the
lower part of the speedometer if the function
is activated.
For further information about Traffic Sign Assist,
see (
Ypage 229).
Activating/deactivating COLLISION PRE-
VENTION ASSIST PLUS
XPress the òbutton on the steering wheel
to open the menu list.
XPress :or9 on the steering wheel to
select the Settingsmenu.
270Menus and submenus
On-board computer and displays
Page 275 of 438

condition of charge of the high-voltage bat-
tery for the departure time set.
Further information on charging the high-volt-
age battery (PLUG-IN HYBRID vehicles)
(
Ypage 181).
Head-up display submenu
Selecting other displays
:Vehicle speed display
;Vehicle speed and navigation instruction
display
=Vehicle speed display and Traffic Sign Assist
Using the Display Content
function, you can
choose from up to four display options depend-
ing on the vehicle's equipment. The selected
contents appear in the head-up display.
In Mercedes-AMG vehicles, you can also choose
between two AMG displays. If you select an
AMG display, the head-up display shows AMG-
specific contents.
XPress the òbutton on the steering wheel
to open the menu list.
XPress :or9 on the steering wheel to
select the Settingsmenu.
XConfirm by pressing aon the steering
wheel.
XPress :or9 to select the Head-upDisplaysubmenu.
XPressato confirm.
XPress :or9 to select Display Con‐tent.
XPressato confirm.
A graphic selection list appears.
XPress :or9 to select the desired dis-
play.
XPress the abutton to confirm the selec-
tion. For further information about the traffic sign
displays, see Traffic Sign Assist (
Ypage 229).
Further information on navigation displays can
be found in the multimedia system; see the sep-
arate operating instructions.
Setting the position
You can adjust the position of the head-up dis-
play on the windshield. You can compensate for
height differences if the seat positions are
changed, for example.
XSwitch on the head-up display (Ypage 259).
XPress the òbutton on the steering wheel
to open the menu list.
XPress the :or9 button on the steering
wheel to select the Settingsmenu.
XConfirm by pressing aon the steering
wheel.
XPress :or9 to select the Head-upDisplaysubmenu.
XPressato confirm.
XPress :or9 to select the Positionfunction.
XPress theabutton to save the setting.
XPress :or9 to adjust the position to a
level from Level+5(up) toLevel-5(down).
XPress the aor% button to save the
setting.
Using the Memory function, you can save and
call up the set position of the head-up display as
a single memory preset (
Ypage 126).
Setting the brightness
The brightness of the head-up display is auto-
matically adjusted to the surrounding ambient
light. You can also individually adjust the bright-
ness of the head-up display.
XSwitch on the head-up display (Ypage 259).
XPress òon the steering wheel to open the
menu list.
XPress the :or9 button on the steering
wheel to select the Settingsmenu.
XConfirm by pressing aon the steering
wheel.
XUse : or9 to select the Head-upDisplaysubmenu.
XPressato confirm.
XPress :or9 to select the Brightnessfunction.
XPress theabutton to save the setting.
Menus and submenus273
On-board computer and displays
Z
Page 276 of 438

XPress:or9 to adjust the brightness
to a level from Level+5(bright) toLevel-5(dark).
XPress theaor% button to save the
setting.
Light submenu
Switching the spotlight function on/off
XPress òon the steering wheel to open the
menu list.
XPress :or9 on the steering wheel to
select the Settingsmenu.
XConfirm by pressing aon the steering
wheel.
XPress :or9 to select the Lightssubmenu.
XPressato confirm.
XPress the :or9 button to select the
Spotlightfunction.
XPress the abutton to save the setting.
When the spotlight function is activated, the
assistance graphic shows the pedestrian
symbol.
Further information on the spotlight function
(
Ypage 232).
Switching the daytime running lamps on/
off
This function is not available in Canada.
XPress the òbutton on the steering wheel
to open the menu list.
XPress :or9 on the steering wheel to
select the Settingsmenu.
XConfirm by pressing aon the steering
wheel.
XUse : or9 to select the Lightssub-
menu.
XPress ato confirm.
XUsing :or9, select the DaytimeRunning Lightsfunction.
If the DaytimeRunningLightsfunction has
been switched on, the cone of light and the
W symbol are shown in white in the multi-
function display.
XPress the abutton to save the setting.
Further information on daytime running lamps
Daytime Running Lights
(Ypage 130).
Instrument cluster submenu
Selecting the distance unit
The DisplayUnitSpeed-/Odometerfunction
allows you to choose whether certain displays
appear in kilometers or miles in the multifunc-
tion display.
XPress the òbutton on the steering wheel
to open the menu list.
XPress the :or9 button on the steering
wheel to select the Settingsmenu.
XConfirm by pressing aon the steering
wheel.
XPress :or9 to select the Instru‐ment Clustersubmenu.
XPressato confirm.
XPress the :or9 button to select the
Display Unit Speed-/Odometerfunction.
The current setting kmorMilesappears.
XPress the abutton to save the setting.
The selected unit of measurement for distance
applies to:
Rspeedometer
Rdigital speedometer in the Tripmenu
Radditional speedometer in the status area on
the multifunction display
The unit in the additional speedometer is dis- played inversely to the selected distance unit.
Rthe odometer and trip odometer
Rthe trip computer
Rthe current consumption and the range
Rnavigation instructions in the Navimenu
Rcruise control
RSPEEDTRONIC
RDISTRONIC PLUS
RDISTRONIC PLUS with Steering Assist and
Stop&Go Pilot
RASSYST PLUS service interval display
Switching the additional speedometer
on/off
TheAdditional Speedometer [km/h]func-
tion allows you to choose whether the status
area in the multifunction display shows the
speed digitally. The unit in the additional speed-
ometer is always inverse to the speedometer
unit.
274Menus and submenus
On-board computer and displays
Page 277 of 438
XPressòon the steering wheel to open the
menu list.
XPress :or9 on the steering wheel to
select the Settingsmenu.
XConfirm by pressing aon the steering
wheel.
XPress :or9 to select the Instru‐ment Clustersubmenu.
XPressato confirm your selection.
XUsing :or9, select the AdditionalSpeedometer [km/h]function.
The current selection appears.
XTo activate/deactivate: pressaagain.
Restoring the factory settings
XPress òon the steering wheel to open the
menu list.
XPress :or9 on the steering wheel to
select the Settingsmenu.
XConfirm by pressing aon the steering
wheel.
XPress :or9 to select the FactorySettingssubmenu.
XPressato confirm.
The Reset All Settings?function
appears.
XPress the :or9 button to select Noor
Yes.
XPress the abutton to confirm the selec-
tion.
If you have selected and confirmed Yes
, the
multifunction display shows a confirmation
message.
For safety reasons, the Daytime Running
Lightsfunction in theLightssubmenu is only
reset when the vehicle is stationary.
AMG menu (Mercedes-AMG vehicles)
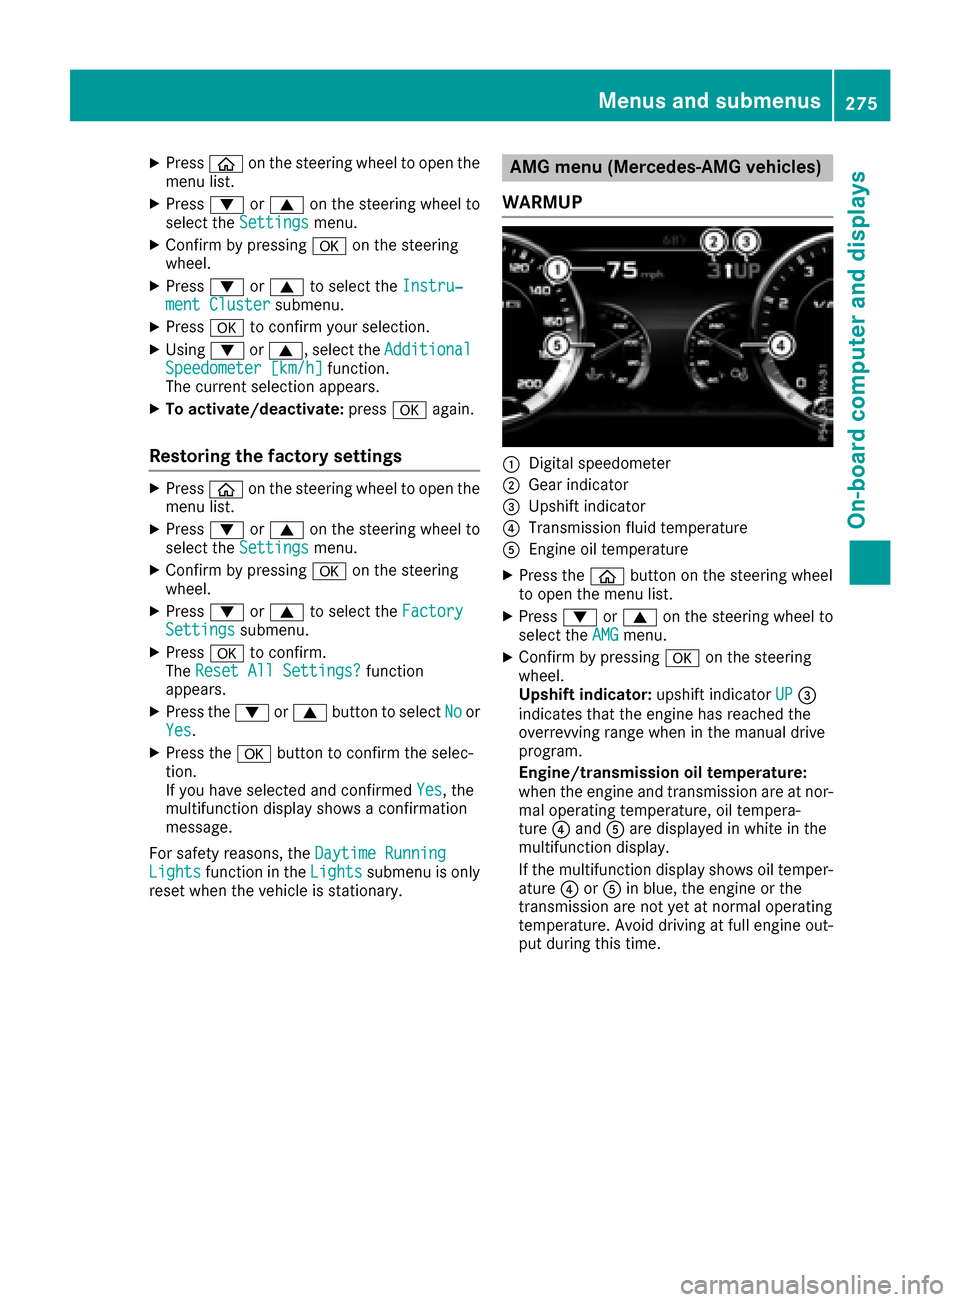
WARMUP
:Digital speedometer
;Gear indicator
=Upshift indicator
?Transmission fluid temperature
AEngine oil temperature
XPress the òbutton on the steering wheel
to open the menu list.
XPress :or9 on the steering wheel to
select the AMGmenu.
XConfirm by pressing aon the steering
wheel.
Upshift indicator: upshift indicatorUP
=
indicates that the engine has reached the
overrevving range when in the manual drive
program.
Engine/transmission oil temperature:
when the engine and transmission are at nor-
mal operating temperature, oil tempera-
ture ?and Aare displayed in white in the
multifunction display.
If the multifunction display shows oil temper-
ature ?orA in blue, the engine or the
transmission are not yet at normal operating
temperature. Avoid driving at full engine out-
put during this time.
Menus and submenus275
On-board computer and displays
Z