2016 MERCEDES-BENZ S-Class SEDAN change time
[x] Cancel search: change timePage 150 of 438
XTo switch on:press theÃrocker switch
on the front control unit up or down.
or
XActivate automatic mode via the air-condi-
tioning setting bar in the multimedia system
(see the separate operating instructions).
The indicator lamp in the Ãrocker switch
lights up.
iSelect the temperature and automatic
mode immediately thereafter. Otherwise, you
will have to select "Rear adjustment" again
from the air-conditioning setting bar before
activating automatic mode.
XTo switch to manual operation: press the
tor !rocker switch up or down.
The climate control menu opens.
XSelect "Rear adjustment" in the air-condition-
ing setting bar (see the separate operating
instructions).
XUse the air-conditioning setting bar to deac-
tivate automatic mode.
or
XSet the air distribution using rocker switch I
or M on the rear control panel (Ypage 141).
or
XSet the airflow using rocker switch Kon the
rear control panel (Ypage 141).
The AUTO indicator on the rear display goes
out.
If you adjust the rear airflow or air distribution
manually using the multimedia system when in
automatic mode, the AUTOindicator on the rear
display goes out. The function which has not
been changed manually, however, continues to
be controll ed a
utomatically. When the manually
set function switches back to automatic mode,
the AUTO display reappears in the rear-com-
partment display.
Controlling rear climate control auto-
matically using the rear control panel
XTurn the SmartKey to position 2in the ignition
lock (Ypage 162).
XSet the desired temperature using rocker
switches Hand N(Ypage 141).
XTo activate: press rocker switch Jup or
down (Ypage 141).
The indicator lamp in rocker switch Jlights
up.
XTo deactivate: press rocker switch Jup or
down (Ypage 141).
The indicator lamp in rocker switch Jgoes
out.
If you adjust the airflow or air distribution man-
ually when in automatic mode, the AUTOdisplay
in the rear-compartment display goes out. The
function which has not been changed manually,
however, continues to be controlled automati-
cally. When the manually set function switches
back to automatic mode, the AUTOdisplay
reappears in the rear-compartment display.
Adjusting the climate mode settings
In automatic mode you can select the following
airflow settings for the driver's and front-
passenger areas:
FOCUS high airflow, slightly cooler setting
MEDIU Mmedium airflow, standard setting
DIFFUSEl ow airflow, slightly warmer and draft-
free setting
XTo set: set the climate mode using the mul-
timedia system (see the separate operating
instructions).
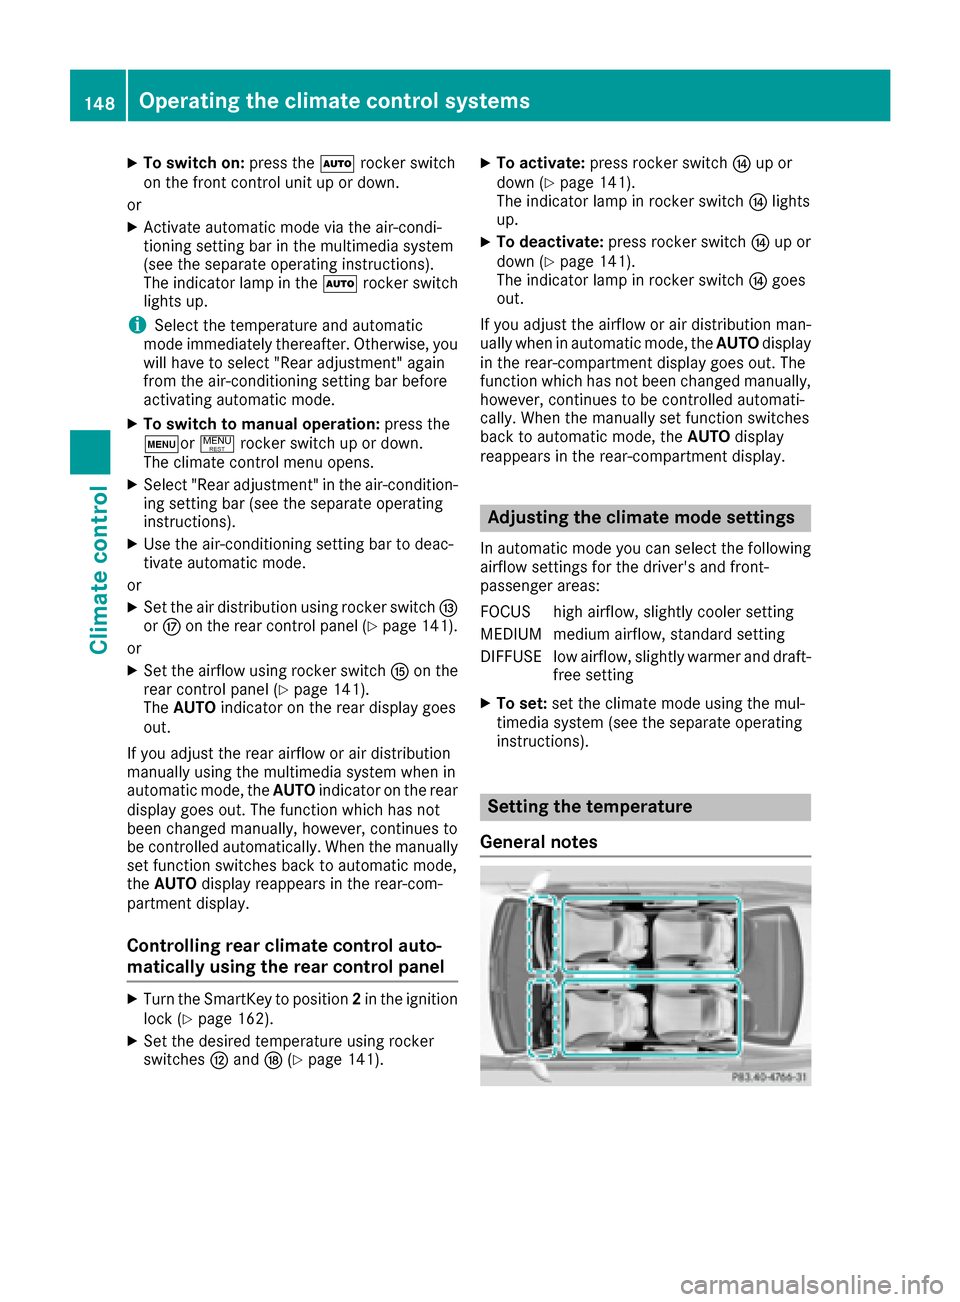
Setting the temperature
General notes
148Operating the climate control systems
Climate control
Page 151 of 438
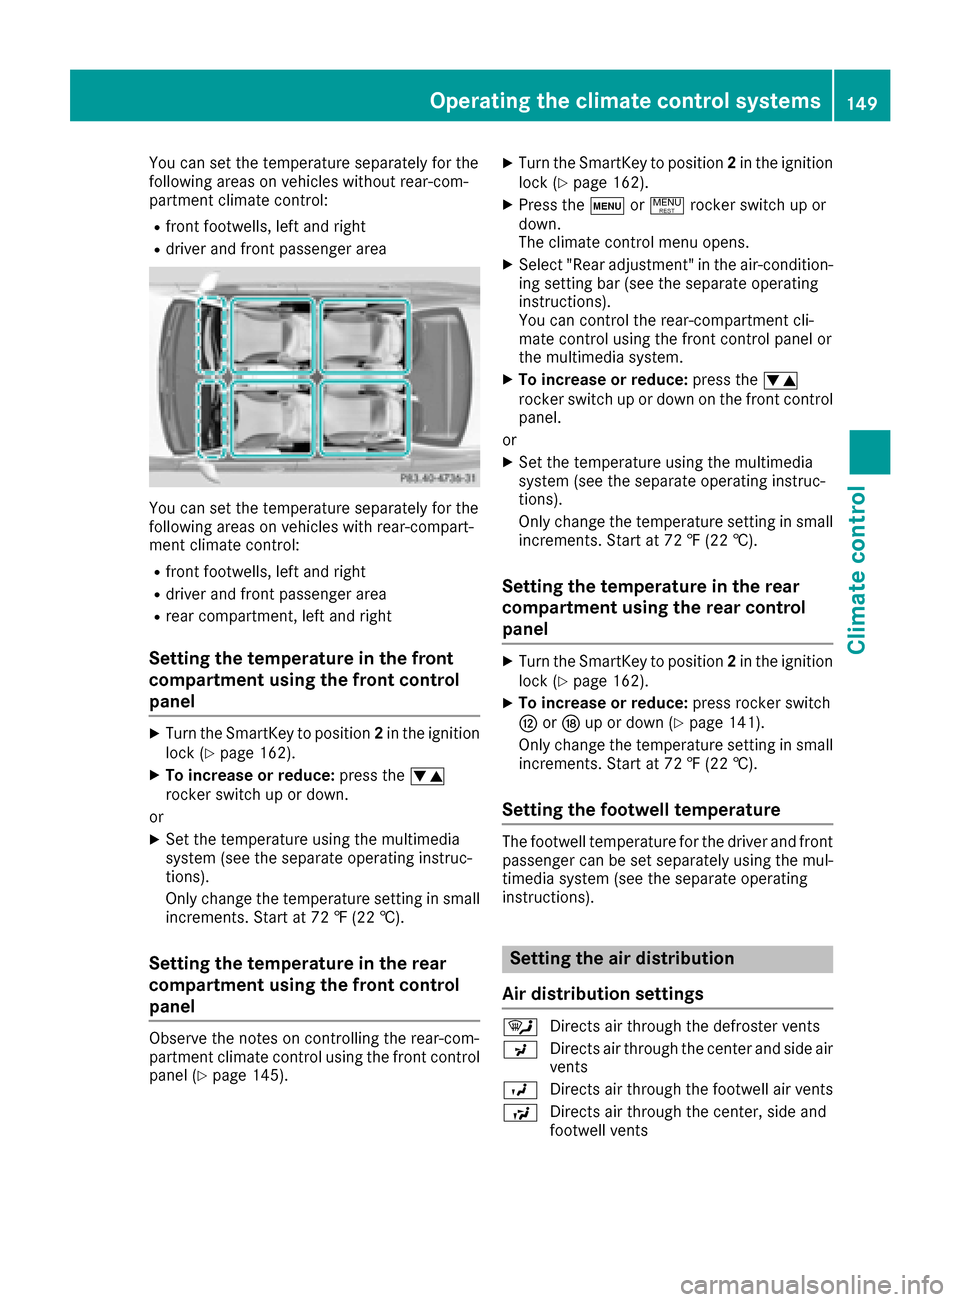
You can set the temperature separately for the
following areas on vehicles without rear-com-
partment climate control:
Rfront footwells, left and right
Rdriver and front passenger area
You can set the temperature separately for the
following areas on vehicles with rear-compart-
ment climate control:
Rfront footwells, left and right
Rdriver and front passenger area
Rrear compartment, left and right
Setting the temperature in the front
compartment using the front control
panel
XTurn the SmartKey to position2in the ignition
lock (Ypage 162).
XTo increase or reduce: press thew
rocker switch up or down.
or
XSet the temperature using the multimedia
system (see the separate operating instruc-
tions).
Only change the temperature setting in small
increments. Start at 72 ‡ (22 †).
Setting the temperature in the rear
compartment using the front control
panel
Observe the notes on controlling the rear-com-
partment climate control using the front control
panel (
Ypage 145).
XTurn the SmartKey to position 2in the ignition
lock (Ypage 162).
XPress the tor! rocker switch up or
down.
The climate control menu opens.
XSelect "Rear adjustment" in the air-condition-
ing setting bar (see the separate operating
instructions).
You can control the rear-compartment cli-
mate control using the front control panel or
the multimedia system.
XTo increase or reduce: press thew
rocker switch up or down on the front control
panel.
or
XSet the temperature using the multimedia
system (see the separate operating instruc-
tions).
Only change the temperature setting in small
increments. Start at 72 ‡ (22 †).
Setting the temperature in the rear
compartment using the rear control
panel
XTurn the SmartKey to position 2in the ignition
lock (Ypage 162).
XTo increase or reduce: press rocker switch
H orN up or down (Ypage 141).
Only change the temperature setting in small increments. Start at 72 ‡ (22 †).
Setting the footwell temperature
The footwell temperature for the driver and front
passenger can be set separately using the mul-
timedia system (see the separate operating
instructions).
Setting the air distribution
Air distribution settings
¯ Directs air through the defroster vents
P Directs air through the center and side air
vents
O Directs air through the footwell air vents
S Directs air through the center, side and
footwell vents
Operating the climate control systems149
Climate control
Page 152 of 438
aDirects air through the defroster and
footwell vents
W Sets the air distribution to automatic
Setting the air distribution in the front/
rear compartments using the multime-
dia system
The air distribution for the left and right sides of
the front and rear compartment can be adjusted
using the multimedia system (see the separate
operating instructions).
Setting the air distribution in the rear
compartment using the rear control
panel
XTurn the SmartKey to position 2in the ignition
lock (Ypage 162).
XPress rocker switch IorM up or down
repeatedly (Ypage 141) until the desired air
distribution symbol is shown in the display.
Setting the airflow
General notes
You can select different airflow settings for the
driver's and front-passenger sides as well as for
the rear compartment (only vehicles with rear
compartment climate control).
Observe the notes on controlling the rear-com-
partment climate control using the front control
panel (
Ypage 145).
Setting the front-compartment airflow
using the front control panel
XTurn the SmartKey to position 2in the ignition
lock (Ypage 162).
XTo increase or reduce: press theK
rocker switch up or down.
or
XSet the airflow using the multimedia system
(see the separate operating instructions).
Setting the rear-compartment airflow
using the front control panel
XTurn the SmartKey to position 2in the ignition
lock (Ypage 162).
XPress the tor! rocker switch up or
down.
The climate control menu opens.
XSelect "Rear adjustment" in the air-condition-
ing setting bar (see the separate operating
instructions).
You can control the rear-compartment cli-
mate control using the front control panel or
via the multimedia system.
XTo increase or reduce: press theK
rocker switch up or down on the front control
panel.
or
XSet the airflow using the multimedia system
(see the separate operating instructions).
Setting the rear compartment airflow
using the rear control panel
XTurn the SmartKey to position 2in the ignition
lock (Ypage 162).
XTo increase or reduce: press rocker switch
K up or down (Ypage 141).
Activating or deactivating the syn-
chronization function
Climate control can be set centrally using the
synchronization function. The settings for tem-
perature, air distribution and airflow on the driv-
er's side are adopted for the front-passenger
side and the rear compartment (vehicles with
rear-compartment air conditioning).
XTo activate or deactivate: activate or deac-
tivate the synchronization function using the
multimedia system (see the separate operat-
ing instructions).
Vehicles with rear-compartment air condi-
tioning: the SYNCdisplay appears on the
rear-compartment display.
The synchronization function is deactivated:
Rif the settings for the front-passenger side are
changed
Rvehicles with rear-compartment air condition-
ing: the settings for the rear compartment are
changed
150Operating the climate control systems
Climate control
Page 163 of 438

Useful information
i
This Operator's Manual describes all models
and all standard and optional equipment of
your vehicle available at the time of publica-
tion of the Operator's Manual. Country-spe-
cific differences are possible. Please note
that your vehicle may not be equipped with all
features described. This also applies to
safety-related systems and functions.
iRead the information on qualified specialist
workshops (Ypage 28).
Notes on breaking-in a new vehicle
Important safety notes
The sensor system of some driving and driving
safety systems adjusts automatically while a
certain distance is being driven after the vehicle has been delivered or after repairs. Full system
effectiveness is not reached until the end of this
teach-in procedure.
New and replaced brake pads and discs only
reach their optimum braking effect after several hundred kilometers of driving. Compensate for
this by applying greater force to the brake pedal.
The first 1000 miles (1500 km)
The more you look after the engine when it is
new, the more satisfied you will be with its per-
formance in the future.
RYou should therefore drive at varying vehicle
and engine speeds for the first 1000 miles
(1500 km).
RAvoid heavy loads, e.g. driving at full throttle,during this period.
RWhen shifting gears manually, upshift in good
time, before the tachometer needle reaches
Ô of the way to the red area of the tachom-
eter.
RDo not manually shift to a lower gear to brake
the vehicle.
RTry to avoid depressing the accelerator pedal
beyond the point of resistance (kickdown).
RAll vehicles (except Mercedes-AMG vehi-
cles): ideally, for the first 1,000 miles
(1,500 km), drive in drive program E.Additional breaking-in notes for Mercedes-AMG
vehicles:
RDo not drive faster than 85 mph (140 km/h)
for the first 1,000 miles (1,500 km).
ROnly allow the engine to reach a maximum
engine speed of 4,500 rpm briefly.
RChange gear in good time.
RIdeally, for the first 1,000 miles (1,500 km),
drive in program C.
After 1000 miles (1500 km), you can increase
the engine speed gradually and accelerate the
vehicle to full speed.
You should also observe these notes on break-
ing in if the engine or parts of the drive train on
your vehicle have been replaced.
Always observe the maximum permissible
speed.
Driving
Important safety notes
GWARNING
Objects in the driver's footwell can restrict the pedal travel or obstruct a depressed pedal.
The operating and road safety of the vehicle is
jeopardized. There is a risk of an accident.
Make sure that all objects in the vehicle are
stowed correctly, and that they cannot enter
the driver's footwell. Install the floormats
securely and as specified in order to ensure
sufficient clearance for the pedals. Do not use
loose floormats and do not place floormats on
top of one another.
GWARNING
Unsuitable footwear can hinder correct usage of the pedals, e.g.:
Rshoes with thick soles
Rshoes with high heels
Rslippers
There is a risk of an accident.
Wear suitable footwear to ensure correct
usage of the pedals.
Driving161
Driving and parking
Z
Page 166 of 438
Starting the engine
Important safety notes
GWARNING
If children are left unsupervised in the vehicle,
they could:
Ropen the doors, thus endangering other
people or road users.
Rget out and disrupt traffic.
Roperate the vehicle's equipment.
Additionally, children could set the vehicle in
motion if, for example, they:
Rrelease the parking brake.
Rshifting the automatic transmission out of
park position P
RStart the engine.
There is a risk of an accident and injury.
When leaving the vehicle, always take the
SmartKey with you and lock the vehicle. Never
leave children or animals unattended in the
vehicle. Always keep the SmartKey out of
reach of children.
GWARNING
Combustion engines emit poisonous exhaust
gases such as carbon monoxide. Inhaling
these exhaust gases leads to poisoning. There
is a risk of fatal injury. Therefore never leave
the engine running in enclosed spaces with-
out sufficient ventilation.
GWARNING
Flammable materials introduced through
environmental influence or by animals can
ignite if in contact with the exhaust system or
parts of the engine that heat up. There is a risk
of fire.
Carry out regular checks to make sure that
there are no flammable foreign materials in
the engine compartment or in the exhaust
system.
General notes
During a cold start, the engine runs at higher
speeds to enable the catalytic converter to
reach its operating temperature. The sound of
the engine may change during this time.
Automatic transmission
XShift the transmission to position P
(Ypage 170).
The transmission position display in the mul-
tifunction display shows P(
Ypage 172).
You can start the engine in transmission posi-
tion Pand N.
Starting procedure with the SmartKey
To start the engine using the SmartKey instead
of the Start/Stop button, pull the Start/Stop
button out of the ignition lock.
XTurn the SmartKey to position 3in the ignition
lock and release it as soon as the engine is
running (
Ypage 162).
Starting procedure with the Start/Stop
button
The Start/Stop button can be used to start the
vehicle manually without inserting the SmartKey
into the ignition lock. The Start/Stop button
must be inserted in the ignition lock and the
SmartKey must be in the vehicle. This mode for
starting the engine operates independently of
the ECO start/stop automatic engine start func-
tion.
You can start the engine if a valid SmartKey is in
the vehicle. Always take the SmartKey with you
when leaving the vehicle, even if you only leave
it for a short time. Pay attention to the important
safety notes.
XDepress the brake pedal and keep it
depressed.
XPress the Start/Stop button once
(Ypage 162).
The engine starts.
Starting procedure via smartphone
Observe the important safety notes on starting
the engine (Ypage 164).
You can also start your engine via your smart-
phone from outside the vehicle. In this case, the
164Driving
Driving and parking
Page 177 of 438
All vehicles (except Mercedes-AMG vehi-
cles:)Mand the selected gear appear in the
multifunction display.
Further information on activating manual drive
program Mon PLUG-IN HYBRID vehicles
(
Ypage 250).
Shifting gears
If you pull on the left or right steering wheel
paddle shifter, the automatic transmission
switches to manual drive program Mfor a limi-
ted amount of time. Depending on which paddle
shifter is pulled, the automatic transmission
immediately shifts into the next gear down or
up, if permitted.
XTo shift up: pull the right-hand steering wheel
paddle shifter (Ypage 174).
The automatic transmission shifts up to the
next gear.
If the maximum engine speed on the currently
engaged gear is reached and you continue to
accelerate, the automatic transmission auto-
matically shifts up in order to prevent engine
damage.
Mercedes-AMG vehicles: the automatic
transmission will not shift up to the next gear
when the engine speed is very low.
XTo shift down: pull on the left-hand steering
wheel paddle shifter (Ypage 174).
The automatic transmission shifts down to
the next gear.
If the engine exceeds the maximum engine
speed when shifting down, the automatic
transmission protects against engine damage
by not shifting down.
Automatic down shifting occurs when coast-
ing.
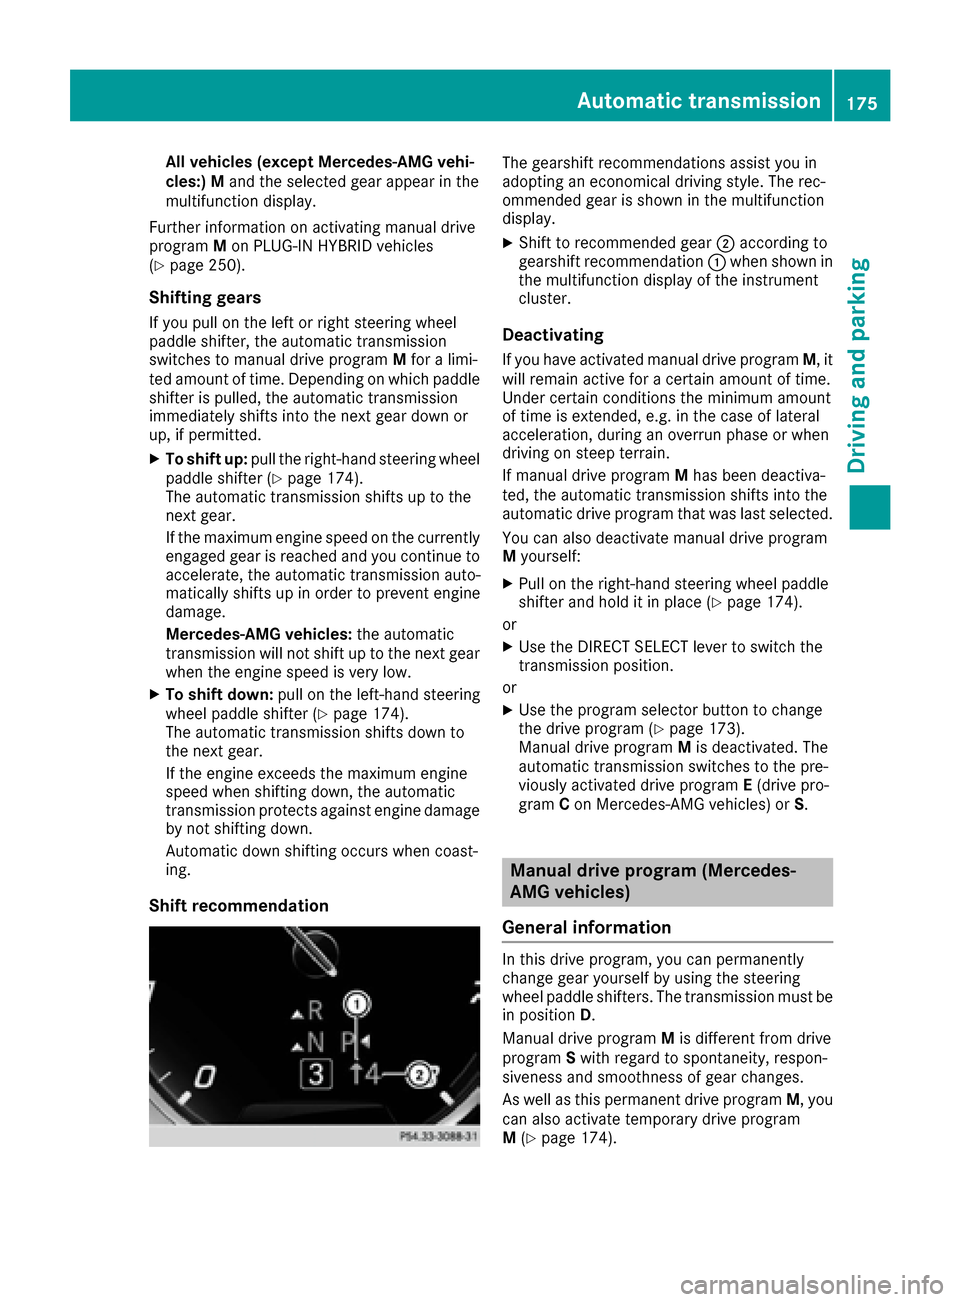
Shift recommendation
The gearshift recommendations assist you in
adopting an economical driving style. The rec-
ommended gear is shown in the multifunction
display.
XShift to recommended gear ;according to
gearshift recommendation :when shown in
the multifunction display of the instrument
cluster.
Deactivating
If you have activated manual drive program M, it
will remain active for a certain amount of time.
Under certain conditions the minimum amount
of time is extended, e.g. in the case of lateral
acceleration, during an overrun phase or when
driving on steep terrain.
If manual drive program Mhas been deactiva-
ted, the automatic transmission shifts into the
automatic drive program that was last selected.
You can also deactivate manual drive program
M yourself:
XPull on the right-hand steering wheel paddle
shifter and hold it in place (Ypage 174).
or
XUse the DIRECT SELECT lever to switch the
transmission position.
or
XUse the program selector button to change
the drive program (Ypage 173).
Manual drive program Mis deactivated. The
automatic transmission switches to the pre-
viously activated drive program E(drive pro-
gram Con Mercedes-AMG vehicles) or S.
Manual drive program (Mercedes-
AMG vehicles)
General information
In this drive program, you can permanently
change gear yourself by using the steering
wheel paddle shifters. The transmission must be
in position D.
Manual drive program Mis different from drive
program Swith regard to spontaneity, respon-
siveness and smoothness of gear changes.
As well as this permanent drive program M, you
can also activate temporary drive program
M (
Ypage 174).
Automatic transmission175
Driving and parking
Z
Page 196 of 438
RAccel.(evaluation of all acceleration pro-
cesses)
-The bar fills up: moderate acceleration,
especially at higher speeds
-The bar empties: sporty acceleration
RConstant(assessment of driving behavior at
all times)
-The bar fills up: constant speed and avoid-
ance of unnecessary acceleration and
deceleration
-The bar empties: fluctuations in speed
RCoasting(assessment of all deceleration
processes)
-The bar fills up: anticipatory driving, keep-
ing your distance and early release of the
accelerator. The vehicle can coast without
use of the brakes.
-The bar empties: frequent braking
An economical driving style specially requires
driving at moderate engine speeds.
To achieve a higher value in the categories
Accel.
and Constant,
Robserve the gearshift recommendations.
Rdrive in drive program E
On long journeys at a constant speed, e.g. on the
highway, only the bar for Constant
will change.
The ECO display summarizes the driving char-
acteristics from the start of the journey to its
completion. For this reason, the bars change
dynamically at the beginning of the journey. On
longer journeys, there are fewer changes. For
more dynamic changes, carry out a manual
reset.
For further information on the ECO display, see
(
Ypage 262).
Brakes
Important safety notes
GWARNING
If you shift down on a slippery road surface in an attempt to increase the engine's braking
effect, the drive wheels could lose their grip.
There is an increased danger of skidding and
accidents.
Do not shift down for additional engine brak-
ing on a slippery road surface.
Downhill gradients
!On long and steep gradients, you must
reduce the load on the brakes by shifting to a
lower gear in good time. This allows you to
take advantage of the engine's braking effect.
This helps you to avoid overheating the
brakes and wearing them out excessively.
When you take advantage of engine braking, a
drive wheel may not turn for some time, e.g.
on a slippery road surface. This could cause
damage to the drive train. This type of damage
is not covered by the Mercedes-Benz war-
ranty.
Heavy and light loads
GWARNING
If you rest your foot on the brake pedal while
driving, the braking system can overheat. This increases the stopping distance and can even
cause the braking system to fail. There is a
risk of an accident.
Never use the brake pedal as a footrest. Never
depress the brake pedal and the accelerator
pedal at the same time.
!Depressing the brake pedal constantly
results in excessive and premature wear to
the brake pads.
If the brakes have been subjected to a heavy
load, do not stop the vehicle immediately. Drive
on for a short while. This allows the airflow to
cool the brakes more quickly.
Wet roads
If you have driven for a long time in heavy rain
without braking, there may be a delayed reac-
tion from the brakes when braking for the first
time. This may also occur after the vehicle has
been washed or driven through deep water.
You have to depress the brake pedal more
firmly. Maintain a greater distance from the
vehicle in front.
After driving on a wet road or having the vehicle
washed, brake firmly while paying attention to
the traffic conditions. This will warm up the
brake discs, thereby drying them more quickly
and protecting them against corrosion.
194Driving tips
Driving and parking
Page 197 of 438
Limited braking performance on salt-
treated roads
If you drive on salted roads, a layer of salt resi-
due may form on the brake discs and brake
pads. This can result in a significantly longer
braking distance.
RIn order to prevent any salt build-up, apply the
brakes occasionally while paying attention to the traffic conditions.
RCarefully depress the brake pedal and the
beginning and end of a journey.
RMaintain a greater distance to the vehicle
ahead.
Servicing the brakes
!The brake fluid level may be too low, if:
Rif the red brake warning lamp lights up in
the instrument cluster and
Ryou hear a warning tone while the engine is
running
Observe additional warning messages in the
multifunction display.
The brake fluid level may be too low due to
brake pad wear or leaking brake lines.
Have the brake system checked immediately.
Consult a qualified specialist workshop to
arrange this.
!Vehicles with 4MATIC: function or per-
formance tests may only be carried out on a 2-
axle dynamometer. If you wish to operate the
vehicle on such a dynamometer, please con-
sult a qualified specialist workshop in
advance. You could otherwise damage the
drive train or the brake system.
!Vehicles with 4MATIC: the ESP®system
operates automatically. The engine and the
ignition must therefore be switched off (the
SmartKey must be in position 0or 1in the
ignition lock or the Start/Stop button must be
in position 0or 1) if the electric parking brake
is tested on a brake dynamometer.
Braking triggered automatically by ESP
®may
cause severe damage to the brake system.
!Vehicles without 4MATIC: the ESP®sys-
tem operates automatically. The engine and
the ignition must therefore be switched off
(the SmartKey must be in position 0or 1in the
ignition lock or the Start/Stop button must be
in position 0or 1) if:
Rthe electric parking brake is tested using a
brake dynamometer.
Rthe vehicle is towed with one axle raised.
Braking triggered automatically by ESP®may
cause severe damage to the brake system.
All checks and maintenance work on the brake
system must be carried out at a qualified spe-
cialist workshop.
Have brake pads installed and brake fluid
replaced at a qualified specialist workshop.
If the brake system has only been subject to
moderate loads, you should test the functional-
ity of your brakes at regular intervals.
Information on BAS (Brake Assist) (
Ypage 69)
and BAS PLUS (Brake Assist PLUS) (Ypage 69).
For safety reasons, Mercedes-Benz recom-
mends only installing the following brake disks
and brake pads/linings:
Rbrake disks that have been approved by
Mercedes-Benz
Rbrake pads/linings that have been approved
by Mercedes-Benz or that are of an equivalent
standard of quality
Other brake disks or brake pads/linings can
compromise the safety of your vehicle.
Always replace all brake disks and brake pads/
linings on an axle at the same time. Always
install new brake pads/linings when replacing
brake disks.
The vehicle is equipped with lightweight brake
disks to which the wheel assembly with rim and
threaded connection is matched.
The use of brake disks other than those
approved by Mercedes-Benz can change the
track width and is subject to approval, if appli-
cable.
Shoc
k-type loads when handling the brake
discs, such as when changing wheels, can lead
to a reduction in comfort when driving with light-
weight brake discs. Avoid shock-type loads on
the lightweight brake disks, particularly on the
brake plate.
Mercedes-Benz recommends that you only use
brake fluid that has been specially approved for
your vehicle by Mercedes-Benz, or which corre-
Driving tips195
Driving and parking
Z