2016 MERCEDES-BENZ S-Class SEDAN battery light
[x] Cancel search: battery lightPage 96 of 438
Trunk emergency release from the
inside
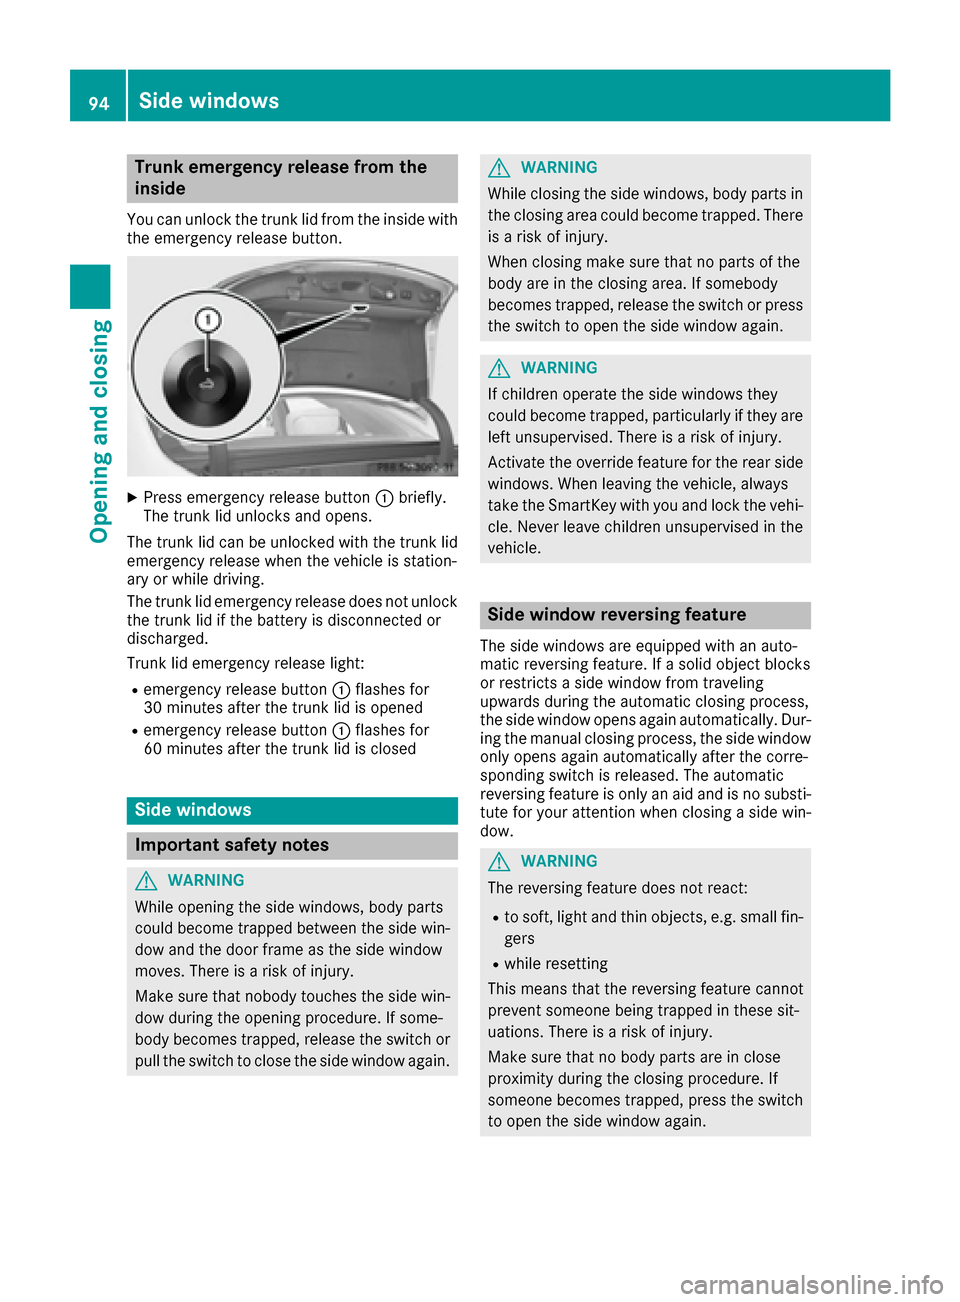
You can unlock the trunk lid from the inside with
the emergency release button.
XPress emergency release button :briefly.
The trunk lid unlocks and opens.
The trunk lid can be unlocked with the trunk lid
emergency release when the vehicle is station-
ary or while driving.
The trunk lid emergency release does not unlock
the trunk lid if the battery is disconnected or
discharged.
Trunk lid emergency release light:
Remergency release button :flashes for
30 minutes after the trunk lid is opened
Remergency release button :flashes for
60 minutes after the trunk lid is closed
Side windows
Important safety notes
GWARNING
While opening the side windows, body parts
could become trapped between the side win-
dow and the door frame as the side window
moves. There is a risk of injury.
Make sure that nobody touches the side win-
dow during the opening procedure. If some-
body becomes trapped, release the switch or
pull the switch to close the side window again.
GWARNING
While closing the side windows, body parts in
the closing area could become trapped. There is a risk of injury.
When closing make sure that no parts of the
body are in the closing area. If somebody
becomes trapped, release the switch or press
the switch to open the side window again.
GWARNING
If children operate the side windows they
could become trapped, particularly if they are left unsupervised. There is a risk of injury.
Activate the override feature for the rear side
windows. When leaving the vehicle, always
take the SmartKey with you and lock the vehi-
cle. Never leave children unsupervised in the
vehicle.
Side window reversing feature
The side windows are equipped with an auto-
matic reversing feature. If a solid object blocks
or restricts a side window from traveling
upwards during the automatic closing process,
the side window opens again automatically. Dur-
ing the manual closing process, the side windowonly opens again automatically after the corre-
sponding switch is released. The automatic
reversing feature is only an aid and is no substi-
tute for your attention when closing a side win-
dow.
GWARNING
The reversing feature does not react:
Rto soft, light and thin objects, e.g. small fin-
gers
Rwhile resetting
This means that the reversing feature cannot
prevent someone being trapped in these sit-
uations. There is a risk of injury.
Make sure that no body parts are in close
proximity during the closing procedure. If
someone becomes trapped, press the switch
to open the side window again.
94Side windows
Openin gan d closing
Page 121 of 438
Problems with the seat heating
ProblemPossible causes/consequences andMSolutions
The seat heating has
switched off prematurely
or cannot be switched
on.The on-board voltage is too low because too many electrical consum-
ers are switched on.
XSwitch off electrical consumers that you do not need, such as the
rear window defroster or interior lighting.
Once the battery is sufficiently charged, the seat heating can be
switched back on manually.
Switching the seat ventilation on/off
Front seats
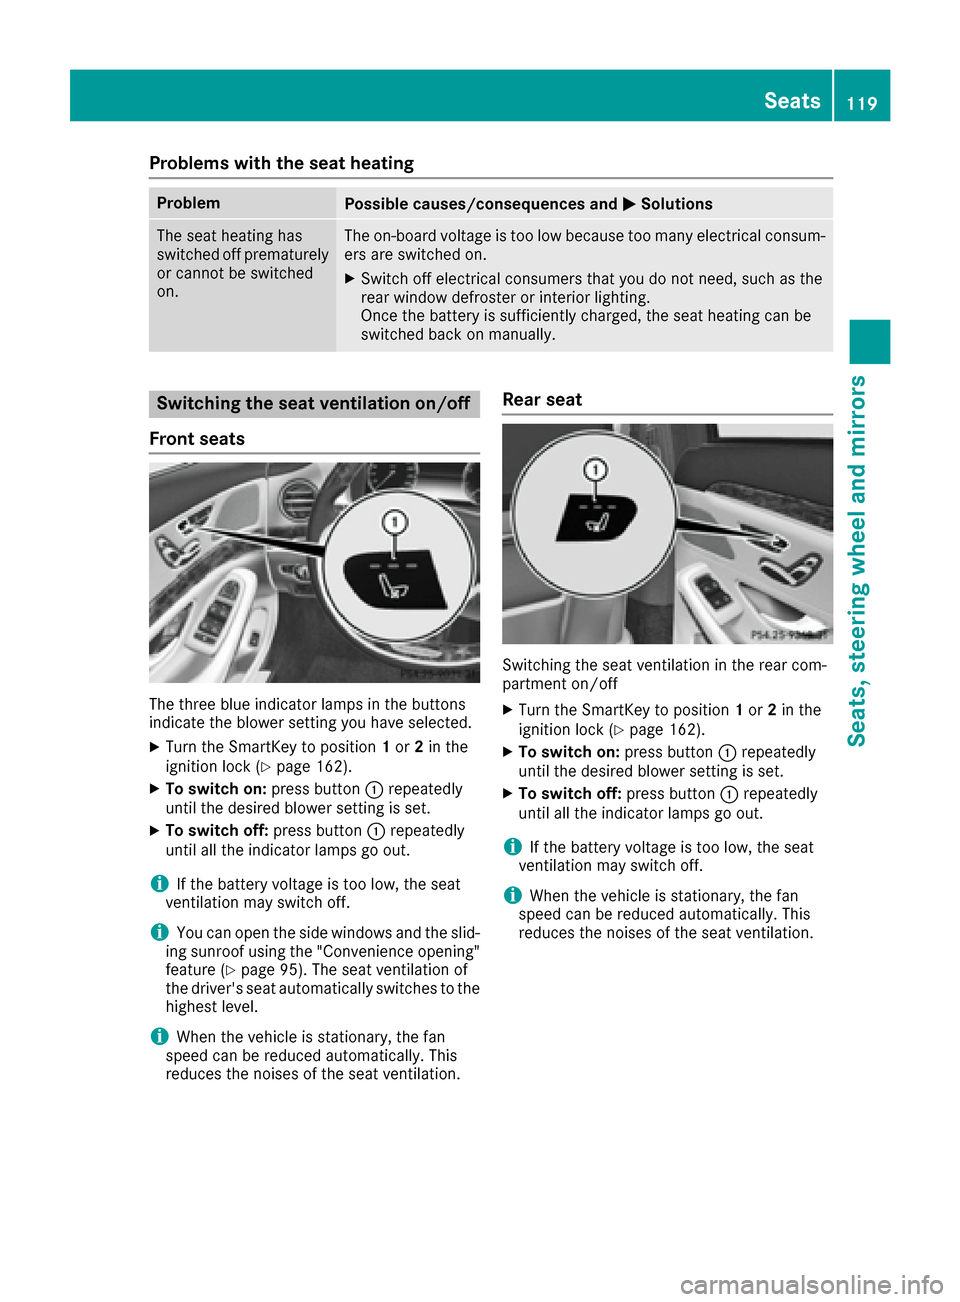
The three blue indicator lamps in the buttons
indicate the blower setting you have selected.
XTurn the SmartKey to position 1or 2in the
ignition lock (Ypage 162).
XTo switch on: press button:repeatedly
until the desired blower setting is set.
XTo switch off: press button:repeatedly
until all the indicator lamps go out.
iIf the battery voltage is too low, the seat
ventilation may switch off.
iYou can open the side windows and the slid-
ing sunroof using the "Convenience opening"
feature (
Ypage 95). The seat ventilation of
the driver's seat automatically switches to the
highest level.
iWhen the vehicle is stationary, the fan
speed can be reduced automatically. This
reduces the noises of the seat ventilation.
Rear seat
Switching the seat ventilation in the rear com-
partment on/off
XTurn the SmartKey to position 1or 2in the
ignition lock (Ypage 162).
XTo switch on: press button:repeatedly
until the desired blower setting is set.
XTo switch off: press button:repeatedly
until all the indicator lamps go out.
iIf the battery voltage is too low, the seat
ventilation may switch off.
iWhen the vehicle is stationary, the fan
speed can be reduced automatically. This
reduces the noises of the seat ventilation.
Seats119
Seats, steering wheel and mirrors
Z
Page 122 of 438
Problems with the seat ventilation
ProblemPossible causes/consequences andMSolutions
The seat ventilation has
switched off prematurely
or cannot be switched
on.The on-board voltage is too low because too many electrical consum-
ers are switched on.
XSwitch off electrical consumers that you do not need, such as the
rear window defroster or interior lighting.
Once the battery is sufficiently charged, the seat ventilation can be
switched back on.
Steering wheel
Important safety notes
GWARNING
You could lose control of your vehicle if you do the following while driving:
Radjust the driver's seat, head restraint,
steering wheel or mirrors
Rfasten the seat belt
There is a risk of an accident.
Adjust the driver's seat, head restraint, steer-
ing wheel and mirror and fasten your seat belt before starting the engine.
GWARNING
Children could injure themselves if they
adjust the steering wheel. There is a risk of
injury.
When leaving the vehicle, always take the
SmartKey with you and lock the vehicle. Never
leave children unsupervised in the vehicle.
The electrically adjustable steering wheel can
still be adjusted when there is no SmartKey in
the ignition lock.
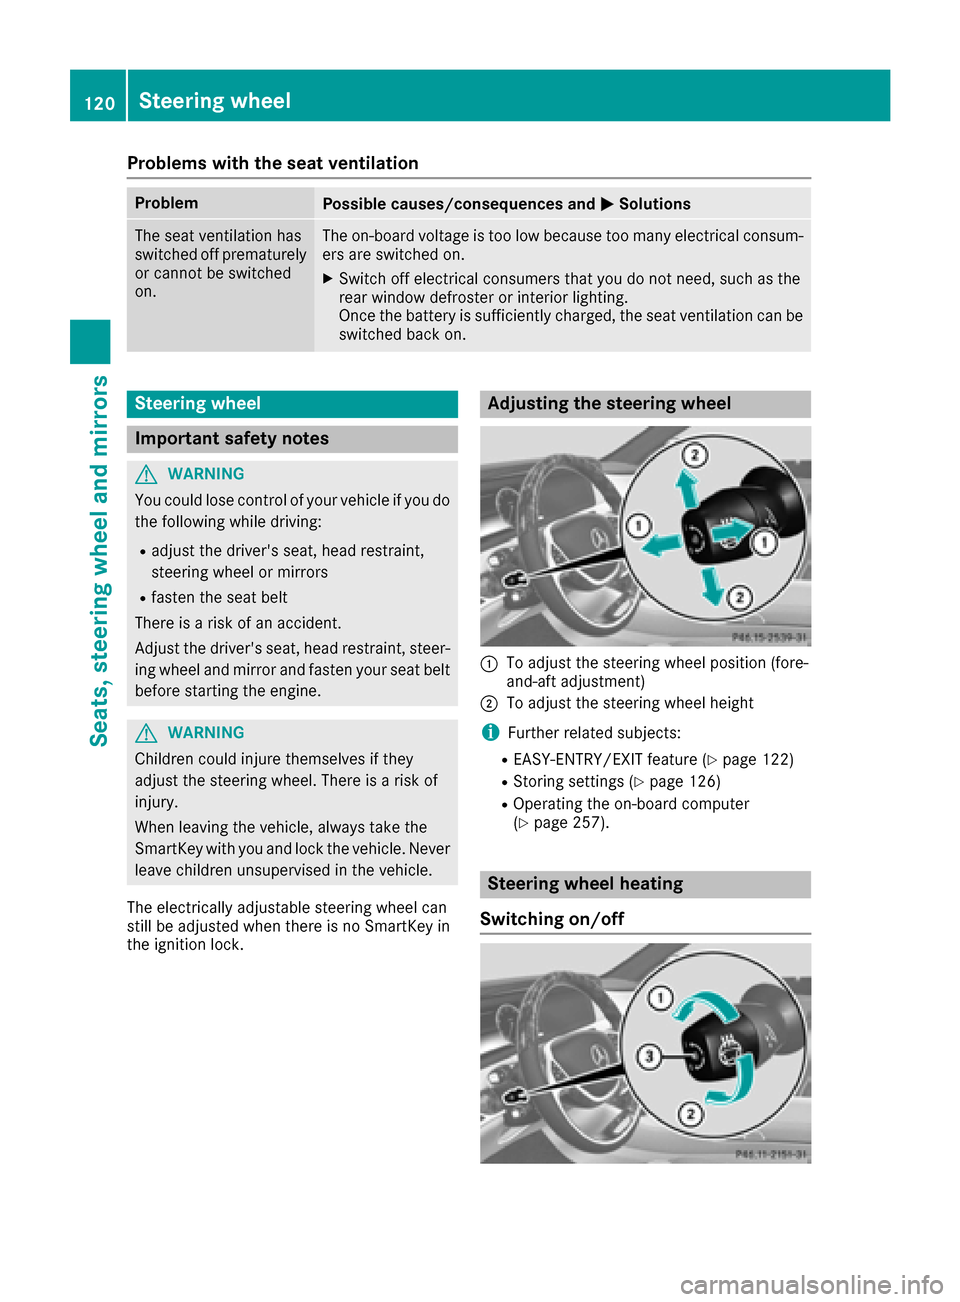
Adjusting the steering wheel
:To adjust the steering wheel position (fore-
and-aft adjustment)
;To adjust the steering wheel height
iFurther related subjects:
REASY-ENTRY/EXIT feature (Ypage 122)
RStoring settings (Ypage 126)
ROperating the on-board computer
(Ypage 257).
Steering wheel heating
Switching on/off
120Steering wheel
Seats, steering wheel and mirrors
Page 126 of 438
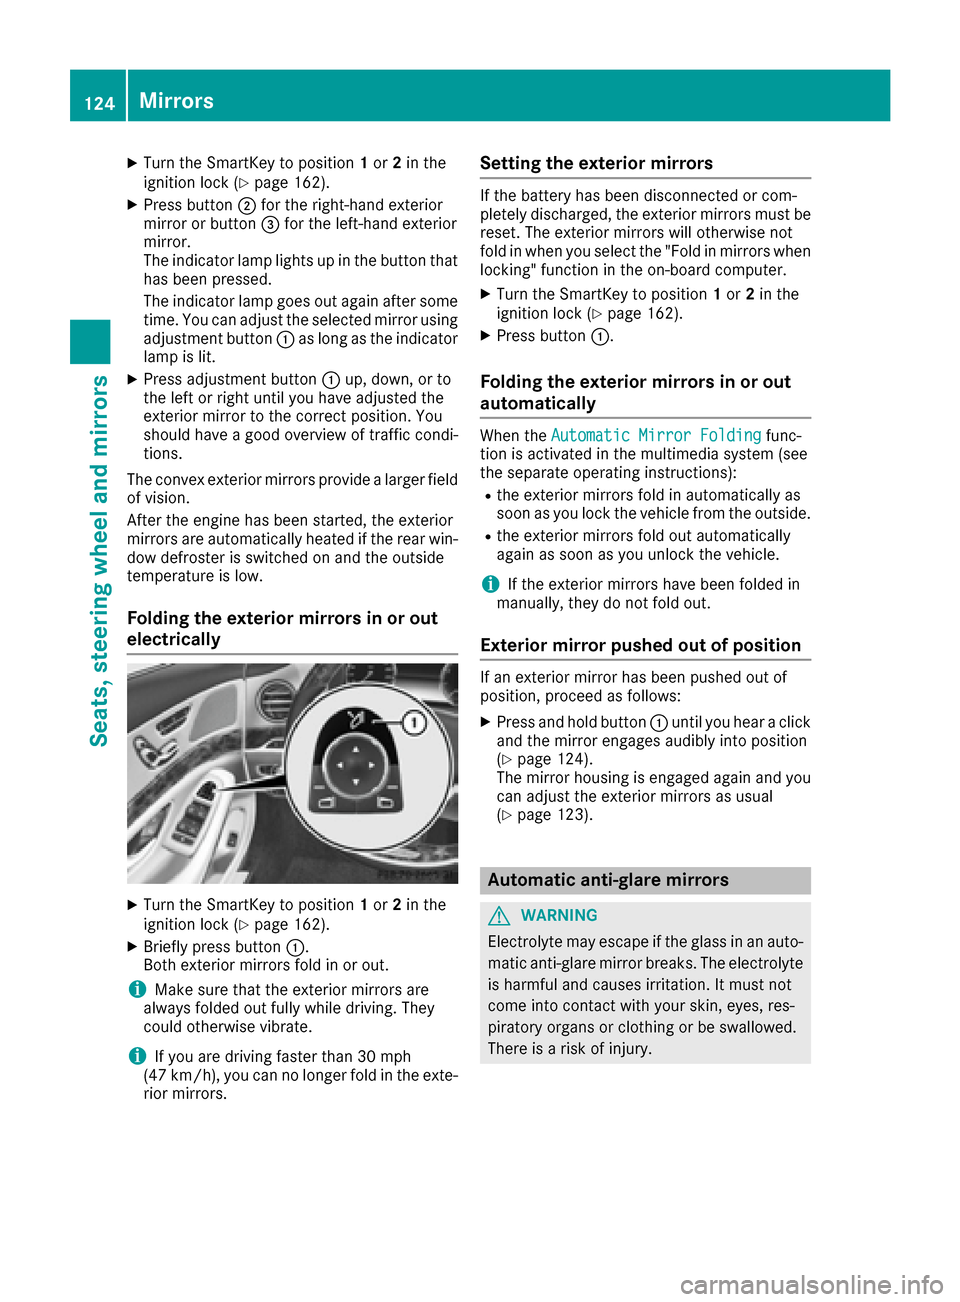
XTurn the SmartKey to position1or 2in the
ignition lock (Ypage 162).
XPress button ;for the right-hand exterior
mirror or button =for the left-hand exterior
mirror.
The indicator lamp lights up in the button that
has been pressed.
The indicator lamp goes out again after some
time. You can adjust the selected mirror using
adjustment button :as long as the indicator
lamp is lit.
XPress adjustment button :up, down, or to
the left or right until you have adjusted the
exterior mirror to the correct position. You
should have a good overview of traffic condi-
tions.
The convex exterior mirrors provide a larger field
of vision.
After the engine has been started, the exterior
mirrors are automatically heated if the rear win-
dow defroster is switched on and the outside
temperature is low.
Folding the exterior mirrors in or out
electrically
XTurn the SmartKey to position 1or 2in the
ignition lock (Ypage 162).
XBriefly press button :.
Both exterior mirrors fold in or out.
iMake sure that the exterior mirrors are
always folded out fully while driving. They
could otherwise vibrate.
iIf you are driving faster than 30 mph
(47 km/h), you can no longer fold in the exte-
rior mirrors.
Setting the exterior mirrors
If the battery has been disconnected or com-
pletely discharged, the exterior mirrors must be
reset. The exterior mirrors will otherwise not
fold in when you select the "Fold in mirrors when
locking" function in the on-board computer.
XTurn the SmartKey to position 1or 2in the
ignition lock (Ypage 162).
XPress button :.
Folding the exterior mirrors in or out
automatically
When theAutomatic Mirror Foldingfunc-
tion is activated in the multimedia system (see
the separate operating instructions):
Rthe exterior mirrors fold in automatically as
soon as you lock the vehicle from the outside.
Rthe exterior mirrors fold out automatically
again as soon as you unlock the vehicle.
iIf the exterior mirrors have been folded in
manually, they do not fold out.
Exterior mirror pushed out of position
If an exterior mirror has been pushed out of
position, proceed as follows:
XPress and hold button :until you hear a click
and the mirror engages audibly into position
(
Ypage 124).
The mirror housing is engaged again and you
can adjust the exterior mirrors as usual
(
Ypage 123).
Automatic anti-glare mirrors
GWARNING
Electrolyte may escape if the glass in an auto-
matic anti-glare mirror breaks. The electrolyte
is harmful and causes irritation. It must not
come into contact with your skin, eyes, res-
piratory organs or clothing or be swallowed.
There is a risk of injury.
124Mirrors
Seats, steering wheel and mirrors
Page 133 of 438

time Running Lightsfunction must be
switched on via the on-board computer
(
Ypage 274).
If the engine is running and you turn the light
switch to the TorL position, the manual
settings take precedence over the daytime run-
ning lamps.
à is the favored light switch setting. The light
setting is automatically selected according to
the brightness of the ambient light (exception:
poor visibility due to weather conditions such as
fog, snow or spray):
RSmartKey in position 1in the ignition lock: the
parking lamps are switched on or off auto-
matically depending on the brightness of the
ambient light.
RWith the engine running: if you have switched
on the DaytimeRunningLightsfunction in
the on-board computer, the daytime running
lamps or the parking lamps and low-beam
headlamps are switched on or off automati-
cally depending on the brightness of the ambi- ent light.
XTo switch on the automatic headlamps:
turn the light switch to the Ãposition.
Low-beam headlamps
Even if the light sensor does not detect that it is
dark, the parking lamps and low-beam head-
lamps switch on when the ignition is switched on
and the light switch is set to the Lposition.
This is a particularly useful function in the event
of rain and fog.
XTo switch on the low-beam headlamps:
turn the SmartKey in the ignition lock to posi- tion 2or start the engine.
XTurn the light switch to the Lposition.
The green Lindicator lamp in the instru-
ment cluster lights up.
Parking lamps
!If the battery charge is very low, the parking
lamps or standing lamps are automatically
switched off to enable the next engine start.
Always park your vehicle safely and suffi-
ciently lit according to legal standards. Avoid
using the parking lamps Tover a period of
several hours. If possible, switch on the right-
hand X or left-hand Wstanding lamp.
XTo switch on: turn the light switch to the
T position.
The green Tindicator lamp in the instru-
ment cluster lights up.
Standing lamps
Switching on the standing lamps ensures the
corresponding side of the vehicle is illuminated.
XTo switch on the standing lamps: the
SmartKey should not be in the ignition lock or
it should be in position 0.
XTurn the light switch to the W(left-hand
side of the vehicle) or X((right-hand side
of the vehicle) position.
Combination switch
Turn signal
:High-beam headlamps
;Turn signal, right
=High-beam flasher
?Turn signal, left
XTo indicate briefly: press the combination
switch briefly to the pressure point in the
direction of arrow ;or?.
The corresponding turn signal flashes three
times.
XTo indicate: press the combination switch
beyond the pressure point in the direction of
arrow ;or?.
Exterior lighting131
Lights and windshield wipers
Z
Page 137 of 438

XTo switch on both sides of the vehicle:
press button=.
Reading lamp :and the make-up lamp light
up.
XTo switch off: press button=.
Reading lamp :and the make-up lamp go
out.
Interior lighting control
General notes
In order to prevent the vehicle's battery from
discharging, the interior lighting functions are
automatically deactivated after some time
except when the SmartKey is in position 2in the
ignition lock.
The color, brightness, zone and display lighting
for the ambient lighting are set using the multi-
media system (see the separate operating
instructions).
The interior lighting control can be operated
using the front overhead control panel.
Automatic interior lighting control
XTo switch on or off: press the|button.
When the automatic interior lighting control is
activated, the button is flush with the over-
head control panel.
The interior lighting automatically switches on if
you:
Runlock the vehicle
Ropen a door
Rremove the SmartKey from the ignition lock
The interior light is activated for a short while
when the SmartKey is removed from the ignition
lock. This delayed switch-off can be adjusted via the multimedia system (see the separate oper-
ating instructions).
Manual interior lighting control
XTo switch the front interior lighting on/
off: press the cbutton.
XTo switch the rear compartment interior
lighting on/off: press theubutton.
XTo switch the reading lamp on/off: press
the p button.
Crash-responsive emergency lighting
The interior lighting is activated automatically if
the vehicle is involved in an accident.
XTo switch off the crash-responsive emer-
gency lighting: press the hazard warning
lamp button.
or
XLock and then unlock the vehicle using the
SmartKey.
Replacing bulbs
The front and rear light clusters of your vehicle
are equipped with LED light bulbs. Do not
replace the bulbs yourself. Contact a qualified
specialist workshop which has the necessary
specialist knowledge and tools to carry out the
work required.
Lamps are an important aspect of vehicle safety.
You must therefore make sure that these func-
tion correctly at all times. Have the headlamp
setting checked regularly.
Windshield wipers
Switching the windshield wipers
on/off
!
Do not operate the windshield wipers when
the windshield is dry, as this could damage
the wiper blades. Moreover, dust that has col-
lected on the windshield can scratch the glass
if wiping takes place when the windshield is
dry.
If it is necessary to switch on the windshield
wipers in dry weather conditions, always use
washer fluid when operating the windshield
wipers.
!If the windshield wipers leave smears on the
windshield after the vehicle has been washed
in an automatic car wash, wax or other resi-
dues may be the reason for this. Clean the
windshield using washer fluid after washing
the vehicle in an automatic car wash.
!Vehicles with a rain sensor: if the windshield
becomes dirty in dry weather conditions, the
windshield wipers may be activated inadver-
tently. This could then damage the windshield wiper blades or scratch the windshield.
Windshield wipers135
Lights and windshield wiper s
Z
Page 153 of 438
Defrosting thewindshield
You can use this function to defrost th ewind-
shield or to clear afogge dup windshield or fron t
sid ewindows on th einside.
Switc hof fth e"Windshield defrosting" function
as soo nas th ewindshield is clear again .
XTurnth eSmartKey to position 2in th eignition
loc k (Ypage 162).
XTo switch on: press the¬ rocker switch
on th efron tcontro luni tup or down .
The indicator lamp in th e¬ rocker switch
lights up.
The climat econtro lsyste mswitches to th e
followin gfunctions:
Rhig hairflow
Rhig htemperature
Rair distribution to th ewindshield and fron t
sid ewindows
Rair-recirculation mode of f
Rwindshield heatingon
Rcoolin gwit hair dehumidification
XTo deactivate :press th e¬ rocker switch
up or down .
The indicator lamp in th e¬ rocker switch
goe sout .The previously selecte dsetting sare
restored .Air-recirculation mode remain s
deactivated.
or
XPress th eà rocker switch up or down .
or
XUse th et or! rocker switch to cal lup
th emultimedia syste mclimat econtro lmenu.
Defrosting th ewindows
Windows fogged up on th einside
XActivat eth e"Coolin gwit hair dehumidifica-
tion "function wit hth eÁ rocker switch .
or
XActivat eth e"Coolin gwit hair dehumidifica-
tion "function via th emultimedia syste m(se e
th eseparat eoperatin ginstructions).
XSwitc hon automatic mode usin gth eÃ
rocker switch .
XIf thewindows continue to fo gup, activat eth e
"Windshield defrosting" function usin gth e ¬
rocker switch .The windshield heatin gis
switched on .
iYou should only selec tthis setting until th e
windshield is clear again .
Windows fogged up on th eoutsid e
XActivat eth ewindshield wipers .
XSwitchon automatic mode usin gth eÃ
rocker switch .
iIf you clean th ewindows regularly, they do
no tfo gup so quickly.
Rea rwindow defroster
General notes
The rea rwindow defroster has ahig hcurren t
draw. You should therefore switch it of fas soo n
as th erea rwindow is clear .Otherwise ,th erea r
window defroster switches of fautomatically
after severa lminutes.
If th ebattery voltage is to olow, th erea rwindow
defroster may switch off.
Activating or deactivating
XTur nth eSmartKey to position 2in th eignition
loc k (Ypage 162).
XPress th e¤ rocker switch up or down .
The indicator lamp in th e¤ rocker switch
lights up or goe sout .
Operating the climate control systems151
Climate control
Page 154 of 438
Problems with the rear window defroster
ProblemPossible causes/consequences andMSolutions
The rear window
defroster has deactiva-
ted prematurely or can-
not be activated.The battery has not been sufficiently charged.
XSwitch off any consumers that are not required, e.g. reading lamps,
interior lighting or the seat heating.
When the battery is sufficiently charged, the rear window defroster
can be activated again.
Switching air-recirculation mode
on/off
General notes
You can also temporarily deactivate the flow of
fresh air manually if unpleasant odors are enter-
ing the vehicle from outside. The air already
inside the vehicle will then be recirculated.
If you switch on air-recirculation mode, the win-
dows can fog up more quickly, in particular at
low temperatures. Only use air-recirculation
mode briefly to prevent the windows from fog-
ging up.
Activating/deactivating
XTurn the SmartKey to position 2in the ignition
lock (Ypage 162).
XTo activate: press thegrocker switch up
or down.
The indicator lamp in the grocker switch
lights up.
Air-recirculation mode switches on automati-
cally:
Rat high outside temperatures
Rat high levels of pollution
Rin a tunnel
The indicator lamp in the grocker switch is
not lit when automatic air-recirculation mode is
activated. Outside air is added after about
30 minutes.
XTo deactivate: press thegrocker switch
up or down.
The indicator lamp in the grocker switch
goes out. Air-recirculation mode deactivates automati-
cally:
Rafter approximately five minutes at outside
temperatures below approximately 41 ‡
(5 †)
Rafter approximately five minutes if cooling
with air dehumidification is deactivated
Rafter approximately 30 minutes at outside
temperatures above approximately 41 ‡
(5 †) if the "Cooling with air dehumidifica-
tion" function is activated
Switching the residual heat on or off
General notes
Vehicles with rear-compartment climate
control: once the engine is switched off, it is
possible to make use of the residual heat of the
engine to continue heating or ventilating the
rear and front compartment of the vehicle for
approximately 15 minutes. If the "Residual heat"
function is set for only the front or only the rear compartment, it is possible to continue heating
or ventilating for approximately 30 minutes.
Vehicles without rear-compartment climate
control: once the engine is switched off, it is
possible to make use of the residual heat of the
engine to continue heating or ventilating the
front compartment of the vehicle for approx-
imately 30 minutes.
The heating or ventilation time depends on the
temperature that has been set.
152Operating the climate control systems
Climate control