2016 MERCEDES-BENZ GLC COUPE instrument cluster
[x] Cancel search: instrument clusterPage 290 of 389
Warning/
indicator
lamp
N N
Signal type
Possible causes/consequences and M
MSolutions ?
N
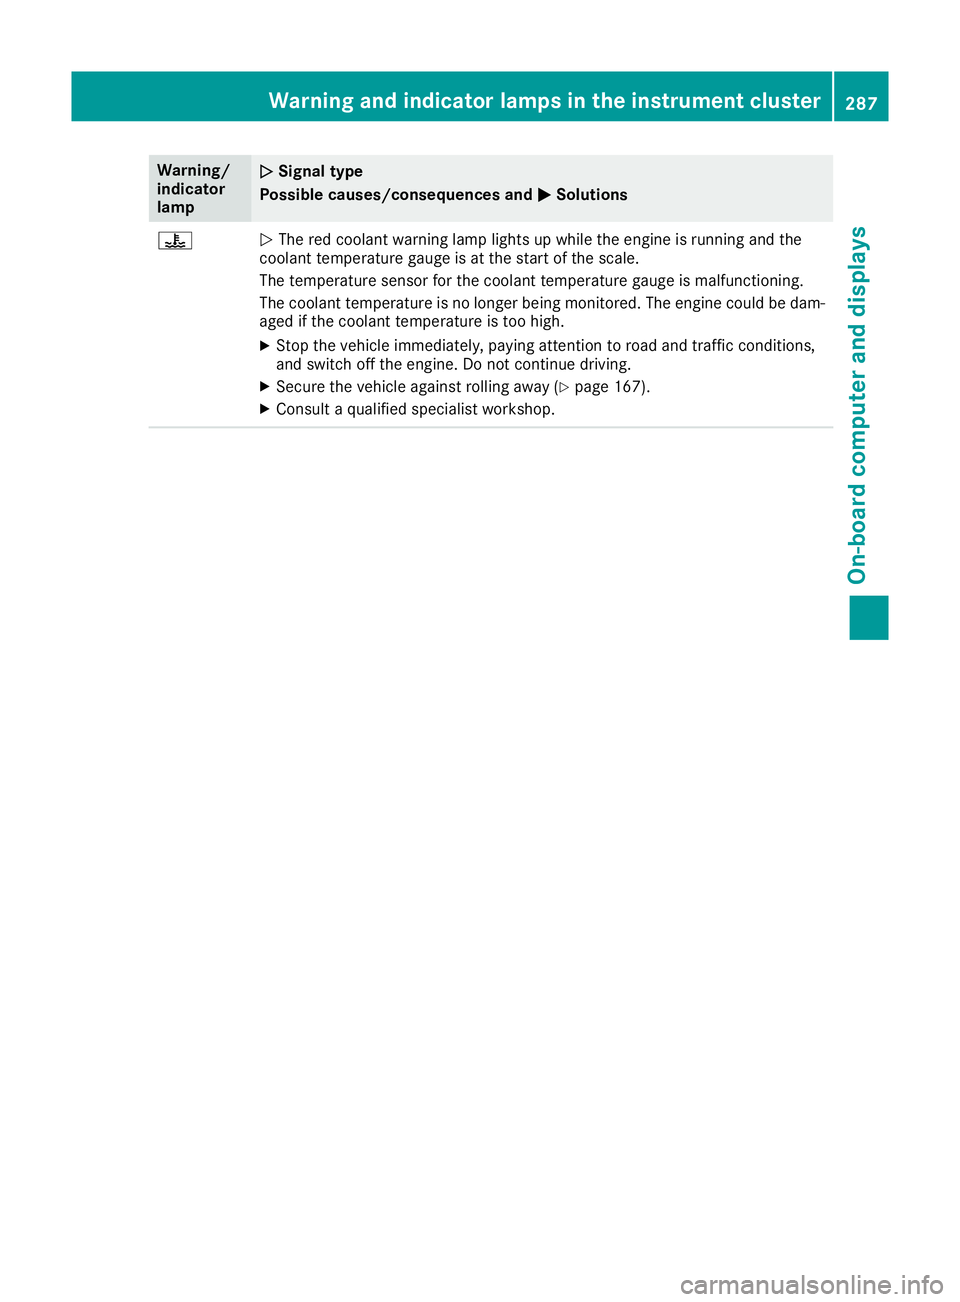
The red coolant warning lamp lights up while the engine is running and the
coolant temperature gauge is at the start of the scale.
The temperature sensor for the coolant temperature gauge is malfunctioning.
The coolant temperature is no longer being monitored. The engine could be dam-
aged if the coolant temperature is too high.
X Stop the vehicle immediately, paying attention to road and traffic conditions,
and switch off the engine. Do not continue driving.
X Secure the vehicle against rolling away (Y page 167).
X Consult a qualified specialist workshop. Warning and indicator lamps in the instrument cluster
287On-board computer and displays Z
Page 291 of 389
Warning/
indicator
lamp
N N
Signal type
Possible causes/consequences and M
M Solutions ?
N
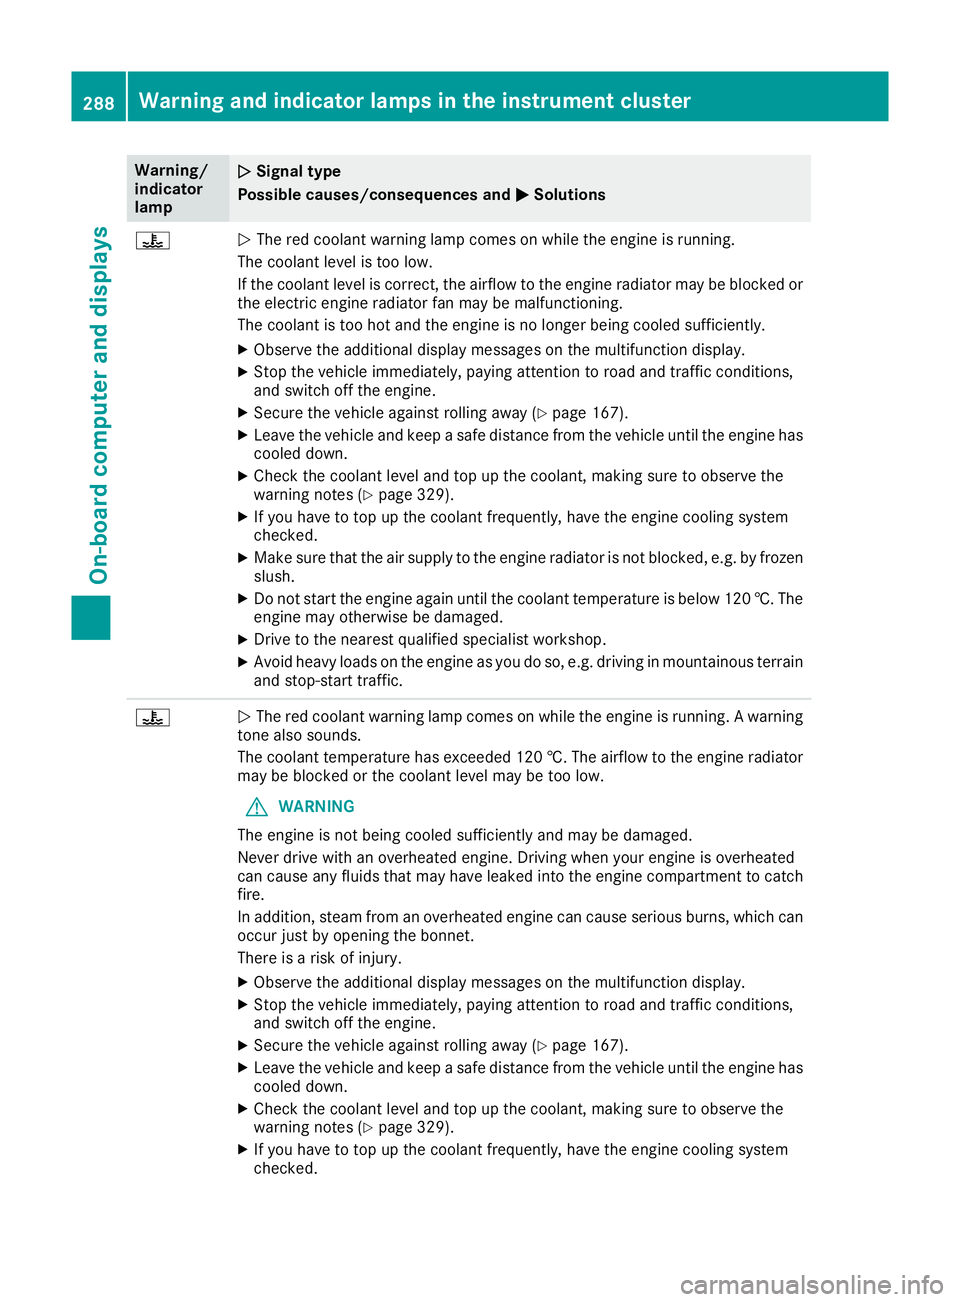
The red coolant warning lamp comes on while the engine is running.
The coolant level is too low.
If the coolant level is correct, the airflow to the engine radiator may be blocked or the electric engine radiator fan may be malfunctioning.
The coolant is too hot and the engine is no longer being cooled sufficiently.
X Observe the additional display messages on the multifunction display.
X Stop the vehicle immediately, paying attention to road and traffic conditions,
and switch off the engine.
X Secure the vehicle against rolling away (Y page 167).
X Leave the vehicle and keep a safe distance from the vehicle until the engine has
cooled down.
X Check the coolant level and top up the coolant, making sure to observe the
warning notes (Y page 329).
X If you have to top up the coolant frequently, have the engine cooling system
checked.
X Make sure that the air supply to the engine radiator is not blocked, e.g. by frozen
slush.
X Do not start the engine again until the coolant temperature is below 120 †. The
engine may otherwise be damaged.
X Drive to the nearest qualified specialist workshop.
X Avoid heavy loads on the engine as you do so, e.g. driving in mountainous terrain
and stop-start traffic. ?
N
The red coolant warning lamp comes on while the engine is running. A warning
tone also sounds.
The coolant temperature has exceeded 120 †. The airflow to the engine radiator
may be blocked or the coolant level may be too low.
G WARNING
The engine is not being cooled sufficiently and may be damaged.
Never drive with an overheated engine. Driving when your engine is overheated
can cause any fluids that may have leaked into the engine compartment to catch fire.
In addition, steam from an overheated engine can cause serious burns, which can
occur just by opening the bonnet.
There is a risk of injury.
X Observe the additional display messages on the multifunction display.
X Stop the vehicle immediately, paying attention to road and traffic conditions,
and switch off the engine.
X Secure the vehicle against rolling away (Y page 167).
X Leave the vehicle and keep a safe distance from the vehicle until the engine has
cooled down.
X Check the coolant level and top up the coolant, making sure to observe the
warning notes (Y page 329).
X If you have to top up the coolant frequently, have the engine cooling system
checked. 288
Warning and indicator lamps in the instrument clusterOn-board computer and displays
Page 292 of 389
Warning/
indicator
lamp
N N
Signal type
Possible causes/consequences and M
MSolutions X
Make sure that the air supply to the engine radiator is not blocked, e.g. by frozen
slush.
X If the coolant temperature is below 120 †, you can continue driving to the
nearest qualified specialist workshop.
X Avoid heavy loads on the engine as you do so, e.g. driving in mountainous terrain
and stop-start traffic. Driving systems
Warning/
indicator
lamp
N N
Signal type
Possible causes/consequences and M
MSolutions ·
N
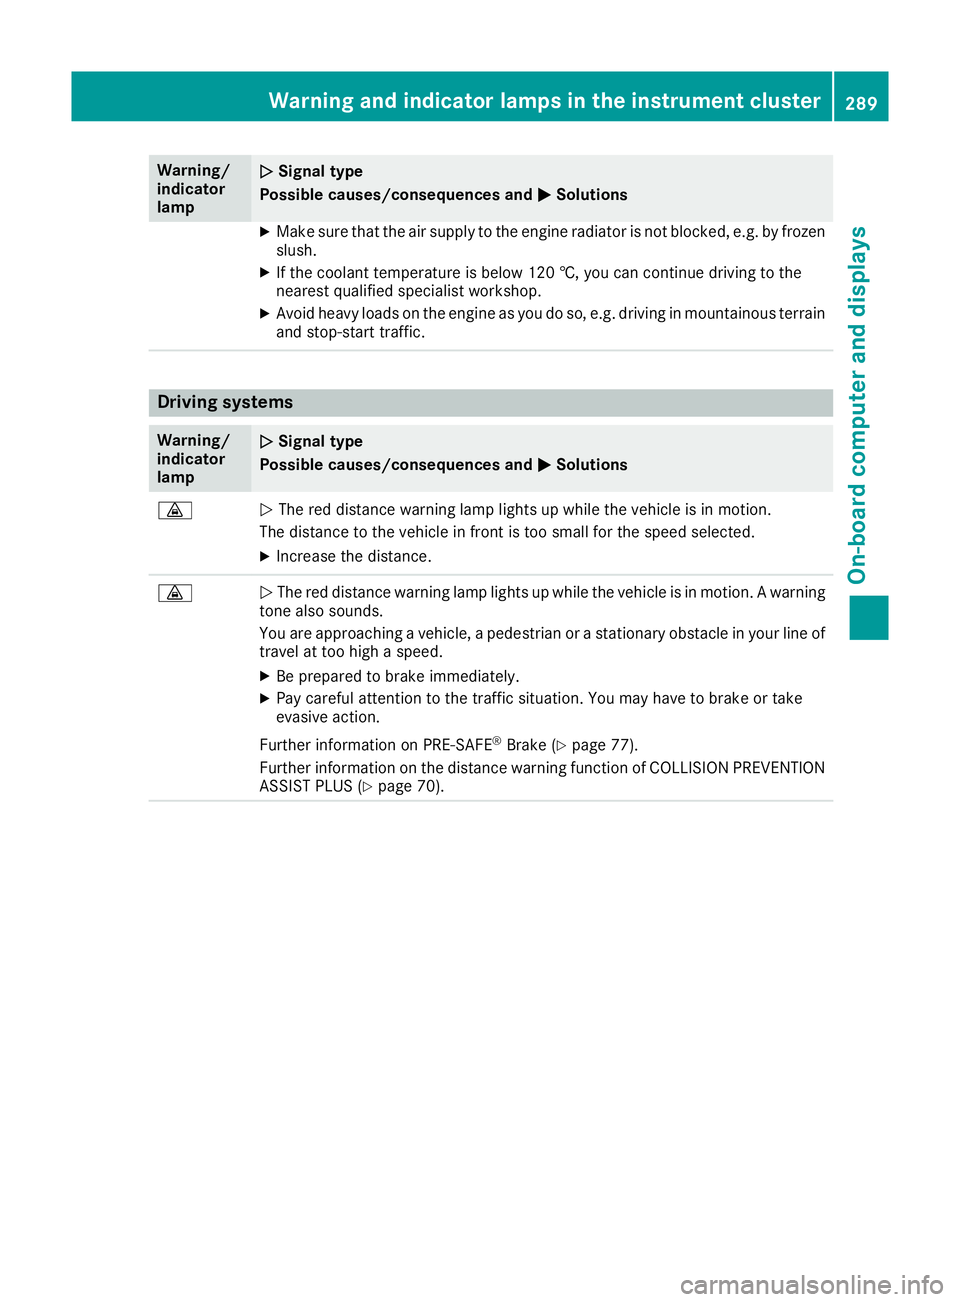
The red distance warning lamp lights up while the vehicle is in motion.
The distance to the vehicle in front is too small for the speed selected.
X Increase the distance. ·
N
The red distance warning lamp lights up while the vehicle is in motion. A warning
tone also sounds.
You are approaching a vehicle, a pedestrian or a stationary obstacle in your line of travel at too high a speed.
X Be prepared to brake immediately.
X Pay careful attention to the traffic situation. You may have to brake or take
evasive action.
Further information on PRE ‑SAFE®
Brake (Y page 77).
Further information on the distance warning function of COLLISION PREVENTION ASSIST PLUS (Y page 70). Warning and indicator lamps in the instrument cluster
289On-board computer and displays Z
Page 293 of 389
Tyres
Warning/
indicator
lamp
N N
Signal type
Possible causes/consequences and M
MSolutions h
N
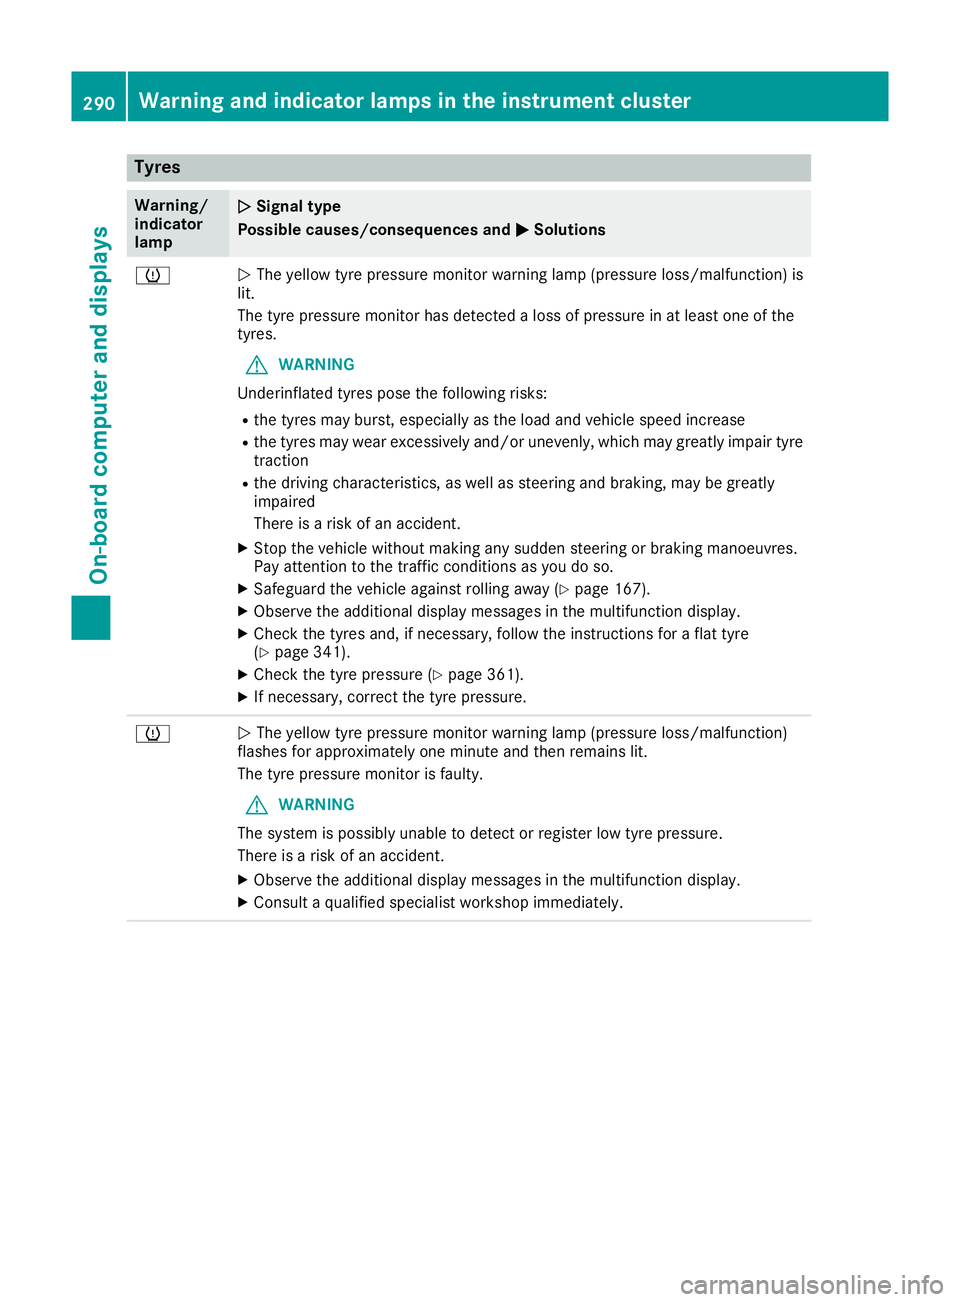
The yellow tyre pressure monitor warning lamp (pressure loss/malfunction) is
lit.
The tyre pressure monitor has detected a loss of pressure in at least one of the
tyres.
G WARNING
Underinflated tyres pose the following risks:
R the tyres may burst, especially as the load and vehicle speed increase
R the tyres may wear excessively and/or unevenly, which may greatly impair tyre
traction
R the driving characteristics, as well as steering and braking, may be greatly
impaired
There is a risk of an accident.
X Stop the vehicle without making any sudden steering or braking manoeuvres.
Pay attention to the traffic conditions as you do so.
X Safeguard the vehicle against rolling away (Y page 167).
X Observe the additional display messages in the multifunction display.
X Check the tyres and, if necessary, follow the instructions for a flat tyre
(Y page 341).
X Check the tyre pressure (Y page 361).
X If necessary, correct the tyre pressure. h
N
The yellow tyre pressure monitor warning lamp (pressure loss/malfunction)
flashes for approximately one minute and then remains lit.
The tyre pressure monitor is faulty.
G WARNING
The system is possibly unable to detect or register low tyre pressure.
There is a risk of an accident.
X Observe the additional display messages in the multifunction display.
X Consult a qualified specialist workshop immediately. 290
Warning and indicator lamps in the instrument clusterOn-board computer and displays
Page 294 of 389
Vehicle
Warning/
indicator
lamp
N N
Signal type
Possible causes/consequences and M
MSolutions Ð
N
The red power steering warning lamp is lit while the engine is running.
The power steering assistance is faulty.
A warning tone also sounds.
G WARNING
You will need to use more force to steer.
There is a risk of an accident.
X Check whether you are able to apply the extra force required.
If you are able to steer safely:
X Drive on carefully.
X Consult a qualified specialist workshop immediately.
If you are unable to steer safely:
X Do not drive on.
X Consult a qualified specialist workshop. Warning and indicator lamps in the instrument cluster
291On-board computer and displays Z
Page 313 of 389
Folding the rear seat backrest back
!
Make sure that the seat belt does not
become trapped when folding the rear seat
backrest back. Otherwise, it could be dam-
aged. Left- and right-hand seat backrest:
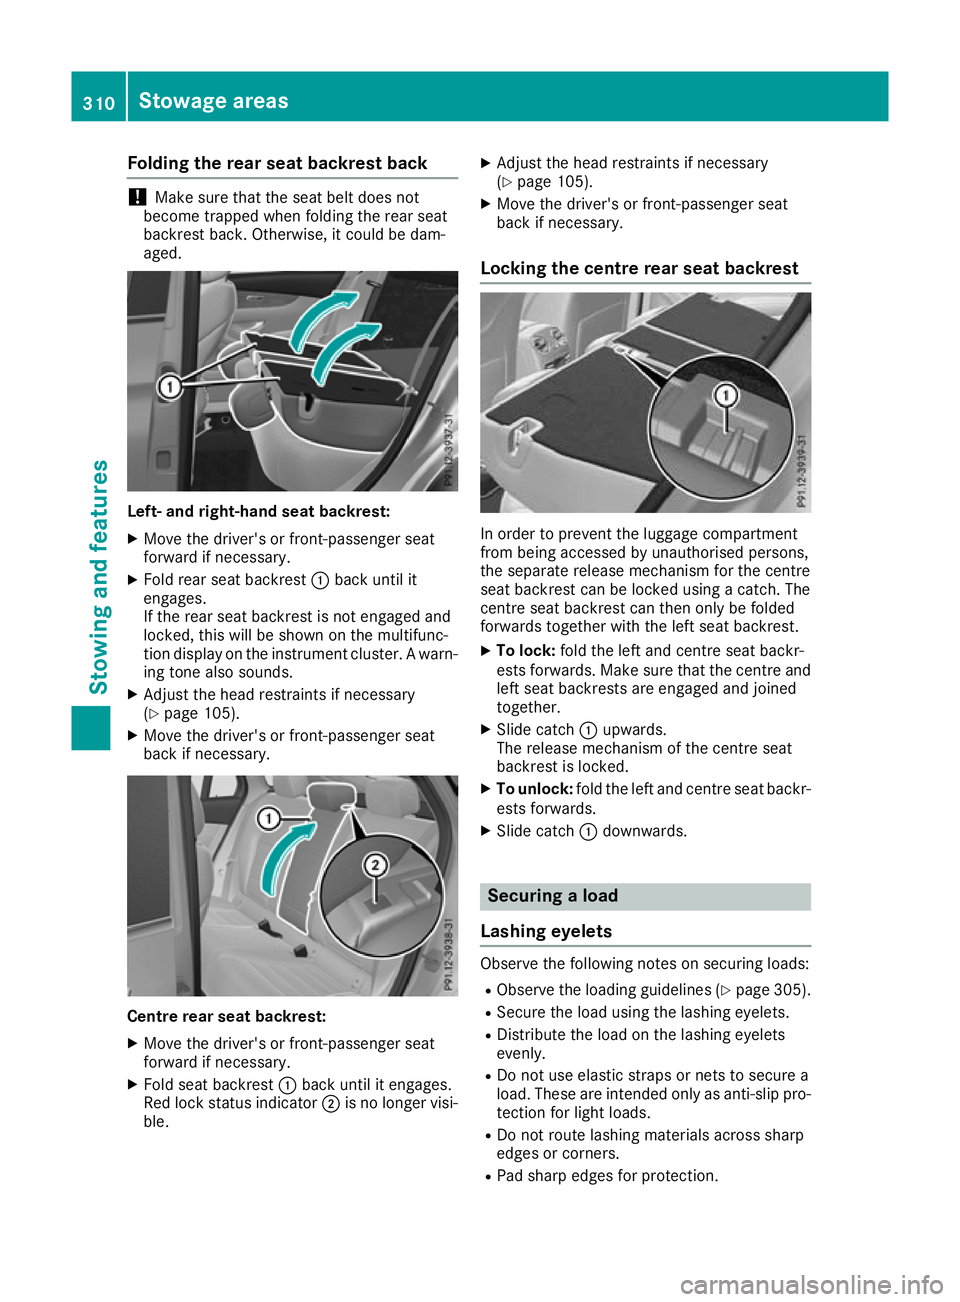
X Move the driver's or front-passenger seat
forward if necessary.
X Fold rear seat backrest :back until it
engages.
If the rear seat backrest is not engaged and
locked, this will be shown on the multifunc-
tion display on the instrument cluster. A warn- ing tone also sounds.
X Adjust the head restraints if necessary
(Y page 105).
X Move the driver's or front-passenger seat
back if necessary. Centre rear seat backrest:
X Move the driver's or front-passenger seat
forward if necessary.
X Fold seat backrest :back until it engages.
Red lock status indicator ;is no longer visi-
ble. X
Adjust the head restraints if necessary
(Y page 105).
X Move the driver's or front-passenger seat
back if necessary.
Locking the centre rear seat backrest In order to prevent the luggage compartment
from being accessed by unauthorised persons,
the separate release mechanism for the centre
seat backrest can be locked using a catch. The
centre seat backrest can then only be folded
forwards together with the left seat backrest.
X To lock: fold the left and centre seat backr-
ests forwards. Make sure that the centre and left seat backrests are engaged and joined
together.
X Slide catch :upwards.
The release mechanism of the centre seat
backrest is locked.
X To unlock: fold the left and centre seat backr-
ests forwards.
X Slide catch :downwards. Securing a load
Lashing eyelets Observe the following notes on securing loads:
R Observe the loading guidelines (Y page 305).
R Secure the load using the lashing eyelets.
R Distribute the load on the lashing eyelets
evenly.
R Do not use elastic straps or nets to secure a
load. These are intended only as anti-slip pro-
tection for light loads.
R Do not route lashing materials across sharp
edges or corners.
R Pad sharp edges for protection. 310
Stowage areasStowing and featu
res
Page 332 of 389
cap, you could be scalded if hot coolant
sprays out. There is a risk of injury.
Let the engine cool down before you open the cap. Wear gloves and eye protection. Open
the cap slowly to release the pressure. G
WARNING
If you open the bonnet while the engine is
overheating or while there is a fire in the
engine compartment, you could come into
contact with hot gases or other leaking ser-
vice products. There is a danger of injury.
Allow an overheating engine to cool down
before opening the bonnet. If there is a fire in the engine compartment, leave the bonnet
closed and notify the fire brigade.
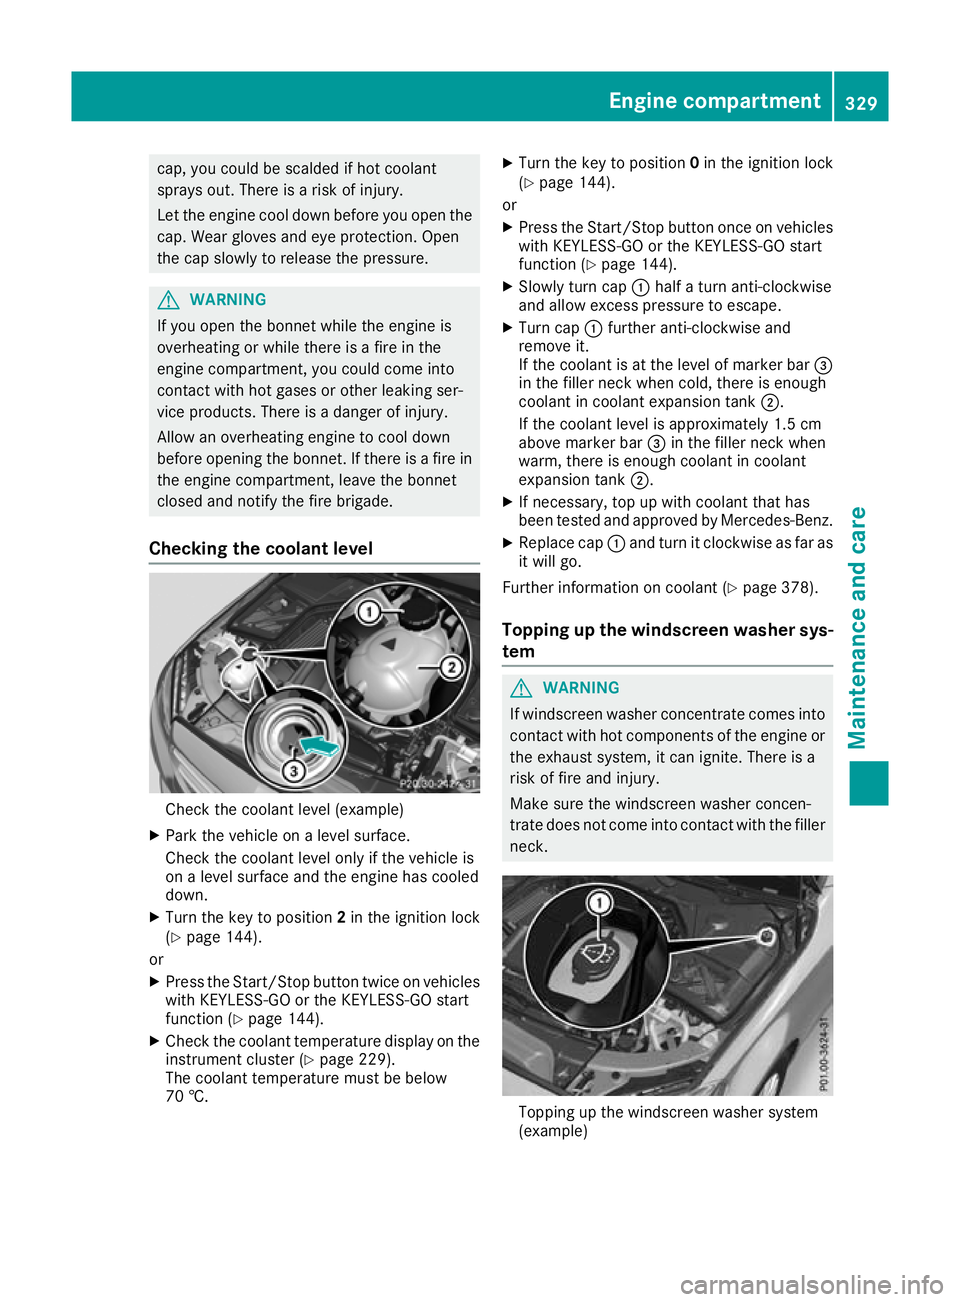
Checking the coolant level Check the coolant level (example)
X Park the vehicle on a level surface.
Check the coolant level only if the vehicle is
on a level surface and the engine has cooled
down.
X Turn the key to position 2in the ignition lock
(Y page 144).
or
X Press the Start/Stop button twice on vehicles
with KEYLESS-GO or the KEYLESS-GO start
function (Y page 144).
X Check the coolant temperature display on the
instrument cluster (Y page 229).
The coolant temperature must be below
70 †. X
Turn the key to position 0in the ignition lock
(Y page 144).
or X Press the Start/Stop button once on vehicles
with KEYLESS-GO or the KEYLESS-GO start
function (Y page 144).
X Slowly turn cap :half a turn anti-clockwise
and allow excess pressure to escape.
X Turn cap :further anti-clockwise and
remove it.
If the coolant is at the level of marker bar =
in the filler neck when cold, there is enough
coolant in coolant expansion tank ;.
If the coolant level is approximately 1.5 cm
above marker bar =in the filler neck when
warm, there is enough coolant in coolant
expansion tank ;.
X If necessary, top up with coolant that has
been tested and approved by Mercedes-Benz.
X Replace cap :and turn it clockwise as far as
it will go.
Further information on coolant (Y page 378).
Topping up the windscreen washer sys-
tem G
WARNING
If windscreen washer concentrate comes into contact with hot components of the engine or
the exhaust system, it can ignite. There is a
risk of fire and injury.
Make sure the windscreen washer concen-
trate does not come into contact with the filler neck. Topping up the windscreen washer system
(example) Engine compartment
329Maintenance and care Z
Page 346 of 389
inhale TIREFIT fumes. Keep tyre sealant away
from children. There is a risk of injury.
If you come into contact with the tyre sealant,
observe the following:
R Rinse off the tyre sealant from your skin
immediately with water.
R If the tyre sealant comes into contact with
your eyes, immediately rinse them thor-
oughly with clean water.
R If tyre sealant is swallowed, immediately
rinse your mouth out thoroughly and drink
plenty of water. Do not induce vomiting,
and seek medical attention immediately.
R Immediately change out of clothing which
has come into contact with tyre sealant.
R If an allergic reaction occurs, seek medical
attention immediately.
! After use, excess tyre sealant may run out of
the filler hose. This could cause stains.
Therefore, place the tyre sealant bottle with
filler hose in the plastic bag which is con-
tained the TIREFIT kit. H
Environmental note
Have the used tyre sealant bottle disposed of
professionally, e.g. at a qualified specialist
workshop.
! Do not operate the tyre inflation compres-
sor for longer than ten minutes at a time with- out a break. It may otherwise overheat.
The tyre inflation compressor can be oper-
ated again once it has cooled down.
Comply with the manufacturer's safety instruc-
tions on the sticker on the tyre inflation com-
pressor.
Using the TIREFIT kit X
Do not remove any foreign objects that have
penetrated the tyre, e.g. screws or nails.
X Remove the tyre sealant bottle, the accom-
panying TIREFIT sticker and the tyre inflation
compressor from the stowage well under-
neath the luggage compartment floor
(Y page 340). X
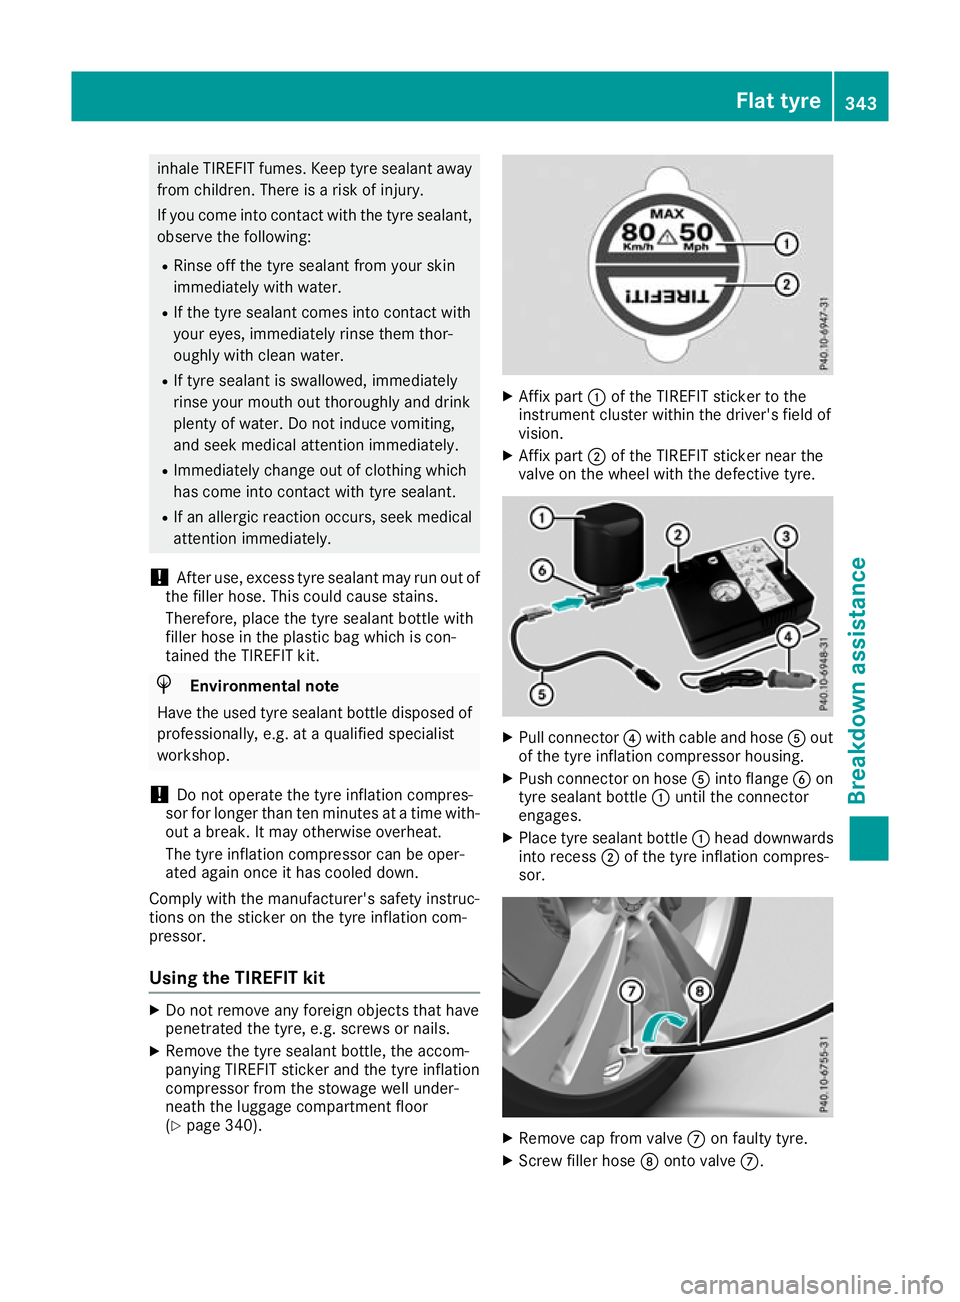
Affix part :of the TIREFIT sticker to the
instrument cluster within the driver's field of
vision.
X Affix part ;of the TIREFIT sticker near the
valve on the wheel with the defective tyre. X
Pull connector ?with cable and hose Aout
of the tyre inflation compressor housing.
X Push connector on hose Ainto flange Bon
tyre sealant bottle :until the connector
engages.
X Place tyre sealant bottle :head downwards
into recess ;of the tyre inflation compres-
sor. X
Remove cap from valve Con faulty tyre.
X Screw filler hose Donto valve C. Flat tyre
343Breakdown assistance Z