2016 MERCEDES-BENZ GLC-Class sensor
[x] Cancel search: sensorPage 383 of 418

Checking tire pressures manually
To determine and set the correct tire pres-
sure, proceed as follows:
XRemove the valve cap of the tire that is to
be checked.
XPress the tire pressure gauge securely onto
the valve.
XRead the tire pressure and compare it to
the recommended value on the Tire and
Loading Information placard or the tire
pressure table (
Ypage 377).
XIf the tire pressure is too low, increase the
tire pressure to the recommended value.
XIf the tire pressure is too high, release air.
To do so, press down the metal pin in the
valve, using the tip of a pen for example.
Then check the tire pressure again using
the tire pressure checker.
XScrew the valve cap onto the valve.
XRepeat these steps for the other tires.
Tire pressure monitor
General notes
If a tire pressure monitor is installed, the vehi-
cle's wheels have sensors that monitor the
tire pressures in all four tires. The tire pres-
sure monitor warns you if the pressure drops
in one or more of the tires. The tire pressure
monitor only functions if the corresponding
sensors are installed in all wheels.
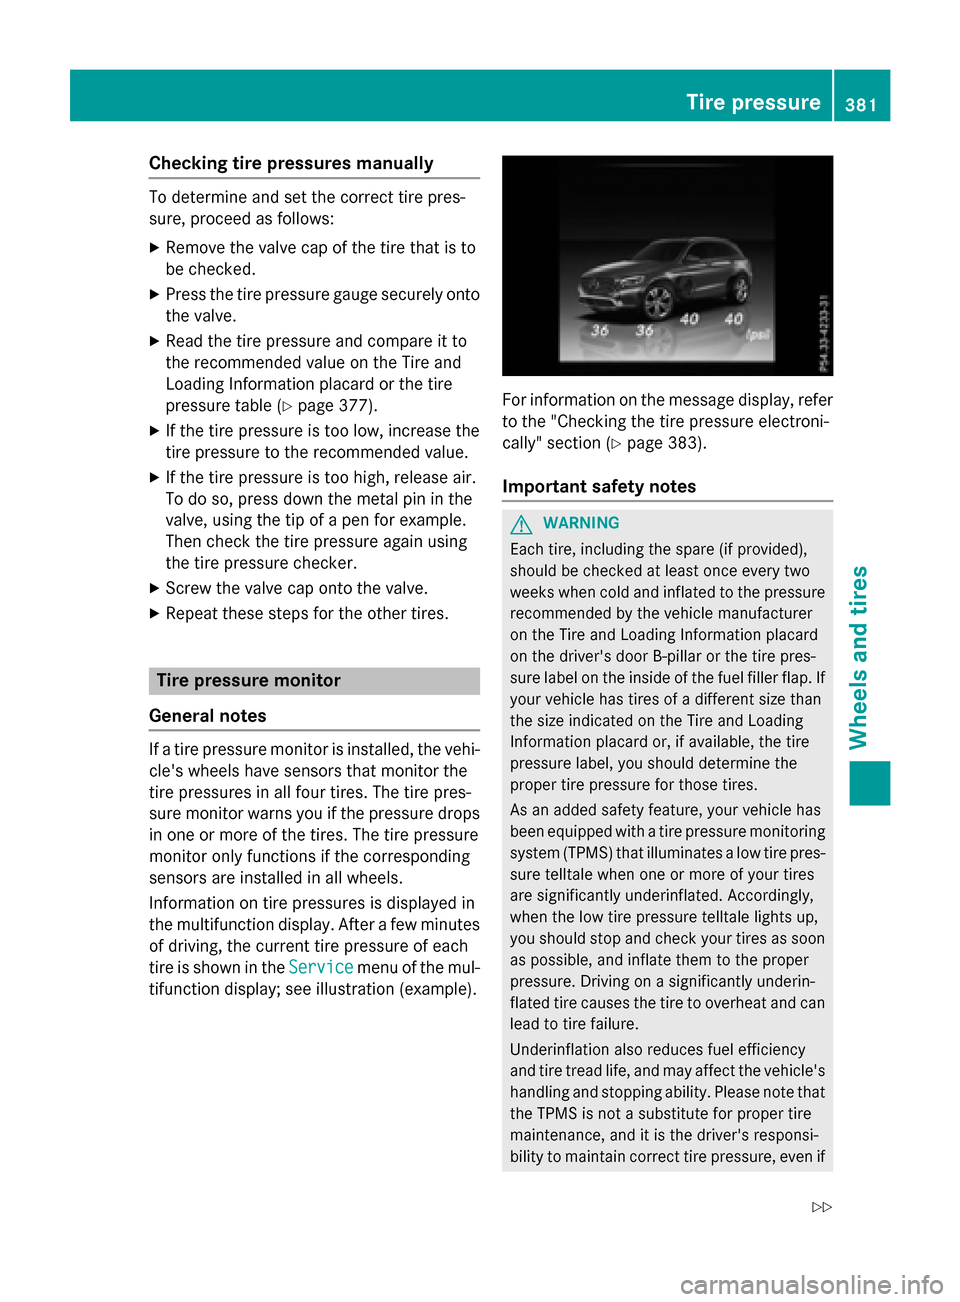
Information on tire pressures is displayed in
the multifunction display. After a few minutes
of driving, the current tire pressure of each
tire is shown in the Service
menu of the mul-
tifunction display; see illustration (example).
For information on the message display, refer
to the "Checking the tire pressure electroni-
cally" section (
Ypage 383).
Important safety notes
GWARNING
Each tire, including the spare (if provided),
should be checked at least once every two
weeks when cold and inflated to the pressure recommended by the vehicle manufacturer
on the Tire and Loading Information placard
on the driver's door B-pillar or the tire pres-
sure label on the inside of the fuel filler flap. If
your vehicle has tires of a different size than
the size indicated on the Tire and Loading
Information placard or, if available, the tire
pressure label, you should determine the
proper tire pressure for those tires.
As an added safety feature, your vehicle has
been equipped with a tire pressure monitoring
system (TPMS) that illuminates a low tire pres-
sure telltale when one or more of your tires
are significantly underinflated. Accordingly,
when the low tire pressure telltale lights up,
you should stop and check your tires as soon
as possible, and inflate them to the proper
pressure. Driving on a significantly underin-
flated tire causes the tire to overheat and can
lead to tire failure.
Underinflation also reduces fuel efficiency
and tire tread life, and may affect the vehicle's
handling and stopping ability. Please note thatthe TPMS is not a substitute for proper tire
maintenance, and it is the driver's responsi-
bility to maintain correct tire pressure, eve n if
Tire pressure381
Wheels and tires
Z
Page 385 of 418

Checking the tire pressure electroni-
cally
XMake sure that the SmartKey is in position2 in the ignition lock (
Ypage 153).
XUse ò on the steering wheel to call up
the list of menus.
XPress 9or: on the steering wheel
to select the Service
menu.
XPress theabutton.
XPress 9or: to select Tire Pres‐
sure.
XPress the abutton.
The current tire pressure of each tire is
shown in the multifunction display.
If the vehicle was parked for longer than
20 minutes, the following message appears:
Tire pressure will be displayed
after driving a few minutes.
After a teach-in process, the tire pressure
monitor automatically detects new wheels or
new sensors. As long as a clear allocation of
the tire pressure value to the individual
wheels is not possible, the Tire Pressure
Monitor Activemessage is shown instead
of the tire pressure display. The tire pressures are already being monitored.
Tire pressure monitor warning mes-
sages
If the tire pressure monitor detects a pressure
loss in one or more tires, a warning message
is shown in the multifunction display. The yel- low tire pressure warning lamp then lights up.
RIf the Please Correct Tire Pressure
message appears in the multifunction dis-
play, the tire pressure in at least one tire is
too low. The tire pressure must be correc-
ted when the opportunity arises.
RIf theCheckTiresmessage appears in the
multifunction display, the tire pressure in at
least one tire has dropped significantly. The
tires must be checked.
RIf the Warning Tire Malfunctionmes-
sage appears in the multifunction display, the tire pressure in at least one tire has
dropped suddenly. The tires must be
checked.
Observe the instructions and safety notes in
the display messages in the "Tires" section
(
Ypage 285).
If the wheel positions on the vehicle are rota-
ted, the tire pressures may be displayed for
the wrong positions for a short time. This is
rectified after a few minutes of driving, and
the tire pressures are displayed for the cor-
rect positions.
Restarting the tire pressure monitor
When you restart the tire pressure monitor, all
existing warning messages are deleted and
the warning lamps go out. The monitor uses
the currently set tire pressures as the refer-
ence values for monitoring. In most cases, the tire pressure monitor will automatically
detect the new reference values after you
have changed the tire pressure. However, you
can also define reference values manually as
described here. The tire pressure monitor
then monitors the new tire pressure values.
XSet the tire pressure to the value recom-
mended for the corresponding driving sit-
uation on the Tire and Loading Informationplacard on the driver's side
B-pillar (
Ypage 377).
You can find more tire pressure values for
various operating conditions in the tire
pressure table inside the fuel filler flap
(
Ypage 377).
XMake sure that the tire pressure is correct
on all four wheels.
XMake sure that the SmartKey is in position 2 in the ignition lock (
Ypage 153).
XUse ò on the steering wheel to call up
the list of menus.
XPress 9or: on the steering wheel
to select the Service
menu.
XPress theabutton.
XPress 9or: to select Tire Pres‐
sure.
Tire pressure383
Wheels and tires
Z
Page 401 of 418

Lowering the vehicle
GWARNING
The wheels could work loose if the wheel nuts and bolts are not tightened to the specified
tightening torque. There is a risk of accident.
Have the tightening torque immediately
checked at a qualified specialist workshop
after a wheel is changed.
XTurn the crank of the jack counter-clock-
wise until the vehicle is once again standing
firmly on the ground.
XPlace the jack to one side.
XTighten the wheel bolts evenly in a cross-
wise pattern in the sequence indicated ( :
to A). The specified tightening torque is
96 lb-f t(130 Nm).
XTurn the jack back to its initial position.
XStow the jack and the rest of the tire-
change tool kit in the cargo compartment
again.
XCheck the tire pressure of the newly moun-
ted wheel and adjust it if necessary.
Observe the recommended tire pressure
(
Ypage 377).
When you are driving with the emergency
spare wheel mounted, the tire pressure mon-
itor cannot function reliably. Only restart the
tire pressure monitor when the defective
wheel has been replaced with a new wheel.
All mounted wheels must be equipped with
functioning sensors for the tire pressure mon-
itor.
Wheel and tire combinations
General notes
!
For safety reasons, Mercedes-Benz rec-
ommends that you only use tires and
wheels which have been approved by
Mercedes-Benz specifically for your vehi-
cle.
These tires have been specially adapted for
use with the control systems, such as ABS
or ESP
®, and are marked as follows:
RMO = Mercedes-Benz Original
RMOE = Mercedes-Benz Original Extended
(tires featuring run-flat characteristics)
RMO1 = Mercedes-Benz Original (only cer-
tain AMG tires)
Mercedes-Benz Original Extended tires
may only be used on wheels that have been
specifically approved by Mercedes-Benz.
Only use tires, wheels or accessories tes-
ted and approved by Mercedes-Benz. Cer-
tain characteristics, e.g. handling, vehicle
noise emissions or fuel consumption, may
otherwise be adversely affected. In addi-
tion, when driving with a load, tire dimen-
sion variations could cause the tires to
come into contact with the bodywork and
axle components. This could result in dam-
age to the tires or the vehicle.
Mercedes-Benz accepts no liability for
damage resulting from the use of tires,
wheels or accessories other than those tes-
ted and approved.
Information on tires, wheels and approved
combinations can be obtained from any
qualified specialist workshop.
!Retreaded tires are neither tested nor rec-
ommended by Mercedes-Benz, since pre-
vious damage cannot always be detected
on retreaded tires. As a result, Mercedes-
Benz cannot guarantee vehicle safety if
retreaded tires are mounted. Do not mount
used tires if you have no information about
their previous usage.
Wheel and tire combinations399
Wheels and tires
Z
Page 416 of 418

!Do not add distilled or de-ionized water to
the washer fluid container. Otherwise, the
level sensor may be damaged.
!Only MB SummerFit and MB WinterFit
washer fluid should be mixed together. The spray nozzles may otherwise become
blocked.
When handling washer fluid, observe the
important safety notes on service products
(
Ypage 409).
At temperatures above freezing:
XFill the washer fluid reservoir with a mixture
of water and windshield washer fluid, e.g.
MB SummerFit.
Add 1 part MB SummerFit to 100 parts water.
At temperatures below freezing:
XFill the washer fluid reservoir with a mixture of water and washer fluid, e.g. MB Winter-
Fit.
For the correct mixing ratio refer to the
information on the antifreeze reservoir.
iAdd windshield washer fluid, e.g. MB
SummerFit or MB WinterFit, to the washer
fluid all year round.
Climate control system refrigerant
Important safety notes
The climate control system of your vehicle is
filled with refrigerant R‑134a.
The instruction label regarding the refrigerant
type used can be found on the radiator cross
member.
!Only the refrigerant R‑134a and the PAG
oil approved by Mercedes-Benz may be
used. The approved PAG oil may not be
mixed with any other PAG oil that is not
approved for R-134a refrigerant. Other-
wise, the climate control system may be
damaged.
Service work, such as topping up refrigerant
or replacing components, may only be carried out by a qualified specialist workshop. All
applicable regulations must be adhered to,
SAE standard J639 included.
Always have work on the climate control sys-
tem carried out at a qualified specialist work-
shop.
Refrigerant instruction label
Example: refrigerant instruction label
:
Warning symbol
;Refrigerant filling capacity
=Applicable standards
?PAG oil part number
AType of refrigerant
Warning symbol :advises you about:
Rpossible dangers
Rhaving service work carried out at a quali-
fied specialist workshop
Filling capacities
All models
Refrigerant22.2 ± 0.4 oz
(630 ± 10 g)
PAG oil2.8 oz
(80 g)
414Service products and filling capacities
Technical data