2016 MERCEDES-BENZ GLC-Class change time
[x] Cancel search: change timePage 183 of 222
Selecting an active partition
XTo selectOptionsin the media menu bar:
turn and press the controller.
XSelect Select Active Partition.
Notes on copyright
Audio/video files that you create or repro-
duce yourself for playback are generally sub-
ject to copyright protection.
In many countries, reproductions, even for
private use, are not permitted without the
prior consent of the copyright holder.
Make sure that you know about the applicable
copyright regulations and that you comply
with these.
Notes on CDs/DVDs
!COMAND is designed to play discs that
comply with the EN 60908 standard. There-
fore, you can only use discs with a maxi-
mum thickness of 1.3 mm.
If you insert thicker discs, e.g. those that
contain data on both sides (DVD on one
side and audio data on the other), they can-
not be ejected and can damage the device.
Only use round discs with a diameter of
12 cm. Do not use discs with a diameter of
8 cm, even with an adapter.
Discs with copy protection are not compati-
ble with the audio CD standard and therefore
may not be able to be played by COMAND.
Playback problems may occur when playing
copied discs.
There may be playback problems if you play
CDs that you have copied yourself with a stor-
age capacity of more than 700 MB.
iCOMAND is able to play back audio CDs in
multichannel audio format.
Inserting and removing a disc from
the single CD/DVD drive
Before inserting or removing a CD/DVD,
ensure that the cup holder is empty.
XTo insert: press theþbutton on the
single drive.
If there is a disc already inserted, it will be
ejected.
XInsert a disc into the disc slot with the prin-
ted side facing upwards.
The drive closes and the disc is played.
If the CD/DVD is operated in Media mode,
the corresponding basic menu will be
shown. If the CD/DVD is started using
another application (e.g. navigation), the
display will not change.
iThe drive may not be able to play discs
with copy protection.
XTo remove: press theþbutton.
The drive ejects the disc.
XRemove the ejected disc from the slot.
If you do not take the disc out of the slot, it
is drawn in again automatically after a short
while.
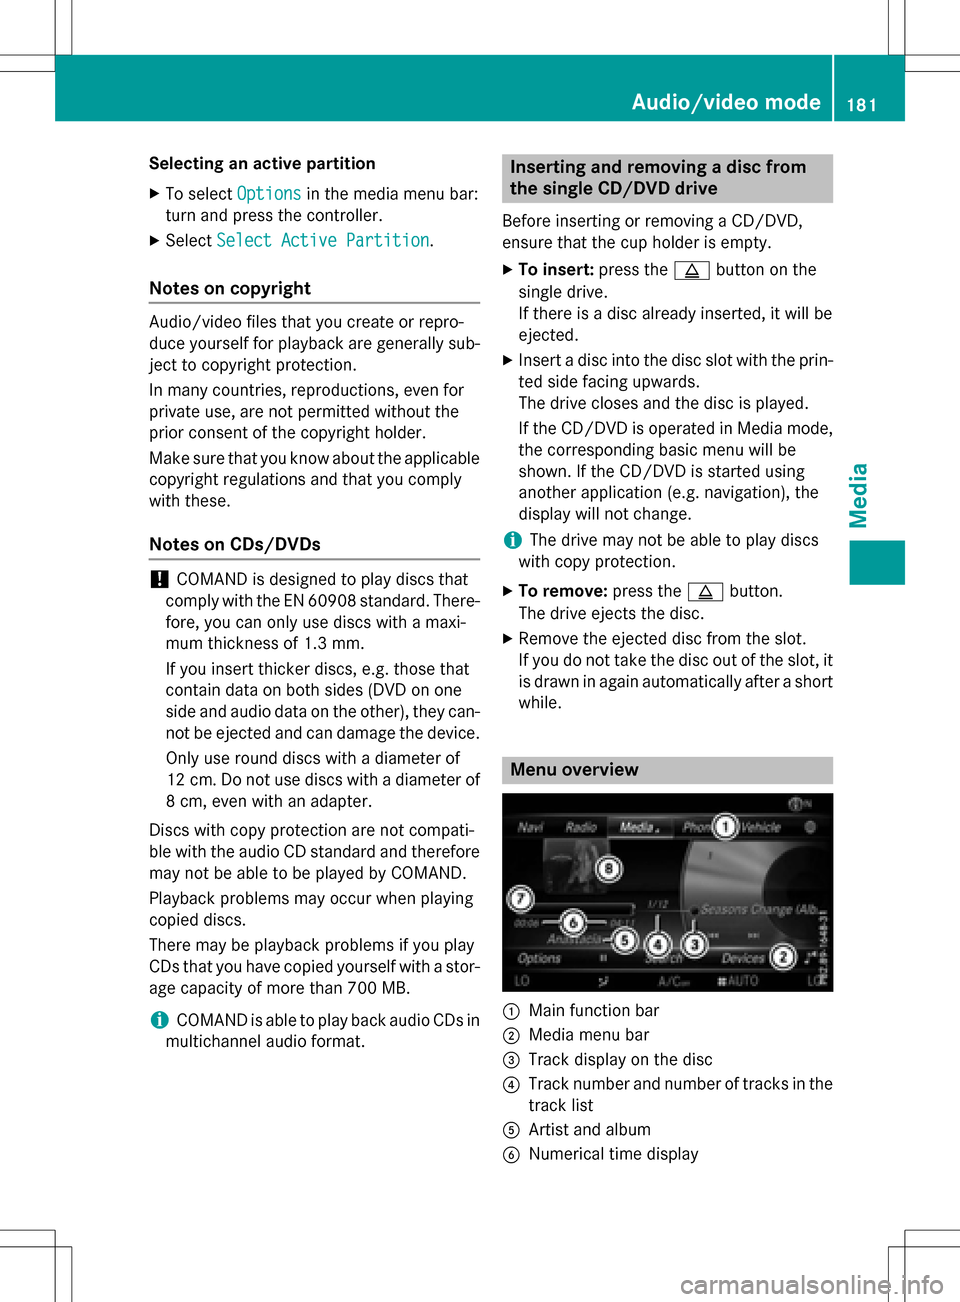
Menu overview
:Main function bar
;Media menu bar
=Track display on the disc
?Track number and number of tracks in the
track list
AArtist and album
BNumerical time display
Audio/video mode181
Media
Z
Page 184 of 222
CGraphic time display
DCover view (if available)
Inserting and ejecting an SD memory
card
Important safety notes
GWAR NING
SD memory car dsare small parts. They can be
swallo wed and cause asphyxiation. This
poses an increased risk of injury or even fatal injury.
Keep SDmemory car dsout of the reach of
ch ildr en. Ifan SD memory card is swallowed,
seek immediate medical attention.
!If you are no longer using the SD memory
card, you should remove it and take it out of
the vehicle. High temperatures can dam-
age the card.
COMAND supports SD memory cards
(Secure Digital), SDHC memory cards
(Secure DigitalHigh Capacity), and SDXC
memory cards ( SecureDigital e Xtended
Capacity.
Inserting an SD memory card
XInsert the SD memory card into the SD card
slot until it engages. The side with the con- tacts must face downwards.
If the memory card has been selected as a
media source, the medium is played and
the files are loaded in the background. If
there are no supported audio/video files,
you will see a message to this effect.
XSelect the media source (Ypage 178).
Ejecting an SD memory card
XPress the memory card.
The memory card is ejected.
XRemove the memory card.
Connecting USB devices
There are two USB ports in the stowage space
under the armrest.
XConnect the USB device to the USB port.
If the corresponding media display is visi-
ble, the medium is played and the files are
loaded in the background. If there are no
supported audio/video files, you will see a
message to this effect.
iMP3 players must support Media Transfer
Protocol (MTP).
Activating media mode
Switching on automatically
After inserting a CD/DVD, this media mode is
automatically switched on by COMAND.
If playable music files are found, they will be
played by COMAND.
If a media function is already switched on in
COMAND, this will be interrupted and the
basic display of the CD/DVD mode will
appear. If another function, such as naviga-
tion, is being operated, the basic display will
not change. Only the music from the last
inserted CD/DVD will be played.
Depending on the vehicle equipment, the
default display must already be turned on
when using with USB devices or SD memory
cards.
XInsert the CDs/DVDs (Ypage 181)
or
XInsert an SD memory card: (Ypage 182)
or
XConnect a USB device: (Ypage 182)
COMAND loads the medium inserted and
starts to play it automatically.
Further options for switching on
RUsing the main function bar: (Ypage 178)
RUsing the device list: (Ypage 179)
RUsing the Õbutton: (Ypage 178)
182Audio/video mode
Media
Page 192 of 222
XTo selectTarget Folder: turn and press
the controller.
XSelect a folder.
XSelect Continue.
XTo select Start: press the controller.
The copying procedure starts and is shown
in the progress bar.
It may take some time for the copying proc-
ess to be completed, depending on the
amount of data. If there is not enough mem-
ory space, a message to this effect
appears.
Once the copying procedure is complete,
you will hear the first track of the copied
album. You can now copy more files to the MEDIA REGISTER.
XTo cancel copying: selectCancel.
Files are stored in the MEDIA REGISTER up until the point of cancellation.
iIt is possible to change to a different func-
tion (e.g. radio) during the copying proce-
dure. The copying procedure continues in
the background. While the copying proce-
dure is taking place, this is shown by a sym-
bol in the status bar.
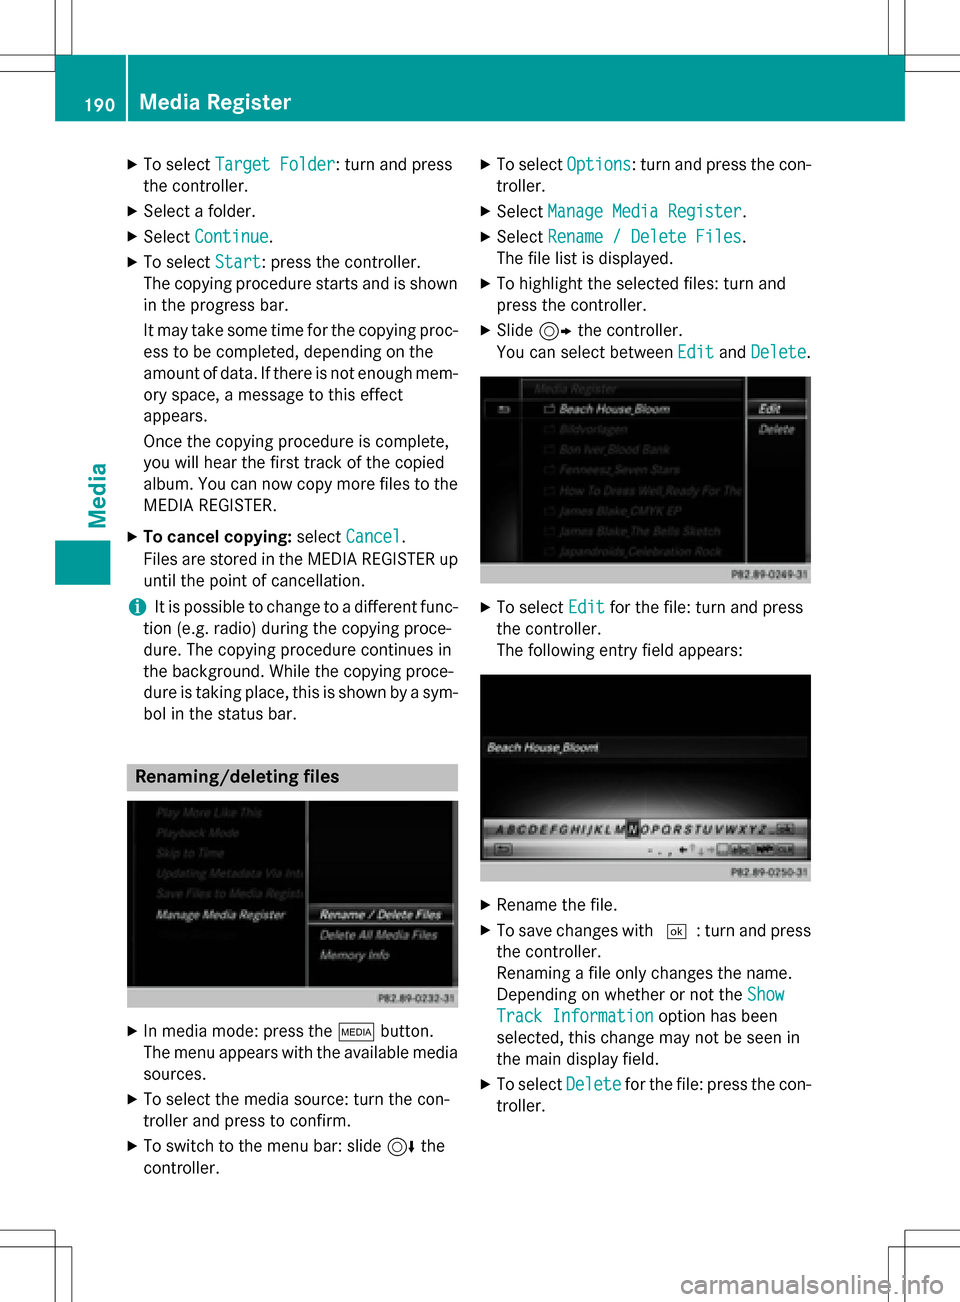
Renaming/deleting files
XIn media mode: press the Õbutton.
The menu appears with the available media sources.
XTo select the media source: turn the con-
troller and press to confirm.
XTo switch to the menu bar: slide 6the
controller.
XTo select Options: turn and press the con-
troller.
XSelect Manage Media Register.
XSelectRename / Delete Files.
The file list is displayed.
XTo highlight the selected files: turn and
press the controller.
XSlide 9the controller.
You can select between Edit
andDelete.
XTo select Editfor the file: turn and press
the controller.
The following entry field appears:
XRename the file.
XTo save changes with ¬: turn and press
the controller.
Renaming a file only changes the name.
Depending on whether or not the Show
Track Informationoption has been
selected, this change may not be seen in
the main display field.
XTo select Deletefor the file: press the con-
troller.
190Media Register
Media
Page 194 of 222
XIn media mode: press theÕbutton.
The menu appears with the available media sources.
XTo select the media source: turn the con-
troller and press to confirm.
XTo switch to the menu bar: slide 6the
controller.
XTo select Options: turn and press the con-
troller.
XSelect Playback Mode.
The options list appears. The #dot indi-
cates the current setting.
XSelect the desired option.
The option is switched on. For all options
except Normal Track Sequence
, you will
see a corresponding icon in the main dis-
play.
iThe Normal Track Sequenceoption is
automatically selected when you change
the disc you are currently listening to or
when you select a different medium. If an
option is selected, it remains selected after
COMAND is switched on or off.
Bluetooth®audio mode
Connecting Bluetooth®audio devices
Prerequisites
XActivate the Bluetooth®function in
COMAND (
Ypage 44).
Bluetooth
®audio mode requires a Blue-
tooth®-capable audio device.
Check your Bluetooth
®audio device for the
following (see the manufacturer's operating
instructions):
RBluetooth®audio profile
The Bluetooth
®audio device must support
the A2DP and AVRCP Bluetooth®audio
profiles.
RBluetooth®visibility
Certain Bluetooth
®audio devices do not
just require activation of the Bluetooth®
function. In addition, your device must be
made "visible" to other devices.
RBluetooth®device name
This device name is predetermined but can
usually be changed. For a clear selection of the Bluetooth
®device, Mercedes-Benz rec-
ommends that you customize the device
name.
iA2DP ( Advanced Audio Distribution
Profile): Bluetooth®audio profile for audio
data transmission
AVRCP (A udioVideo Remote Control
Profile): Bluetooth
®audio profile for audio
data playback.
iThe Bluetooth®device must be visible for
authorization. After authorization,
COMAND even finds the Bluetooth
®device
when it is not visible.
General notes
Before using your Bluetooth®audio device
with COMAND for the first time, you will need
to authorize it.
When you authorize a new Bluetooth
®audio
device, it is connected automatically. Con-
nection involves first searching for a Blue-
tooth
®audio device and then authorizing it.
You can authorize up to fifteen Bluetooth
®
devices.
iIf you authorize a mobile phone that sup-
ports Bluetooth®audio, the A2DP and
AVRCP Bluetooth®audio profiles are con-
nected automatically.
The mobile phone is then entered:
Rin the Bluetooth®telephone list
(
Ypage 113)
Rin the Bluetooth®device list
(
Ypage 193)
Mercedes-Benz recommends authorizing a
mobile phone in Bluetooth
®telephony
(
Ypage 114).
192Bluetooth®audio mode
Media
Page 203 of 222
Bear in mind that at a speed of only 30 mph
(approximately 50 km/h) your vehicle covers
a distance of 44 feet (approximately 14m)
ever yse cond.
General notes
Notes on discs
!Do not affix stickers or labels to the discs.
They could peel off and damage COMAND.
Stickers can cause the disc to bend, which
can result in read errors and disc recogni-
tion problems.
!COMAND is designed to play discs that
comply with the EN 60908 standard. There- fore, you can only use discs with a maxi-
mum thickness of 1.3 mm.
If you insert thicker discs, e.g. those that
contain data on both sides (DVD on one
side and audio data on the other), they can-
not be ejected and can damage the device.
Only use round discs with a diameter of
12 cm. Do not use discs with a diameter of
8 cm, even with an adapter.
The variety of data media, burners and burn
software means there is no guarantee that
the system will be able to play discs that you
have copied yourself.
DVD playback conditions
If video DVDs do not conform to the NTSC or
PAL TV standards, they may create picture,
sound or other problems during playback.
COMAND is capable of playing back video
DVDs produced according to the following
standards:
RRegion code 1 or region code 0 (no region
code)
RPAL or NTSC standard
You will generally find the relevant details
either on the DVD itself or on the DVD case.
iIf you insert a video DVD with a different
region code, a message to this effect
appears.
iCOMAND is set to region code 1 at the
factory. This setting can be changed at an
authorized Mercedes-Benz Center. It is also
possible to play video DVDs with a different
region code, provided that they are pro-
duced in accordance with the PAL or NTSC
TV standard. The region code can be
changed up to five times.
Control options
There are four control menus available in
video DVD mode.
Most DVDs have their own control menu.
The DVD's control menu is operated directly
using the controller or DVD functions.
Control menu and
functionOperation
RDVD's control
menu
Selection of title,
scene, language,
subtitles ...Operation with the
controller
RMenu Options
Selection of
brightness, con-
trast, color, for-
mat
Operation using the
menu bar options,
video settings
RVideo menu
Selection of
scene, fast
forward or rewindIn full-screen mode,
slide6the con-
troller
RDVD functions
Selection of title,
scene, language,
subtitles ...In full-screen mode,
press the controller
Video DVD mode201
Media
Z
Page 219 of 222

Sample displays of weather data in the
map
Displaying the rain radar:
XActivate theRadar Mapdisplay level
(
Ypage 216).
The rain radar image is then displayed if
weather data is available.
iYou can call up the legend for the precip-
itation radar (
Ypage 219).
The transparency of the precipitation radar
map display level can be adjusted in five
stages.
Displaying storm characteristics:
XActivate the StormCharacteristicsdis-
play level (
Ypage 216).
If weather data is available, the weather
map will then display the storm character-
istics.
You can call up the legend for storms
(
Ypage 219).
The following information on a storm cell is
displayed (if available):
Rcharacteristics of the storm cell
Rdate and time of observation (time
stamp)
Rdirectional movement speed and path
Propagation speed: the speed at which the
storm cell is advancing.
Displaying weather fronts:
XActivate the Atmospheric Pressuredis-
play level (
Ypage 216).
If weather data is available, the weather
map will then display the weather fronts.
The example shows the position of high and
low-pressure areas (H, L), weather fronts
and isobars. Isobars are lines that show
where the air pressure is the same.
Legend: weather fronts
Weather
frontExplanation
Cold front
(blue line
with blue tri-
angles)If a cold front moves in, the
weather remains changea-
ble and there are often rain
showers and thunder-
storms. The air tempera-
ture decreases.
Warm front
(red line with
red semi-cir-
cles)A warm front may cause
more prolonged steady
rain, more cloud cover and
a slow rise in temperature.
Weather forecasts217
SIRIUS Weather
Page 220 of 222

Weather
frontExplanation
Stationary
front
(red and blue
line with red
semi-circles
and blue tri-
angles)The weather front moves
minimally. The weather
remains changeable in this
area.
Occlusion
(purple line
with purple
semi-circles
and trian-
gles)When the faster cold front
catches up and joins the
warm front ahead of it, an
occluded front is formed.
The weather remains
changeable and rainy
within an occlusion.
Displaying storm tracking information:
XActivate theTropical Storm Tracking
display level (Ypage 216).
If weather data is available, the weather
map will then display storm tracking infor-
mation.
Example: in the middle of the map you can see the current position of the tropical low-
pressure area (cyclone). To the right of this
a solid line shows the previous path with
positions and times. The forecast for the
direction of propagation is shown by a dot-
ted line with positions and times.
You can find out detailed information on a
cyclone in the Storm Guide (
Ypage 220).
Showing detailed information (if available):
Rname of the tropical storm and category
RTime stamp
Rdirectional movement speed and path
Rmaximum wind speed
Propagation speed: the speed at which the
storm cell of a tropical cyclone is advancing.
A tropical storm is separated into different
categories according to the location at which
it develops.
Region of originCategory
Atlantic, North
and South
Pacific OceansTropical Low
Press. Sys.
Atlantic, North
and South
Pacific OceansTropicalDepression
Atlantic, North
and South
Pacific OceansName of tropical storm
(Tropical Storm)
Atlantic, North
and South
Pacific OceansName of tropical storm
(Hurricane Cate‐
gory 3)
Displays hurricane cat-
egories 1 through 5
Northwestern
Pacific OceanTropical Low
Press. Sys.
Northwestern
Pacific OceanName of tropical storm
(Tropical Cyclone)
218Weather forecasts
SIRIUS Weather
Page 221 of 222
Region of originCategory
Northwestern
Pacific OceanName of tropical storm
(Typhoon)
Northwestern
Pacific OceanName of tropical storm
(Super-Typhoon)
You can also see the time stamp for the
weather data on map scales of 50 miles and
smaller.
The weather map shows wind directions and
wind speeds.
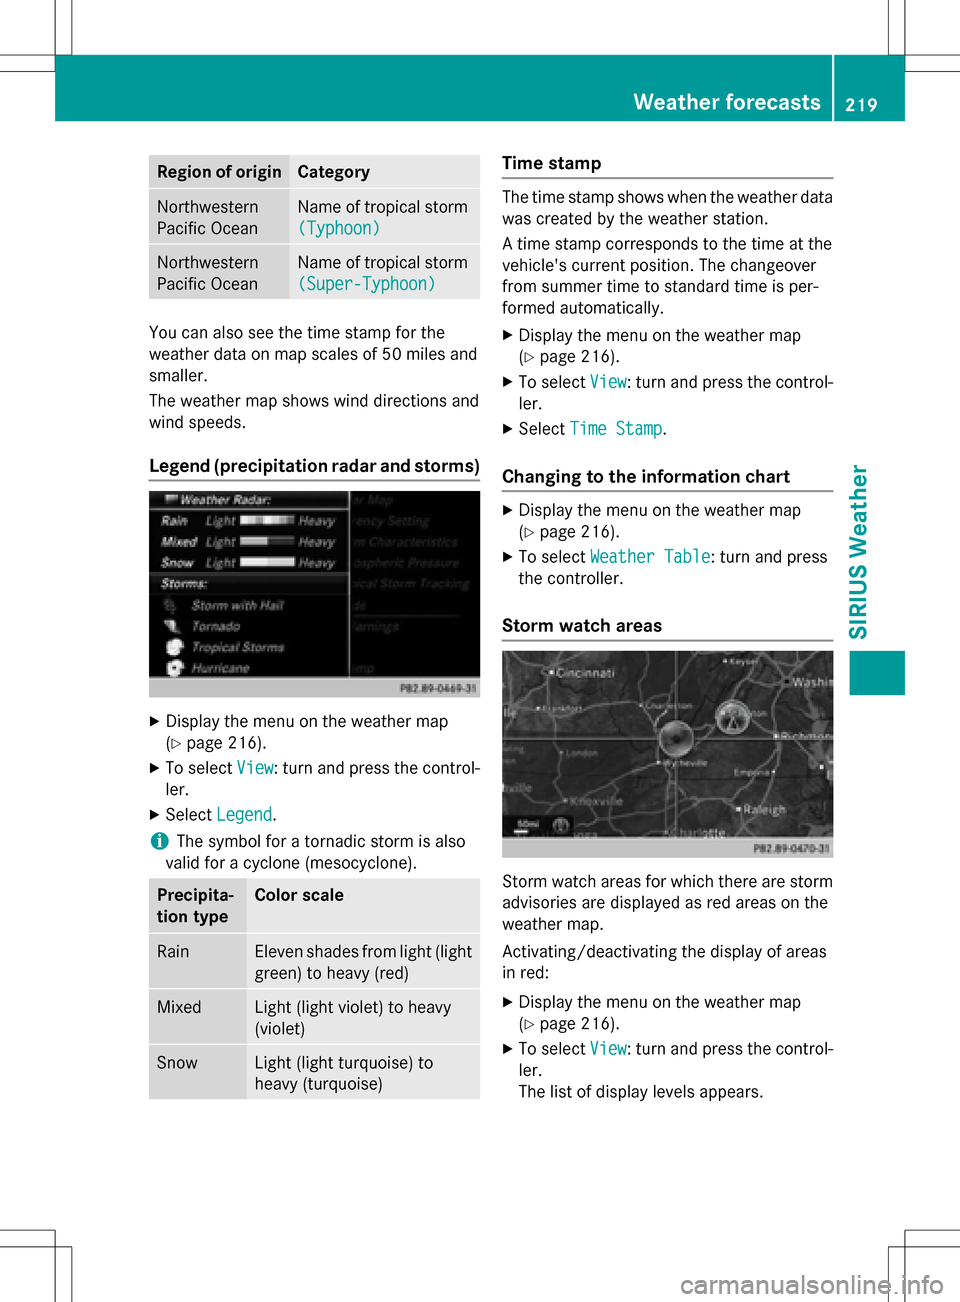
Legend (precipitation radar and storms)
XDisplay the menu on the weather map
(
Ypage 216).
XTo selectView: turn and press the control-
ler.
XSelect Legend.
iThe symbol for a tornadic storm is also
valid for a cyclone (mesocyclone).
Precipita-
tion typeColor scale
RainEleven shades from light (light
green) to heavy (red)
MixedLight (light violet) to heavy
(violet)
SnowLight (light turquoise) to
heavy (turquoise)
Time stamp
The time stamp shows when the weather data
was created by the weather station.
A time stamp corresponds to the time at the
vehicle's current position. The changeover
from summer time to standard time is per-
formed automatically.
XDisplay the menu on the weather map
(
Ypage 216).
XTo select View: turn and press the control-
ler.
XSelect Time Stamp.
Changing to the information chart
XDisplay the menu on the weather map
(
Ypage 216).
XTo select Weather Table: turn and press
the controller.
Storm watch areas
Storm watch areas for which there are storm
advisories are displayed as red areas on the
weather map.
Activating/deactivating the display of areas
in red:
XDisplay the menu on the weather map
(
Ypage 216).
XTo select View: turn and press the control-
ler.
The list of display levels appears.
Weather forecasts219
SIRIUS Weather