2016 MERCEDES-BENZ GL child seat
[x] Cancel search: child seatPage 9 of 462

Cargo compartment cover
Notes/how to use ........................ .3 46
Cargo compartment enlargement
Important safety notes .................. 344
Cargo compartment floor
Important safety notes .................. 347
Opening/closing ............................ 347
Stowage well (under) ..................... 347
Cargo tie down rings ......................... 345
CD player (on-board computer) ....... .2 79
Center console
Lower section .................................. 39
Upper section .................................. 38
Central locking
Automatic locking (on-board com-
puter) ............................................. 285
Locking/unlocking (SmartKey) ....... .8 2
Changing bulbs
Brake lamps .................................. .1 39
High-beam headlamps ................... 138
Low-beam headlamps .................... 138
Child
Restraint system .............................. 62
Child seat
Forward-facing restraint system ...... 66
LATCH-type (ISOFIX) child seat
anchors ............................................ 63
On the front-passenger seat ............ 65
Rearward-facing restraint system .... 66
Top Tether ....................................... 64
Child-proof locks
Important safety notes .................... 66
Rear doors ....................................... 67
Children
Special seat belt retractor ............... 61
Cigarette lighter ................................ 352
Cleaning
Mirror turn signal ........................... 380
Trailer tow hitch ............................. 381
Climate control
3-zone automatic climate control
with additional rear-compartment
climate control ............................... 150
Automatic climate control (3-
zone) .............................................. 148
Controlling automatically ............... 154
Cooling with air dehumidification .. 153
Defrosting the windows ................. 158 Defrosting the windshield .............. 157
Dual-zone automatic cli mate con-
tro l ................................................. 145
General notes ................................ 144
Indicator lamp ................................ 154
Information about using auto-
matic climate control ..................... 152
Information about using dual-zone
automatic climate control .............. 147
Maximum cooling .......................... 157
Overview of systems ...................... 144
Problem with the rear window
defroster ........................................ 159
Problems with cooling with air
dehumidification ............................ 154
Rear control panel ......................... 148
Rear control panel (3-zone auto-
matic climate control with addi-
tional rear-compartment climate
control) .......................................... 150
Refrigerant ..................................... 453
Refrigerant filling capacity ............. 454
Setting the air distribution ............. 156
Setting the air vents ...................... 160
Setting the airflow ......................... 156
Setting the climate mode (AIR
FLOW) ............................................ 155
Setting the temperature ................ 155
Switching air-recirculation mode
on/off ............................................ 159
Switching on/off ........................... 152
Switching residual heat on/off ...... 159
Switching the rear window
defroster on/off ............................ 158
Switching the ZONE function on/
off .................................................. 157
Coat hooks ......................................... 347
Cockpit
Overview .......................................... 34
see Instrument cluster
COLLISION PREVENTION ASSIST
Operation/notes .............................. 70
COMAND
ON&OFFROAD menu ..................... 262
see separate operating instructions
COMAND display
Cleaning ......................................... 381
Combination switch .......................... 132Index 7
Page 15 of 462

L Lamps
see Warning and indicator lamps
Lane Keeping Assist
Activating/deactivating ................ .2 82
Display message ............................ 314
Function/information .................... 246
see Active Lane Keeping Assist
Lap time (RACETIMER) ...................... 288
LATCH-type (ISOFIX) child seat
anchors ................................................ 63
Level control (display message) ...... 311
Level control (vehicles with AIR-
MATIC package)
Basic settings ................................ 220
Function/notes ............................. 219
Important safety notes .................. 219
Level control (vehicles with the
ON&OFFROAD package)
Basic settings ................................ 214
Function/notes ............................. 213
Important safety notes .................. 213
License plate lamp (display mes-
sage) ................................................... 304
Light function, active
Display message ............................ 305
Light sensor (display message) ....... 306
Lights
Activating/deactivating the inte-
rior lighting delayed switch-off ....... 285
Adaptive Highbeam Assist ............. 134
Automatic headlamp mode ............ 130
Cornering light function ................. 133
Hazard warning lamps ................... 133
High beam flasher .......................... 132
High-beam headlamps ................... 132
Light switch ................................... 130
Low-beam headlamps .................... 131
Parking lamps ................................ 131
Rear fog lamp ................................ 131
Setting the brightness of the
ambient lighting (on-board com-
puter) ............................................. 284
Setting the color of the ambient
lighting (on-board computer) ......... 284
Standing lamps .............................. 132 Switching the daytime running
lamps on/off (on-board com-
puter) ............................................. 284
Switching the exterior lighting
delayed switch-off on/off (on-
boa rd computer) ............................ 284
Switching the surround lighting
on/off (on-board computer) .......... 284
Turn signals ................................... 132
see Interior lighting
see Replacing bulbs
Loading guidelines ............................ 340
Locking
see Central locking
Locking (doors)
Automatic ........................................ 91
Emergency locking ........................... 92
From inside (central locking but-
ton) .................................................. 91
Locking centrally
see Central locking
Locking verification signal (on-
board computer) ............................... 285
LOW RANGE
Display message ............................ 312
Off-road gear ................................. 259
LOW RANGE off-road gear ................ 259
Low-beam headlamps
Changing bulbs .............................. 138
Display message ............................ 303
Switching on/off ........................... 131
Lumbar support
Adjusting (on the seat) .................. 118
Luxury head restraints ..................... 112
M
M+S tires ............................................ 406
Malfunction message
see Display messages
Matte finish (cleaning instruc-
tions) .................................................. 378
mbrace
Call priority .................................... 360
Display message ............................ 297
Downloading destinations
(COMAND) ..................................... 360
Downloading routes ....................... 363 Index 13
Page 19 of 462
Rear seats
Adjusting ....................................... 113
Display message ............................ 322
Rear view camera
Cleaning instructions ..................... 380
Displays in the Audio display ......... 232
Displays in the COMAND display ... 232
Function/notes ............................. 231
Switching on/off ........................... 232
Rear window defroster
Problem (malfunction) ................... 159
Switching on/off ........................... 158
Rear window wiper
Replacing the wiper blade .............. 141
Switching on/off ........................... 140
Rear-view mirror
Anti-glare (manual) ........................ 124
Dipping (automatic) ....................... 125
Refrigerant (air-conditioning sys-
tem)
Important safety notes .................. 453
Refueling
Fuel gauge ....................................... 35
Important safety notes .................. 182
Refueling process .......................... 183
see Fuel
Remote control
Garage door opener ....................... 364
Programming (garage door
opener) .......................................... 365
Replacing bulbs
Important safety notes .................. 136
Overview of bulb types .................. 137
Removing/replacing the cover
(front wheel arch) .......................... 137
Reporting safety defects .................... 29
Rescue card ......................................... 30
Reserve (fuel tank)
see Fuel
Reserve fuel
Display message ............................ 309
Warning lamp ................................. 334
see Fuel
Residual heat (climate control) ........ 159
Restraint system
Display message ............................ 299
Introduction ..................................... 44
Warning lamp ................................. 333 Warning lamp (function) ................... 45
Reversing feature
Panorama sliding sunroof .............. 103
Roller sunblinds ............................. 104
Side windows ................................... 98
Sliding sunroof ............................... 103
Tailgate ............................................ 93
Reversing lamps (display mes-
sage) ................................................... 305
Roadside Assi stance (breakdown) .... 26
Ro
ller sunblind
Panorama roof with power tilt/
sliding panel .................................. 104
Rear side windows ......................... 351
Roof carrier ........................................ 348
Roof lining and carpets (cleaning
guidelines) ......................................... 384
Roof load (maximum) ........................ 454
Route (navigation)
see Route guidance (navigation)
Route guidance (navigation) ............ 277
S Safety
Children in the vehicle ..................... 61
Safety system
see Driving safety systems
Seat belts
Adjusting the driver's and front-
passenger seat belt ......................... 49
Adjusting the height ......................... 48
Cleaning ......................................... 383
Correct usage .................................. 47
Fastening ......................................... 48
Important safety guidelines ............. 46
Introduction ..................................... 46
Releasing ......................................... 49
Switching belt adjustment on/off
(on-board computer) ...................... 286
Warning lamp ................................. 325
Warning lamp (function) ................... 49
Seats
Adjusting (electrically) ................... 110
Adjusting the head restraint .......... 110
Cleaning the cover ......................... 383
Correct driver's seat position ........ 108
Entry position (3rd row of seats) .... 116 Index 17
Page 46 of 462
Useful information
i This Operator's Manual describes all
models and all standard and optional equip-
ment of your vehicle available at the time of
publication of the Operator's Manual.
Country-specific differences are possible.
Please note that your vehicle may not be
equipped with all features described. This
also applies to safety-related systems and
functions.
i Read the information on qualified special-
ist workshops ( Y
page 29).
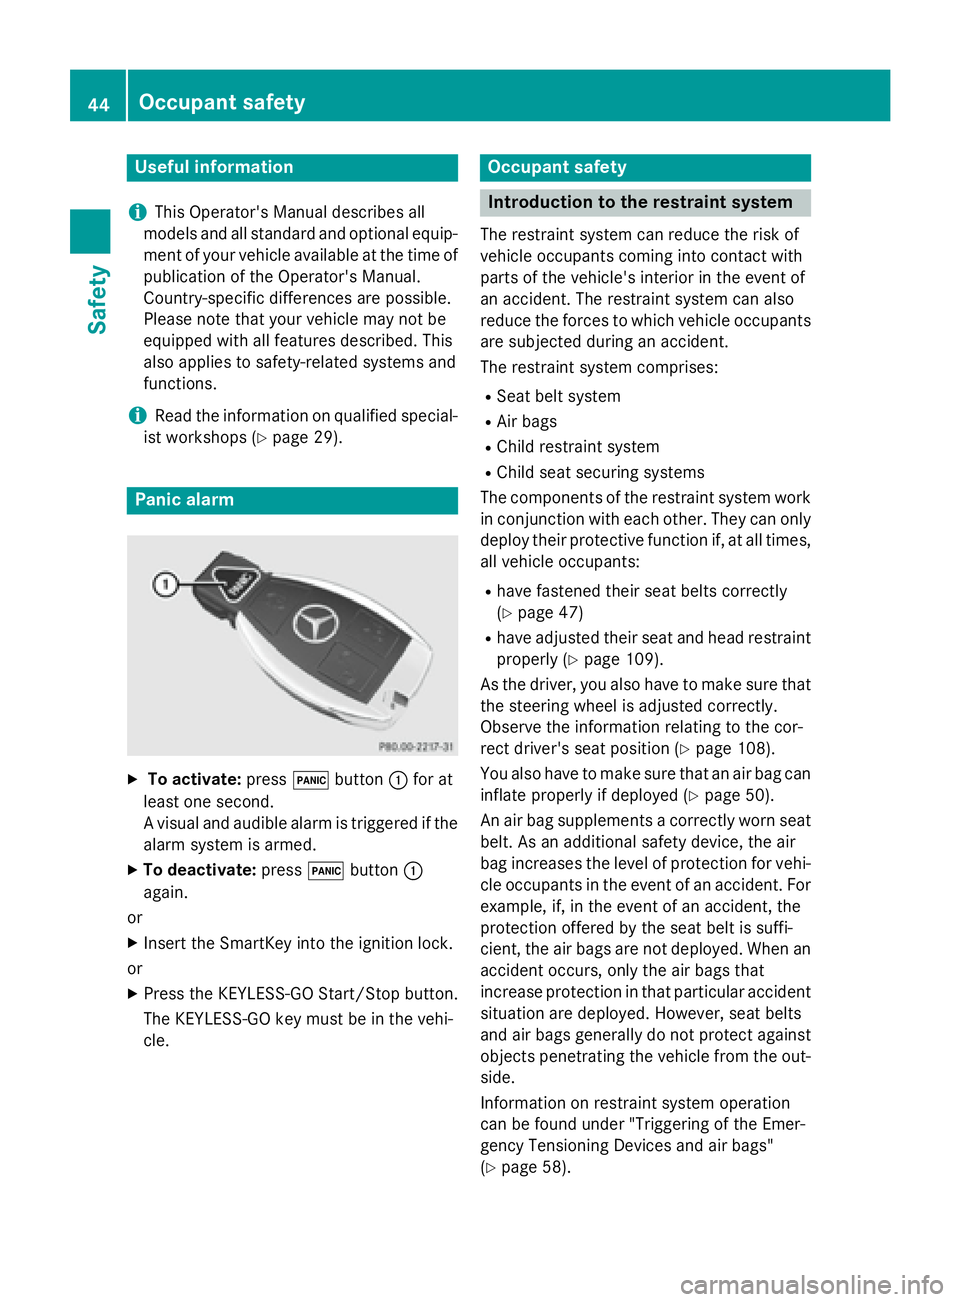
Panic alarm
X
To activate: press �3 button �C for at
least one second.
A visual and audible alarm is triggered if the
alarm system is armed. X
To deactivate: press �3 button �C
again.
or X
Insert the SmartKey into the ignition lock.
or X
Press the KEYLESS-GO Start/Stop button.
The KEYLESS-GO key must be in the vehi-
cle. Occupant safety
Introduction to the restraint system The restraint system can reduce the risk of
vehicle occupants coming into contact with
parts of the vehicle's interior in the event of
an accident. The restraint system can also
reduce the forces to which vehicle occupants
are subjected during an accident.
The restraint system comprises: R
Seat belt system R
Air bags R
Child restraint system R
Child seat securing systems
The components of the restraint system work
in conjunction with each other. They can only
deploy their protective function if, at all times,
all vehicle occupants: R
have fastened their seat belts correctly
( Y
page 47) R
have adjusted their seat and head restraint
properly ( Y
page 109).
As the driver, you also have to make sure that
the steering wheel is adjusted correctly.
Observe the information relating to the cor-
rect driver's seat position ( Y
page 108).
You also have to make sure that an air bag can
inflate properly if deployed ( Y
page 50).
An air bag supplements a correctly worn seat
belt. As an additional safety device, the air
bag increases the level of protection for vehi-
cle occupants in the event of an accident. For
example, if, in the event of an accident, the
protection offered by the seat belt is suffi-
cient, the air bags are not deployed. When an
accident occurs, only the air bags that
increase protection in that particular accident
situation are deployed. However, seat belts
and air bags generally do not protect against
objects penetrating the vehicle from the out-
side.
Information on restraint system operation
can be found under "Triggering of the Emer-
gency Tensioning Devices and air bags"
( Y
page 58).44
Occupant safety
Safety
Page 48 of 462
Depending on the person in the front-
passenger seat, the front-passenger front air
bag must either be deactivated or enabled;
see the following points. You must make sure
of this both before and during a journey. R
Children in a child restraint system:
whether the front-passenger front air bag is
enabled or deactivated depends on the
installed child restraint system, and the age
and size of the child. Therefore, be sure to
observe the notes on the "Occupant Clas-
sification System (OCS)" ( Y
page 53) and
on "Children in the vehicle" ( Y
page 61).
There you will also find instructions on rear-
ward and forward-facing child restraint sys-
tems on the front-passenger seat. R
All other persons: depending on the clas-
sification of the person in the front-
passenger seat, the front-passenger front
air bag is enabled or deactivated
( Y
page 53). Be sure to observe the notes
on "Seat belts“ ( Y
page 46) and "Air bags"
( Y
page 50). There you can also find infor-
mation on the correct seat position.
Seat belts
Introduction
Seat belts are the most effective means of
restricting the movement of vehicle occu-
pants in the event of an accident or the vehi-
cle rolling over. This reduces the risk of vehi-
cle occupants coming into contact with parts
of the vehicle interior or being ejected from
the vehicle. Furthermore, the seat belt helps
to keep the vehicle occupant in the best posi-
tion in relation to the air bag.
The seat belt system comprises: R
Seat belts R
Emergency Tensioning Devices for the
front seat belts and the outer seat belts in
the second row of seats as well as the seat
belts in the third row R
Belt force limiters for the front seat belts
and the outer seat belts in the second row of seats as well as the seat belts in the third
row
If the seat belt is pulled out of the belt outlet
quickly or with a jerky movement, the belt
retractor locks. The belt strap cannot be
extracted any further.
The Emergency Tensioning Device tightens
the seat belt in an accident, pulling the belt
close against the body. However it does not
pull the vehicle occupant back in the direction
of the backrest.
The Emergency Tensioning Device does not
correct an incorrect seat position or the rout-
ing of an incorrectly fastened seat belt.
W h
en triggered, a belt force limiter helps to
reduce the force exerted by the seat belt on
the vehicle occupant.
The belt force limiters for the front seats are
synchronized with the front air bags, which
absorb part of the deceleration force. This
can reduce the force exerted on the vehicle
occupants during an accident.
! If the front-passenger seat is unoccupied,
do not insert the belt tongue into the buckle
of the front-passenger seat. This may oth-
erwise lead to the triggering of the Emer-
gency Tensioning Device in the event of an
accident, which will then need to be
replaced.
Important safety notes
The use of seat belts and child restraint sys-
tems is required by law in: R
all 50 states R
the U.S. territories R
the District of Columbia R
all Canadian provinces
Even where this is not required by law, all
vehicle occupants should correctly fasten
their seat belts before starting the journey.
G WARNING
If the seat belt is incorrectly fastened, it can-
not protect as intended. Furthermore, an
incorrectly fastened seat belt can cause addi-46
Occupant safety
Safety
Page 49 of 462
tional injury, for example, in an accident, dur-
ing braking or when abruptly changing direc-
tion. This poses an increased risk of injury or
even fatal injury.
Make sure that all vehicle occupants are
seated properly with a correctly fastened seat
belt.
G WARNING
The seat belt does not offer the intended level
of protection if you have not moved the back-
rest to an almost vertical position. When brak-
ing or in the event of an accident, you could
slide underneath the seat belt and sustain
abdomen or neck injuries, for example. This
poses an increased risk of injury or even fatal
injury.
Adjust the seat properly before beginning
your journey. Always ensure that the backrest
is in an almost vertical position and that the
shoulder section of your seat belt is routed
across the center of your shoulder.
G WARNING
Persons under 5 ft (1.50 m) in height cannot
fasten the seat belt correctly without an addi-
tional suitable restraint system. If the seat
belt is incorrectly fastened, it cannot protect
as intended. Furthermore, an incorrectly fas-
tened seat belt can cause additional injury, for
example, in an accident, during braking or an
abrupt change of direction. This poses an
increased risk of injury or even fatal injury.
For this reason, always secure persons under
5 ft (1.50 m) in height in suitable restrain t
systems.
If a child younger than twelve years old and
under 5 ft (1.50 m) in height is traveling in the
vehicle: R
always secure the child in a child restraint
system suitable for this Mercedes-Benz
vehicle. The child restraint system must be appropriate to the age, weight and size of
the child R
always observe the instructions and safety
notes in the "Children in the vehicle" sec-
tion of this Operator's Manual
( Y
page 61) in addition to the child
restraint system manufacturer's installa-
tion instructions R
be sure to observe the instructions and
safety notes on the "Occupant classifica-
tion system (OCS)" ( Y
page 53)
G WARNING
The seat belts may not perform their intended
protective function if: R
they are damaged, modified, extremely
dirty, bleach or dyed R
the seat belt buckle is damaged or
extremely dirty R
the Emergency Tensioning Devices, belt
anchorages or inertia reels have been modi-
fied
Seat belts may sustain non-visible damage in
an accident, e.g. due to glass splinters. Modi-
fied or damaged seat belts may tear or fail,
e.g. in an accident. Modified Emergency Ten-
sioning Devices could accidentally trigger or
fail to deploy when necessary. This poses an
increased risk of injury or even fatal injury.
Never modify the seat belts, Emergency Ten-
sioning Devices, belt anchorages or inertia
reels. Make sure that the seat belts are
undamaged, not worn out and clean. Follow-
ing an accident, have the seat belts checked
immediately at a qualified specialist work-
shop.
Only use seat belts that have been approved
for your vehicle by Mercedes-Benz.
Proper use of the seat belts
Observe the safety notes on the seat belt
( Y
page 46).
All vehicle occupants must be wearing the
seat belt correctly before beginning the jour-
ney. Also make sure that all vehicle occu- Occupant safety 47
Safety Z
Page 50 of 462
pants are always wearing the seat belt cor-
rectly while the vehicle is in motion.
When fastening the seat belt, always make
sure that: R
the seat belt tongue is only inserted to the
belt buckle belonging to that seat. R
the seat belt is tight across your body.
Avoid wearing bulky clothing, e.g. a winter
coat. R
the seat belt is not twisted.
Only then can the forces which occur be
distributed over the area of the belt. R
the shoulder section of the belt is always
routed across the center of your shoulder.
The shoulder section of the belt must not
come into contact with your neck or be
routed under your arm. Where possible,
adjust the seat belt to the appropriate
height. R
the lap belt passes tightly and as low down
as possible across your lap.
The lap belt must always be routed across
your hip joints and not across your abdo-
men. This applies particularly to pregnant
women. If necessary, push the lap belt
down to your hip joint and pull it tight using
the shoulder section of the belt. R
the seat belt is not routed across sharp,
pointed or fragile objects.
If you have such items located on or in your
clothing, e.g. pens, keys or eyeglasses,
store these in a suitable place. R
only one person is using a seat belt at a
time.
Infants and children must never travel sit-
ting on the lap of a vehicle occupant. In the
event of an accident, they could be crushed
between the vehicle occupant and seat
belt. R
objects are never secured with a seat belt if
the seat belt is also being used by one of the
vehicle's occupants.
Seat belts are only intended to secure and
restrain vehicle occupants. Always observe the "Loading guidelines" for securing objects,
luggage or loads ( Y
page 340).
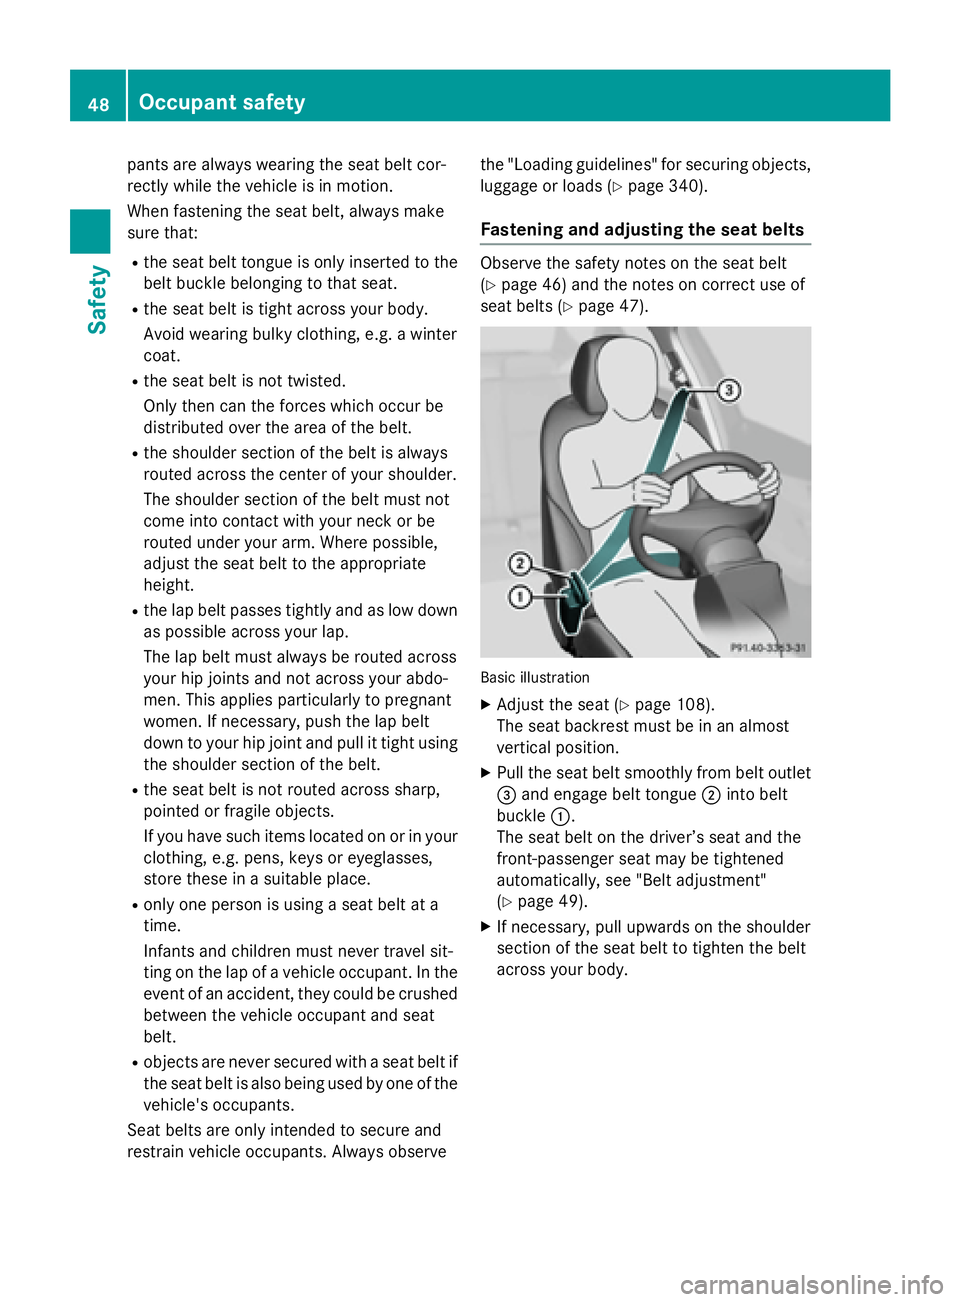
Fastening and adjusting the seat belts Observe the safety notes on the seat belt
( Y
page 46) and the notes on correct use of
seat belts ( Y
page 47).
Basic illustration X
Adjust the seat ( Y
page 108).
The seat backrest must be in an almost
vertical position. X
Pull the seat belt smoothly from belt outlet
�
Page 51 of 462
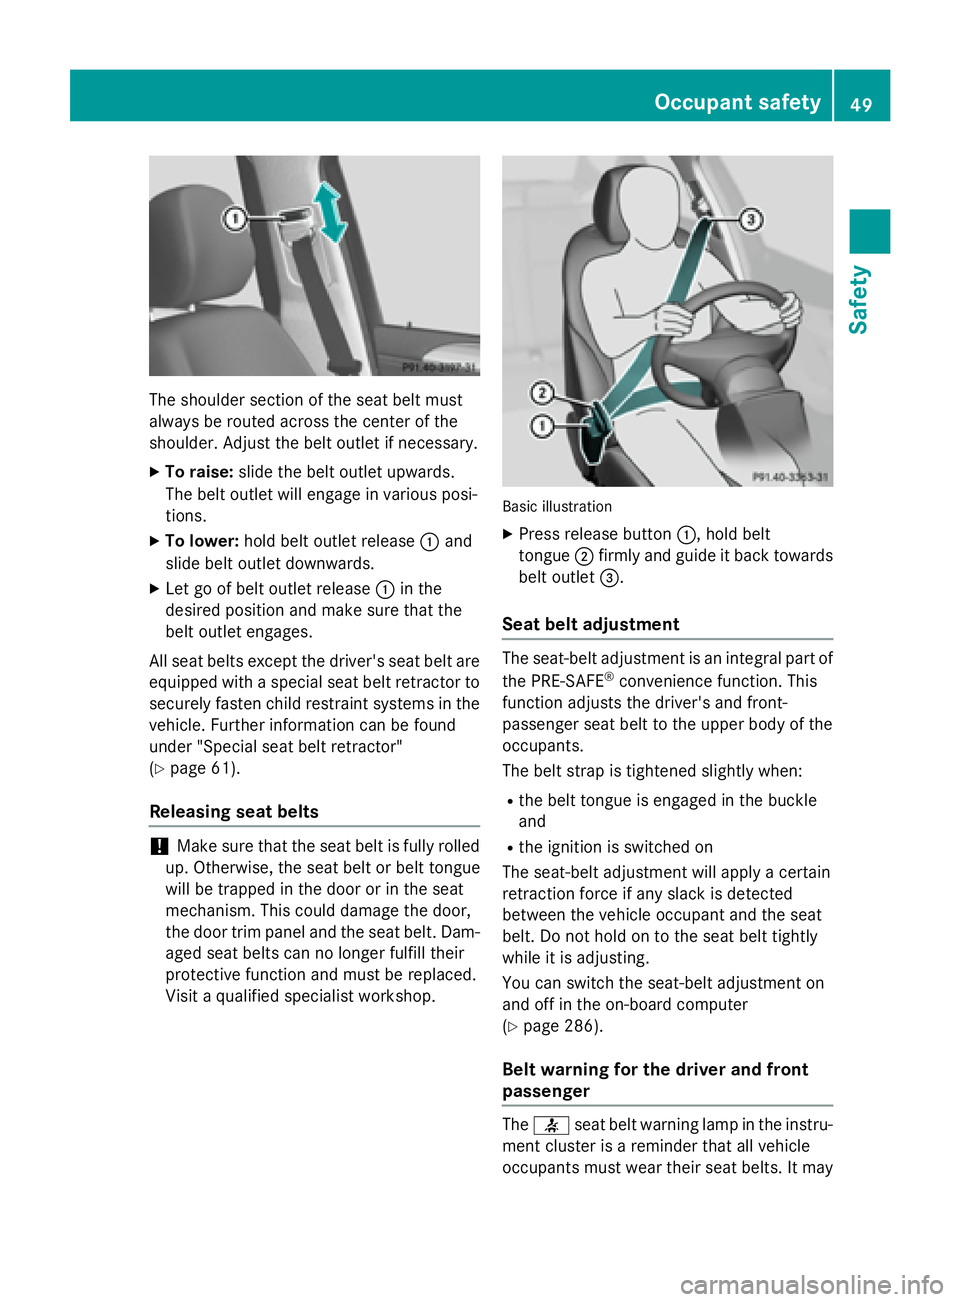
The shoulder section of the seat belt must
always be routed across the center of the
shoulder. Adjust the belt outlet if necessary. X
To raise: slide the belt outlet upwards.
The belt outlet will engage in various posi-
tions. X
To lower: hold belt outlet release �C and
slide belt outlet downwards. X
Let go of belt outlet release �C in the
desired position and make sure that the
belt outlet engages.
All seat belts except the driver's seat belt are
equipped with a special seat belt retractor to
securely fasten child restraint systems in the
vehicle. Further information can be found
under "Special seat belt retractor"
( Y
page 61).
Releasing seat belts
! Make sure that the seat belt is fully rolled
up. Otherwise, the seat belt or belt tongue
will be trapped in the door or in the seat
mechanism. This could damage the door,
the door trim panel and the seat belt. Dam-
aged seat belts can no longer fulfill their
protective function and must be replaced.
Visit a qualified specialist workshop. Basic illustration X
Press release button �C , hold belt
tongue �D firmly and guide it back towards
belt outlet �