Page 255 of 462

If you leave your lane, under certain circum-
stances the vehicle will brake briefly on one
side. This is meant to assist you in bringing
the vehicle back to the original lane.
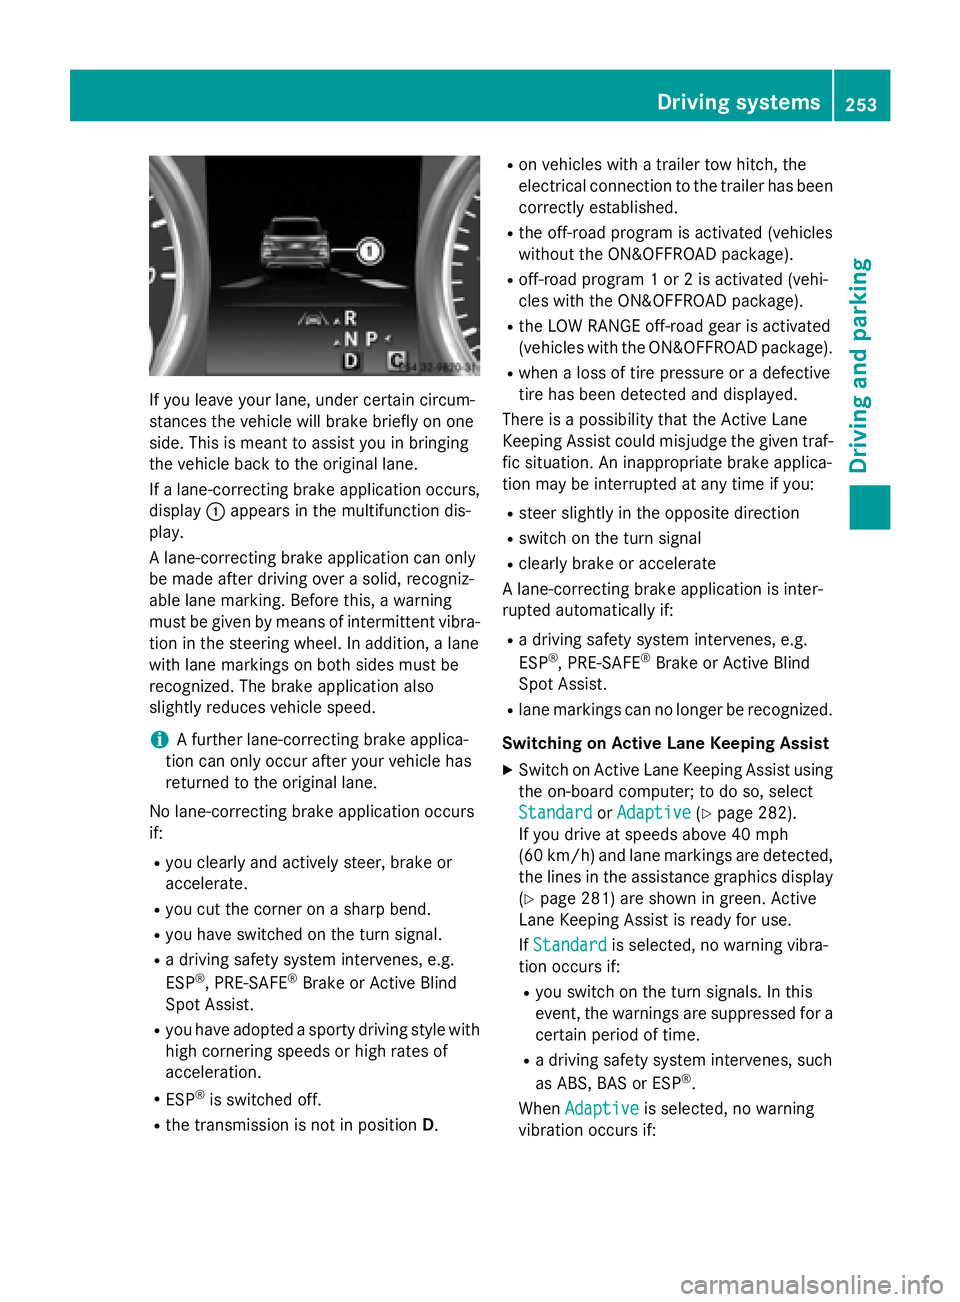
If a lane-correcting brake application occurs,
display �C appears in the multifunction dis-
play.
A lane-correcting brake application can only
be made after driving over a solid, recogniz-
able lane marking. Before this, a warning
must be given by means of intermittent vibra-
tion in the steering wheel. In addition, a lane
with lane markings on both sides must be
recognized. The brake application also
slightly reduces vehicle speed.
i A further lane-correcting brake applica-
tion can only occur after your vehicle has
returned to the original lane.
No lane-correcting brake application occurs
if: R
you clearly and actively steer, brake or
accelerate. R
you cut the corner on a sharp bend. R
you have switched on the turn signal. R
a driving safety system intervenes, e.g.
ESP ®
, PRE-SAFE ®
Brake or Active Blind
Spot Assist. R
you have adopted a sporty driving style with
high cornering speeds or high rates of
acceleration. R
ESP ®
is switched off.R
the transmission is not in position D . R
on vehicles with a trailer tow hitch, the
electrical connection to the trailer has been
correctly established. R
the off-road program is activated (vehicles
without the ON&OFFROAD package). R
off-road program 1 or 2 is activated (vehi-
cles with the ON&OFFROAD package). R
the LOW RANGE off-road gear is activated
(vehicles with the ON&OFFROAD package). R
when a loss of tire pressure or a defective
tire has been detected and displayed.
There is a possibility that the Active Lane
Keeping Assist could misjudge the given traf-
fic situation. An inappropriate brake applica-
tion may be interrupted at any time if you: R
steer slightly in the opposite direction R
switch on the turn signal R
clearly brake or accelerate
A lane-correcting brake application is inter-
rupted automatically if: R
a driving safety system intervenes, e.g.
ESP ®
, PRE-SAFE ®
Brake or Active Blind
Spot Assist. R
lane markings can no longer be recognized.
Switching on Active Lane Keeping Assist X
Switch on Active Lane Keeping Assist using
the on-board computer; to do so, select
Standard
or Adaptive ( Y
page 282).
If you drive at speeds above 40 mph
(60 km/h) and lane markings are detected,
the lines in the assistance graphics display
( Y
page 281) are shown in green. Active
Lane Keeping Assist is ready for use.
If Standard is selected, no warning vibra-
tion occurs if: R
you switch on the turn signals. In this
event, the warnings are suppressed for a
certain period of time. R
a driving safety system intervenes, such
as ABS, BAS or ESP ®
.
When Adaptive is selected, no warning
vibration occurs if: Driving systems 253
Driving and parking Z
Page 382 of 462

X
Clean the plast ic lenses of the exterior
lighting using a wet sponge and a mild
cleaning agent, e.g. Mercedes-Benz car
shampoo or cleaning cloths.
Cleaning the mirror turn signals
! On ly use cleaning agents or cleaning
cloths that are suitable for plast ic lenses.
Unsuit able cleaning agents or cleaning
cloths could scratch or damage the plastic
lenses of the mirror turn signals. X
Clean the plast ic lenses of the mirror turn
signals in the exterior mirror housing using
a wet sponge and mild cleaning agent, e.g.
Mercedes-Benz car shampoo or cleaning
cloths.
Cleaning the side running board
! Do not clean the aluminum inserts of the
side running board with alkaline or acidic
cleaners, such as wheel cleaner. Do not use
acid ic wheel cleaners to remove brake
dust. The aluminum inserts could other-
wise be damaged.
Cleaning the sensors
! If you clean the sensors with a power
washer, make sure that you keep a dis-
tance of at least 11.8 in (30 cm) between
the veh icle and the power washer nozzle.
In formation about the correct distance is
availab le from the equipment manufac-
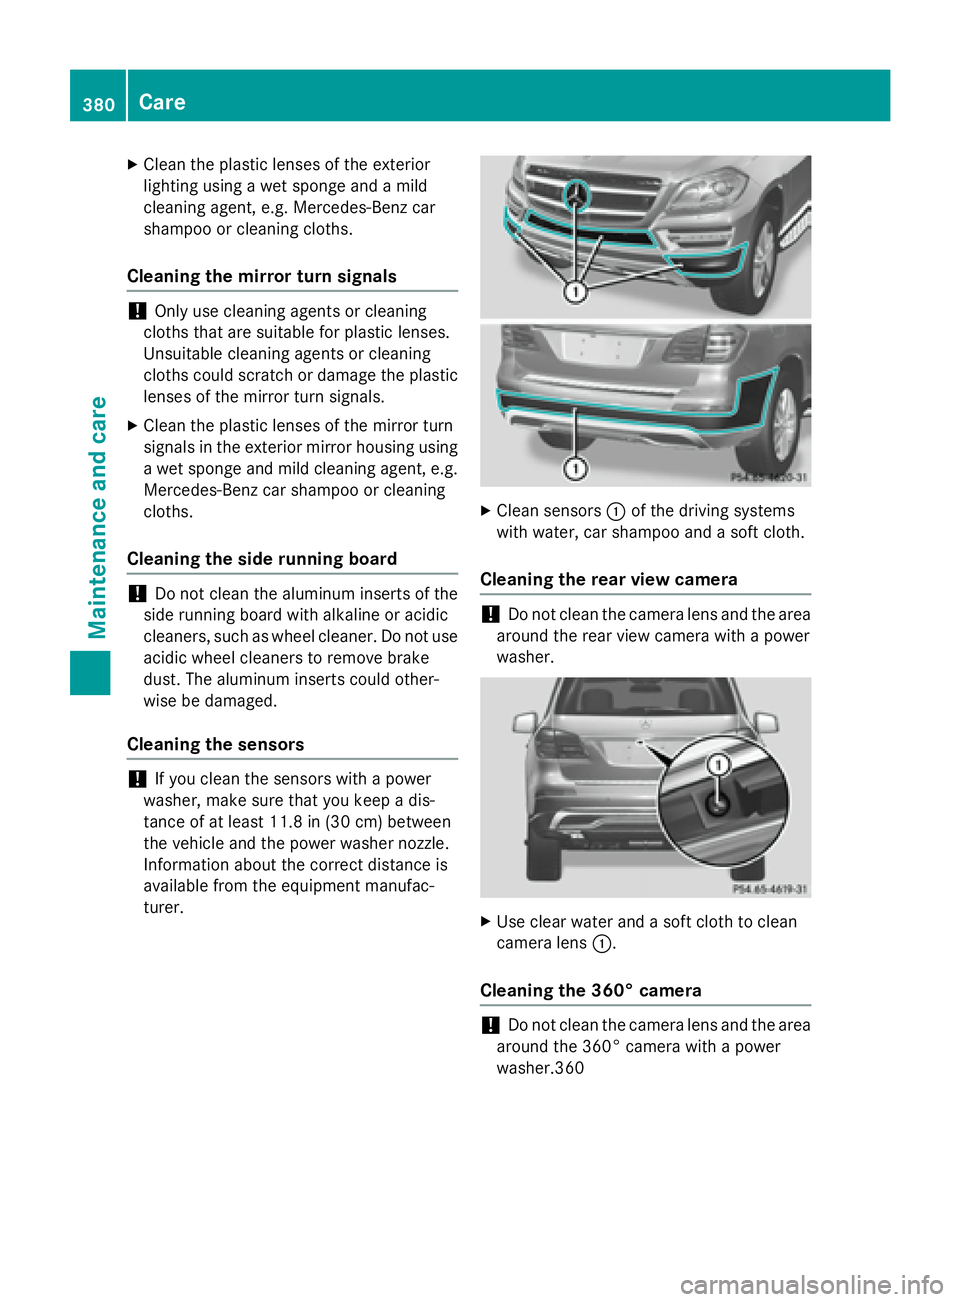
turer. X
Clean sensors �C of the driv ing systems
wit h water, car shampoo and a soft cloth.
Cleaning the rear view camera
! Do not clean the camera lens and the area
around the rear view camera with a power
washer.
X
Use clear water and a soft cloth to clean
camera lens �C .
Cleaning the 360° camera
! Do not clean the camera lens and the area
around the 360° camera with a power
washer.360380
Care
Maintenance and care
Page 401 of 462

The brackets for the screw-in towing eyes are
located in the bumpers. They are at the front
and at the rear, behind the covers. X
Remove the towing eye from the vehicle
tool kit ( Y
page 386).X
To open the cover at the front: press the
mark on cover �C inwards in the direction
of the arrow. X
To open the cover at the rear: insert a
flat, blunt object into the cutout and lever
cover �D out of the bumper.X
Take cover �C or �D off the opening.X
Screw in the towing eye clockwise as far as
it will go and tighten it.
Removing the towing eye X
Unscrew and remove the towing eye. X
Attach cover �C or �D to the bumper and
press until it engages. X
Place the towing eye in the vehicle tool kit.
Towing a vehicle with both axles on
the ground
It is important that you observe the safety
instructions when towing away your vehicle
( Y
page 397).
The automatic transmission automatically
shifts to position P when you open the driver's
or front-passenger door or when you remove
the SmartKey from the ignition lock.
In order to ensure that the automatic trans-
mission stays in position N when towing the
vehicle, you must observe the following
points: X
Make sure that the vehicle is stationary and
the SmartKey in the ignition lock is in posi-
tion 0 .X
Turn the SmartKey to position 2 in the igni-
tion lock.
On vehicles with KEYLESS-GO, use the
SmartKey instead of the Start/Stop button
( Y
page 165). X
Depress and hold the brake pedal. X
Shift the automatic transmission to posi-
tion N . X
Release the brake pedal. X
Release the electric parking brake. X
Leave the SmartKey in position 2 in the
ignition lock. X
Switch on the hazard warning lamps
( Y
page 133).
i In order to signal a change of direction
when towing the vehicle with the hazard
warning lamps switched on, use the com-
bination switch as usual. In this case, only
the indicator lamps for the direction of
travel flash. After resetting the combina-
tion switch, the hazard warning lamp starts
flashing again.
Transporting the vehicle
! You may only secure the vehicle by the
wheels, not by parts of the vehicle such as
axle or steering components. Otherwise,
the vehicle could be damaged.
The towing eye can be used to pull the vehicle
onto a trailer or transporter for transporting
purposes. X
Turn the SmartKey to position 2 in the igni-
tion lock. X
Shift the automatic transmission to posi-
tion N .
As soon as the vehicle has been loaded: X
Prevent the vehicle from rolling away by
applying the electric parking brake. X
Shift the automatic transmission to posi-
tion P . X
Turn the SmartKey to position 0 in the igni-
tion lock and remove it. X
Secure the vehicle.Towing and tow-starting 399
Breakdown assistance Z
Page:
< prev 1-8 9-16 17-24