Page 129 of 462

Using the memory button
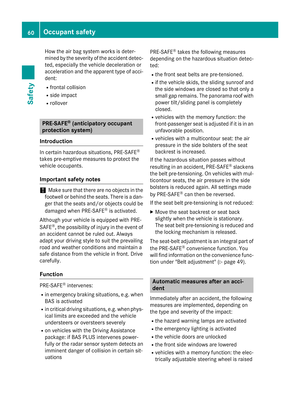
You can position the front-passenger side
exterior mirror in such a way that you can see
the rear wheel on that side as soon as you
engage reverse gear. This setting can be
stored using memory buttonM?.
XTurn the SmartKey to position 2in the igni-
tion lock (
Ypage 165).
XWith the exterior mirror on the front-
passenger side activated, use adjustment
button =to adjust the exterior mirror. In
the exterior mirror, the rear wheel and the
curb should be visible.
XPress memory button M? and one of the
arrows on adjustment button =within
three seconds.
The parking position is stored if the exterior
mirror does not move.
XIf the mirror moves out of position, repeat
the steps.
Calling up a stored parking position set-
ting
XTurn the SmartKey to position 2in the igni-
tion lock (
Ypage 165).
XAdjust the exterior mirror on the front-
passenger side using button ;.
XEngage reverse gear.
The exterior mirror on the front-passenger
side moves to the stored parking position.
The exterior mirror on the front-passenger
side moves back to its original position:
Ras soon as you exceed a speed of 9 mph
(15 km/h)
Rif you press button :for the exterior mir-
ror on the driver's side
Memory function
Storing settings
GWARNING
If you use the memory function on the driver's side while driving, you could lose control of
the vehicle as a result of the adjustments
being made. There is a risk of an accident.
Only use the memory function on the driver's
side when the vehicle is stationary.
GWARNING
When the memory function adjusts the seat or steering wheel, you and other vehicle occu-
pants – particularly children – could become
trapped. There is a risk of injury.
While the memory function is making adjust-
ments, make sure that no one has any body
parts in the sweep of the seat or steering
wheel. If somebody becomes trapped, imme-
diately release the memory function position
button. The adjustment process is stopped.
GWARNING
Children could become trapped if they acti-
vate the memory function, particularly when
unattended. There is a risk of injury.
When leaving the vehicle, always take the
SmartKey with you and lock the vehicle. Never
leave children unsupervised in the vehicle.
The memory function can be used at any time,
e.g. even when the SmartKey isn't in the igni-
tion lock.
With the memory function, you can store up
to three different settings, e.g. for three dif-
ferent people.
The following settings are stored as a single
memory preset:
Rposition of the seat, backrest and head
restraint
Rdriver's side: steering wheel position
Rdriver's side: position of the exterior mir-
rors on the driver's and front-passenger
sides
Memory function127
Seats, steering wheel and mirrors
Z
Page 130 of 462
XAdjust the seat (Ypage 110).
XOn the driver's side, adjust the steering
wheel (
Ypage 122)and the exterior mirrors
(
Ypage 124).
XPress the Mmemory button and then press
one of the storage position buttons 1,2 or
3 within three seconds.
The settings are stored in the selected pre-
set position. A tone sounds when the set-
tings have been completed.
The memory function can still be used if the
SmartKey has been removed.
Calling up a stored setting
XPress the button for storage position 1,2 or
3 . Keep pressing until the seat, steering
wheel and exterior mirrors are in the stored
position.
The setting procedure is interrupted as soon
as you release the storage position buttons.
128Memory function
Seats, steering wheel and mirrors
Page 131 of 462
Useful information............................130
Exterior lighting ................................ 130
Interior lighting ................................. 135
Replacing bulbs ................................. 136
Windshield wipers ............................139
129
Lights and windshield wipers
Page 132 of 462

Useful information
i
This Operator's Manual describes all
models and all standard and optional equip-
ment of your vehicle available at the time of
publication of the Operator's Manual.
Country-specific differences are possible.
Please note that your vehicle may not be
equipped with all features described. This
also applies to safety-related systems and
functions.
iRead the information on qualified special-
ist workshops (
Ypage 29).
Exterior lighting
General notes
For reasons of safety, Mercedes-Benz recom-
mends that you drive with the lights switched
on even during the daytime. In some coun-
tries, operation of the headlamps varies due
to legal requirements and self-imposed obli-
gations.
Setting the exterior lighting
Setting options
Exterior lighting can be set using:
Rthe light switch
Rthe combination switch (Ypage 132)
Rthe on-board computer (Ypage 284)
Light switch
Operation
1 WLeft-hand standing lamps
2XRight-hand standing lamps
3TParking lamps, license plate and
instrument cluster lighting
4ÃAutomatic headlamp mode, control-
led by the light sensor
5LLow-beam/high-beam headlamps
BRRear fog lamp
If you hear a warning tone when you leave the
vehicle, the lights may still be switched on.
XTurn the light switch to Ã.
The exterior lighting (except the parking/
standing lamps) switches off automatically if
you:
Rremove the SmartKey from the ignition lock
Ropen the driver's door with the SmartKey in
position 0
Automatic headlamp mode
à is the favored light switch setting. The
light setting is automatically selected accord-
ing to the brightness of the ambient light
(exception: poor visibility due to weather con-
ditions such as fog, snow or spray):
RSmartKey in position 1in the ignition lock:
the parking lamps are switched on or off
automatically depending on the brightness
of the ambient light.
RWith the engine running: if you have acti-
vated the daytime running lamps function
via the on-board computer, the daytime
130Exterior lighting
Lights and windshield wipers
Page 133 of 462

running lamps or the parking lamps and the
low-beam headlamps are switched on or off
automatically depending on the brightness
of the ambient light.
XTo switch on automatic headlamp
mode: turn the light switch to Ã.
GWARNING
When the light switch is set to Ã, the low-
beam headlamps may not be switched on
automatically if there is fog, snow or other
causes of poor visibility due to the weather
conditions such as spray. There is a risk of an
accident.
In such situations, turn the light switch to
L.
The automatic headlamp feature is only an
aid. The driver is responsible for the vehicle's
lighting at all times.
Only for Canada:
The daytime running lamps improve the visi-
bility of your vehicle during the day. The day-
time running lamps function is required by law
in Canada. It cannot therefore be deactivated.
When the engine is running and the vehicle is
stationary: if you move the selector lever from
a drive position to P, the daytime running
lamps/low-beam headlamps go out after
three minutes.
When the engine is running, the vehicle is
stationary and in bright ambient light: if you
turn the light switch to T, the daytime
running lamps and parking lamps switch on.
If the engine is running and you turn the light
switch to L, the manual settings take
precedence over the daytime running lamps.
USA only:
The daytime running lamps improve the visi-
bility of your vehicle during the day. To do this,
the daytime running lamps function must be
switched on using the on-board computer
(
Ypage 284).
If the engine is running and you turn the light
switch to TorL, the manual settings take precedence over the daytime running
lamps.
Low-beam headlamps
Even if the light sensor does not detect that it
is dark, the parking lamps and low-beam
headlamps switch on when the ignition is
switched on and the light switch is set to the
L
position. This is a particul
arly useful
function in the event of rain and fog.
XTo switch on the low-beam headlamps:
turn the SmartKey in the ignition lock to
position 2or start the engine.
XTurn the light switch to L.
The green Lindicator lamp in the instru-
ment cluster lights up.
Rear fog lamp
The rear fog lamp improves visibility of your
vehicle for the traffic behind in the event of
thick fog. Please take note of the country-
specific regulations for the use of rear fog
lamps.
XTo switch on the rear fog lamps: turn the
SmartKey to position 2in the ignition lock
or start the engine.
XTurn the light switch to LorÃ.
XPress the Rbutton.
The yellow Rindicator lamp in the
instrument cluster lights up.
XTo switch off the rear fog lamp: press the
R button.
The yellow Rindicator lamp in the
instrument cluster goes out.
Parking lamps
!If the battery has been excessively dis-
charged, the parking lamps or standing
lamps are automatically switched off to
enable the next engine start. Always park
your vehicle safely and sufficiently lit
according to legal standards. Avoid the
continuous use of the Tparking lamps
for several hours. If possible, switch on the
X right or the Wleft standing lamp.
Exterior lighting131
Lights and windshield wipers
Z
Page 134 of 462

XTo switch on:turn the light switch to T.
The green Tindicator lamp in the instru-
ment cluster lights up.
Standing lamps
Switching on the standing lamps ensures the
corresponding side of the vehicle is illumina-
ted.
XTo switch on the standing lamps: the
SmartKey is not in the ignition lock or it is in
position 0.
XTurn the light switch to W(left-hand side
of the vehicle) or X(right-hand side of
the vehicle).
Vehicles towing a trailer: both the right and
left standing lamps (tail lamps) are always
illuminated on the trailer.
Combination switch
Turn signal
:High-beam headlamps
;Turn signal, right
=High-beam flasher
?Turn signal, left
XTo indicate briefly: press the combination
switch briefly to the pressure point in the
direction of arrow ;or?.
The corresponding turn signal flashes three
times.
XTo indicate: press the combination switch
beyond the pressure point in the direction
of arrow ;or?.
High-beam headlamps
XTo switch on manually: turn the Smart-
Key to position 2in the ignition lock or start
the engine.
XVehicles without Adaptive Highbeam
Assist: turn the light switch to Lor
Ã.
XVehicles with Adaptive Highbeam Assist:
turn the light switch to L.
XPress the combination switch beyond the
pressure point in the direction of arrow :.
In the Ãposition, the high-beam head-
lamps are only switched on when it is dark
and the engine is running.
The blue Kindicator lamp in the instru-
ment cluster lights up when the high-beam
headlamps are switched on.
XTo deactivate: move the combination
switch back to its normal position.
The blue Kindicator lamp in the instru-
ment cluster goes out.
Vehicles with Adaptive Highbeam Assist:
when Adaptive Highbeam Assist is active, it
automatically controls activation of the high-
beam headlamps (
Ypage 134).
High-beam flasher
XTo switch on: turn the SmartKey in the
ignition lock to position 1or 2, or start the
engine.
XPull the combination switch in the direction of arrow =.
132Exterior lighting
Lights and windshield wiper s
Page 135 of 462

Hazard warning lamps
XTo switch on the hazard warning lamps:press button :.
All turn signals flash. If you now switch on a
turn signal using the combination switch,
only the turn signal lamp on the corre-
sponding side of the vehicle will flash.
XTo switch off the hazard warning lamps:
press button :.
The hazard warning lamps automatically
switch on if:
Ran air bag is deployed or
Rthe vehicle decelerates rapidly from a
speed of above 45 mph (70 km/h) and
comes to a standstill
The hazard warning lamps switch off auto-
matically if the vehicle reaches a speed of
above 6 mph (10 km/h) again after a full
brake application.
iThe hazard warning lamps still operate if
the ignition is switched off.
Cornering light function
The cornering light function improves the illu-
mination of the road over a wide angle in the
direction you are turning, enabling better vis-
ibility in tight bends, for example. It can only
be activated when the low-beam headlamps
are switched on.
Active:
Rif you are driving at speeds below 25 mph
(40 km/h) and switch on the turn signal or
turn the steering wheel
Rif you are driving at speeds between
25 mph (40 km/h) and 45 mph (70 km/h)
and turn the steering wheel
The cornering lamp may remain lit for a short
time, but is automatically switched off after
no more than three minutes.
Exterior lighting133
Lights and windshield wipers
Z
Page 136 of 462

Adaptive Highbeam Assist
Gene ral notes
You can use this function to set th ehead-
lamp sto chang ebetween low beam and high
beam automatically. The system recognizes
vehicles wit htheir lights on ,either approach-
ing from th eopposit edirection or traveling in
fron tof your vehicle, and consequentl y
switches th eheadlamps from high beam to
low beam .
The system automatically adapt sth elow-
beam headlamp range depending on th edis-
tance to th eother vehicle. Once thesystem
no longer detects any other vehicles, it reac -
tivates th ehigh-beam headlamps .
The system' soptical sensor is locate dbehind
th ewindshield near th eoverhead control
panel.
Import ant safety notes
GWARNIN G
Adaptive Highbea mAssis tdoes no trecogniz e
road users:
Rwho hav eno lights ,e.g. pedestrian s
Rwho havepoor lighting ,e.g. cyclist s
Rwhoselighting is blocked, e.g. by abarrier
In ver yrar ecases, Adaptive Highbea mAssis t
may fail to recogniz eother road user sthat
hav elights ,or may recogniz ethem to olate. In
this or similar situations, th eautomatic high -
beam headlamp swill no tbe deactivated or
activated regardless .There is aris kof an acci-
dent.
Always carefully observ eth etraffic condition s
and switch off th ehigh-beam headlamp sin
goo dtime.
Adaptive Highbeam As sistcanno ttak eint o
accoun troad ,weather or traffic conditions.
Adaptive Highbeam As sistis only an aid. You
are responsible for adj usting thevehicle's
lighting to th eprevailing light, visibilit yand
traffic conditions.
In particular, th edetection of obstacles can
be restricted if there is:
Rpoor visibility, e.g. due to fog ,heav yrain or
snow
Rdirt on th e sensors or the sensors are
obscured
Switching Adaptive Highbeam Assist
on/off
XTo switch on: turnth eligh tswitch to Ã.
XPress thecombination switch beyon dth e
pressur epoin tin th edirection of arrow :.
The _ indicator lamp in th emultifunc-
tion display lights up when it is dark and th e
ligh t sensor activates th elow-beam head-
lamps.
If you are driving at speeds abov eapprox -
imately 16 mph (25 km/h):
The headlamp range is set automatically
depending on the distance between the
vehicle and other road users.
If you are driving at speeds above approx-
imately 19 mph (30 km/h) and no other
road users have been detected:
The high-beam headlamps are switched on automatically. The Kindicator lamp in
the instrument cluster also lights up.
If you are driving at speeds below approx-
imately 16 mph (25 km/h) or other road
134Exterior lighting
Lights and windshield wipers