2016 MERCEDES-BENZ G-CLASS SUV park assist
[x] Cancel search: park assistPage 7 of 261

1, 2,
3...
4ETS (Electronic Traction System) see ETS/4ETS (Electronic Trac-
tion System)
12 Vsocket
see Socket (12 V) A
ABS (Anti-lock Braking System) Display message ............................ 142
Function/notes ................................ 52
Warning lamp .................................1 58
Activating/deactivating air-recir-
culation mode ...................................... 89
ADAPTIVE BRAKE ................................. 56
Adaptive brake lights .......................... 53
AdBlue ®
Additive ......................................... 252
Display message ............................ 148
Filling capacity ............................... 252
Important safety notes .................. 251
Low outside temperatures ............. 252
Purity ............................................. 252
Topping up ..................................... 111
Additives (engine oil) ........................ 253
Adjustin gthe seat ............................... 69
AF (alternative frequency) ................ 177
Airc onditioning
Windscreen heating ......................... 88
Airf ilter(wh ite display message) .... 148
Airv ents
Important safety notes .................... 93
Rea r................................................. 94
Setting ............................................. 93
Setting the centre airv ents ............. 94
Setting the sid eairvents ................. 94
Air-conditionin gsystem
see Climate control
Airbag
Introduction ..................................... 36
PASSENGER AIR BAG OFF indica-
tor lamp .......................................... .32
Airbags
Fron tairbag (driver ,front
passenger )....................................... 37
Important safety gu idelines............. 36 Triggering ......................................... 37
Alarm
ATA (Anti-Theft Alarm system) ......... 56
Switching off (ATA) .......................... 56
Switching the function on/off
(ATA) ................................................ 56
All-whee ldrive
Transfer case ................................. 124
Approach/departurea ngle.............. 121
Aquaplaning ....................................... 117
Ashtray ............................................... 208
Assembly tool
General notes ................................ 210
Radio aerial .................................... 210
Assistance display (on-board com-
puter) .................................................. 137
Assistance menu (on-board com-
puter) .................................................. 137
ASSYST service interva ldisplay
Servic emessages .......................... 216
ATA (Anti-Theft Alarm system)
Activating/deactivatin g................... 56
Function ........................................... 56
Switching off the alarm .................... 56
Audi oAUX jack .................................. 178
AUTO lights
Displa ymessage ............................ 145
see Lights
Automatic engine start (ECO start/
sto pfunction) ...................................... 99
Automatic engine switch-off (ECO
start/sto pfunction) ............................ 98
Automatic headlamp mode ................ 75
Automatic transmission
Displa ymessage ............................ 153
Drive position (EC Ostart/stop
function) ........................................ 103
Drive programs .............................. 104
Driving tip s.................................... 103
Emergency running mod e.............. 108
Engaging drive position .................. 103
Engaging neutral ............................ 102
Engaging reverse gea r................... 102
Engaging the park position ............ 102
Important safety notes .................. 101
Kickdow n....................................... 104
Manua lshifting .............................. 106 4
Index
Page 8 of 261
Neutral (ECO start/stop func-
tion) ............................................... 102
Overview ........................................ 101
Problem( fault) ............................... 108
Program selector button ................ 104
Pulling away. .................................... 97
Selector lever ................................ 101
Shift ranges ................................... 105
Steering whee lgearshift paddle s... 104
Trailer towing ................................. 104
Transmission position display ........ 101
Automatic transmission emer-
genc yrunnin gmode ......................... 108
Auxiliary heating
Activating/deactivating ................... 90
Activating/deactivating (o nthe
centre console )................................ 90
Displa ymessage ............................ 154
Important safety notes .................... 89
Malfunction ...................................... 93
Problem (displa ymessage) .............. 93
Remote control ................................ 90
Setting ........................................... 139
Auxiliary heating/ventilation
Setting the departur etime ............... 92
Auxiliary ventilation
Activating/deactivating ................... 90
Activating/deactivating (o nthe
centre console )................................ 90
Problem (displa ymessage) .............. 93
Remote control ................................ 90
Axle load, permissibl e(traile rtow-
ing) ...................................................... 256 B
Backres t(display message) ............. 154
BAS (Brake Assist System) ................. 53
Battery
Changing (auxiliary heating
remote control) ................................ 92
Battery (key)
Checking .......................................... 59
Important safety notes .................... 59
Replacing ......................................... 59
Battery (vehicle)
Charging ........................................ 226
Displa ymessage ............................ 147 Importan
tsafety notes .................. 224
Jump starting .................................2 27
Overview ........................................ 224
Belt tensioner
Activatio n......................................... 37
Belt warning ......................................... 36
BlueTEC
see AdBlue ®
BlueTE C(AdBlue ®
) ............................ .251
Bluetooth ®
Activating audio mode ................... 178
Activating/deactivating ................. 174
Connecting automatically .............. 175
Connecting devices ....................... 175
Connectio nrequirements .............. 174
Pairing code ................................... 175
Pairing devices ............................... 174
Unpairing adevice ......................... 175
Bonnet
Closing .......................................... .212
Display message ............................ 153
Important safety notes .................. 211
Opening ......................................... 211
Brake
EBD ................................................. .55
Brake fluid
Displa ymessage ............................ 144
Note s............................................. 253
Brake forc edistribution
see EBD (electroni cbrake force
distribution)
Brake lamp
Replacing bulb s............................... 80
Brake lamps
Adaptive ........................................... 53
Displa ymessage ............................ 145
Brakes
ABS .................................................. 52
BAS .................................................. 53
Brake fluid (notes) ......................... 253
Displa ymessage ............................ 142
Driving tip s.................................... 115
HOLD function ............................... 122
Important safety notes .................. 115
Parking brake ................................ 114
Warning lamp ................................. 157 Index
5
Page 16 of 261

Off-road fording
................................. 117
Off-road system
Permanen tall-wheel drive .............1 23
On-board computer
Assistance menu ........................... 137
Audi omenu ................................... 135
Convenience submenu .................. 140
Display messages .......................... 141
Factory setting submenu .............. .141
Heating submenu ........................... 139
Important safety notes .................. 131
Instrument cluster submenu .......... 137
Ligh tsubmenu ............................... 138
Menu overview .............................. 133
Message memory .......................... 141
Navigation menu ............................ 134
Operation ....................................... 132
Selecting the language .................. 138
Service menu ................................. 137
Settings menu ............................... 137
Standard displa y............................ 133
Telephone menu ............................ 136
Time ............................................... 138
Time/Date submenu ..................... 138
Tri pm enu ...................................... 133
Vehicl esubmenu ........................... 139
Operatin ginstructions
Vehicl eequipment ........................... 21
Operatin gsafety
Declaration of conformity ................ 22
Important safety note ...................... 21
Operatin gsystem
see On-board computer
Operatin gthe touchscreen
Confirming the selection ................ 170
Introduction ................................... 170
Moving the roa dmap (ma pview) ... 171
Selecting amenu ite m................... 170
Outside temperature display ........... 131
Overhead contro lpanel ...................... 30 P
Paint code .......................................... 249
Paintwork (clea ning instructions) ... 218
Parking ............................................... 113
Engaging park position .................. 102
Important safety notes .................. 113 Parking brake ................................ 114
Switching off the engine ................1
14
Parking brake
Display message ............................ 143
Emergency braking ........................ 114
Operating ....................................... 114
Warning lamp ................................. 157
Parking lamps
Display message ............................ 145
Switching on/off .............................. 75
PASSENGE RAIRBAG OFF
Indicator lamp .................................. 32
Problems (malfunctions) .................. 46
Permanent all-whee ldrive
Off-road system ............................ .123
Petrol ................................................. .251
Pets in the vehicle ............................... 52
Plastic trim (cleaning instruc-
tions) ................................................. .220
Power supply (trailer) ....................... 129
Program selector button .................. 104
Protection against theft
ATA (Anti-Theft Alarm system) ......... 56
Immobiliser ...................................... 56
Protection of the environment
General notes .................................. 20
Pulling away
Automatic transmission ................... 97
General notes .................................. 97
Trailer .............................................. 97 Q
QR code Mercedes-Benz GuideA pp ................. 1
Rescue card .....................................24
Qualified specialist workshop ........... 23 R
Radiator cover ................................... 212
Radio
Calling up stored stations .............. 176
Overview ........................................ 176
Radio Dat aSystem ........................ 177
Searching for astation .................. 176
Selecting astation ......................... 135
Setting astation ............................ 176 Index
13
Page 82 of 261
the xeno
nbulbs carrie doutataq uali fied spe-
cialist workshop. G
WARNING
Bulbs, lamp sand plugc onnectors can
become very hot during use. When replacing a bulb, you coul dburn yourself on these com-
ponents. There is arisk of injury.
Allow these components to cool downb efore
replacing the bulb.
Do not use abulbifith as been dropped or if its
glass has been scratched.
The bulbm ay explode if:
R you touch it
R it is hot
R you drop it
R you scratch it
Use bulbs only in closed lamp sthat have been
designed for this purpose. Fit only spar ebulbs of
the same type and the specified voltage.
Marks on the glass reduce the service life of the bulbs. Do not touch the glass tube with your
bare hands. If necessary, clea nthe glass tube
when cold with alcohol or spiri tand rub it off
with alint-free cloth.
Protect bulbs from moisture during operation.
Do not allow bulbs to come into contact with
liquids.
Xeno nbulbs and LED modules: you cannot
replace xenon bulbs or LED modules yourself.
Have the following bulbs replaced at aqualified
specialist workshop:
R third brake lamp
R side lamps/parking lamp s(front)
R main-beam/dipped-beam headlamps (xenon
headlamps)
R daytime driving lights
R licence plate lamp
i Individuals
egments of the licence plate
lamp LEDs may fail without adisplay message
appearing in the multifunction display.R egu-
larl ycheck the licence plate lighting. If nec-
essary, visit aqualified specialist workshop.
You can replace the following bulbs: R turn signa llamp (front)
R brake/tai llamp
R turn signa llamp (rear) R
tail lamp/parking lamp
R reversing light
R rear foglamp
Replace only the bulb sliste d( Ypage 79).
Hav ethe bulb stha tyou cannot change yourself
replaced at aquali fied specialis tworkshop.
If yo urequire assistance replacing bulbs, con-
sult aquali fied specialis tworkshop.
If the new bulb still does not light up ,consul ta
qualified specialis tworkshop.
Headlamps and lights ar eanimportant aspect of
vehicl esafety .You must therefore make sure
tha tthese functio ncorrectl yatalltimes .Have
the headlamp setting verified regularly. Overview of bulb types
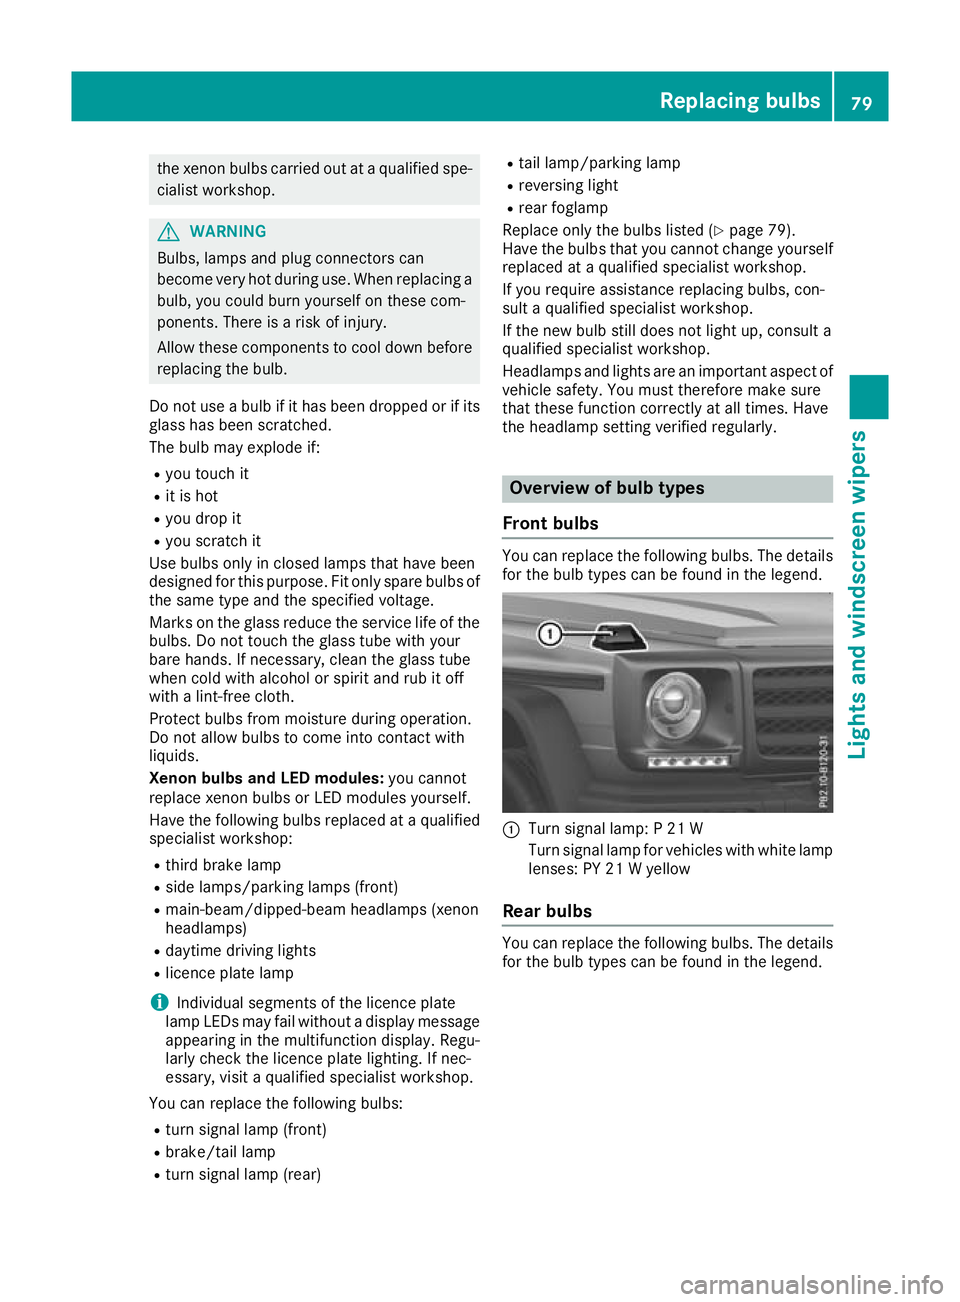
Fron tbulbs You can replace the following bulbs. The details
for the bulb types can be found in the legend. :
Turn signal lamp: P21W
Turn signal lamp for vehicles with white lamp lenses: PY 21 Wyellow
Rear bulbs You can replace the following
bulbs. The details
for the bulb types can be foun dinthe legend. Replacing bulbs
79Lights and windscreen wipers Z
Page 109 of 261
Manual gearshifting
Temporary setting X
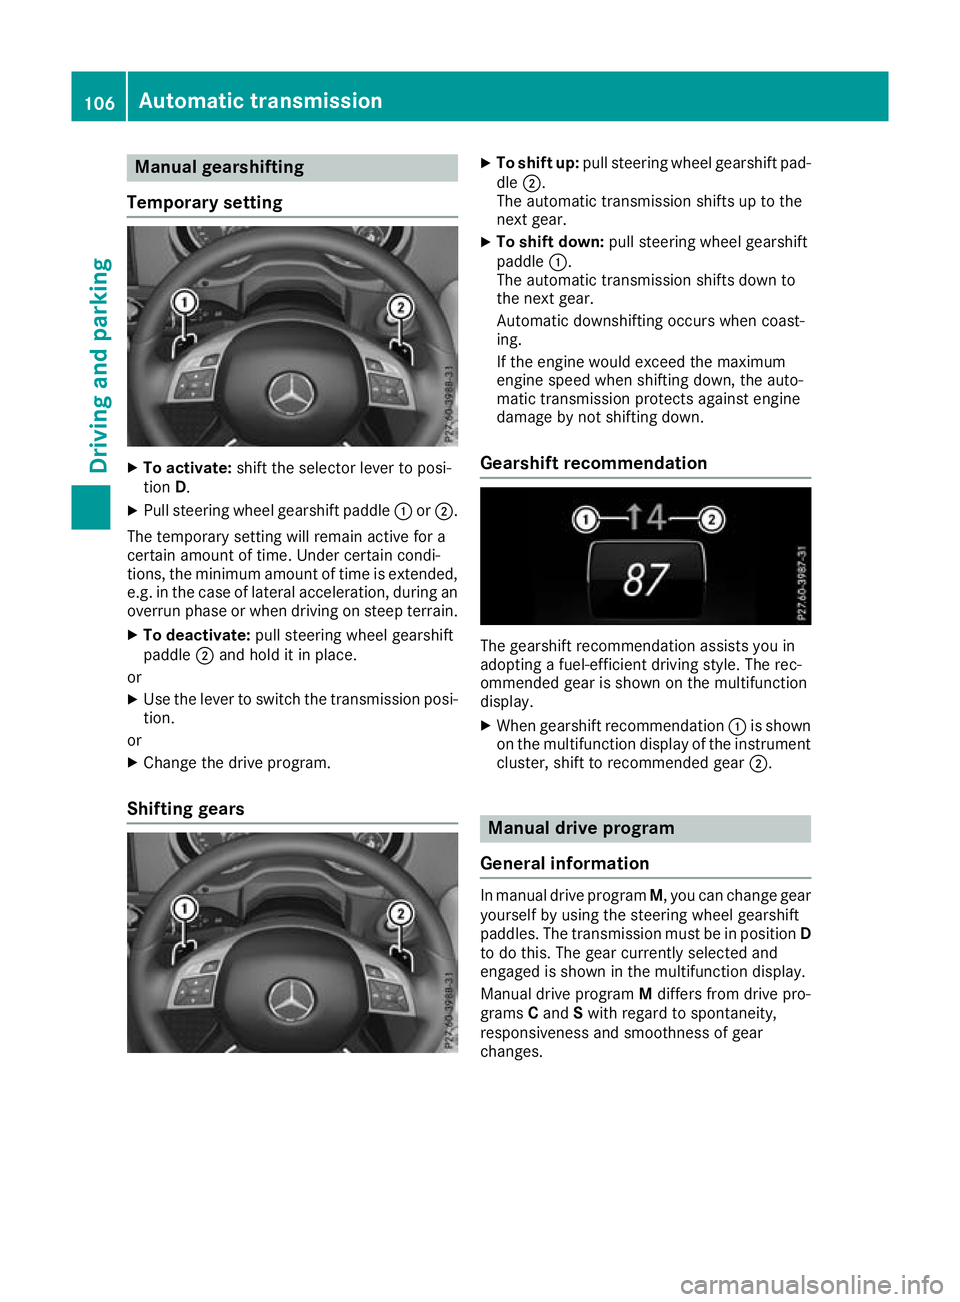
To activate: shift the selector lever to posi-
tion D.
X Pull steering whee lgearshift paddle :or;.
The temporary setting will remai nactive for a
certain amount of time .Unde rcertain condi-
tions, the minimu mamount of time is extended,
e.g .int he cas eoflatera lacceleration, during an
overru nphase or when driving on stee pterrain.
X To deactivate: pull steering whee lgearshift
paddle ;and hol ditinp lace.
or X Use the lever to switch the transmission posi-
tion.
or X Chang ethe drive program.
Shiftin ggears X
To shift up: pull steering whee lgearshift pad-
dle ;.
The automatic transmission shifts up to the
next gear.
X To shift down: pull steering whee lgearshift
paddle :.
The automatic transmission shifts down to
the next gear.
Automatic downshifting occurs when coast-
ing.
If the engine woul dexceed the maximum
engine speed when shifting down, the auto-
matic transmission protects against engine
damage by not shifting down.
Gearshift recommendation The gearshift recommendation assist
syou in
adopting afuel-efficien tdriving style. The rec-
ommended gear is shown on the multifunction
display.
X When gearshift recommendation :is shown
on the multifunction display of the instrument
cluster, shift to recommended gear ;. Manual drivep
rogram
General information In manua
ldrive program M,you can change gear
yourself by using the steering wheel gearshift
paddles. The transmission must be in position D
to do this. The gear currently selected and
engaged is shown in the multifunction display.
Manuald rive program Mdiffers from drive pro-
grams Cand Swith regard to spontaneity,
responsiveness and smoothness of gear
changes. 106
Automatic transmissionDriving and parking
Page 125 of 261
When driving on an incline, drive into the line
of fall (upwards or downwards in astraight
line) and do not turn.
Always observe the approach/departure angle
values (Y page 255).
R Observe the safety notes (Y page 119) and
general notes (Y page 119) on driving off-
road.
R Follow the line of fall when driving on slopes
and steep inclines.
R Befor edriving on extreme uphill and extreme
downhill gradients ,set the transfer case to
the LOW RANGE off-road driving position
(Y page 124).
R Engage the differential locks if necessary
(Y page 126).
R Drive slowly.
R Accelerate gently and make sure that the
wheels are gripping.
R Avoid high engine speeds, except when driv-
ing on sandy and muddy routes with high driv-
ing resistance.
R Use the braking power of the engine when
driving down aslope. Observe the engine
speed; do not overrev the engine.
R Shift the automatic transmission to alow gear
appropriate for tackling an uphill gradient or a long, steep downhill gradient.
The HOLD function assists you when pulling
away and manoeuvrin gonaslope or hillside
(Y page 122).
Maximum gradient-climbing capability Alwayso
bserve the maximu mgradient climbing
ability values (Y page 255).
Hilltops When drivin
gupanu phill gradient, slightly
reduce pressure on the accelerator immediately
before reaching the brow of the hill. Make use of the vehicle's own impetus to travel over the
brow.
This style of driving prevents:
R the vehicle from lifting off the ground on the
brow of ahill
R loss of traction
R the vehicle from travelling too quickly down
the other side Driving downhill R
Drive slowly.
R Do no tdrive at an angle down stee pinclines.
Stee rinto the line of fall and drive with the
front wheels aligned straight forwards .Oth-
erwise, the vehicl ecould slip sideways ,tip
and overturn.
R Before tackling stee pdownhil lgradients ,shift
the automatic transmission to alow gear.
By doing so, yo uwillu se the braking effect of
the engine to reduce the speed. If thi sisnot
sufficient, brake gently .Whend oing so, make
sure tha tthe vehicl eisfacing in the direction
of the line of fall.
R Observe the note sondrivinginm ountainous
terrai n(Ypage 122).
R Check tha tthe servic ebrake is workin gnor-
mall yafter alon gd ownhil lstretch.
When drivin gatspeeds below60km/h ,off-road
ABS is activated and the front wheels lock cycli- cally durin gbraking .The digging-i neffect ach-
ieved in the proces sreduce sthe stopping dis-
tance durin goff-roa ddriving. Thi slim its steering
capability. Driving systems
HOLD function
General notes Th
eH OLD function can assist the driver in the
following situations:
R when pulling away,e specially on steep slopes
R when manoeuvring on steep slopes
R when waiting in traffic
The vehicle is kept stationary without the driver having to depress the brake pedal.
The braking effect is cancelled and the HOLD
function deactivated when you depress the
accelerator pedal to pull away.
Do not use the HOLD function when driving off-
road, on steep uphill or downhill gradients or on
slippery or loose surfaces. The HOLD function
cannot hold the vehicle on such surfaces. 122
Driving systemsDriving and parking
Page 227 of 261
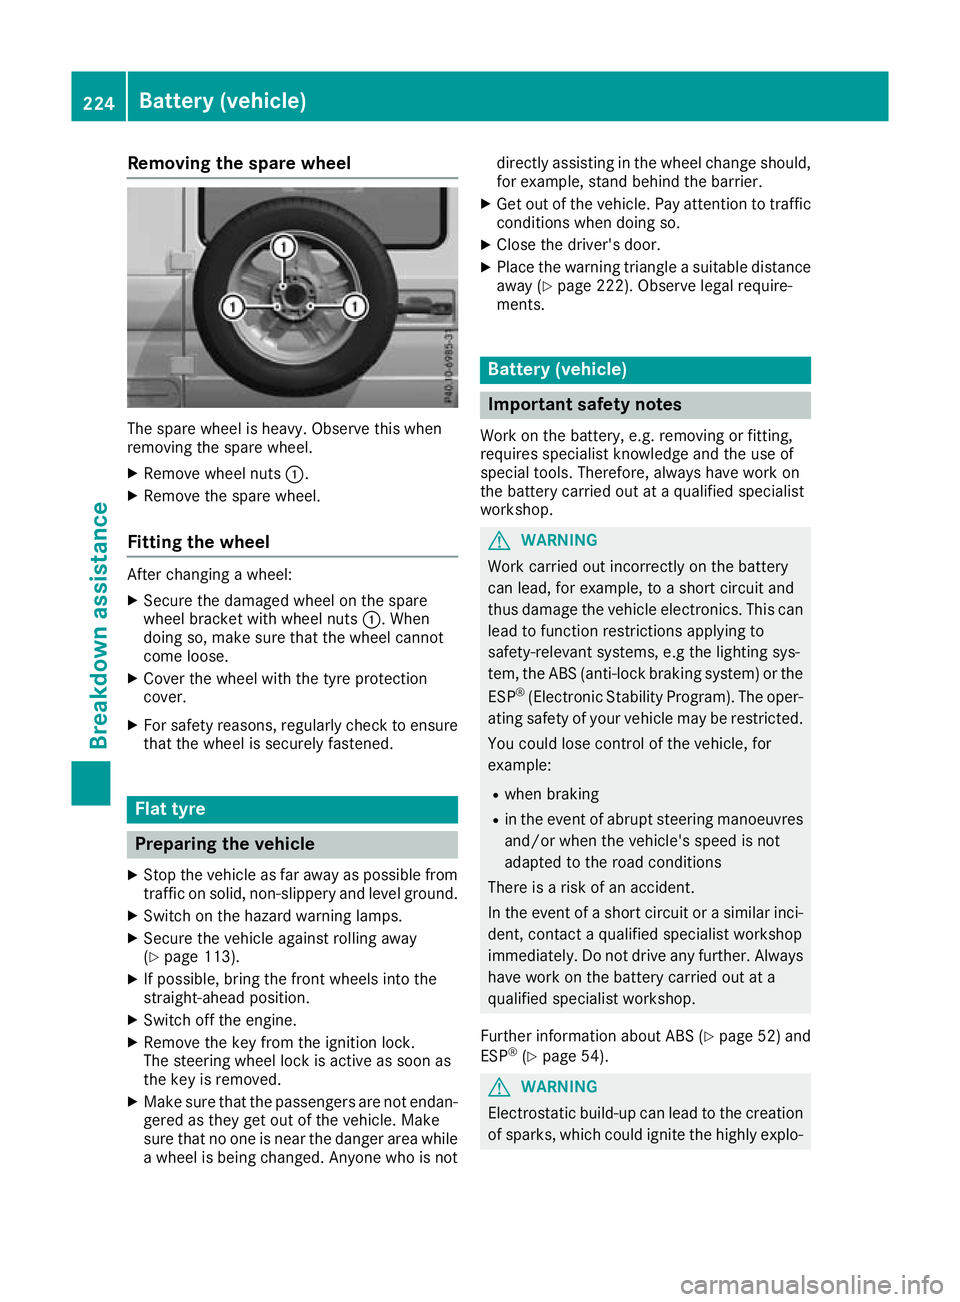
Removin
gthe spare wheel The spare wheel is heavy. Observ
ethis when
removing the spare wheel.
X Remove wheel nuts :.
X Remove the spare wheel.
Fitting the wheel After changing
awheel:
X Secure the damaged whee lonthe spare
whee lbracket with whee lnuts :.W hen
doing so, make sure tha tthe whee lcannot
come loose.
X Cover the whee lwitht he tyr eprotection
cover.
X For safety reasons ,regularly check to ensure
tha tthe whee lissecurel yfastened. Flat tyre
Preparing the vehicle
X Sto pthe vehicle as far away as possible from
traffic on solid, non-slippery and level ground.
X Switch on the hazard warning lamps.
X Secure the vehicle against rolling away
(Y page 113).
X If possible, bring the front wheels into the
straight-ahead position.
X Switch off the engine.
X Remove the key from the ignition lock.
The steering wheel lock is active as soon as
the key is removed.
X Make sure that the passengers are not endan-
gered as they get out of the vehicle. Make
sure that no one is near the danger area while
aw heel is being changed. Anyone who is not directly assisting in the wheel change should,
for example, stand behind the barrier.
X Get out of the vehicle. Pay attention to traffic
condition swhen doing so.
X Close the driver' sdoor.
X Place the warning triangle asuitable distance
away (Y page 222). Observe legal require-
ments. Batter
y(vehicle) Importan
tsafety notes
Wor kont hebattery, e.g. removing or fitting,
require sspecialist knowledge and th euse of
special tools. Therefore, always have wor kon
th eb attery carrie dout at aqualified specialist
workshop. G
WARNING
Work carried ou tincorrectly on the battery
can lead, for example, to ashort circui tand
thus damage the vehicl eelectronics. This can
leadtof unction restrictions applying to
safety-relevant systems ,e.g the lighting sys-
tem, the ABS (anti-lock braking system) or the
ESP ®
(Electronic Stability Program). The oper-
ating safety of yourv ehiclemay be restricted.
You coul dlose control of the vehicle, for
example:
R when braking
R in the event of abrupt steering manoeuvres
and/or when the vehicle's spee disnot
adapted to the road conditions
There is arisk of an accident.
In the event of ashort circui torasimilar inci-
dent, contact aqualified specialist workshop
immediately. Do not drive any further. Always have work on the battery carrie dout at a
qualified specialist workshop.
Further information about ABS (Y page52) and
ESP ®
(Y page5 4). G
WARNING
Electrostatic build-u pcan leadtot he creation
of sparks, which coul dignite the highly explo- 224
Battery (vehicle)Breakdown assistance
Page 229 of 261
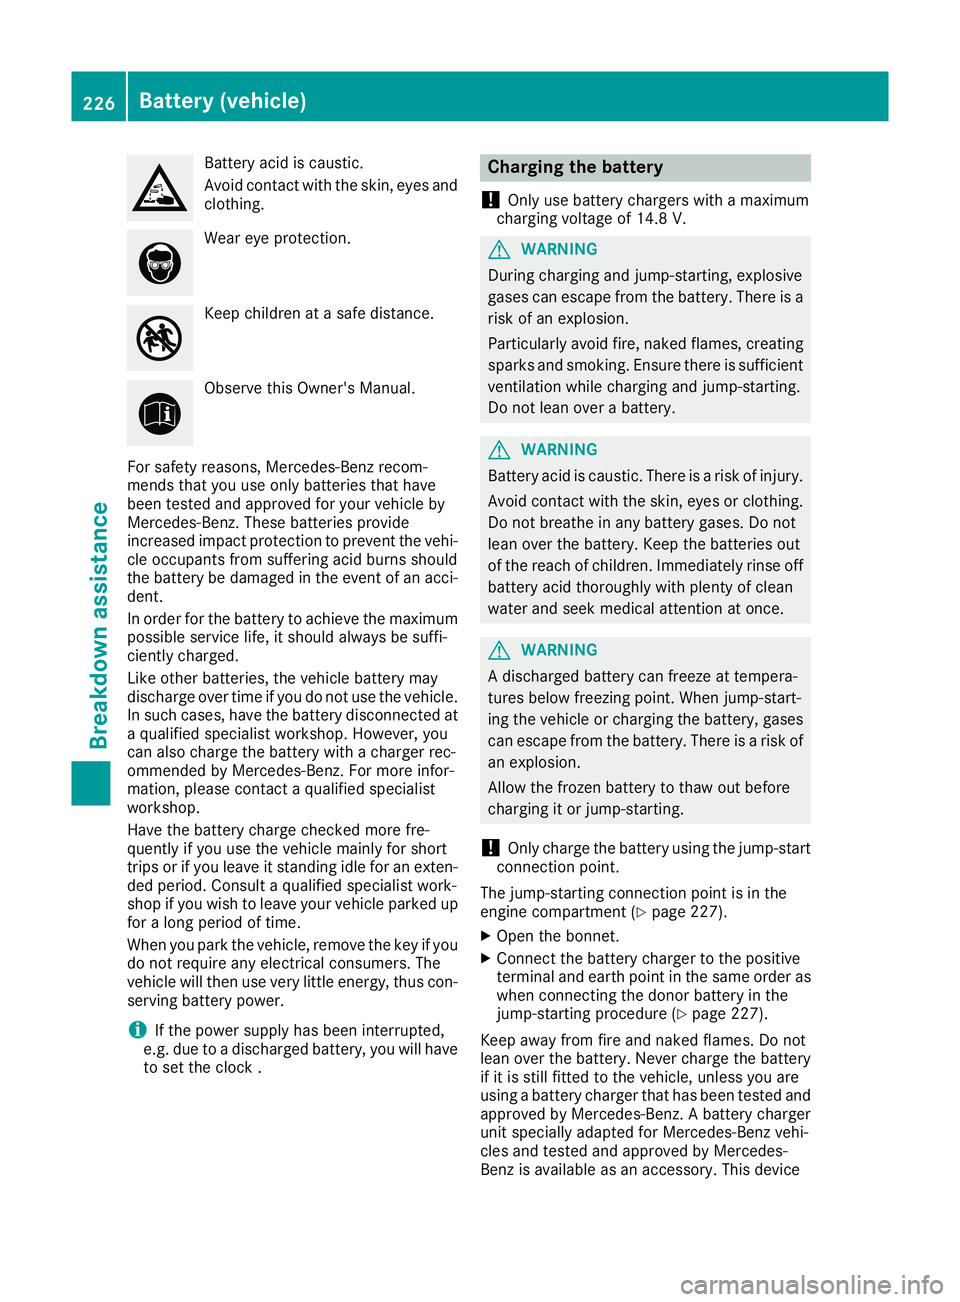
Battery aci
discaustic.
Avoid contact with the skin, eyes and clothing. Wea
reye protection. Keep children at
asafe distance. Observe this Owner's Manual.
For safety reasons, Mercedes-Benz recom-
mends that you use only batteries that have
been tested and approved for your vehicle by
Mercedes-Benz. These batteries provide
increased impact protection to prevent the vehi-
cle occupants from suffering acid burns should
the battery be damaged in the event of an acci- dent.
In order for the battery to achieve the maximumpossible service life, it should always be suffi-
ciently charged.
Like other batteries, the vehicle battery may
discharge over time if you do not use the vehicle.
In such cases, have the battery disconnected at aq uali fied specialist workshop .However, you
can also charge the battery with acharger rec-
ommended by Mercedes-Benz. For more infor-
mation, please contact aquali fied specialist
workshop.
Have the battery charge checked more fre-
quently if yo uuse the vehicle mainly for short
trips or if yo uleave it standing idl efor an exten-
ded period .Consul taq ualified specialist work-
shop if yo uwishtol eave your vehicle parked up
for along period of time.
Whe nyou park the vehicle, remove the key if you
do not require any electrica lconsumers. The
vehicle will then use very little energy, thus con- serving battery power.
i If the power supply has bee
ninterrupted,
e.g. du etoad ischarged battery, yo uwillh ave
to set the clock . Chargin
gthe battery
! Only use battery chargers wit
hamaximum
chargin gvoltage of 14.8 V. G
WARNING
During charging an djump-starting, explosive
gase scan escap efrom the battery .There is a
risk of an explosion.
Particularl yavoi dfire, naked flames, creating
sparks and smoking. Ensure there is sufficient
ventilation while charging and jump-starting.
Do not leano verabattery. G
WARNING
Battery acid is caustic. There is arisk of injury.
Avoid contact with the skin, eyesorc lothing.
Do not breathe in any battery gases. Do not
leano ver the battery .Keep the batterie sout
of the reach of children. Immediately rinse off
battery acid thoroughly with plenty of clean
water and seek medical attention at once. G
WARNING
Ad ischarged battery can freeze at tempera-
tures below freezing point. When jump-start-
ing the vehicl eorcharging the battery ,gases
can escap efrom the battery .There is arisk of
an explosion.
Allow the frozen battery to thaw out before
charging it or jump-starting.
! Only charge the battery using the jump-start
connection point.
The jump-starting connection point is in the
engine compartment (Y page227).
X Open the bonnet.
X Connect the battery charge rtothe positive
terminal and earth point in the same order as when connecting the donor battery in the
jump-starting procedure (Y page227).
Keep awayf rom fire and naked flames. Do not
leano ver the battery .Never charge the battery
if it is still fitted to the vehicle, unless you are
using abattery charge rthat has been tested and
approved by Mercedes-Benz. Abattery charger
unit speciallya dapted for Mercedes-Benz vehi-
cles and tested and approved by Mercedes-
Benz is available as an accessory. This device 226
Battery (vehicle)Breakdown assistance