2016 MERCEDES-BENZ G-CLASS SUV change wheel
[x] Cancel search: change wheelPage 227 of 261
Removin
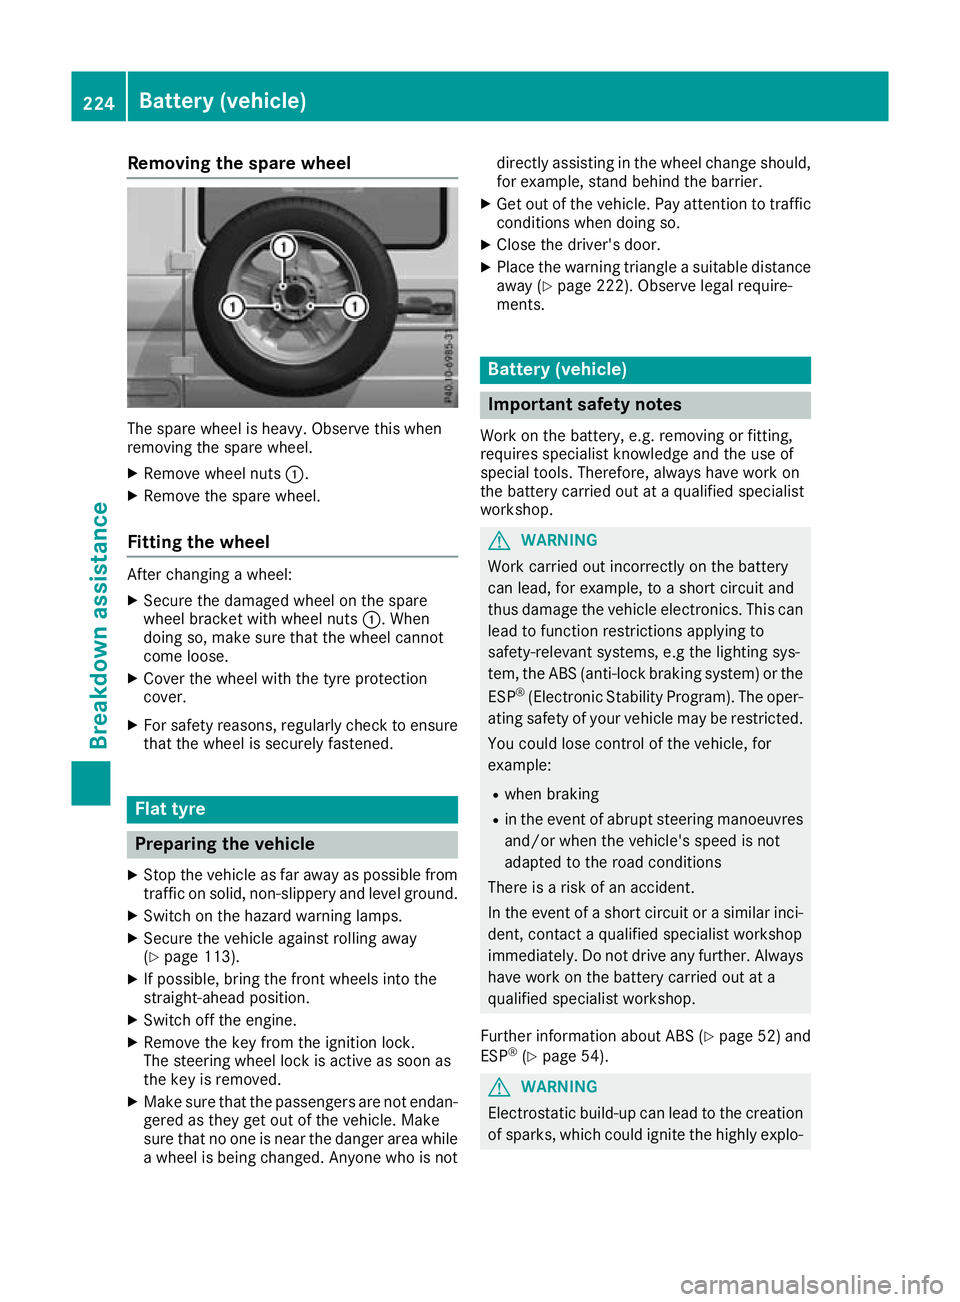
gthe spare wheel The spare wheel is heavy. Observ
ethis when
removing the spare wheel.
X Remove wheel nuts :.
X Remove the spare wheel.
Fitting the wheel After changing
awheel:
X Secure the damaged whee lonthe spare
whee lbracket with whee lnuts :.W hen
doing so, make sure tha tthe whee lcannot
come loose.
X Cover the whee lwitht he tyr eprotection
cover.
X For safety reasons ,regularly check to ensure
tha tthe whee lissecurel yfastened. Flat tyre
Preparing the vehicle
X Sto pthe vehicle as far away as possible from
traffic on solid, non-slippery and level ground.
X Switch on the hazard warning lamps.
X Secure the vehicle against rolling away
(Y page 113).
X If possible, bring the front wheels into the
straight-ahead position.
X Switch off the engine.
X Remove the key from the ignition lock.
The steering wheel lock is active as soon as
the key is removed.
X Make sure that the passengers are not endan-
gered as they get out of the vehicle. Make
sure that no one is near the danger area while
aw heel is being changed. Anyone who is not directly assisting in the wheel change should,
for example, stand behind the barrier.
X Get out of the vehicle. Pay attention to traffic
condition swhen doing so.
X Close the driver' sdoor.
X Place the warning triangle asuitable distance
away (Y page 222). Observe legal require-
ments. Batter
y(vehicle) Importan
tsafety notes
Wor kont hebattery, e.g. removing or fitting,
require sspecialist knowledge and th euse of
special tools. Therefore, always have wor kon
th eb attery carrie dout at aqualified specialist
workshop. G
WARNING
Work carried ou tincorrectly on the battery
can lead, for example, to ashort circui tand
thus damage the vehicl eelectronics. This can
leadtof unction restrictions applying to
safety-relevant systems ,e.g the lighting sys-
tem, the ABS (anti-lock braking system) or the
ESP ®
(Electronic Stability Program). The oper-
ating safety of yourv ehiclemay be restricted.
You coul dlose control of the vehicle, for
example:
R when braking
R in the event of abrupt steering manoeuvres
and/or when the vehicle's spee disnot
adapted to the road conditions
There is arisk of an accident.
In the event of ashort circui torasimilar inci-
dent, contact aqualified specialist workshop
immediately. Do not drive any further. Always have work on the battery carrie dout at a
qualified specialist workshop.
Further information about ABS (Y page52) and
ESP ®
(Y page5 4). G
WARNING
Electrostatic build-u pcan leadtot he creation
of sparks, which coul dignite the highly explo- 224
Battery (vehicle)Breakdown assistance
Page 234 of 261
X
When the vehicle is stationary, depress the
brake pedal and keep it depressed.
X Shift the transfer case to position Neutral
(Y page 125).
X Shift the automatic transmission to position
N.
X Leave the key in position 2in the ignition
lock.
X Release the brake pedal.
X Release the parking brake.
X Switc hont he hazard warning lamps
(Y page 76).
In order to signal achange of direction when
towing the vehicle with the hazard warning
lamps switched on, use the combination switch
as usual. In this case, only the turn signals for
the desired direction flash. When you reset the
combination switch, the hazard warning lamps
start flashing again.
i The automatic transmission can only
change gear when the batter yhas sufficient
charge.
If you cannot shift the automatic transmission
to position N,the propeller shafts to the
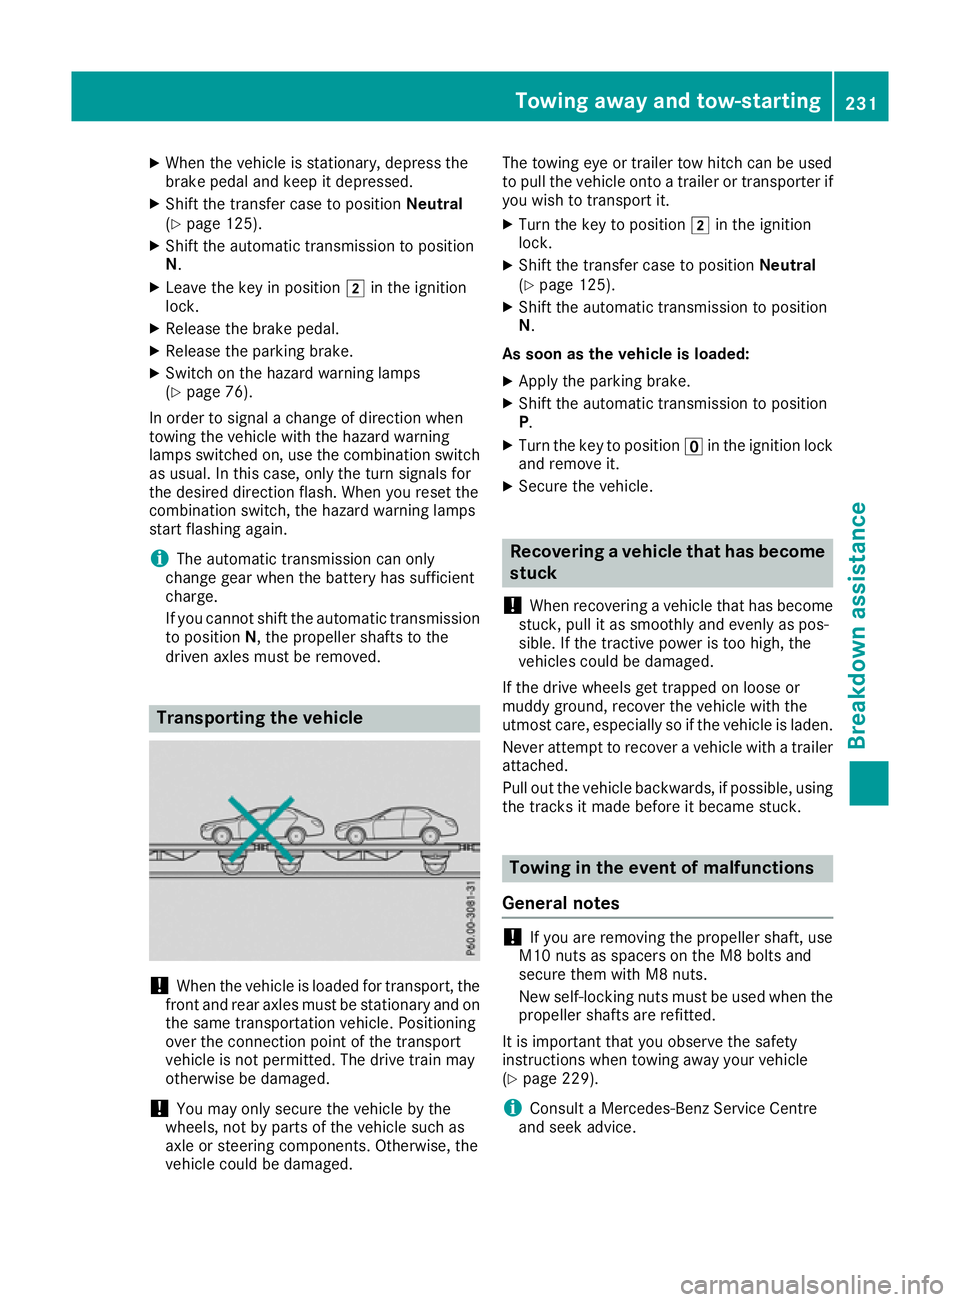
driven axles must be removed. Transporting thev
ehicle !
Whe
nthe vehicle is loadedf or transport, the
front and rear axles must be stationary and on the same transportation vehicle. Positioning
over the connection point of the transport
vehicle is not permitted. The drive train may
otherwise be damaged.
! You may only secure the vehicle by the
wheels, not by parts of the vehicle such as
axle or steering components. Otherwise, the
vehicle could be damaged. The towing eye or trailer tow hitch can be used
to pull the vehicle onto
atrailer or transporter if
you wish to transport it.
X Turn the key to position 2in the ignition
lock.
X Shift the transfer case to position Neutral
(Y page 125).
X Shift the automatic transmission to position
N.
As soon as the vehicle is loaded:
X Apply the parking brake.
X Shift the automatic transmission to position
P.
X Turn the key to position uin the ignition lock
and remove it.
X Secure the vehicle. Recovering
avehicle that has become
stuck
! Whe
nrecovering avehicl ethat ha sbecome
stuck, pull it as smoothly and evenly as pos-
sible .Ifthe tractive power is too high, the
vehicles could be damaged.
If the drive wheel sget trapped on loose or
muddy ground ,recover the vehicl ewitht he
utmost care ,especially so if the vehicl eisladen.
Neve rattempt to recover avehicl ewithat railer
attached.
Pull ou tthe vehicl ebackwards ,ifpossible ,using
the tracks it mad ebefore it became stuck. Towin
ginthe even tofm alfunctions
General notes !
If you are removing the propelle
rshaft, use
M10 nuts as spacers on the M8 bolts and
secure them with M8 nuts.
New self-locking nuts must be used when the propellers hafts are refitted.
It is important that you observe the safety
instructionsw hen towing awayy our vehicle
(Y page 229).
i Consult
aMercedes-Benz Service Centre
and seek advice. To
wing away and tow-starting
231Breakdown assis tance Z
Page 240 of 261
Drivin
gwiths ummer tyres
At temperature sbelo w+ 7† ,summer tyres lose
elasticity and therefore traction and braking
power. Change th etyres on your vehicle to
M+ Styres. Using summer tyres at ver ycold
temperature scould cause tears to form,
thereby damagin gthe tyres permanently.
Mercedes-Ben zcanno taccept responsibilit yfor
this typ eofdamage. G
WARNING
Damaged tyre scan caus etyre inflation pres-
sure loss. As aresult, you coul dlose control of
yourv ehicle. There is arisk of accident.
Check the tyres regularl yfor signs of damage
and replace any damaged tyres immediately. M+S tyres
G
WARNING
M+S tyres with atyre tread depth of less than
4mma re not suitable for use in winter as they
do not provid esufficient traction. There is a
risk of accident.
M+S tyres with atread depth of less than
4mmm ust be replaced. G
WARNING
The whee lortyre size as wellast he tyre type
of the spar ewhee land the whee ltobe
replaced may differ .Driving characteristics
can be severely impaired when you fit the
spar ewheel. There is arisk of an accident.
To prevent risks:
R adapt yourd riving style accordingly and
drive carefully
R never fit more than one spar ewhee lthat
differ sfrom the whee ltobechanged
R only use aspar ew hee lthat differ sfrom the
whee ltobec hanged for abriefp eriod
R do not switch ESP ®
off
R have aspar ew hee lofad ifferent size
replaced at the neares tqualified specialist
workshop. You must make sure that the wheel and tyre dimensions as wel
lasthe
tyr etype are correct.
Do not exceed amaximum speed of 80 km/h if
as pare wheel of adifferen tsizeisf itted.
At temperatures below +7 †, use winter tyres or all-season tyres. Bot htypes of tyr eare identified
by th eM+S marking.
Only winter tyres bearin gthe i snowflake
symbo linaddition to th eM+S marking provide
th eb est possible grip in wintry road conditions.
Only these tyres will allow driving safet ysys-
tem ssuch as AB Sand ESP ®
to function opti-
mally in winter. These tyres have been devel-
oped specifically for driving in snow.
Use M+S tyres of th esame mak eand tread on all
wheels to maintain safe handling characteris-
tics.
Always observe th emaximum permissible
speed specified for th eM+S tyres you have fit-
ted.
If you fit M+S tyres that have alower maximum
permissible speed than that of th evehicle, affix
an appropriat ewarning label in th edriver's field
of vision. This can be obtained at aqualified
specialist workshop.
When you have fitted th eM+S tyres:
X Chec kthe tyrep ressures (Y page 238).
X Restart th etyrep ressure monitor
(Y page 241). Snow chains
G
WARNING
If you drive too fas twith snow chains fitted,
they may snap. As aresult, you coul dinjure
others and damage the vehicle. There is arisk
of an accident.
Observe the maximu mpermissible spee dfor
operation with snow chains.
! Before fitting the snow chains, check them
for damage. Damaged or worn snow chains
may snap and damage the following compo-
nents:
R wheel
R whee lhousing
R whee lsuspension Winter operation
237Wheels and tyres Z
Page 241 of 261
Therefore, only use snow chains that are in
perfect condition. Observe the manufactur-
er's installation instructions.
For safety reasons, Mercedes-Benz recom-
mends that you use only snow chains that have been approved for Mercedes-Benz or that are of
an equivalent standard of quality. For more
information, please contact aqualified special-
ist workshop.
If you wish to fit snow chains, please bear the
following points in mind:
R snow chains cannot be fitted to all wheel/tyre
combinations. Observe the information
regarding permitted wheel/tyre combina-
tions (Y page 246)
R fit the snow chains on all four wheels for max-
imum tractive power and driving stability.
Snow chains must alway sbefitted in pairs; if
you only have two snow chains, fit these on
the rear wheels. The vehicle then remains
more stable under braking
R use snow chains only if the road surface is
completely snow-covered. Remove the snow
chains as soon as possible when you come to ar oad that is not snow-covered
R local regulations may restrict the use of snow
chains. Observe the appropriate regulations if you wish to fit snow chains
R do not exceed the maximum permissible
speed of 50 km/h
You may wish to deactivate ESP ®
when pulling
away with snow chains fitted (Y page 54). This
allows the wheels to spin in acontrolled manner,
achieving increased propulsive force (cut). Tyre pressure
Tyre pressur
especifications
Important safety notes G
WARNING
Underinf lated or overinflated tyres pose the
following risks:
R the tyres may burst, especially as the load
and vehicl espee dincrease.
R the tyres may weare xcessively and/or
unevenly, which may greatly impair tyre
traction.
R the driving characteristics, as wellass teer-
ing and braking, may be greatly impaired.
There is arisk of an accident.
Observe the recommende dtyre pressure and
check the tyre pressure of all the tyres includ-
ing the spar ewheel:
R at least every two weeks
R when the loadc hanges
R before embarking on alonger journey
R for changed operating conditions, e.g. off-
road driving
If necessary, correct the tyre pressure. G
WARNING
If you fit unsuitabl eaccessories onto tyre
valves, the tyre valve smay be overloadeda nd
malfunction, which can caus etyre pressure
loss. Due to their design, retrofitted tyre pres-
sure monitors keep the tyre valve open. This
can alsor esult in tyre pressure loss. There is a
risk of accident.
Only screw standar dvalve caps or valve caps
specifically provided by Mercedes-Benz for
yourv ehicleonto the tyre valve. G
WARNING
If the tyre pressure drops repeatedly ,the
wheel, valve or tyre may be damaged. Tyre
pressure that is too low may result in atyre
blow-out. There is arisk of accident. 238
Tyre pressureWheels and tyres
Page 242 of 261

R
Chec kthe tyrefor foreign objects.
R Chec kwhether th ewheel is losin gair or the
valv eisl eaking.
If you are unable to rectif ythe damage, con-
tac taq ualified specialist workshop. H
Environmenta
lnote
Chec kthe tyrep ressure regularly, at least
ever y14d ays.
The recommended tyr epressures for various
operatin gcondition scan be foun donthetyre
pressure table on th efuel filler flap
(Y page 109).
Operation with atrailer: thea pplicable value
for th erear axle is th emaximum value stated in
th et yrep ressure table.
The tyr epressure table may also state tyr epres-
sures for differen tload conditions. Thes eare
defined in th etable as differen tnumbers of pas-
sengers and amounts of luggage. The actual
number of seat smay differ fro mthis.
If tyr esizes are not specified ,the tyrep ressures
stated on th etyrep ressure informatio nlabel
apply for all tyres approved for this vehicle. If one or mor
etyre sizes precedes atyre pres-
sure, the following tyre pressure information is
valido nly for that tyre size.
Use asuitable pressure gauge to check the tyre
pressure. The outer appearance of atyre does
not give any reliable indicatio nofthe tyre pres-
sure.
You can also check the tyre pressure using the
on-board computer.
If possible, correct tyre pressures only when the
tyres are cold. The tyres are cold:
R if the vehicl ehas been parked with the tyres
out of direct sunlight for at least three hours
and
R if the vehicle has not been driven further than
1.6 km
Dependin gonthe outside temperature, the
vehicle speed and the load on the tyres, the tyre temperature and thus the tyre pressure changes by approximately 10 kPa (0.1 bar/1.5 psi )per
10 †. Take this into account when checking the
pressure of warm tyres. Correct the tyre pres-
sure only if it is too low for the current operating
condition.
Drivin gwithatyre pressure that is too high or
too low can:
R shorten the service life of the tyres
R cause increased tyre damage
R have anegative effect on handling character-
istics and thus driving safety (e.g. aquaplan-
ing)
The tyre pressure values given for low loads are minimum values that offer you good driving
comfor tcharacteristics.
However, you can also use the values given for
higher loads. These are permissible and will not
adversely affect the runnin gofthe vehicle. Tyre pressur
emonitor
General notes If
at yre pressure monitor is fitted, the vehicle's
wheelsh ave sensors fitted that monitor the tyre
pressures in all four tyres. The tyre pressure
monitor warns you if the pressure drops in one
or more of the tyres. The tyre pressure monitor
functions only if the corresponding sensors are
fitted to all wheels.
Information on tyre pressures is shown on the
multifunction display. After afew minutes of
driving, the current tyre pressure of each wheel
is shown in the Serv.
Serv. menu. Tyrep
ressure
239Wheels and tyres Z
Page 244 of 261
R
If the Rectify tyre pressure
Rectify tyre pressure message
appears in the multifunction display, the tyre
pressure in at least one tyre is too low. The
tyre pressure must be corrected when the
opportunity arises.
R If the Check Check tyre(s)
tyre(s) message appears in the
multifunction display, the tyre pressure in at
least one tyre has droppe dsignificantly. The
tyres must be checked.
R If the Warning tyre defect Warning tyre defect message
appears in the multifunction display, the tyre
pressure in at least one tyre has droppe dsud-
denly.T he tyres must be checked.
Observe the instructions and safety notes in the display messages in the "Tyres" section
(Y page 150).
If the positio nofthe wheelsont he vehicle is
changed, the tyre pressures may be displayedin the wrong positions for ashort time. After afew
minutes of driving, this is rectified and the tyre
pressures are displayedint he correct positions.
Restarting the tyre pressure monitor When you restart the tyre pressure monitor, all
existing warning messages are deleted and the
h
warning lamp goes out. The monitor uses
the currently set tyre pressures as the reference valuesf or monitoring. In most cases, the tyre
pressure monitor will automatically detect the
new reference values after you have changed
the tyre pressure. However, you can also set
reference values manually as described here.
The tyre pressure monitor then monitors the
new tyre pressure values.
X Use the table on the inside of the fuel filler flap
to ensure that the tyre pressure is set cor-
rectly in all four tyres for the curren toperating
conditions.
Observe the notes on tyre pressure
(Y page 238).
X Make sure that the key is in position 2in the
ignition lock.
X Press the =or; button on the steering
wheel to select the Serv.
Serv. menu.
X Press the 9or: button to select
Tyre pressure Tyre pressure .
X Press the abutton.
The multifunction display shows the current
tyre pressure for each tyre or the Tyre
Tyre pres‐
pres‐ sures
sures
will
willbe
bedisplayed
displayed after a
after afew
few
minutes of driving
minutes of driving message appears.
X Press the :button.
The Use
Use current
current pressures
pressures as
asnew
new ref‐
ref‐
erence
erence values
valuesmessage appears in the mul-
tifunction display.
If you wish to confirm the restart:
X Press the abutton.
The Tyre
Tyre press.
press. monitor
monitor restarted
restarted mes-
sage appears in the multifunction display.
After you have driven for afew minutes, the
system checks whether the current tyre pres-
sures are within the specified range. The new tyre pressures are then accepted as refer-
ence valuesa nd monitored.
If you wish to cancelt he restart:
X Press the %button.
The tyre pressure valuess tored at the last
restart will continue to be monitored.
Radio type approval for the tyre pres-
sure monitor country Radi
otype approva lnumber Argentina Schrader GG4
Numero de Registro CNC:
H-12338
Brazil see below
Abu
Dhabi,
Dubai,
United
Arab Emi-
rates TRA
REGISTERED NO:
ER0099792/12.
DEALER NO: DA0047074/10
European
Union Hereby, Schrader Electronics
Ltd., declare
sthat this TPM Sisin
compliance with the essential
requirements and other provi-
sions of directive 1999/5/EC.
The declaration of conformity
may be consulted at emcteam@
schrader.co.uk Tyre pressure
241Wheels and tyres Z
Page 246 of 261
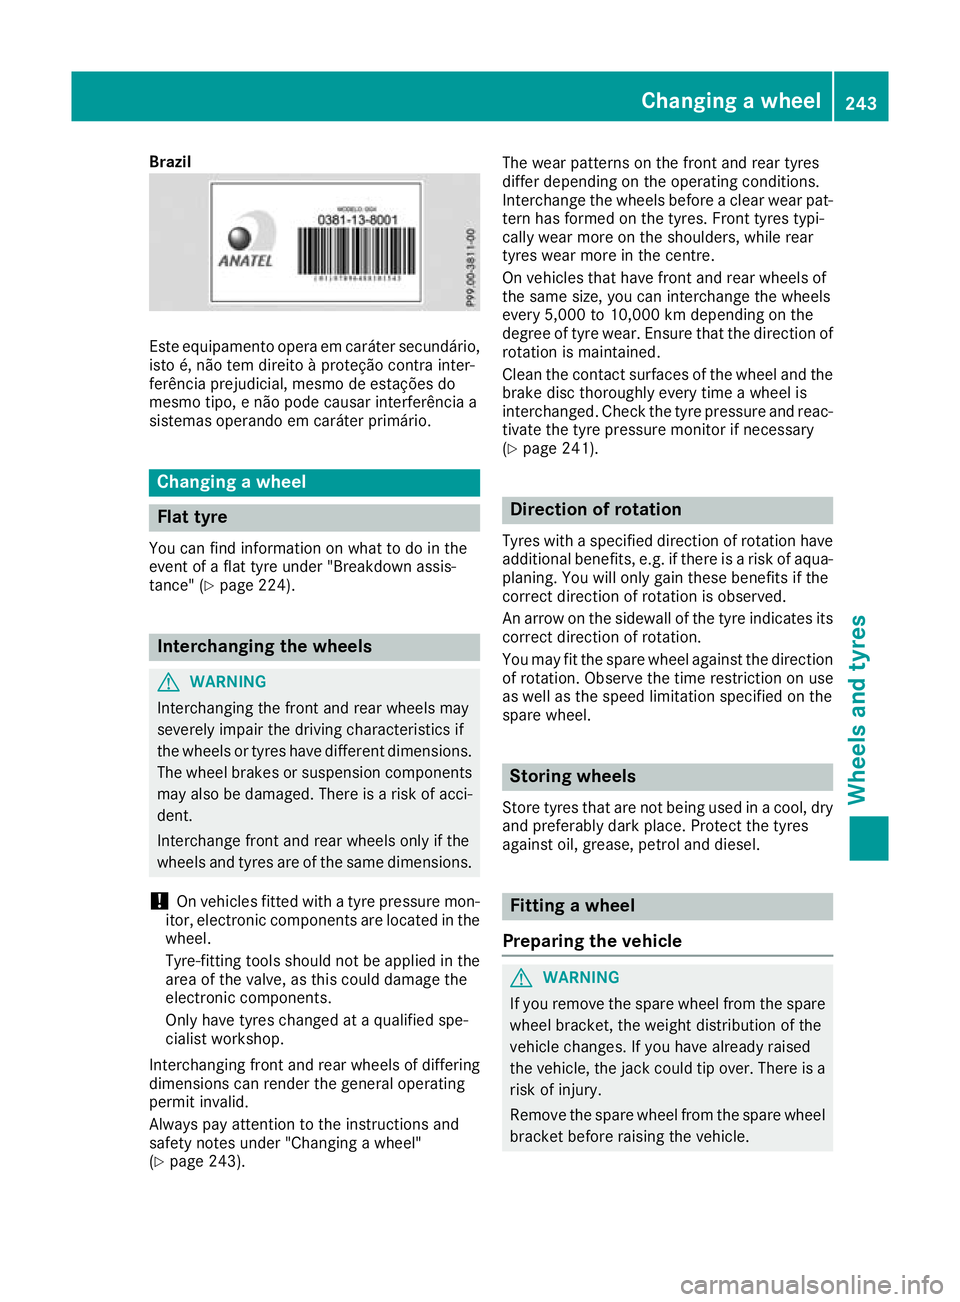
Brazil
Este equipamento opera em caráte
rsecundário,
isto é, não tem direito àproteçã ocontra inter-
ferênci aprejudicial ,mesmo de estaçõe sdo
mesmo tipo, enão pode causa rinterferência a
sistemas operando em caráte rprimário. Changin
gawheel Flat tyre
You can fin dinformation on what to do in the
event of aflat tyr eunder "Breakdown assis-
tance" (Y page 224). Interchanging th
ewheels G
WARNING
Interchangin gthe front and rear wheels may
severely impair the driving characteristics if
the wheels or tyres have different dimensions. The whee lbrakes or suspension components
may alsobed amaged. There is arisk of acci-
dent.
Interchange front and rear wheels only if the
wheels and tyres are of the same dimensions.
! On vehicles fitted with
atyre pressure mon-
itor, electronic components are located in the wheel.
Tyre-fitting tools should not be appliedint he
area of the valve ,asthis coul ddamage the
electronic components.
Only have tyres changed at aqualified spe-
cialist workshop.
Interchanging front and rear wheels of differing
dimensions can render the genera loperating
permi tinvalid.
Always pay attention to the instructions and
safety notes under "Changing awheel"
(Y page2 43). The wear patterns on the front and rear tyres
diffe
rdepending on the operating conditions.
Interchange the wheels before aclear wear pat-
tern has formed on the tyres. Frontt yres typi-
cally wear more on the shoulders, while rear
tyres wear more in the centre.
On vehicles that have front and rear wheels of
the same size, you can interchange the wheels
every 5,000 to 10,00 0kmd epending on the
degree of tyre wear. Ensure that the direction of
rotation is maintained.
Clean the contact surfaces of the wheel and the
brake disc thoroughly every time awheel is
interchanged. Check the tyre pressure and reac-
tivate the tyre pressure monitor if necessary
(Y page 241). Direction of rotation
Tyres with aspecifie ddirection of rotation have
additional benefits, e.g. if there is ariskofa qua-
planing. You will only gain these benefit sifthe
correc tdirection of rotation is observed.
An arrow on th esidewall of th etyrei nd icates its
correc tdirection of rotation.
You may fit th espar ewhee lagainst th edirection
of rotation .Observ ethe time restriction on use
as well as th espeed limitation specifie donthe
spar ewheel. Storin
gwheels
Storet yres that are not being used in acool, dry
and preferably dark place. Protect the tyres
against oil, grease, petrol and diesel. Fitting
awheel
Preparing th evehicle G
WARNING
If yo uremove the spar ewhee lfrom the spare
whee lbracket, the weight distributio nofthe
vehicl echanges .Ifyou have already raised
the vehicle, the jack coul dtip over. There is a
risk of injury.
Remove the spar ewhee lfrom the spar ewheel
bracket before raising the vehicle. Changing
awheel
243Wheels an dtyres Z
Page 247 of 261
X
Stop the vehicl eonsolid,non-slipper yand
level ground.
X Appl ythe parking brake.
X Move the front wheel stothe straight-ahead
position.
X Shif tthe automatic transmissio ntoposition
P.
X Switch off the engine.
X Ifat raile risc oupled to the vehicle, uncouple
it.
X Remove the vehicl etool sand jack from the
vehicl e(Ypage 223).
X Remove the spare wheel from the spare wheel
bracket (Y page 223).
X Secure the vehicl eagains trolling away.
Securing the vehicle against rolling
away X
Place chocks or other suitable items under
the front and rea rofthe wheel that is diago-
nally opposite the wheel you wish to change.
Raising the vehicle G
WARNING
If you do not position the jack correctl yatthe
appropriate jacking point of the vehicle, the
jack coul dtip over with the vehicl eraised.
There is arisk of injury.
Only position the jack at the appropriate jack-
ing point of the vehicle. The base of the jack
must be positioned vertically,d irectly under
the jacking point of the vehicle.
! Only position the jack at the appropriate
jacking point of the vehicle. Otherwise, you
coul ddamage the vehicle.
Observe the following whenr aisingthe vehi-
cle:
R Use only the vehicle-specific jack that has
been tested and approved by Mercedes-Benz
to rais ethe vehicle. If the jack is used incor-
rectly, it coul dtip over while the vehicl eis
raised.
R The jack is designed only to rais ethe vehicle
for ashort time while awhee lisb eing
changed .Itisnot permissible to use it to per-
form maintenance work under the vehicle. R
Avoid changing the whee lonuphilland down-
hill slopes.
R Before raising the vehicle, secur eitagainst
rolling away by applying the parking brake and
positioning whee lchocks. Do not release the
parking brake whil ethe vehicl eisraised.
R The jack must be place donafirm, flatand
non-slip surface. On aloo se surface, alarge,
fla tload-beari ng underlay must be used .Ona
slippery surface, anon-slip underlay must be
used ,e.g.u se arubber matont iles.
R Do not us ewoode nblocks or similar objects
as ajack underlay .Otherwise, the jack will not
be able to achieve its load-bearing capacity
du etot he restricte dheight.
R Ensure tha tthe distance between the under-
side of the tyr eand the ground does not
exceed 3cm.
R Do not place your hands or fee tunder the
raised vehicle.
R Do not li eunder the raised vehicle.
R Do not start the engine when the vehicl eis
raised.
R Do not open or close adoorw hent he vehicle
is raised.
R Ensure tha tnopersons ar epresent in the
vehicl ewhenr aisin gthe vehicle. X
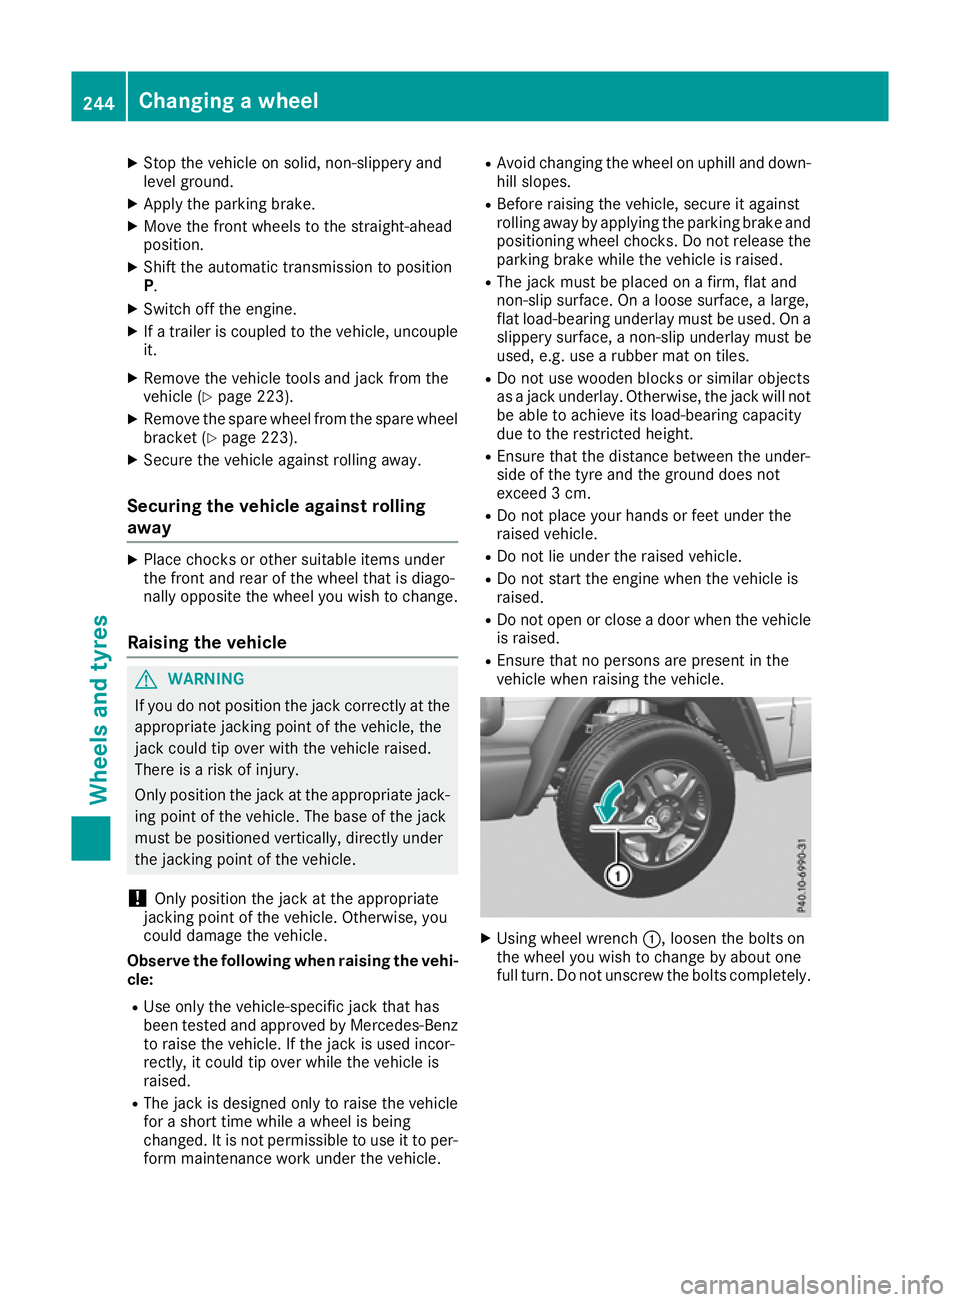
Using wheel wrench :,loosen the bolts on
the wheel you wish to change by abouto ne
full turn. Do not unscrew the bolts completely. 244
Changing
awheelWheels and tyres