2016 MERCEDES-BENZ G-Class key
[x] Cancel search: keyPage 164 of 302

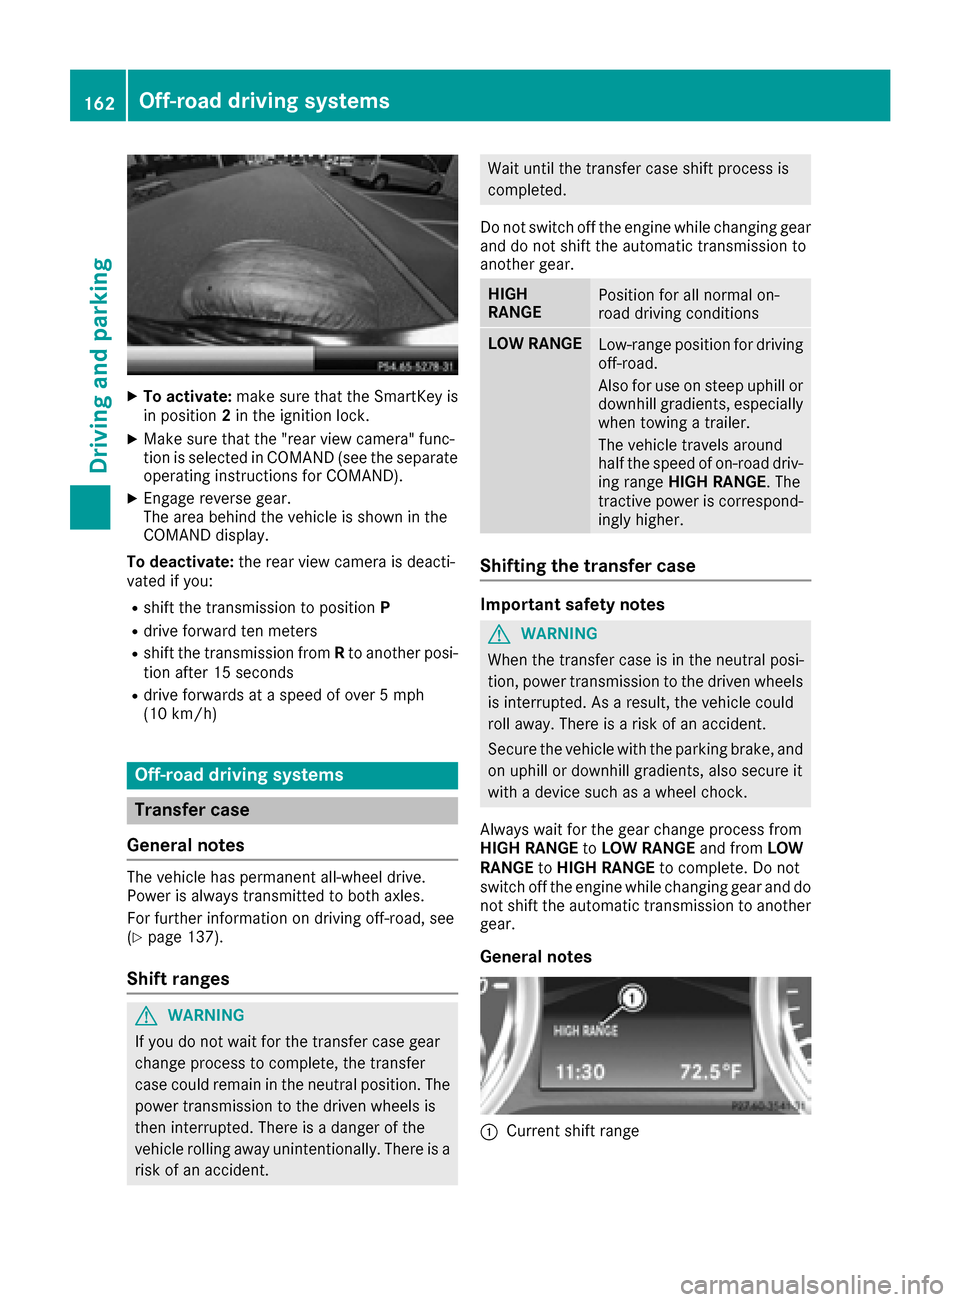
XTo activate:make sure that the SmartKey is
in position 2in the ignition lock.
XMake sure that the "rear view camera" func-
tion is selected in COMAND (see the separate
operating instructions for COMAND).
XEngage reverse gear.
The area behind the vehicle is shown in the
COMAND display.
To deactivate: the rear view camera is deacti-
vated if you:
Rshift the transmission to position P
Rdrive forward ten meters
Rshift the transmission fromRto another posi-
tion after 15 seconds
Rdrive forwards at a speed of over 5 mph
(10 km/h)
Off-road driving systems
Transfer case
General notes
The vehicle has permanent all-wheel drive.
Power is always transmitted to both axles.
For further information on driving off-road, see
(
Ypage 137).
Shift ranges
GWARNING
If you do not wait for the transfer case gear
change process to complete, the transfer
case could remain in the neutral position. The power transmission to the driven wheels is
then interrupted. There is a danger of the
vehicle rolling away unintentionally. There is a
risk of an accident.
Wait until the transfer case shift process is
completed.
Do not switch off the engine while changing gear
and do not shift the automatic transmission to
another gear.
HIGH
RANGEPosition for all normal on-
road driving conditions
LOW RANGELow-range position for driving
off-road.
Also for use on steep uphill or
downhill gradients, especially
when towing a trailer.
The vehicle travels around
half the speed of on-road driv-
ing range HIGH RANGE . The
tractive power is correspond-
ingly higher.
Shifting the transfer case
Important safety notes
GWARNING
When the transfer case is in the neutral posi-
tion, power transmission to the driven wheels
is interrupted. As a result, the vehicle could
roll away. There is a risk of an accident.
Secure the vehicle with the parking brake, and
on uphill or downhill gradients, also secure it
with a device such as a wheel chock.
Always wait for the gear change process from
HIGH RANGE toLOW RANGE and fromLOW
RANGE toHIGH RANGE to complete. Do not
switch off the engine while changing gear and do
not shift the automatic transmission to another
gear.
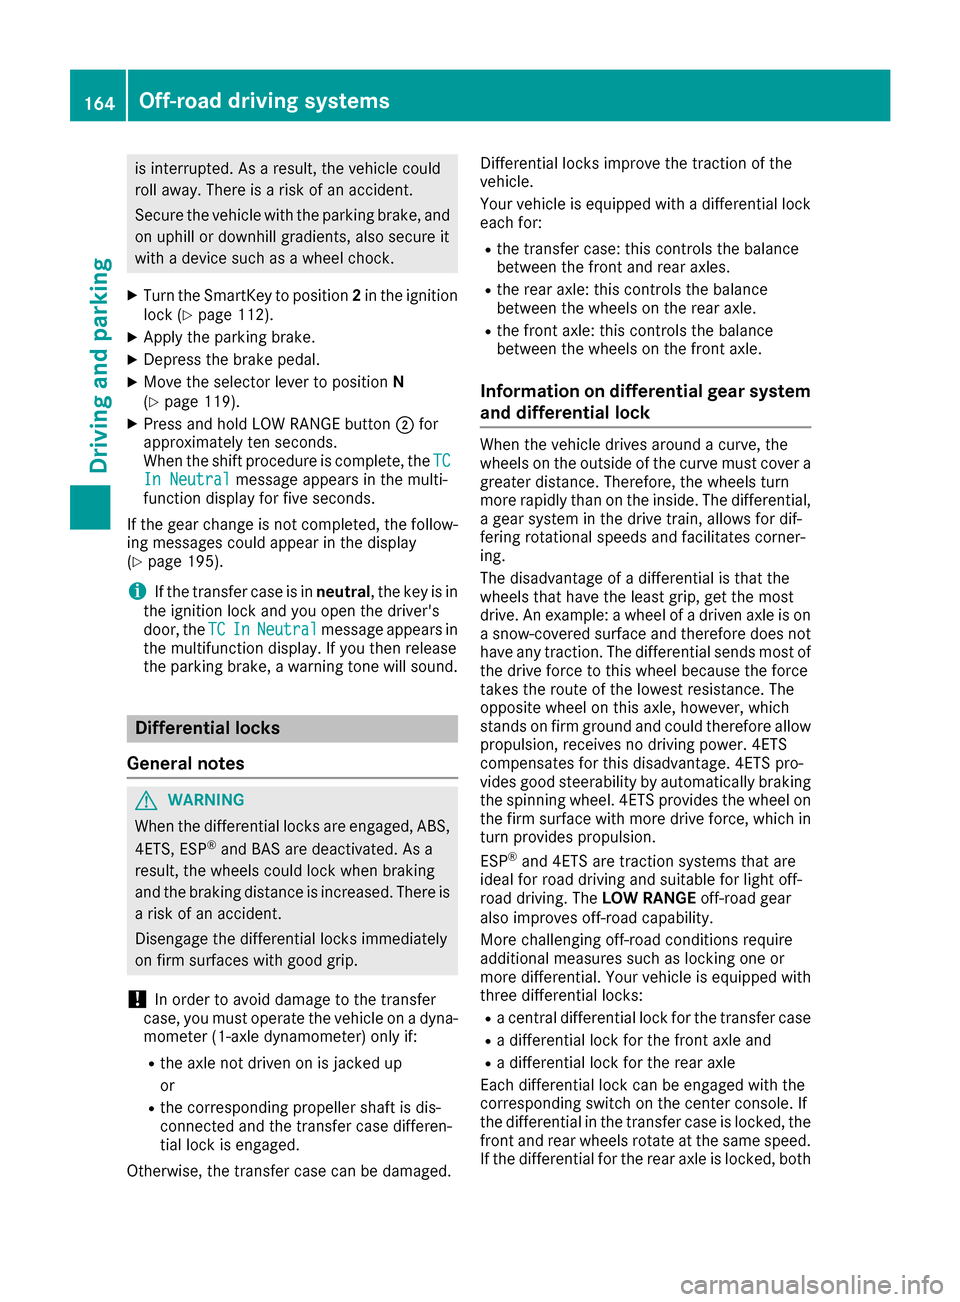
General notes
:Current shift range
162Off-road driving systems
Driving an d parking
Page 166 of 302

is interrupted. As a result, the vehicle could
roll away. There is a risk of an accident.
Secure the vehicle with the parking brake, and
on uphill or downhill gradients, also secure it
with a device such as a wheel chock.
XTurn the SmartKey to position2in the ignition
lock (Ypage 112).
XApply the parking brake.
XDepress the brake pedal.
XMove the selector lever to position N
(Ypage 119).
XPress and hold LOW RANGE button ;for
approximately ten seconds.
When the shift procedure is complete, the TC
In Neutralmessage appears in the multi-
function display for five seconds.
If the gear change is not completed, the follow-
ing messages could appear in the display
(
Ypage 195).
iIf the transfer case is in neutral, the key is in
the ignition lock and you open the driver's
door, the TC
InNeutralmessage appears in
the multifunction display. If you then release
the parking brake, a warning tone will sound.
Differential locks
General notes
GWARNING
When the differential locks are engaged, ABS, 4ETS, ESP
®and BAS are deactivated. As a
result, the wheels could lock when braking
and the braking distance is increased. There is
a risk of an accident.
Disengage the differential locks immediately
on firm surfaces with good grip.
!In order to avoid damage to the transfer
case, you must operate the vehicle on a dyna-
mometer (1-axle dynamometer) only if:
Rthe axle not driven on is jacked up
or
Rthe corresponding propeller shaft is dis-
connected and the transfer case differen-
tial lock is engaged.
Otherwise, the transfer case can be damaged. Differential locks improve the traction of the
vehicle.
Your vehicle is equipped with a differential lock
each for:
Rthe transfer case: this controls the balance
between the front and rear axles.
Rthe rear axle: this controls the balance
between the wheels on the rear axle.
Rthe front axle: this controls the balance
between the wheels on the front axle.
Information on differential gear system
and differential lock
When the vehicle drives around a curve, the
wheels on the outside of the curve must cover a
greater distance. Therefore, the wheels turn
more rapidly than on the inside. The differential,
a gear system in the drive train, allows for dif-
fering rotational speeds and facilitates corner-
ing.
The disadvantage of a differential is that the
wheels that have the least grip, get the most
drive. An example: a wheel of a driven axle is on
a snow-covered surface and therefore does not
have any traction. The differential sends most of
the drive force to this wheel because the force
takes the route of the lowest resistance. The
opposite wheel on this axle, however, which
stands on firm ground and could therefore allow
propulsion, receives no driving power. 4ETS
compensates for this disadvantage. 4ETS pro-
vides good steerability by automatically braking
the spinning wheel. 4ETS provides the wheel on
the firm surface with more drive force, which in
turn provides propulsion.
ESP
®and 4ETS are traction systems that are
ideal for road driving and suitable for light off-
road driving. The LOW RANGEoff-road gear
also improves off-road capability.
More challenging off-road conditions require
additional measures such as locking one or
more differential. Your vehicle is equipped with
three differential locks:
Ra central differential lock for the transfer case
Ra differential lock for the front axle and
Ra differential lock for the rear axle
Each differential lock can be engaged with the
corresponding switch on the center console. If
the differential in the transfer case is locked, the
front and rear wheels rotate at the same speed.
If t
he differential for the rear axle is locked, both
164Off-road driving systems
Driving and parking
Page 174 of 302

Operating the on-board computer
Overview
:Multifunction display
;Switches on the Voice Control System (see
the separate operating instructions)
=Right control panel
?Left control panel
ABack button
XTo activate the on-board computer: turn
the SmartKey to position 1in the ignition lock
(
Ypage 112).
You can control the multifunction display and
the settings in the on-board computer using the
buttons on the multifunction steering wheel.
Left control panel
=
;RCalls up the menu and menu bar
9
:Press briefly:
RScrolls in lists
RSelects a submenu or function
RIn the Audiomenu: selects a
stored station, an audio track or a
video scene
RIn the Tel(telephone) menu:
switches to the phone book and
selects a name or telephone num-
ber
9
:Press and hold:
RIn the Audiomenu: selects the
previous/next station or selects
an audio track or a video scene
using rapid scrolling
RIn the Tel(telephone) menu:
starts rapid scrolling if the phone
book is open
aRConfirms a selection/display mes-
sage
RIn the Tel(telephone) menu:
switches to the telephone book
and starts dialing the selected
number
RIn the Audiomenu: stops the sta-
tion search function at the desired
station
Right control panel
~RRejects or ends a call
RExits phone book/redial memory
6RMakes or accepts a call
RSwitches to the redial memory
W
XRAdjusts the volume
8RMute
Back button
%Press briefly:
RBack
RSwitches off the Voice Control
System (see the separate operat-
ing instructions)
RHides display messages/calls up
the last Tripmenu function used
RExits the telephone book/redial
memory
%Press and hold:
RCalls up the standard display in the
Tripmenu
172Displays and operation
On-board computer and displays
Page 182 of 302

Deactivating delayed switch-off of the exterior
lighting temporarily:
XBefore leaving the vehicle, turn the SmartKey
to position0(Ypage 112 )in the ignition lock.
XTurn the SmartKey to position 2in the ignition
lock (Ypage 112).
The exterior lighting delayed switch-off is
deactivated.
Delayed switch-off of the exterior lighting is
reactivated the next time you start the engine.
If you have activated the Surround Lighting
function and the light switch is set to Ã, the
following functions are activated when it is dark:
Rsurround lighting: the exterior lighting
remains lit for 40 seconds after unlocking
with the SmartKey. If you start the engine, the
surround lighting is switched off and auto-
matic headlamp mode is activated
(
Ypage 85).
Rexterior lighting delayed switch-off: the
exterior lighting remains lit for 60 seconds
after the engine is switched off. If you close all
the doors and the trunk lid, the exterior light- ing goes off after 15 seconds.
iDepending on your vehicle's equipment,
when the surround lighting and delayed
switch-off exterior lighting are on, the follow-
ing light up:
RParking lamps
RLow-beam headlamps
RDaytime running lamps
RSide marker lamps
RSurround lighting in the exterior mirrors
Activating/deactivating the interior light-
ing delayed switch-off
If you activate the Interior Lighting Delayfunction, the interior lighting remains on for
20 seconds after you remove the SmartKey from
the ignition lock.
XPress the=or; button on the steering
wheel to select the Sett.menu.
XPress the:or9 button to select the
Lightssubmenu.
XPress ato confirm.
XPress :or9 to select the InteriorLighting Delayfunction.
When the Interior Lighting Delayfunc-
tion is activated, the vehicle interior is dis-
played in red in the multifunction display.
XPress the abutton to save the setting.
Vehicle
Activating/deactivating the automatic
door locking mechanism
If you activate the AutomaticDoorLockfunc-
tion, the vehicle is centrally locked above a
speed of approximately 9 mph (15 km/h).
XPress the =or; button on the steering
wheel to select the Sett.menu.
XPress the:or9 button to select the
Vehiclesubmenu.
XPress ato confirm.
XPress the :or9 button to select the
Automatic Door Lockfunction.
When the Automatic Door Lockfunction is
activated, the vehicle doors are displayed in
red in the multifunction display.
XPress the abutton to save the setting.
For further information on the automatic locking
feature, see (
Ypage 66).
Activating/deactivating the acoustic
locking verification signal
If you switch on the AcousticLockfunction, an
acoustic signal sounds when you lock the vehi-
cle.
XPress the =or; button on the steering
wheel to select the Sett.menu.
XPress:or9 to select the Vehiclesubmenu.
XPressato confirm.
XPress the :or9 button to select the
Acoustic Lockfunction.
If the Acoustic Lockfunction is activated,
the & symbol in the multifunction display
lights up red.
XPress the abutton to save the setting.
180Menus and submenus
On-board computer and displays
Page 184 of 302

AMG menu in AMG vehicles
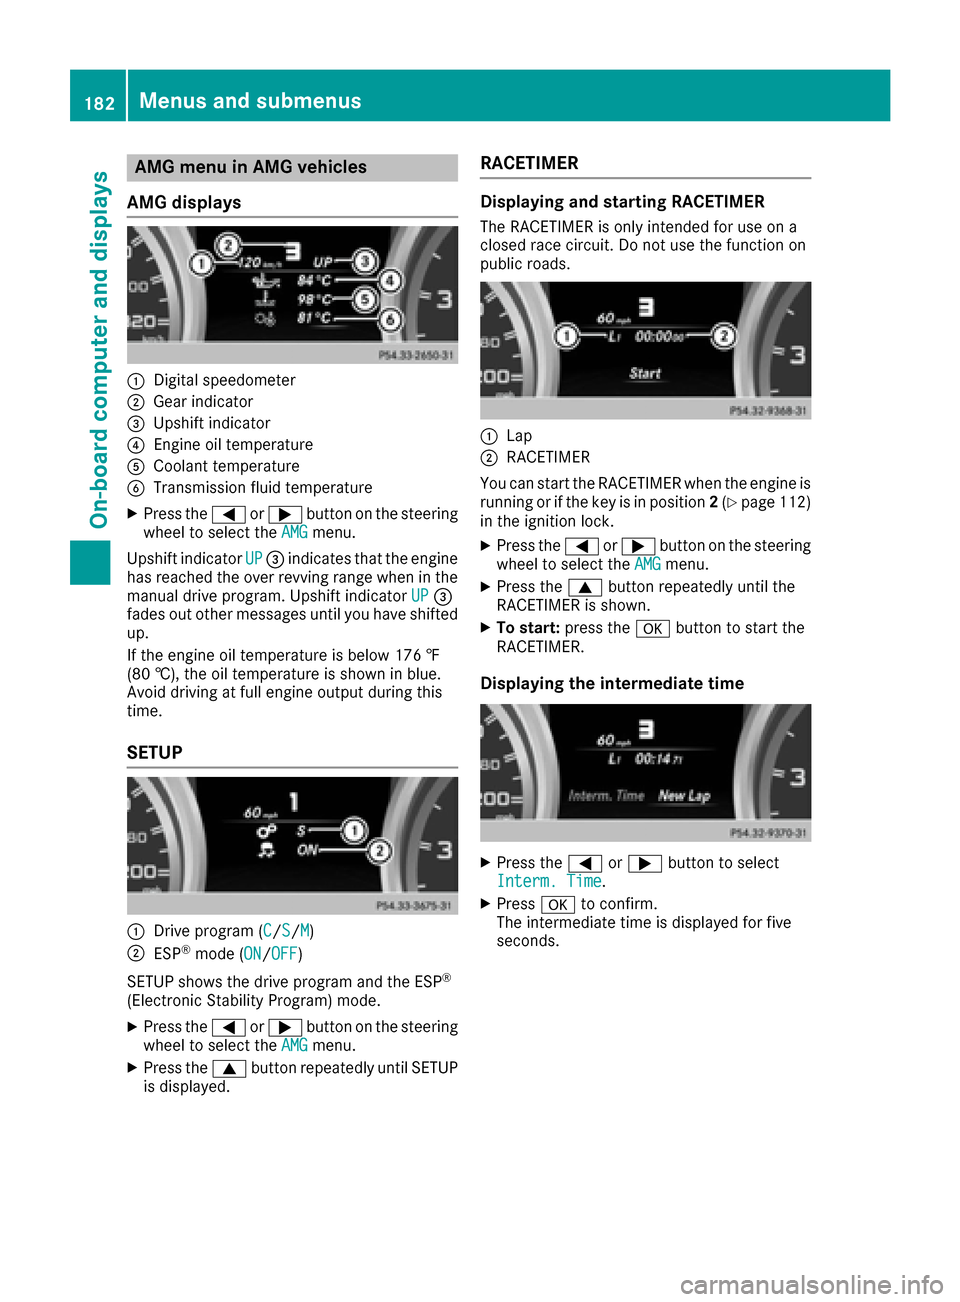
AMG displays
:Digital speedometer
;Gear indicator
=Upshif tindicator
?Engin eoil temperature
ACoolan ttemperature
BTransmission fluid temperature
XPress th e= or; buttonon th esteering
whee lto select th eAMGmenu.
Upshif tindicator UP
=indicates that th eengin e
has reached th eove rrevvin grange when in th e
manual drive program .Upshif tindicator UP
=
fade sout other message suntil you hav eshifte d
up.
If th eengin eoil temperature is belo w17 6 ‡
(80 †) ,the oi ltemper ature is shown in blue.
Avoid driving at full engine output during this
time.
SETUP
:Drive program (C/S/M)
;ESP®mode ( ON/OFF)
SETUP shows the drive program and the ESP
®
(Electronic Stability Program) mode.
XPress the =or; button on the steering
wheel to select the AMGmenu.
XPress the9button repeatedly until SETUP
is displayed.
RACETIMER
Displaying and starting RACETIMER
The RACETIMER is only intended for use on a
closed race circuit. Do not use the function on
public roads.
:Lap
;RACETIMER
You can start the RACETIMER when the engine is
running or if the key is in position 2(
Ypage 112)
in the ignition lock.
XPress the =or; button on the steering
wheel to select the AMGmenu.
XPress the9button repeatedly until the
RACETIMER is shown.
XTo start: press the abutton to start the
RACETIMER.
Displaying the intermediate time
XPress the =or; button to select
Interm. Time.
XPress ato confirm.
The intermediate time is displayed for five
seconds.
182Menus and submenus
On-board computer and displays
Page 185 of 302

Starting a new lap
:RACETIMER
;Fastest lap time (best lap)
=Lap
XPressato confirm New Lap.
iIt is possible to store a maximum of sixteen
laps. The 16th lap can only be completed with
Finish Lap
.
Stopping the RACETIMER
XPress the %button on the steering wheel.
XConfirm Yeswitha.
The RACETIMER is interrupted if you stop the
vehicle and turn the SmartKey to position 1
(
Ypage 112) in the ignition lock. If you turn the
SmartKey to position 2or 3(Ypage 112) and
then press ato confirm Start
, timing is
continued.
Resetting the current lap
XStop the RACETIMER (Ypage 183).
XPress the =or; button to select
Reset Lap.
XPress ato reset the lap time to "0".
Deleting all laps
If you switch off the engine, the RACETIMER is
reset to "0" after 30 seconds. All laps are
deleted.
You cannot delete individual stored laps. If you
have stopped 16 laps, the current lap does not
have to be reset.
XReset the current lap (Ypage 183).
XPress ato confirm Reset.
Reset Race Timer?appears in the multi-
function display.
XPress the :button to select Yesand press
the a button to confirm.
All laps are deleted.
Overall statistics
:RACETIMER overall evaluation
;Total time driven
=Average speed
?Distance covered
AMaximum speed
This function is shown if you have stored at least
one lap and stopped the RACETIMER.
XPress =or; on the steering wheel to
select the AMGmenu.
XPress the9button repeatedly until the
overall evaluation is shown.
Lap statistics
:Lap
;Lap time
=Average lap speed
?Lap length
ATop speed during lap
Menus and submenus183
On-board computer and displays
Z
Page 204 of 302

Display messagesPossible causes/consequences andMSolutions
D
Power Steering Mal‐function. See Oper‐ator's Manual
The powersteering is malfunctioning .
A warning tone also sounds.
GWARNIN G
You will need to use mor eforce to steer .
There is aris kof an accident.
XChec kwhether you are able to apply th eextr aforce required.
XIf you ar eabl eto steer safely: carefully drive on to aqualified
specialist workshop .
XIf you areunable to steer safely: do notdrive on .Contac tth e
neares tqualified specialist workshop .
TelephoneNoServiceYour vehicl eis outside th enetwork provider' stransmitter/receiver
range.
XWait until th emobile phone operational readiness symbol appear s
in th emultifunction display.
¥
Check Washer Fluid
The washer flui dlevel in th ewasher flui dreservoir has dropped belo w
th eminimum .
XAddwasher flui d (Ypage 239).
SmartKey
Display messagesPossible causes/consequences and MSolutions
Â
KeyDoesNotBelongto Vehicl e
You haveput th ewrong SmartKey in th eignition lock.
XUse th ecorrec tSmartKey.
Â
Tak eYou rKey fro mIgnition
The SmartKey is in th eignition lock.
XRemove th eSmartKey.
Â
Obtain aNew Key
The SmartKey needs to be replaced.
XVisit aqualified specialist workshop .
Warning and indicat orlamps in the
instrume nt cluster
Overview ofwarning and indicat or
lamps
L Low-beam headlamp s (Ypage 84)
#
! Turn signal
(
Ypage 88) K
High-beam headlamp s (
Ypage 88)
R Rear fog lamp (
Ypage 86)
ü Seat belts (
Ypage 204)
$
(USA) Brake
s (
Ypage 205)
J
(Can -
ada) Brake
s(yellow) (
Ypage 205)
202Warning and indicator lamps in the instrument cluster
On-board computer and displays
Page 218 of 302

XTo lock:insert the mechanical key into the
lock (Ypage 61) and turn it 90° clockwise to
position 2.
XTo unlock: insert the mechanical key into the
lock (Ypage 61) and turn it 90° counter-
clockwise to position 1.
iThe glove box can only be locked and
unlocked using the mechanical key.
Door stowage compartment
There is an additional compartment located on
the driver's door paneling, which can be used to
store a mini tablet PC, for example.
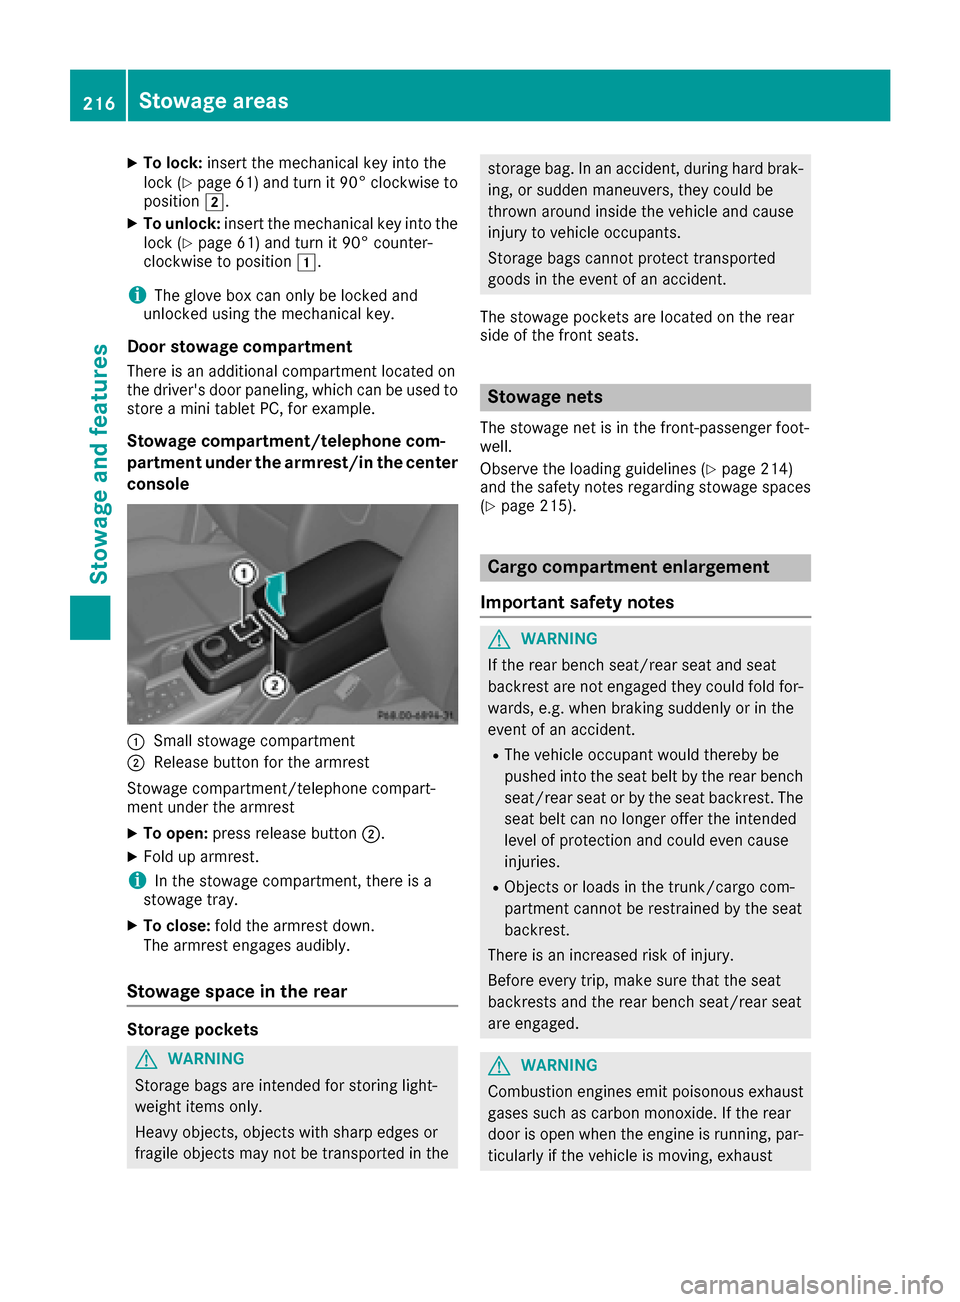
Stowage compartment/telephone com-
partment under the armrest/in the center
console
:Small stowage compartment
;Release button for the armrest
Stowage compartment/telephone compart-
ment under the armrest
XTo open: press release button ;.
XFold up armrest.
iIn the stowage compartment, there is a
stowage tray.
XTo close: fold the armrest down.
The armrest engages audibly.
Stowage space in the rear
Storage pockets
GWARNING
Storage bags are intended for storing light-
weight items only.
Heavy objects, objects with sharp edges or
fragile objects may not be transported in the
storage bag. In an accident, during hard brak-
ing, or sudden maneuvers, they could be
thrown around inside the vehicle and cause
injury to vehicle occupants.
Storage bags cannot protect transported
goods in the event of an accident.
The stowage pockets are located on the rear
side of the front seats.
Stowage nets
The stowage net is in the front-passenger foot-
well.
Observe the loading guidelines (
Ypage 214)
and the safety notes regarding stowage spaces
(
Ypage 215).
Cargo compartment enlargement
Important safety notes
GWARNING
If the rear bench seat/rear seat and seat
backrest are not engaged they could fold for-
wards, e.g. when braking suddenly or in the
event of an accident.
RThe vehicle occupant would thereby be
pushed into the seat belt by the rear bench
seat/rear seat or by the seat backrest. The
seat belt can no longer offer the intended
level of protection and could even cause
injuries.
RObjects or loads in the trunk/cargo com-
partment cannot be restrained by the seat
backrest.
There is an increased risk of injury.
Before every trip, make sure that the seat
backrests and the rear bench seat/rear seat
are engaged.
GWARNING
Combustion engines emit poisonous exhaust
gases such as carbon monoxide. If the rear
door is open when the engine is running, par-
ticularly if the vehicle is moving, exhaust
216Stowage areas
Stowag ean d features