2016 MERCEDES-BENZ G-Class trailer
[x] Cancel search: trailerPage 164 of 302
XTo activate:make sure that the SmartKey is
in position 2in the ignition lock.
XMake sure that the "rear view camera" func-
tion is selected in COMAND (see the separate
operating instructions for COMAND).
XEngage reverse gear.
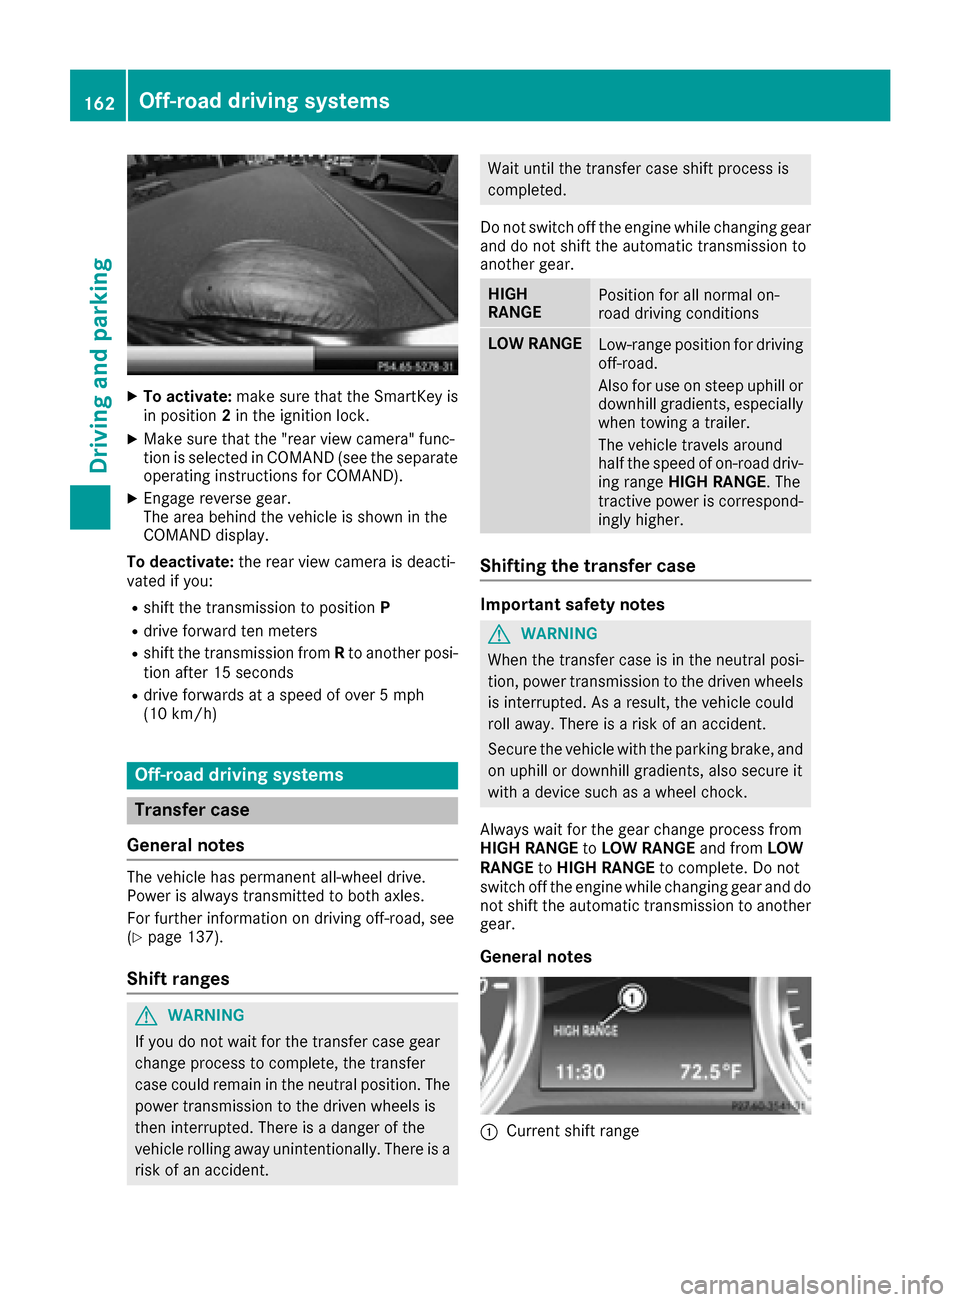
The area behind the vehicle is shown in the
COMAND display.
To deactivate: the rear view camera is deacti-
vated if you:
Rshift the transmission to position P
Rdrive forward ten meters
Rshift the transmission fromRto another posi-
tion after 15 seconds
Rdrive forwards at a speed of over 5 mph
(10 km/h)
Off-road driving systems
Transfer case
General notes
The vehicle has permanent all-wheel drive.
Power is always transmitted to both axles.
For further information on driving off-road, see
(
Ypage 137).
Shift ranges
GWARNING
If you do not wait for the transfer case gear
change process to complete, the transfer
case could remain in the neutral position. The power transmission to the driven wheels is
then interrupted. There is a danger of the
vehicle rolling away unintentionally. There is a
risk of an accident.
Wait until the transfer case shift process is
completed.
Do not switch off the engine while changing gear
and do not shift the automatic transmission to
another gear.
HIGH
RANGEPosition for all normal on-
road driving conditions
LOW RANGELow-range position for driving
off-road.
Also for use on steep uphill or
downhill gradients, especially
when towing a trailer.
The vehicle travels around
half the speed of on-road driv-
ing range HIGH RANGE . The
tractive power is correspond-
ingly higher.
Shifting the transfer case
Important safety notes
GWARNING
When the transfer case is in the neutral posi-
tion, power transmission to the driven wheels
is interrupted. As a result, the vehicle could
roll away. There is a risk of an accident.
Secure the vehicle with the parking brake, and
on uphill or downhill gradients, also secure it
with a device such as a wheel chock.
Always wait for the gear change process from
HIGH RANGE toLOW RANGE and fromLOW
RANGE toHIGH RANGE to complete. Do not
switch off the engine while changing gear and do
not shift the automatic transmission to another
gear.
General notes
:Current shift range
162Off-road driving systems
Driving an d parking
Page 168 of 302
The vehicle's ability to steer is severely restric-
ted. Drive carefully and accelerate gently for
optimum traction.
iYou can now engage the differential lock for
rear axle ?and the differential lock for front
axle ;as required.
Differential lock for the rear axle
XTo engage: press switch ?.
Yellow activation indicator lamp Alights up
first, followed by red function indicator
lamp :of switch ?.
The differential lock for the rear axle is
engaged.
Differential lock for the front axle
XTo engage: press switch ;.
First, the yellow activation indicator lamp
lights up, followed by the red function indica-
tor lamp.
The differential lock for the front axle is
engaged.
Disengaging the differential locks
You can disengage the differential locks in the
following order: ;,?,=.
XTo simultaneously disengage all differen-
tial locks: press switch =.
Yellow activation indicator lamps Aand red
function indicator lamps :go out.
After approximately three seconds of normal
driving, ABS, 4ETS, ESP
®and BAS are activa-
ted.
The ABS not available differential
lockedmessage disappears in the multifunc-
tion display and the å,!and÷
warning lamps in the instrument cluster go
out.
XShift the transfer case to the HIGH RANGE
on-road position (Ypage 162).
iIf red function indicator lamps :do not go
out when disengaging the differential locks,
stop the vehicle safely as soon as possible, in
accordance with the traffic conditions. Then,
continue driving and the load change can
release the differential lock.
Towing a trailer
Notes on towing a trailer
Important safety notes
GWARNING
If you rest your foot on the brake pedal while
driving, the braking system can overheat. This increases the stopping distance and can even
cause the braking system to fail. There is a
risk of an accident.
Never use the brake pedal as a footrest. Never
depress the brake pedal and the accelerator
pedal at the same time.
GWARNING
When the vehicle/trailer combination begins
to lurch, you could lose control of it. The vehi- cle/trailer combination could even rollover.
There is a risk of an accident.
On no account should you attempt to
straighten up the vehicle/trailer combination
by increasing the speed. Reduce vehicle
speed and do not countersteer. Apply the
brake as necessary.
GWARNING
If you install a ball coupling other than the one
delivered with the vehicle, the trailer tow hitch
and the rear axle may be overloaded. This
applies especially if the ball coupling in ques-
tion is longer or angled differently. This could
seriously impair the driving characteristics
and the trailer can come loose. There is a risk
of an accident.
Only install the ball coupling delivered with
the vehicle or a ball coupling that is designed
to meet your trailer towing requirements. Do
not modify the ball coupling or the trailer tow
hitch.
GWARNING
If the ball coupling is not installed correctly or not secured with the bolt provided and the
corresponding spring cotter, the trailer may
come loose. There is a risk of an accident.
166Towing a trailer
Driving and parking
Page 169 of 302

Always install and secure the ball coupling asdescribed. Before every journey, ensure that
the ball coupling is secured with the bolt and
the corresponding spring cotter.
Please observe the manufacturer's operating
instructions for the trailer coupling if a detach-
able trailer coupling is used.
Exceeding the maximum permissible nose-
weight may cause damage to the following:
Ryour vehicle
Rthe trailer
Rthe ball coupling
Rtrailer tow hitch
The vehicle/trailer combination could become
unstable.
If the noseweight used is lower than the mini-
mum permissible noseweight, the vehicle/
trailer combination could also become unstable.
To avoid hazardous situations:
Rmake sure to check the noseweight before
each journey
Ruse a drawbar noseweight as close as possi-
ble to the maximum noseweight
Rdo not exceed the maximum permissible
noseweight
Rdo not use a noseweight lower than the min-
imum permissible trailer drawbar noseweight
When backing up the vehicle towards the trailer,
make sure there is nobody between the trailer
and the vehicle.
The applicable permissible values, which must
not be exceeded, can be fou nd:
Rin your vehicle documents
Ron the type plate of the trailer tow hitch and
trailer
Ron the vehicle identification plate
Couple and uncouple the trailer carefully. If you
do not couple the trailer to the towing vehicle
correctly, the trailer could become detached.
Make sure that the following values are not
exceeded:
Rthe permissible trailer drawbar noseweight
Rthe permissible trailer load
Rthe permissible rear axle load of the towing
vehicle
Rthe maximum permissible gross vehicle
weight of both the towing vehicle and the
trailer When towing a trailer, your vehicle's handling
characteristics will be different in comparison
with when driving without a trailer.
The vehicle/trailer combination:
Ris heavier
Ris restricted in its acceleration and gradient-
climbing capability
Rhas an increased braking distance
Ris affected more by strong crosswinds
Rdemands more sensitive steering
Rhas a larger turning radius
This could impair the handling characteristics.
Adapt your driving style accordingly. Maintain a
safe distance. Drive carefully.
When towing a trailer, always adjust your speed
to the current road and weather conditions. Do
not excee
d the maximum permissible speed for
your vehicle/trailer combination.
You will find the values approved by the manu-
facturer on the vehicle identification plates and
those for the towing vehicle in the "Technical
data" section (
Ypage 297).
General notes
RDo not exceed the legally prescribed maxi-
mum speed for vehicle/trailer combinations
in the relevant country.
This lowers the risk of an accident.
ROnly install an approved trailer coupling on
your vehicle.
Further information on availability and on
installation is available from any authorized
Mercedes-Benz Center.
RThe bumpers of your vehicle are not suitable
for installing detachable trailer couplings.
RDo not install hired trailer couplings or other
detachable trailer couplings on the bumpers
of your vehicle.
RIf you do not need the ball coupling, remove
the ball coupling from the ball coupling
recess. This reduces the risk of damage to the
ball coupling.
iCheck the tire pressures when towing a
trailer. You will find the values in the tire pres-
sure table in the fuel filler flap of the vehicle
(
Ypage 266).
You will find installation dimensions and loads
under "Technical data" (
Ypage 297).
Towing a trailer167
Driving an d parking
Z
Page 170 of 302

The maximum noseweight of the trailer drawbar
on the ball coupling for up to 3 people is 562 lbs
(255 kg). The maximum permissible trailer draw-bar noseweight for more than 3 persons and the
maximum load in the trunk can be found in the
trailer drawbar noseweight table (
Ypage 298).
However, the actual noseweight must not
exceed the value given on the trailer tow hitch or trailer identification plates. The lowest weight
applies.
Please note that when towing a trailer,
PARKTRONIC (
Ypage 158) and Blind Spot
Assist (Ypage 154) are only available with lim-
itations, or not at all.
iOn vehicles without level control, the height
of the ball coupling will alter according to the
load placed on the vehicle. If necessary, use a
trailer with a height-adjustable drawbar.
Driving tips
XOn long and steep downhill gradients, select
shift range 1,2or 3(Ypage 123) in good
time.
iThis also applies if you have activated cruise
control or SPEEDTRONIC.
XIf necessary, shift the transfer case to LOW
RANGE (Ypage 162).
This will use the braking effect of the engine,
so that less braking will be required to main-
tain the speed. This relieves the load on the
brake system and prevents the brakes from
overheating and wearing too quickly. If you
need additional braking, depress the brake
pedal repeatedly rather than continuously.
The maximum permissible speed for vehicle/
trailer combinations depends on the type of
trailer. Before beginning the journey, check the
trailer's documents to see what the maximum
permissible speed is. Observe the legally pre-
scribed maximum speed in the relevant country.
For certain Mercedes-Benz vehicles, the maxi-
mum permissible rear axle load is increased
when towing a trailer. Refer to the "Technical
data" section to find out whether this applies to
your vehicle. If you utilize any of the added max- imum rear axle load when towing a trailer, the
vehicle/trailer combination may not exceed a
maximum speed of 60 mph (100 km/h) for rea-
sons concerning the operating permit. This also applies in countries in which the permissible
maximum speed for vehicle/trailer combina-
tions is above 60 mph (100 km/h). When towing a trailer, your vehicle's handling
characteristics will be different in comparison to
when driving without a trailer and it will con-
sume more fuel.
On long and steep downhill gradients, you must
select shift range
1,2or 3in good time.
iThis also applies if you have activated cruise
control or DISTRONIC PLUS.
This will use the braking effect of the engine, so
that less braking will be required to maintain the
speed. This relieves the load on the brake sys-
tem and prevents the brakes from overheating
and wearing too quickly. If you need additional
braking, depre ss the bra
ke pedal repeatedly
rather than continuously.
Driving tips
If the trailer swings from side to side:
XDo not accelerate.
XDo not counter-steer.
XBrake if necessary.
RMaintain a greater distance from the vehicle
in front than when driving without a trailer.
RAvoid braking abruptly. If possible, brake gen- tly at first to allow the trailer to run on. Then,
increase the braking force rapidly.
RThe values given for gradient-climbing capa-
bilities from a standstill refer to sea level.
When driving in mountainous areas, note that
the power output of the engine and, conse-
quently, the vehicle's gradient-climbing capa-
bility, decreases with increasing altitude.
Trailer power supply
!
You can connect accessories with a maxi-
mum power consumption of 180 W to the
permanent power supply.
You must not charge a trailer battery using the
power supply.
The trailer socket of your vehicle is equipped at
the factory with a permanent power supply.
The permanent power supply is supplied via
trailer socket pin 9.
A qualified specialist workshop can provide
more information about installing the trailer
electrics.
168Towing a trailer
Driving and parking
Page 171 of 302
Trailer with 7-pin connector
General notes
You can make a connection to the 13-pin socket
on the ball coupling using an adapter or, if nec-
essary, an adapter cable. Both can be obtained
in a qualified specialist workshop.
Installing the adapter
!Make sure that there is enough slack in the
cable for cornering so that the cable cannot
become detached.
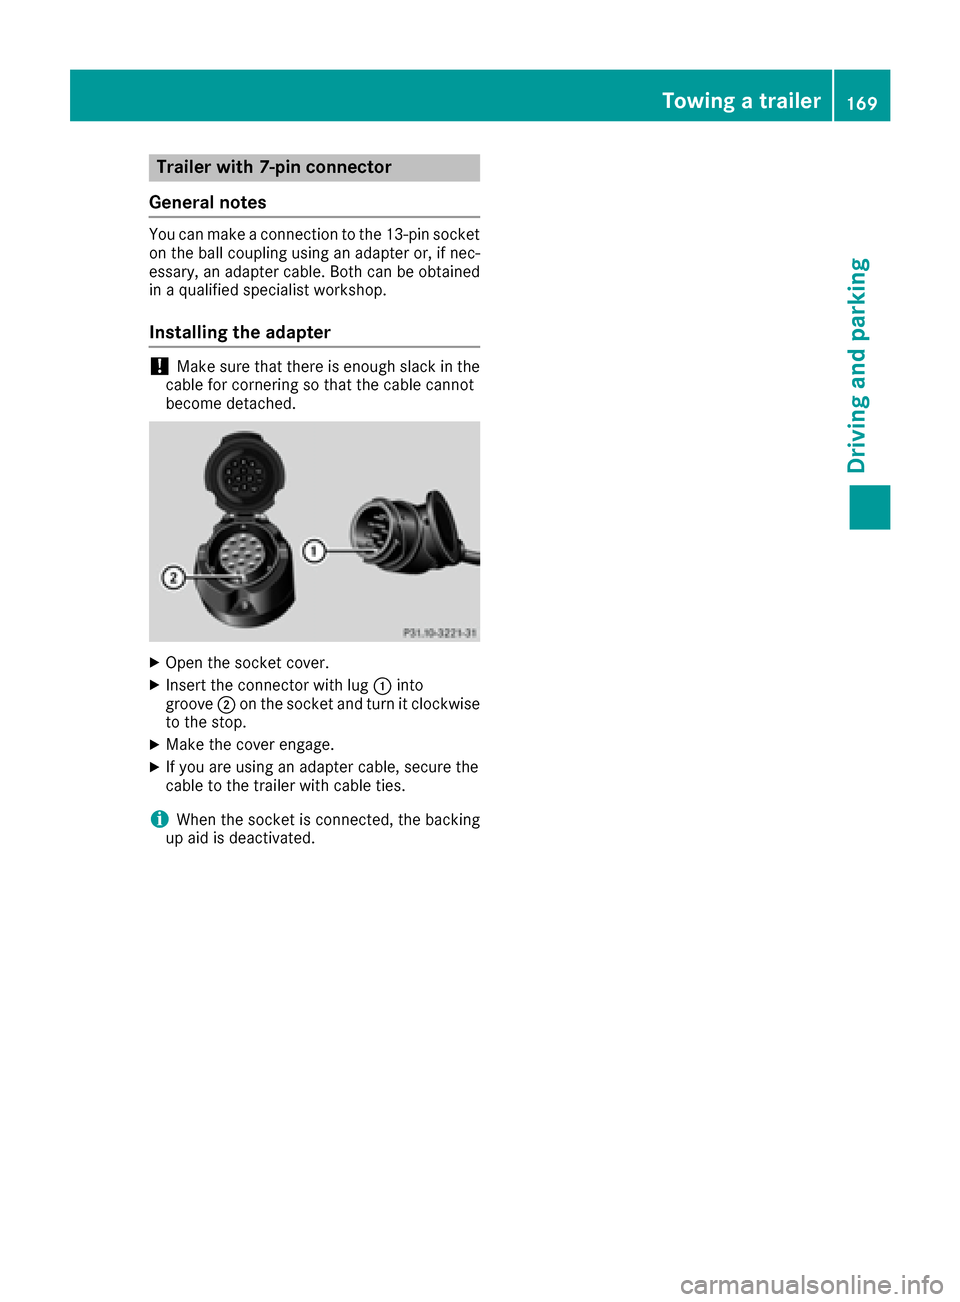
XOpen the socket cover.
XInsert the connector with lug :into
groove ;on the socket and turn it clockwise
to the stop.
XMake the cover engage.
XIf you are using an adapter cable, secure the
cable to the trailer with cable ties.
iWhen the socket is connected, the backing
up aid is deactivated.
Towing a trailer169
Driving an d parking
Z
Page 187 of 302
Safety systems
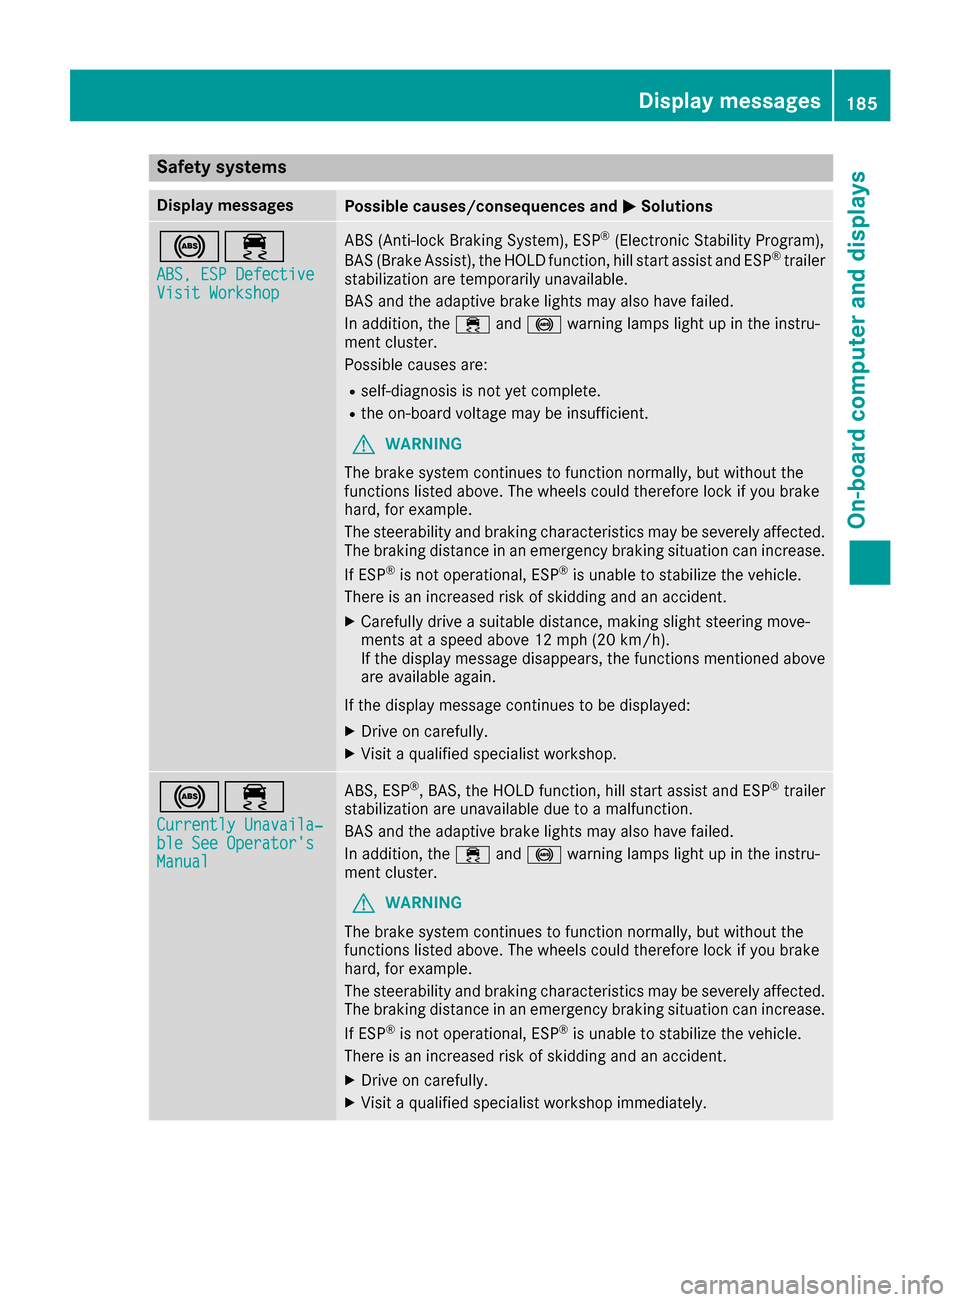
Display messagesPossible causes/consequences andMSolutions
!÷
ABS, ESP DefectiveVisit Workshop
ABS (Anti-lock Braking System), ESP®(Electronic Stability Program),
BAS (Brake Assist), the HOLD function, hill start assist and ESP®trailer
stabilization are temporarily unavailable.
BAS and the adaptive brake lights may also have failed.
In addition, the ÷and! warning lamps light up in the instru-
ment cluster.
Possible causes are:
Rself-diagnosis is not yet complete.
Rthe on-board voltage may be insufficient.
GWARNING
The brake system continues to function normally, but without the
functions listed above. The wheels could therefore lock if you brake
hard, for example.
The steerability and braking characteristics may be severely affected.
The braking distance in an emergency braking situation can increase.
If ESP
®is not operational, ESP®is unable to stabilize the vehicle.
There is an increased risk of skidding and an accident.
XCarefully drive a suitable distance, making slight steering move-
ments at a speed above 12 mph (20 km/h).
If the display message disappears, the functions mentioned above are available again.
If the display message continues to be displayed:
XDrive on carefully.
XVisit a qualified specialist workshop.
!÷
Currently Unavaila‐ble See Operator'sManual
ABS, ESP®, BAS, the HOLD function, hill start assist and ESP®trailer
stabilization are unavailable due to a malfunction.
BAS and the adaptive brake lights may also have failed.
In addition, the ÷and! warning lamps light up in the instru-
ment cluster.
GWARNING
The brake system continues to function normally, but without the
functions listed above. The wheels could therefore lock if you brake
hard, for example.
The steerability and braking characteristics may be severely affected.
The braking distance in an emergency braking situation can increase.
If ESP
®is not operational, ESP®is unable to stabilize the vehicle.
There is an increased risk of skidding and an accident.
XDrive on carefully.
XVisit a qualified specialist workshop immediately.
Display messages185
On-board computer and displays
Z
Page 188 of 302
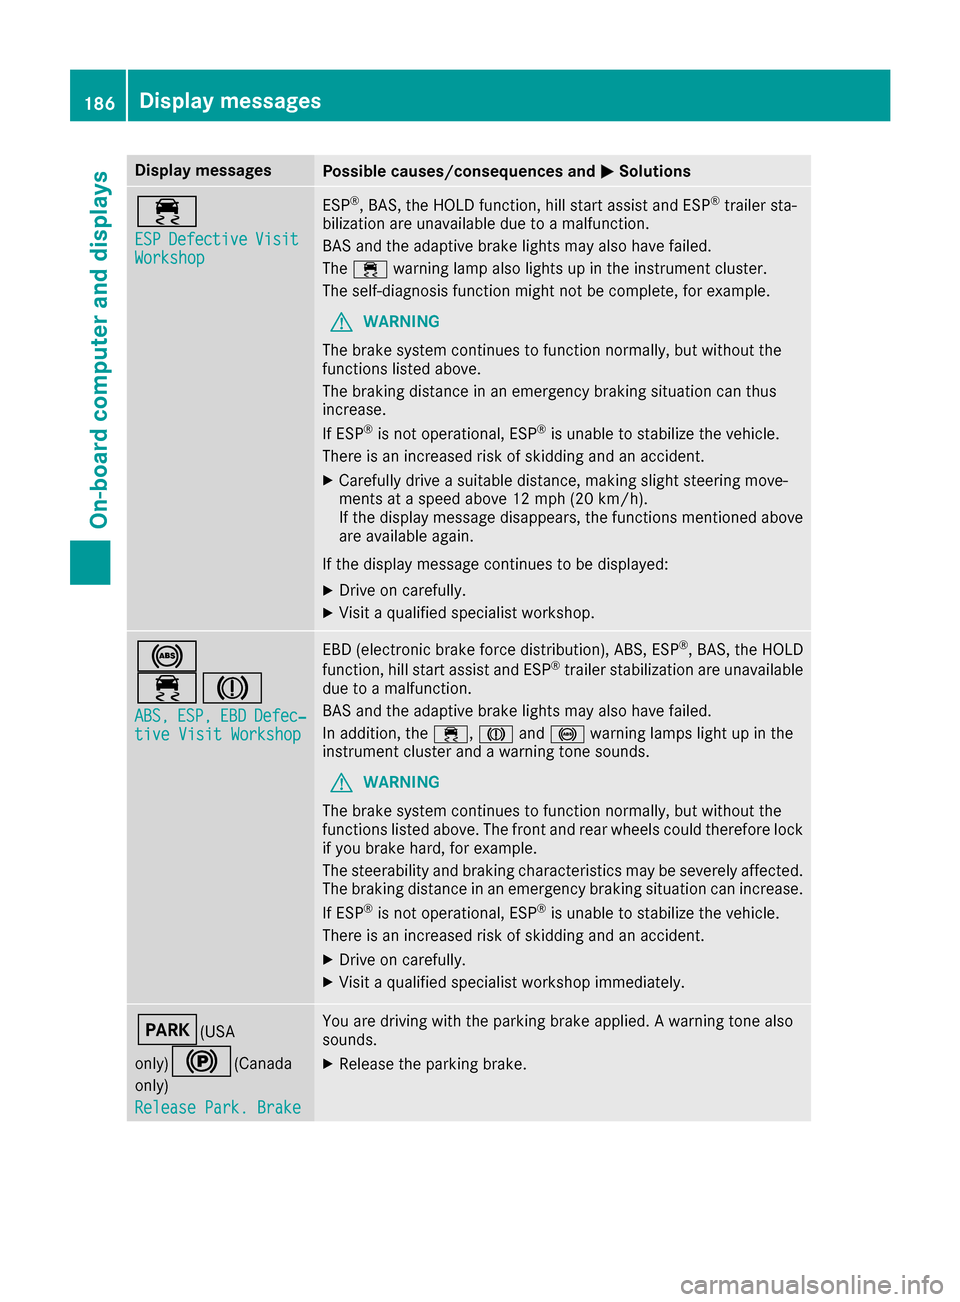
Display messagesPossible causes/consequences andMSolutions
÷
ESPDefectiveVisitWorkshop
ESP®,BAS, th eHOLD function ,hill start assist and ES P®trailer sta-
bilization are unavailable due to amalfunction .
BA Sand th eadaptive brak elights may also hav efailed.
The ÷ warning lamp also lights up in th einstrumen tcluster.
The self-diagnosis function might no tbe complete, for example.
GWARNIN G
The brak esystem continues to function normally, but without th e
function slisted above.
The braking distanc ein an emergenc ybraking situation can thus
increase.
If ES P
®is no toperational, ES P®is unable to stabiliz eth evehicle.
There is an increased ris kof skiddin gand an accident.
XCarefully drive asuitable distance, making slight steering move-
ments at aspeed abov e12 mph (20 km/ h).
If the display message disappears, the functions mentioned above are available again.
If the display message continues to be displayed:
XDrive on carefully.
XVisit a qualified specialist workshop.
!
÷J
ABS,ESP,EBDDefec‐tive Visit Workshop
EBD (electronic brake force distribution), ABS, ESP®, BAS, the HOLD
function, hill start assist and ESP®trailer stabilization are unavailable
due to a malfunction.
BAS and the adaptive brake lights may also have failed.
In addition, the ÷,Jand! warning lamps light up in the
instrument cluster and a warning tone sounds.
GWARNING
The brake system continues to function normally, but without the
functions listed above. The front and rear wheels could therefore lock
if you brake hard, for example.
The steerability and braking characteristics may be severely affected.
The braking distance in an emergency braking situation can increase.
If ESP
®is not operational, ESP®is unable to stabilize the vehicle.
There is an increased risk of skidding and an accident.
XDrive on carefully.
XVisit a qualified specialist workshop immediately.
F(USA
only)
!(Canada
only)
Release Park. Brake
You are driving with the parking brake applied. A warning tone also
sounds.
XRelease the parking brake.
186Display messages
On-board computer and displays
Page 191 of 302

Display messagesPossible causes/consequences andMSolutions
FrontPassengerAir‐bag Disabled SeeOperator' sManual
ABabySmart ™compatible child restrain tsystem is installed on th e
front-passenger seat .
The 45indicator lamp also lights up.
The front-passenger air bag is therefore disabled.
Further information on BabySmart™ (
Ypage 50).
FrontPassengerAir‐bag Enabled SeeOperator's Manual
The 45indicator lamp does not remain lit if a special Baby-
Smart™-compatible child restraint system has been installed on the
front-passenger seat.
The BabySmart™ system is malfunctioning.
GWARNING
The front-passenger front air bag can be triggered unintentionally in
the event of an accident.
There is a risk of an accident.
XMake sure there is nothing between the seat cushion and the child
seat.
XCheck for correct installation of the child restraint system.
XIf the 45indicator lamps do not light up, have the Baby-
Smart™ system checked as soon as possible at a qualified special-
ist workshop.
Do not transport a child on the front-passenger seat until the air bag
deactivation system has been repaired.
Lights
i
Display messages about LEDs:
This display message will only appear if all LEDs have failed.
Display messagesPossible causes/consequences and MSolutions
b
CheckLeftLowBeamorCheck Right LowBeam
The left or right-hand low-beam headlamp is defective.
XVisit a qualified specialist workshop.
b
Check Trailer LeftTail LamporCheckTrailer Right TailLamp
The left or right-hand trailer tail lamp is faulty.
XCheck whether you are permitted to replace the bulb yourself.
or
XVisit a qualified specialist workshop.
b
Check Trailer LeftTurn Signalor CheckTrailer Right TurnSignal
The left or right-hand trailer turn signal lamp is defective.
XCheck whether you are permitted to replace the bulb yourself.
or
XVisit a qualified specialist workshop.
Display messages189
On-board computer and displays
Z