2016 MERCEDES-BENZ E-CLASS ESTATE display
[x] Cancel search: displayPage 170 of 565
The engine is
restar ted automatically if:
R Vehicles with manual transmission: Yo u
depress the clutch pedal.
R Vehicles with manual transmission: Yo u
engage reve rsege ar k.
R Vehicles with automatic transmission: In
transmission position h,youre lease the
brake pedal when the HOLD function is not
active.
R Vehicles with automatic transmission:
Yo u shift out of transmission position j.
R Vehicles with automatic transmission:
Yo u shift into transmission position hor
k.
R You depress the accelerator pedal.
R Allvehicles except
E 220 d 4MATIC All‑Ter rain: You swit chto
drive program S+
R E 220 d 4MATIC All‑Ter rain: You swit chto
drive program All‑Terrain.
R Youch ange theve hicle le vel.
R An automatic engine start is necessar y.If
th e engine was switched off bythe ECO start/
st op function and you lea vetheve hicle, a warn‐
ing tone sounds. The Vehicle is operational
Switch off the ignition before exiting display
messa gealso appears in the multifunction dis‐
pla y.
If yo u do not swit choff the ignition, the ignition
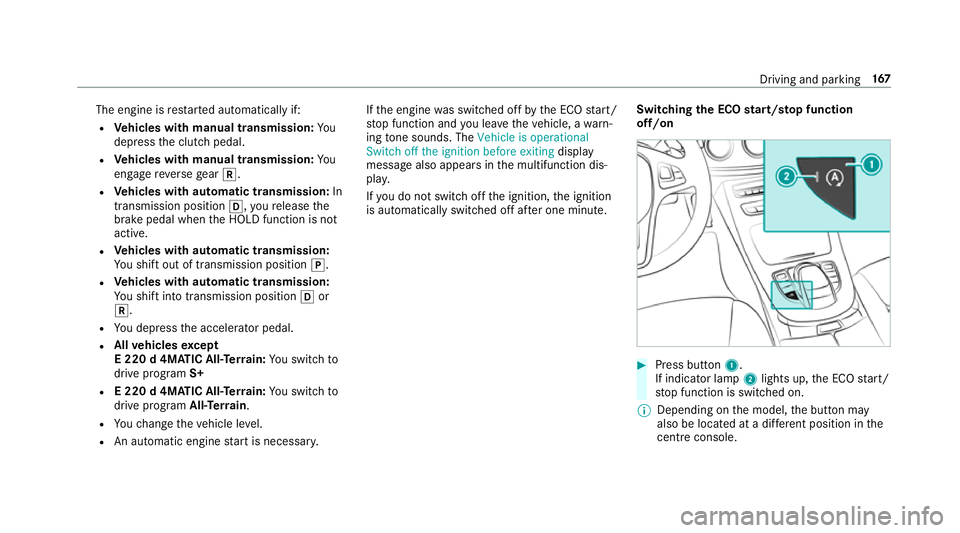
is automatically switched off af ter one minute. Switching
the ECO start/s top function
off/on #
Press button 1.
If indicator la mp2lights up, the ECO start/
st op function is switched on.
% Depending on the model, the button may
also be located at a dif fere nt position in the
centre console. Driving and pa
rking 167
Page 171 of 565
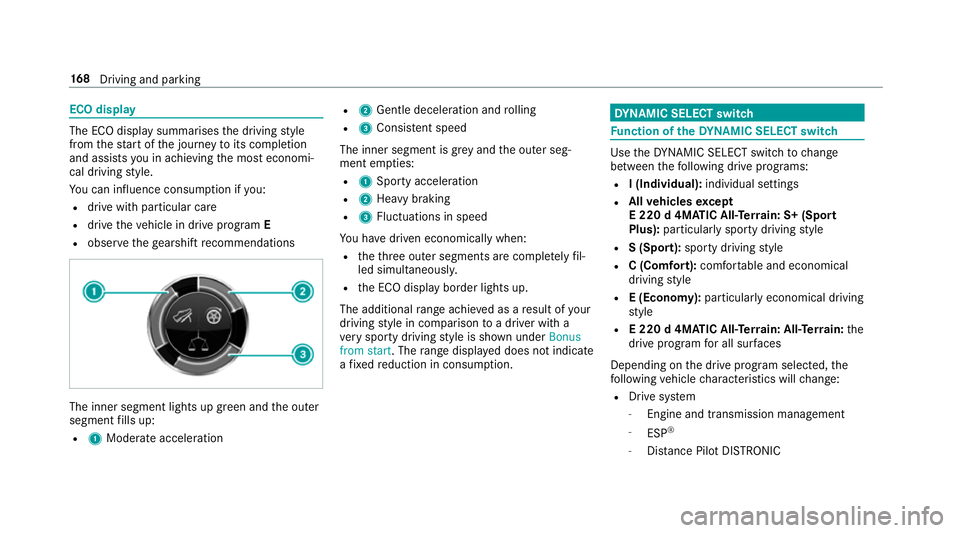
ECO display
The ECO display summarises
the driving style
from thest art of the journey toits completion
and assists you in achieving the most economi‐
cal driving style.
Yo u can influence consum ption if you:
R drive with particular care
R drive theve hicle in drive program E
R obser vethege arshift recommendations The inner segment lights up green and
the outer
segment fills up:
R 1 Moderate acceleration R
2 Gentle decele ration and rolling
R 3 Consis tent speed
The inner segment is gr eyand the outer seg‐
ment em pties:
R 1 Sporty acceleration
R 2 Heavy braking
R 3 Fluctuations in speed
Yo u ha vedriven economically when:
R theth re e outer segments are comple tely fil‐
led simultaneousl y.
R the ECO display border lights up.
The additional range achi eved as a result of your
driving style in comparison toa driver with a
ve ry sporty driving style is shown under Bonus
from start. The range displ ayed does not indicate
a fixe dre duction in consum ption. DY
NA MIC SELECT switch Fu
nction of theDY NA MIC SELECT switch Use
theDY NA MIC SELECT switch tochange
between thefo llowing drive programs:
R I (Individual): individual settings
R Allvehicles except
E 220 d 4MATIC All‑Ter rain: S+ (Sport
Plus): particularly sporty driving style
R S (Sport): sporty driving style
R C (Comfort): comfortable and economical
driving style
R E (Economy): particularly economical driving
st yle
R E 220 d 4MATIC All‑Ter rain: All‑Ter rain: the
drive prog ram for all sur faces
Depending on the drive program selected, the
fo llowing vehicle characteristics will change:
R Drive sy stem
- Engine and transmission management
- ESP ®
- Distance Pilot DISTRONIC 16 8
Driving and pa rking
Page 172 of 565
R
Suspension
R Steering
R Availability of the ECO start/ stop function
% Time until the next vehicle star t:
R Less than four hours: the last selected
drive program is active.
R More than four hours: drive program Cis
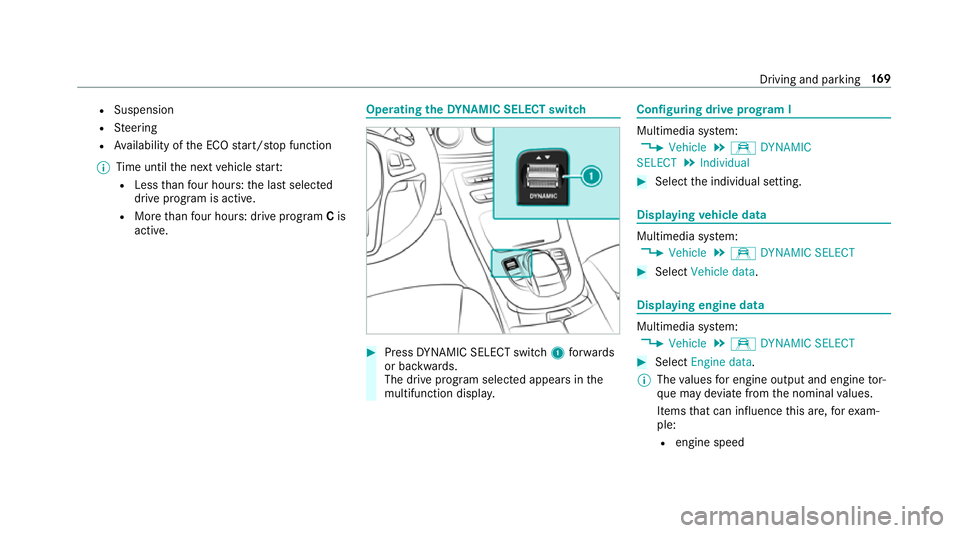
active. Ope
rating the DYNA MIC SELECT switch #
Press DYNA MIC SELECT switch 1forw ards
or backwards.
The drive prog ram selected appears in the
multifunction displa y. Configuring drive prog
ram I Multimedia sy
stem:
, Vehicle .
e DYNAMIC
SELECT .
Individual #
Select the individual setting. Displaying
vehicle data Multimedia sy
stem:
, Vehicle .
e DYNAMIC SELECT #
Select Vehicle data . Displaying engine data
Multimedia sy
stem:
, Vehicle .
e DYNAMIC SELECT #
Select Engine data.
% The values for engine output and engine tor‐
qu e may deviate from the nominal values.
Items that can influence this are, forex am‐
ple:
R engine speed Driving and parking
16 9
Page 175 of 565
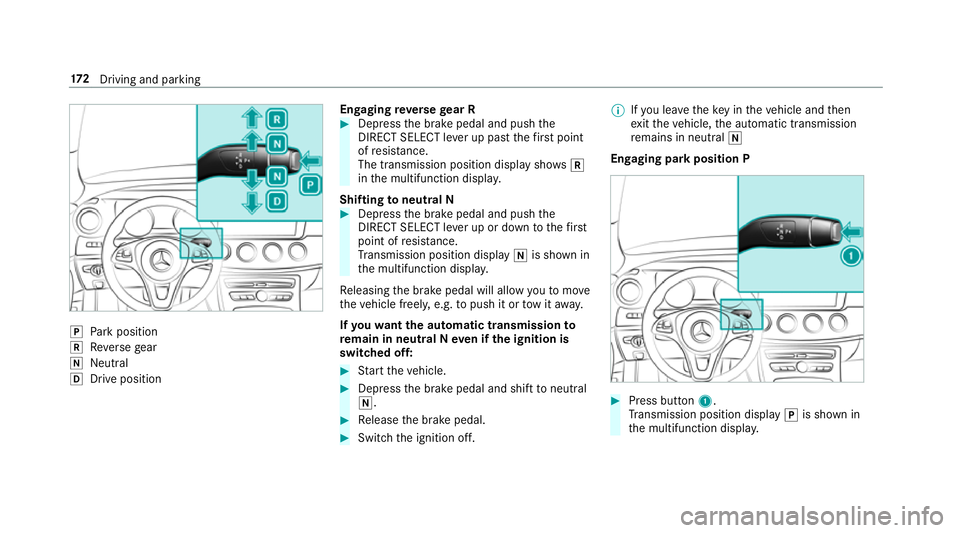
j
Park position
k Reversege ar
i Neut ral
h Drive position En
gaging reve rsege ar R #
Depress the brake pedal and push the
DIRECT SELECT le ver up past thefirs t point
of resis tance.
The transmission position displ aysho wsk
in the multifunction displa y.
Shifting toneutral N #
Depress the brake pedal and push the
DIRECT SELECT le ver up or down tothefirst
point of resis tance.
Tr ansmission position display iis shown in
th e multifunction displa y.
Re leasing the brake pedal will allow youto mo ve
th eve hicle freely, e.g. topush it or tow it away.
If yo uwa ntthe automatic transmission to
re main in neutral N even if the ignition is
switched off: #
Start theve hicle. #
Depress the brake pedal and shift toneutral
i. #
Release the brake pedal. #
Switch the ignition off. %
Ifyo u lea vetheke y in theve hicle and then
ex itth eve hicle, the automatic transmission
re mains in neutral i
Engaging park position P #
Press button 1.
Tr ansmission position display jis shown in
th e multifunction displa y.17 2
Driving and pa rking
Page 182 of 565
Re
quirements:
The following announcements appear in order in
th e multifunction display when theAd Blue ®
tank
requ iresrefuelling:
R Refill AdBlue See Owner's Manual . The
Ad Blue ®
re ser voir is down tothere ser ve
le ve l.
R Refill AdBlue No start in XXX mi. You can still
drive theve hicle overth e dis tance shown.
To p up AdBlue ®
as soon as possible.
R Refill AdBlue Start not possible. The vehicle
can no longer be star ted.
The vehicle must be unloc ked. Opening
theAd Blue ®
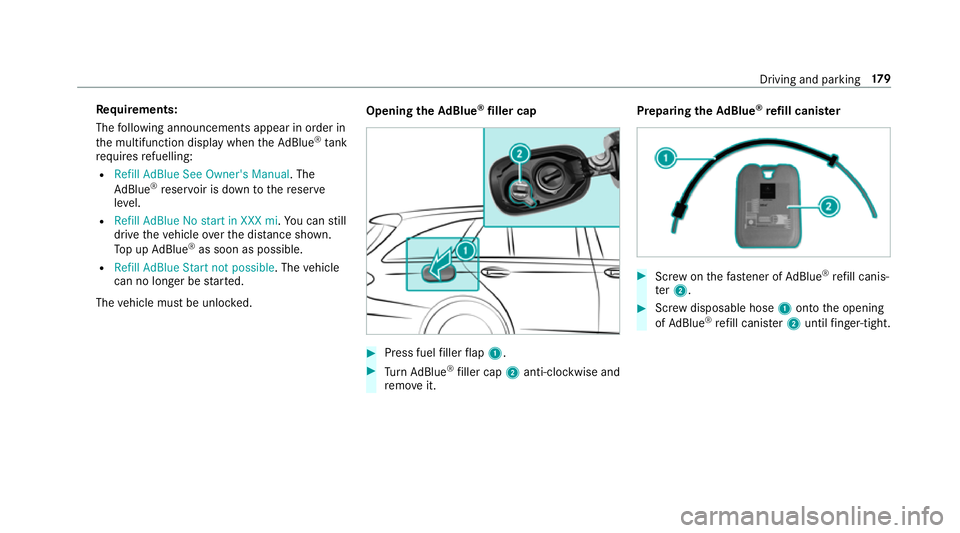
filler cap #
Press fuel filler flap 1. #
Turn AdBlue ®
filler cap 2anti-clockwise and
re mo veit. Preparing
theAd Blue ®
re fill canis ter #
Screw onthefast ener of AdBlue ®
re fill canis‐
te r2. #
Screw disposable hose 1onto the opening
of Ad Blue ®
re fill canis ter2 until finger-tight. Driving and pa
rking 17 9
Page 183 of 565
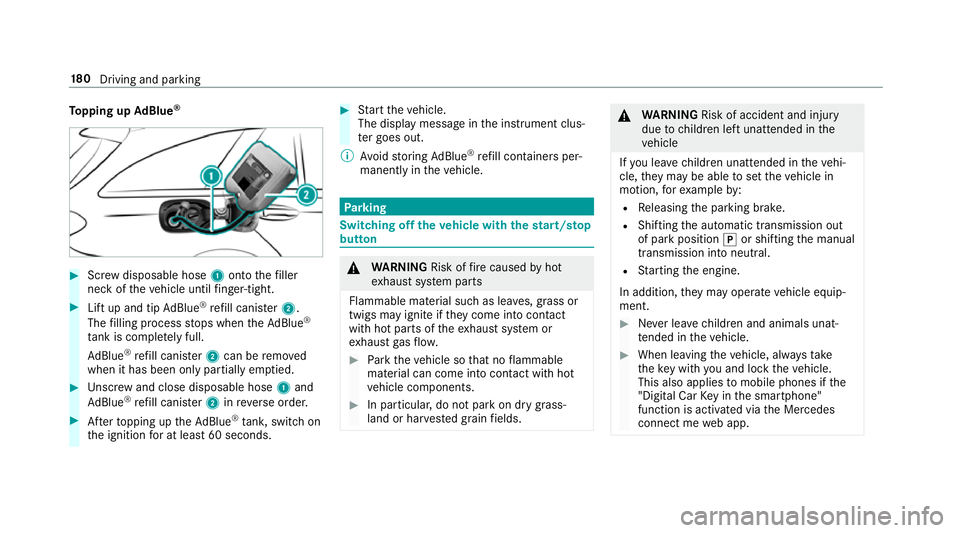
To
pping up AdBlue ® #
Screw disposable hose 1onto thefiller
neck of theve hicle until finger-tight. #
Lift up and tip AdBlue ®
re fill canis ter2.
The filling process stops when theAd Blue ®
ta nk is compl etely full.
Ad Blue ®
re fill canis ter2 can be remo ved
when it has been only partially em ptied. #
Unscr ew and close disposable hose 1and
Ad Blue ®
re fill canis ter2 inreve rse order. #
Afterto pping up theAd Blue ®
tank, switch on
th e ignition for at least 60 seconds. #
Start theve hicle.
The display message in the instrument clus‐
te r goes out.
% Avoid storing AdBlue ®
re fill con tainers per‐
manently in theve hicle. Pa
rking Switching off
theve hicle with thest art/s top
button &
WARNING Risk offire caused byhot
ex haust sy stem parts
Flammable material such as lea ves, grass or
twigs may ignite if they come into contact
wi th hot parts of theex haust sy stem or
ex haust gasflow. #
Park theve hicle so that no flammable
material can come into con tact wi thhot
ve hicle components. #
In particular, do not park on dry grass‐
land or har vested grain fields. &
WARNING Risk of accident and inju ry
due tochildren left unat tended in the
ve hicle
If yo u lea vechildren unat tended in theve hi‐
cle, they may be able toset theve hicle in
motion, forex ample by:
R Releasing the parking brake.
R Shifting the automatic transmission out
of park position jor shifting the manual
transmission into neutral.
R Starting the engine.
In addition, they may operate vehicle equip‐
ment. #
Never lea vechildren and animals unat‐
te nded in theve hicle. #
When leaving theve hicle, alw aysta ke
th eke y with you and lock theve hicle.
This also applies tomobile phones if the
"Digital Car Key in the smartphone"
function is activated via the Mercedes
connect me web app. 18 0
Driving and pa rking
Page 190 of 565
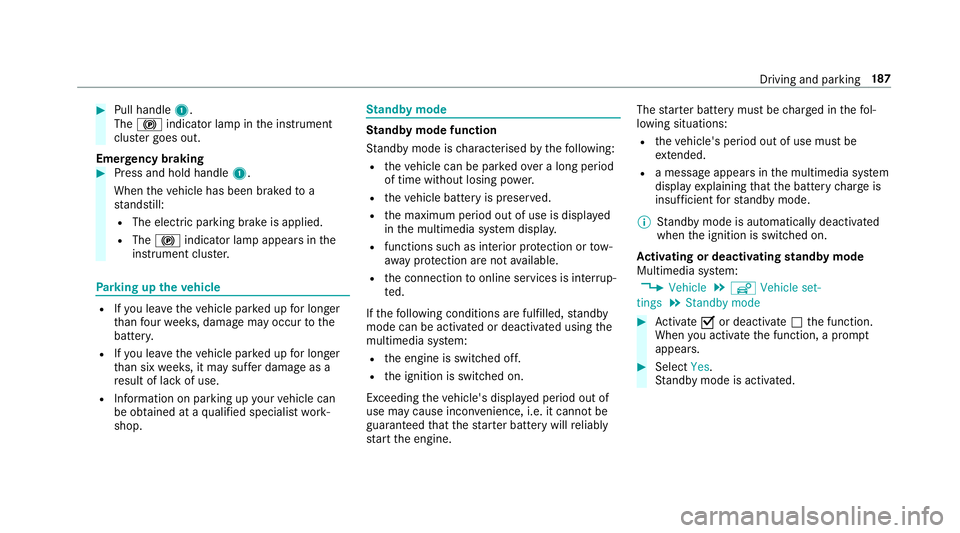
#
Pull handle 1.
The ! indicator lamp in the instrument
clus ter goes out.
Emer gency braking #
Press and hold handle 1.
When theve hicle has been braked to a
st andstill:
R The electric parking brake is applied.
R The ! indicator lamp appears in the
instrument clus ter. Pa
rking up theve hicle R
Ifyo u lea vetheve hicle par ked up for longer
th an four we eks, damage may occur tothe
batter y.
R Ifyo u lea vetheve hicle par ked up for longer
th an six weeks, it may suf fer dama geas a
re sult of lack of use.
R Information on parking up your vehicle can
be obtained at a qualified specialist work‐
shop. St
andby mode St
andby mode function
St andby mode is characterised bythefo llowing:
R theve hicle can be par kedove r a long period
of time without losing po wer.
R theve hicle battery is preser ved.
R the maximum period out of use is displa yed
in the multimedia sy stem displa y.
R functions such as interior pr otection or tow-
aw ay protection are not available.
R the connection toonline services is inter rup‐
te d.
If th efo llowing conditions are fulfilled, standby
mode can be activated or deactivated using the
multimedia sy stem:
R the engine is switched off.
R the ignition is switched on.
Exceeding theve hicle's displa yed period out of
use may cause incon venience, i.e. it cannot be
guaranteed that thest ar ter battery will reliably
st art the engine. The
star ter battery must be charge d in thefo l‐
lowing situations:
R theve hicle's period out of use must be
ex tended.
R a messa geappears in the multimedia sy stem
display explaining that the battery charge is
insuf ficient forst andby mode.
% Standby mode is automatically deactivated
when the ignition is switched on.
Ac tivating or deactivating standby mode
Multimedia sy stem:
, Vehicle .
î Vehicle set-
tings .
Standby mode #
Activate Oor deacti vate ª the function.
When you activate the function, a prom pt
appears. #
Select Yes.
St andby mode is activated. Driving and parking
187
Page 193 of 565
R
When braking.
R Vehicles with trailer hitch: In trailer opera‐
tion from speeds of 65 km/h, if theve hicle/
trailer combination begins tosw ay from side
to side.
R Instro ng sidewinds when you are driving
fast erthan 80 km/h.
ESP ®
can stabilise theve hicle byinter vening in
th efo llowing ways:
R One or more wheels are braked.
R The engine output is adap ted according to
th e situation.
ESP ®
is deactivated if the ESP ®
OFF å warn‐
ing lamp lights up continuously in the instrument
clus ter:
R Driving stability will no lon ger be impr oved.
R Vehicles with trailer hitch: Stabilisation of
th eve hicle/trailer combination is no longer
active.
R Crosswind Assist is no longer active.
R The drive wheels could spin. R
ETS/4ETS traction control is still active.
% Even when ESP ®
is deactivated, you are still
assis tedby ESP ®
when braking.
ESP ®
is inter vening if the ESP ®
÷ warning
lamp flashes in the instrument clus ter:
R Do not deacti vate ESP ®
.
R Only depress the accelera tor pedal as far as
is necessar y.
R Adapt your driving style to suit the cur rent
ro ad and weather conditions.
Deactivate ESP ®
in thefo llowing situations to
impr ovetraction:
R When using snow chains.
R In deep sn ow.
R On sand or gr avel.
% Spinning the wheels results in a cutting
action which pr ovides better grip.
ESP ®
is deactivated if theå ESP®
OFF warn‐
ing lamp lights up continuously in the instrument
clus ter. If
th e ESP ®
÷ warning lamp lights up continu‐
ousl y,ESP ®
is not available due toa malfunction.
Obse rve any information which may be displa yed
in the instrument clus ter:
R Warning and indicator lamps (→ page 501)
R Display messages (→ page445)
ETS/4ETS (Electronic Traction Sy stem)
ETS/4E TStraction control is pa rtof ESP ®
.
ETS/4ETS can impr ovetheve hicle's traction by
inter vening in thefo llowing ways:
R The drive wheels are braked individually if
th ey spin.
R More drive torque is transferred tothe wheel
or wheels with traction.
Influence of drive prog rams on ESP ®
The drive programs enable ESP ®
to adapt todif‐
fe re nt we ather and road conditions as well as
th e driver's prefer red driving style. You can
select the drive programs using theDY NA MIC
SELECT switch. 19 0
Driving and pa rking