2016 MERCEDES-BENZ CLS height
[x] Cancel search: heightPage 168 of 342
X
Fully depress the accelerator pedal.
The engine speed rises to approximately
3,500 rpm.
The RACE START Release brake to start
message appears in the multifunction display.
i If you do not release the brake pedal within
five seconds, RACE START is canceled. The
RACE START Canceled message appears in
the multifunction display. X
Take your foot off the brake, but keep the
accelerator pedal depressed.
The vehicle pulls away at maximum acceler-
ation.
The RACE START Active message appears in
the multifunction display.
RACE START is deactivated when the vehicle
reaches a speed of approximately 30 mph (Can-
ada: 50 km/h). Drive program S+ is activated.
SPORT handling mode remains activated.
RACE START is deactivated immediately if you
release the accelerator pedal during RACE
START or if any of the activation conditions are
no longer fulfilled. The RACE START Not Pos‐
sible See Operator's Manual message
appears in the multifunction display.
i If RACE START is used repeatedly within a
short period of time, it is only available again
after the vehicle has been driven a certain
distance.
AIRMATIC
Vehicle level
Important safety notes
G WARNING
When the vehicle is being lowered, people
could become trapped if their limbs are
between the vehicle body and the wheels or
underneath the vehicle. There is a risk of
injury.
Make sure no one is underneath the vehicle or
in the immediate vicinity of the wheel arches
when the vehicle is being lowered.
Your vehicle regulates its height automatically.
All-round level control ensures the best possible
suspension and constant ground clearance,
even with a laden vehicle. When you drive fast, the vehicle is lowered automatically to improve
driving safety and to reduce fuel consumption.
The following vehicle levels are possible: R
Normal R
Raised: the vehicle is raised by approximately
0.80 in (20 mm) when compared with the nor-
mal level R
Lowered: the vehicle is raised by approx-
imately 0.40 in (10 mm) when compared with
the normal level
i These changes in level are so slight that you
are hardly aware of them.
The "Normal" and "Raised" vehicle levels can be
set manually.
The "Lowered” vehicle level is set automatically: R
at speeds above 70 mph (113 km/h) R
if you have selected "Sports tuning"
( Y
page 167)
Setting the vehicle level Select the "Normal" setting for normal road sur-
faces and "Raised" for driving with snow chains
or on particularly poor road surfaces. Your
selection remains stored even if yo u remove the
Sma rtKe y from the ignition lock.
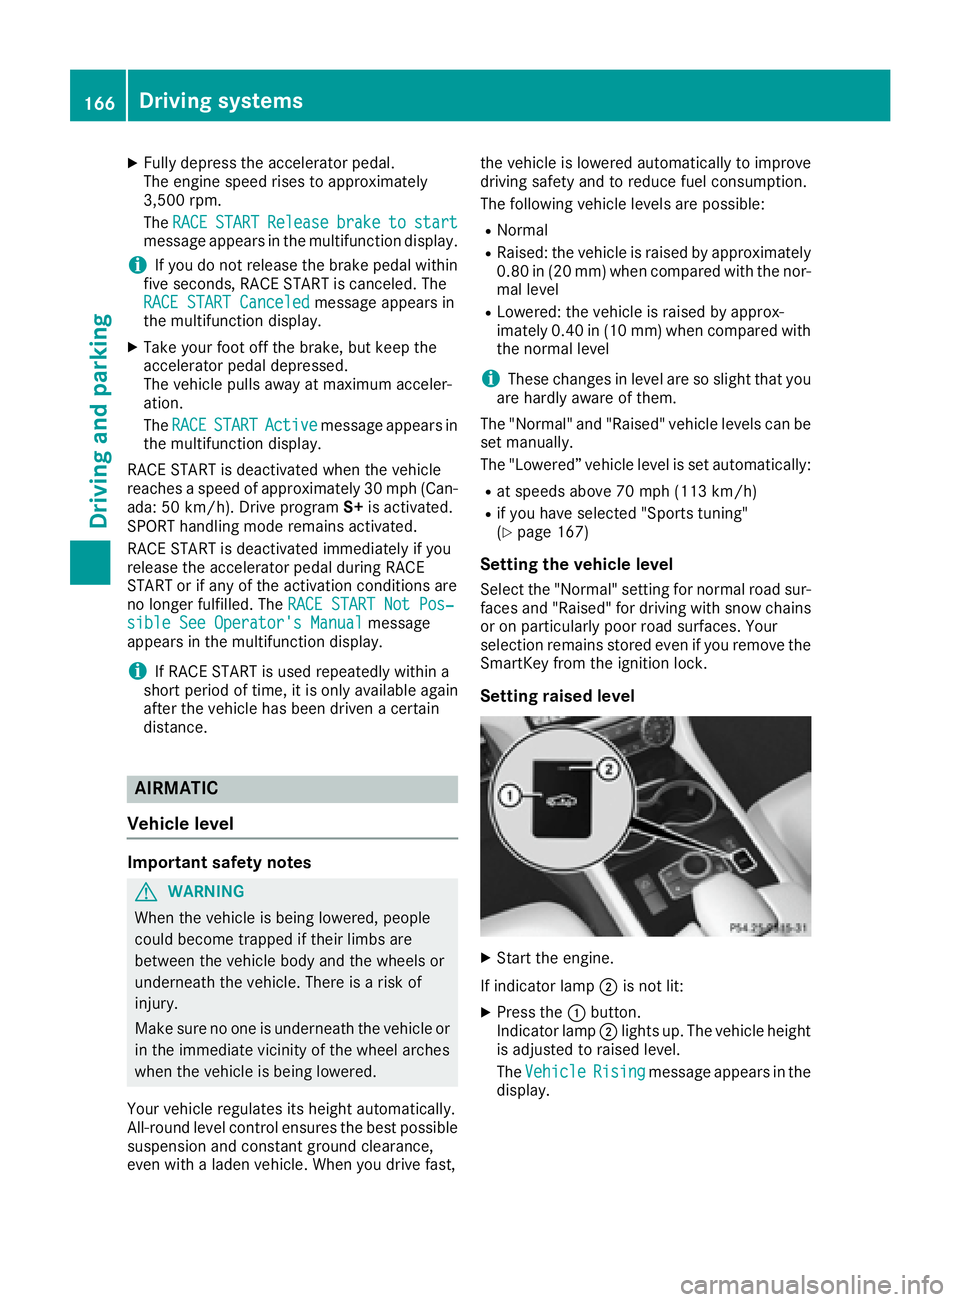
Setting raised level
X
Start the engine.
If indicator lamp �D is not lit:X
Press the �C button.
Indicator lamp �D lights up. The vehicle height
is adjusted to raised level.
The Vehicle
Rising message appears in the
display.166
Driving systems
Driving and parking
Page 176 of 342
R
Snowfall or heavy rain may lead to a parking
space being measured inaccurately. R
Pay attention to the PARKTRONIC
( Y
page 171) warning messages during the
parking procedure. R
You can intervene in the steering procedure
to correct it at any time. Active Parking Assist
will then be canceled. R
When transporting a load which protrudes
from your vehicle, you should not use Active
Parking Assist. R
Never use Active Parking Assist when snow
chains are installed. R
Make sure that the tire pressures are always
correct. This has a direct influence on the
parking characteristics of the vehicle.
Use Active Parking Assist for parking spaces: R
parallel or at right angles to the direction of
travel R
that are on straight roads, not bends R
that are on the same level as the road, e.g. not
on the sidewalk.
Detecting parking spaces Objects located above the height range of Active
Parking Assist will not be detected when the
parking space is measured. These are not taken
into account when the parking procedure is cal-
culated, e.g. overhanging loads, tail sections or
loading ramps of goods vehicles.
G WARNING
If there are objects above the detection range: R
Active Park Assist may steer too early R
the vehicle may not stop in front of these
objects
You may cause a collision as a result. There is
a risk of an accident.
If objects are located above the detection
range, stop and deactivate Active Parking
Assist.
For further information on the detection range
( Y
page 170). Active Parking Assist does not assist you park-
ing in spaces at right angles to the direction of
travel if: R
two parking spaces are located directly next
to one another R
the parking space is directly next to a low
obstacle such as a low curb R
you park forwards
Active Parking Assist does not assist you park-
ing in spaces that are parallel or at right angles
to the direction of travel if: R
the parking space is on a curb R
the system reads the parking space as being
blocked, for example by foliage or grass pav-
ing blocks R
the area is too small for the vehicle to maneu-
ver into R
the parking space is bordered by an obstacle,
e.g. a tree, a post or a trailer
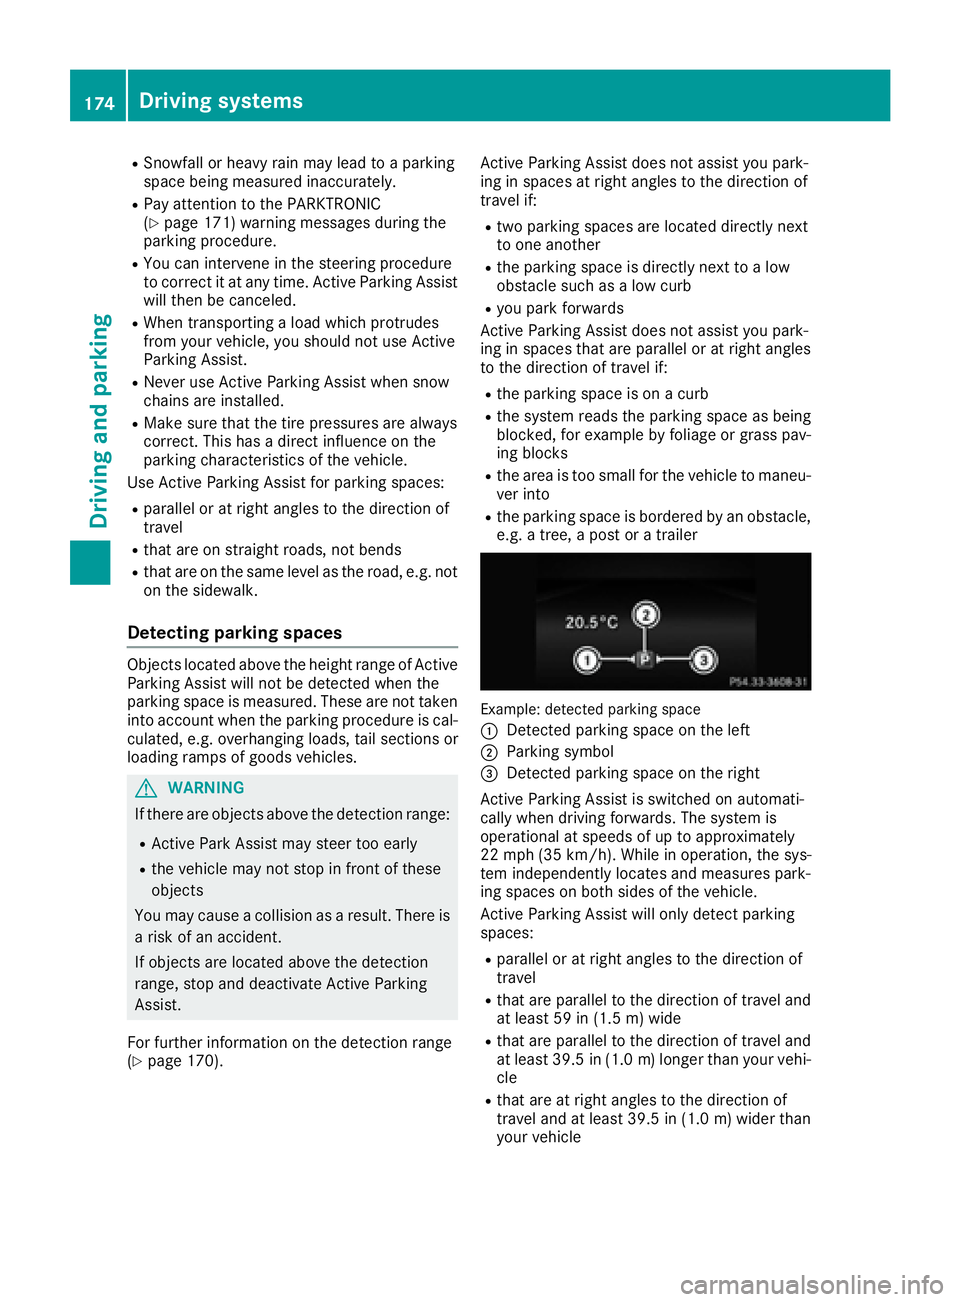
Example: detected parking space
�C
Detected parking space on the left �D
Parking symbol �
Page 180 of 342
R
if the camera lens is dirty or obstructed
Observe the notes on cleaning
( Y
page 282)R
if the rear of your vehicle is damaged. In this
event, have the camera position and setting
checked at a qualified specialist workshop
The field of vision and other functions of the rear
view camera may be restricted due to additional
accessories on the rear of the vehicle (e.g.
license plate holder, bicycle rack).
On vehicles with height-adjustable chassis,
leaving the standard height can result in inac-
curacies in the guide lines, depending on tech-
nical conditions.
i The rear view camera is protected from rain-
drops and dust by means of a flap. When the
rear view camera is activated, this flap opens.
The flap closes again when: R
you have finished the maneuvering process R
you switch off the engine R
you open the trunk
Observe the notes on cleaning ( Y
page 282).
For technical reasons, the flap may remain
open briefly after the rear view camera has
been deactivated.
Activating/deactivating the rear view
camera X
To activate: make sure that the SmartKey is
in position 2 in the ignition lock.X
Make sure that the Activation by R gear
function is selected in the multimedia system
(see the Digital Operator's Manual). X
Engage reverse gear.
The rear view camera flap opens. The area
behind the vehicle is shown with guide lines in
the multimedia system display.
The image from the rear view camera is avail-
able throughout the maneuvering process.
To deactivate: the rear view camera deacti-
vates if you shift the transmission to P or after
driving forwards a short distance. Messages in the multimedia system dis-
play The rear view camera may show a distorted view
of obstacles, show them incorrectly or not at all.
The rear view camera does not show objects in
the following positions: R
very close to the rear bumper R
under the rear bumper R
in the area immediately above the tailgate
handle
! Objects not at ground level may appear to
be further away than they actually are, e.g.: R
the bumper of a parked vehicle R
the drawbar of a trailer R
the ball coupling of a trailer tow hitch R
the rear section of an HGV R
a slanted post
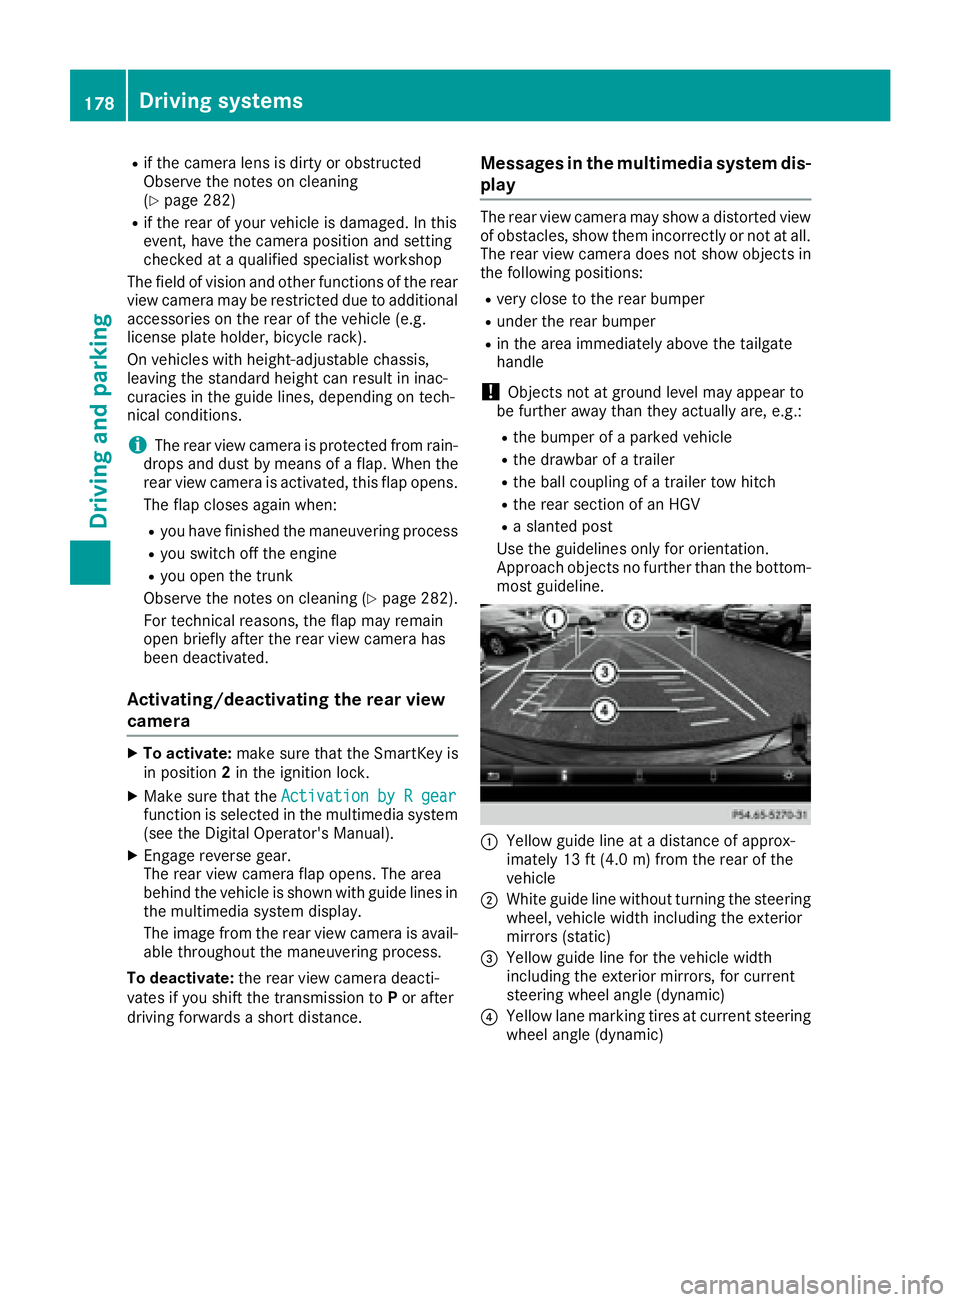
Use the guidelines only for orientation.
Approach objects no further than the bottom-
most guideline.
�C
Yellow guide line at a distance of approx-
imately 13 ft (4.0 m) from the rear of the
vehicle �D
White guide line without turning the steering
wheel, vehicle width including the exterior
mirrors (static)
�
Page 184 of 342
The 360° camera will not function or will func-
tion in a limited manner: R
if the doors are open R
if the exterior mirrors are folded in R
if the trunk lid is open R
in heavy rain, snow or fog R
at night or in very dark places R
if the cameras are exposed to very bright light R
if the area is lit by fluorescent bulbs or LED
lighting (the display may flicker) R
if there is a sudden change in temperature,
e.g. when driving into a heated garage in win-
ter R
if the camera lenses are dirty or covered R
if the vehicle components in which the cam-
eras are installed are damaged. In this event,
have the camera position and setting checked
at a qualified specialist workshop
Do not use the 360° camera in this case. You
can otherwise injure others or cause damage to
objects or the vehicle.
Guide lines are always shown at road level.
The field of vision and other functions of the
camera system may be restricted due to addi-
tional accessories on the rear of the vehicle (e.g.
license plate holder, bicycle rack).
On vehicles with height-adjustable chassis,
depending on technical conditions, leaving the
standard height can result in: R
inaccuracies in the guide lines R
inaccuracies in the display of generated
images (top view)
Activation conditions The 360° camera image can be displayed if: R
your vehicle is equipped with a 360° camera R
the SmartKey is in position 2 in the ignition
lock R
the multimedia system is switched on R
the 360° Camera function is switched on
Switching on the 360° camera X
Press the �
Page 258 of 342
and secure heavy objects in the trunk outside
of the EASY-PACK trunk box.
The maximum permitted load of the EASY-PACK
trunk box is 22 lbs (10 kg). With a load of above
approximately 11 lbs (5 kg), the bottom of the
box moves downward until it rests on the mat of
the trunk floor. Thus, overloading of the box is
avoided.
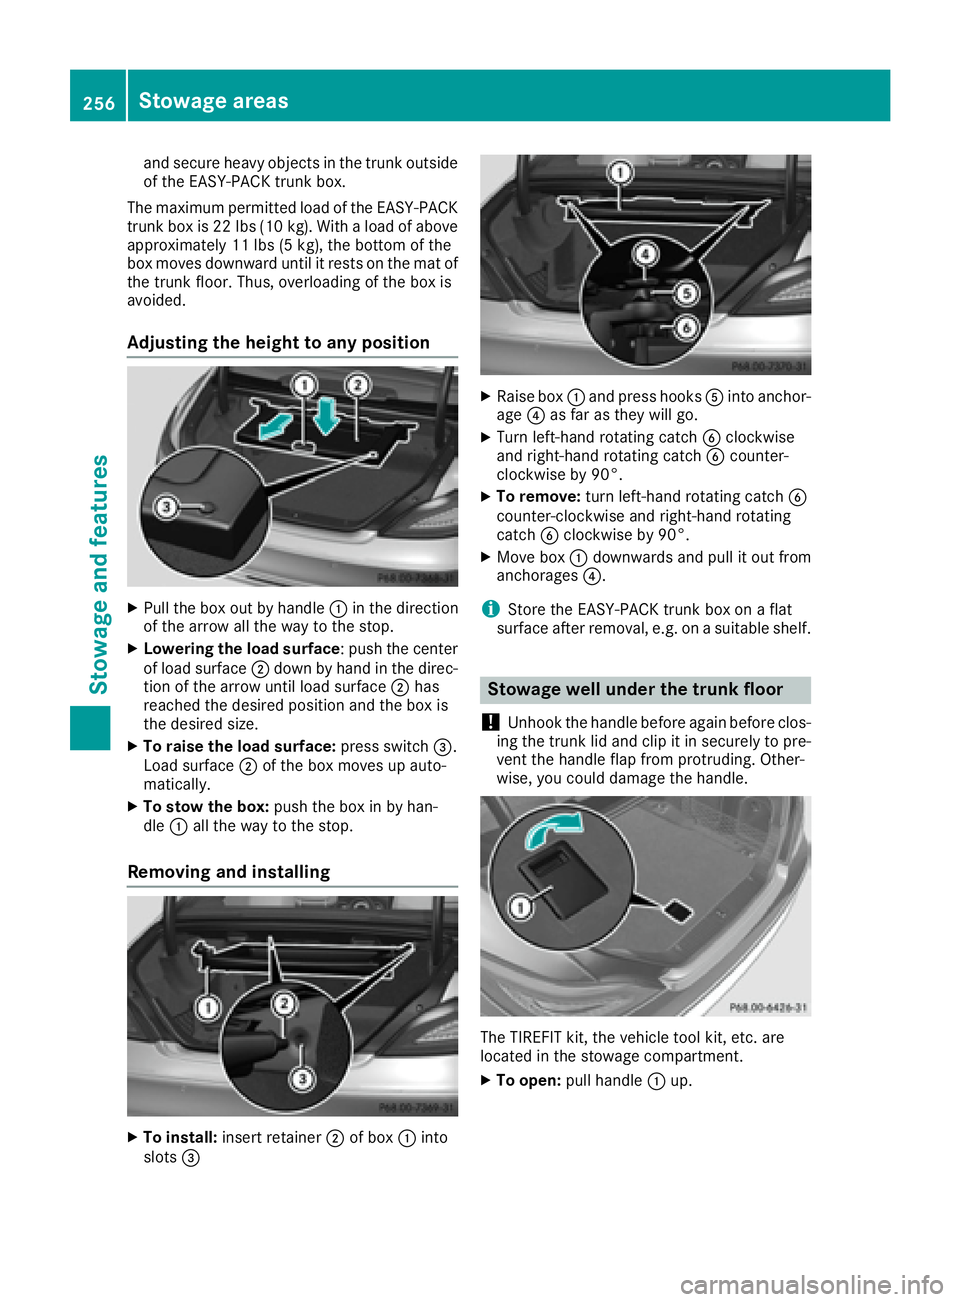
Adjusting the height to any position X
Pull the box out by handle �C in the direction
of the arrow all the way to the stop. X
Lowering the load surface : push the center
of load surface �D down by hand in the direc-
tion of the arrow until load surface �D has
reached the desired position and the box is
the desired size. X
To raise the load surface: press switch �
Page 277 of 342
X
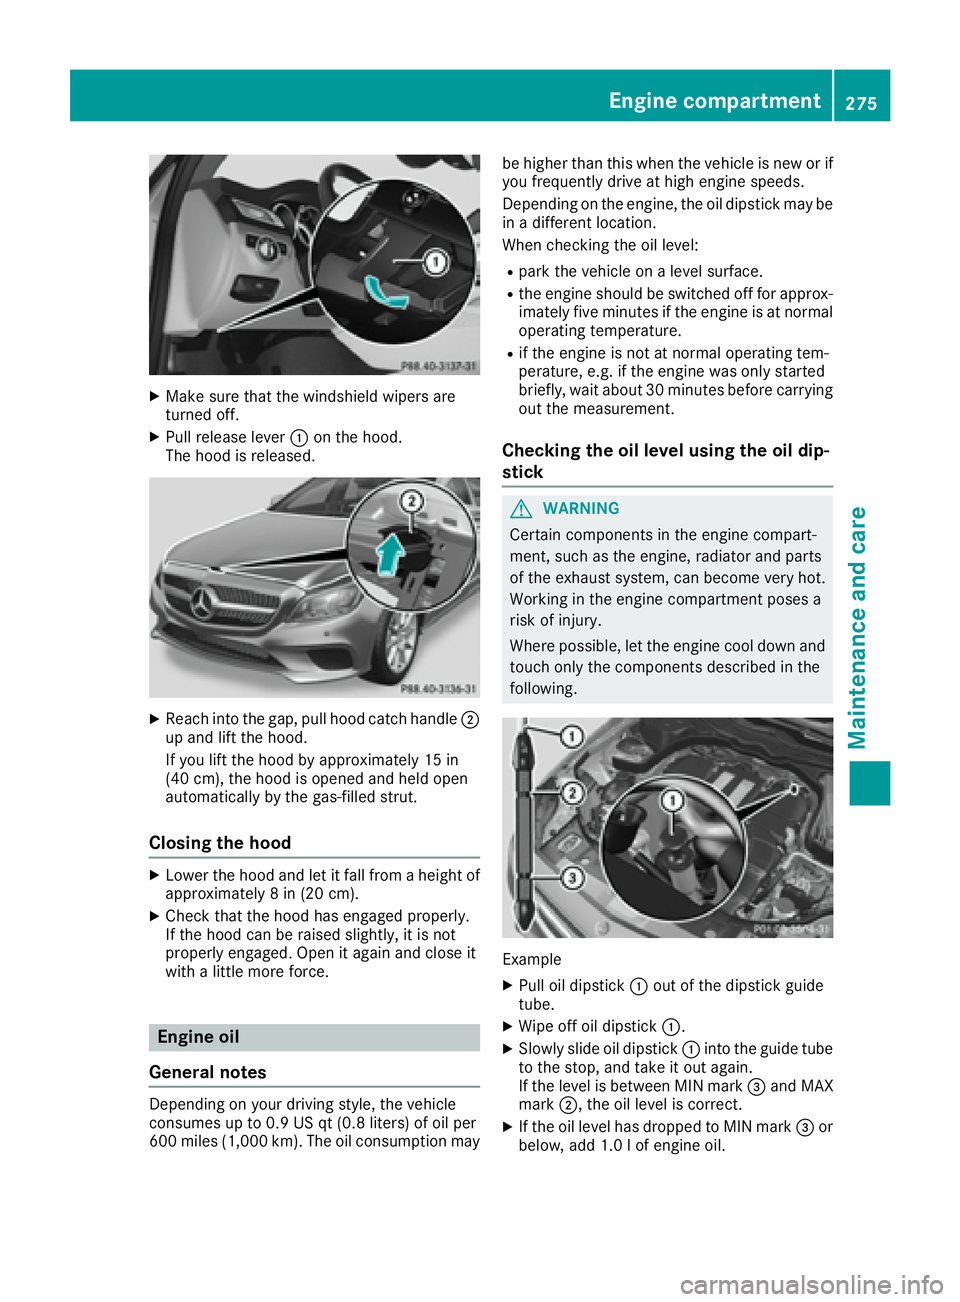
Make sure that the windshield wipers are
turned off. X
Pull release lever �C on the hood.
The hood is released.
X
Reach into the gap, pull hood catch handle �D
up and lift the hood.
If you lift the hood by approximately 15 in
(40 cm), the hood is opened and held open
automatically by the gas-filled strut.
Closing the hood X
Lower the hood and let it fall from a height of
approximately 8 in (20 cm). X
Check that the hood has engaged properly.
If the hood can be raised slightly, it is not
properly engaged. Open it again and close it
with a little more force.
Engine oil
General notes
Depending on your driving style, the vehicle
consumes up to 0.9 US qt (0.8 liters) of oil per
600 miles (1,000 km). The oil consumption may be higher than this when the vehicle is new or if
you frequently drive at high engine speeds.
Depending on the engine, the oil dipstick may be
in a different location.
When checking the oil level: R
park the vehicle on a level surface. R
the engine should be switched off for approx-
imately five minutes if the engine is at normal
operating temperature. R
if the engine is not at normal operating tem-
perature, e.g. if the engine was only started
briefly, wait about 30 minutes before carrying
out the measurement.
Checking the oil level using the oil dip-
stick
G WARNING
Certain components in the engine compart-
ment, such as the engine, radiator and parts
of the exhaust system, can become very hot.
Working in the engine compartment poses a
risk of injury.
Where possible, let the engine cool down and
touch only the components described in the
following.
Example X
Pull oil dipstick �C out of the dipstick guide
tube. X
Wipe off oil dipstick �C .X
Slowly slide oil dipstick �C into the guide tube
to the stop, and take it out again.
If the level is between MIN mark �
Page 322 of 342
PSI (pounds per square inch) A standard unit of measure for tire pressure.
Aspect ratio Relationship between tire height and tire width
in percent.
tire pressure Pressure inside the tire applying an outward
force to every square inch of the tire's surface.
The tire pressure is specified in pounds per
square inch (psi), in kilopascal (kPa) or in bar.
The tire pressure should only be corrected when
the tires are cold.
Cold tire pressure The tires are cold: R
if the vehicle has been parked with the tires
out of direct sunlight for at least three hours
and R
if the vehicle has not been driven further than
1 mile (1.6 km)
Tread The part of the tire that comes into contact with
the road.
Bead The tire bead ensures that the tire sits securely
on the wheel. There are several steel wires in the
bead to prevent the tire from coming loose from
the wheel rim.
Sidewall The part of the tire between the tread and the
bead.
Weight of optional extras
The combined weight of those optional extras
that weigh more than the replaced standard
parts and more than 2.3 kg (5 lbs). These
optional extras, such as high-performance
brakes, level control, a roof rack or a high-per-
formance battery, are not included in the curb
weight and the weight of the accessories.
TIN (Tire Identification Number)
This is a unique identifier which can be used by
a tire manufacturer to identify tires, for example
for a product recall, and thus identify the pur-
chasers. The TIN is made up of the manufactur-
er's identity code, tire size, tire type code and
the manufacturing date. Load bearing index The load bearing index (also load index) is a code
that contains the maximum load bearing capa-
city of a tire.
Traction Traction is the result of friction between the tires
and the road surface.
Treadwear indicators Narrow bars (tread wear bars) that are distrib-
uted over the tire tread. If the tire tread is level
with the bars, the wear limit of �
Page 324 of 342
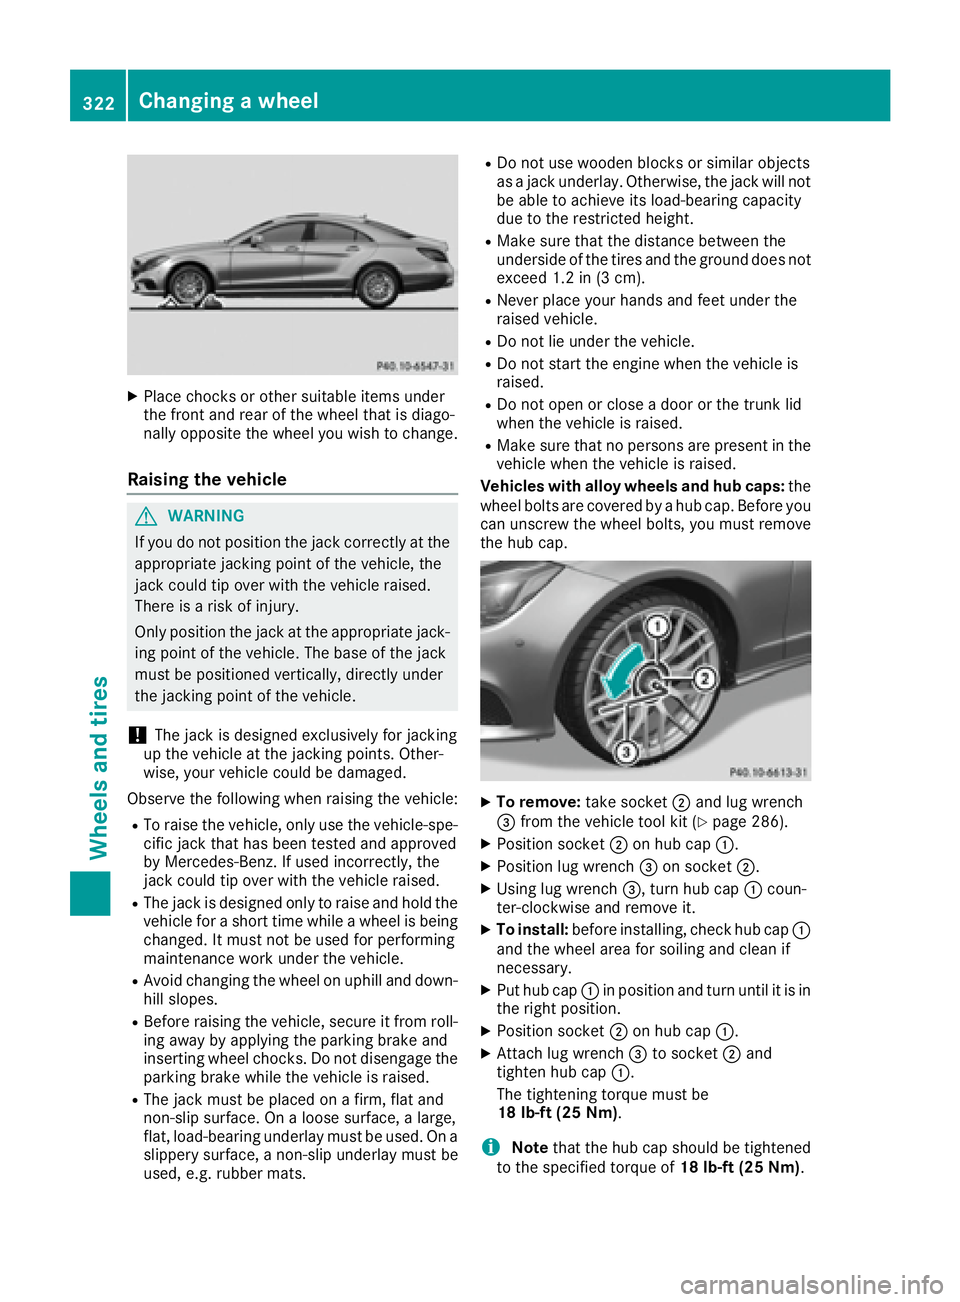
X
Place chocks or other suitable items under
the front and rear of the wheel that is diago-
nally opposite the wheel you wish to change.
Raising the vehicle
G WARNING
If you do not position the jack correctly at the
appropriate jacking point of the vehicle, the
jack could tip over with the vehicle raised.
There is a risk of injury.
Only position the jack at the appropriate jack-
ing point of the vehicle. The base of the jack
must be positioned vertically, directly under
the jacking point of the vehicle.
! The jack is designed exclusively for jacking
up the vehicle at the jacking points. Other-
wise, your vehicle could be damaged.
Observe the following when raising the vehicle: R
To raise the vehicle, only use the vehicle-spe-
cific jack that has been tested and approved
by Mercedes-Benz. If used incorrectly, the
jack could tip over with the vehicle raised. R
The jack is designed only to raise and hold the
vehicle for a short time while a wheel is being
changed. It must not be used for performing
maintenance work under the vehicle. R
Avoid changing the wheel on uphill and down-
hill slopes. R
Before raising the vehicle, secure it from roll-
ing away by applying the parking brake and
inserting wheel chocks. Do not disengage the
parking brake while the vehicle is raised. R
The jack must be placed on a firm, flat and
non-slip surface. On a loose surface, a large,
flat, load-bearing underlay must be used. On a
slippery surface, a non-slip underlay must be
used, e.g. rubber mats. R
Do not use wooden blocks or similar objects
as a jack underlay. Otherwise, the jack will not
be able to achieve its load-bearing capacity
due to the restricted height. R
Make sure that the distance between the
underside of the tires and the ground does not
exceed 1.2 in (3 cm). R
Never place your hands and feet under the
raised vehicle. R
Do not lie under the vehicle. R
Do not start the engine when the vehicle is
raised. R
Do not open or close a door or the trunk lid
when the vehicle is raised. R
Make sure that no persons are present in the
vehicle when the vehicle is raised.
Vehicles with alloy wheels and hub caps: the
wheel bolts are covered by a hub cap. Before you
can unscrew the wheel bolts, you must remove
the hub cap.
X
To remove: take socket �D and lug wrench
�