2016 MERCEDES-BENZ CLS length
[x] Cancel search: lengthPage 177 of 342
i Note that Active Parking Assist cannot
measure the length of a parking space if it is at
right angles to the direction of travel. You will
need to judge whether your vehicle will fit into
the parking space.
When driving at speeds below 19 mph
(30 km/h), you will see the parking symbol as a
status indicator in the instrument cluster. When
a parking space has been detected, an arrow
towards the right or the left also appears. By
default, Active Parking Assist only displays park-
ing spaces on the front-passenger side. Parking
spaces on the driver's side are displayed as
soon as the turn signal on the driver's side is
activated. When parking on the driver's side,
this must remain switched on until you acknowl-
edge the use of Active Parking Assist by press-
ing the �v button on the multifunction steer-
ing wheel. The system automatically determines
whether the parking space is parallel or at right
angles to the direction of travel.
A parking space is displayed while you are driv-
ing past it, and until you are approximately 50 ft
(15 m) away from it.
Parking
G WARNING
If you leave the vehicle when it is only being
braked by Active Parking Assist it could roll
away if: R
there is a malfunction in the system or in
the voltage supply. R
the electrical system in the engine com-
partment, the battery or the fuses have
been tampered with. R
the battery is disconnected. R
the accelerator pedal has been depressed,
e.g. by a vehicle occupant.
There is a risk of an accident.
Before leaving the vehicle, always secure it
against rolling away.
i When PARKTRONIC detects obstacles,
Active Parking Assist brakes automatically
during the parking process. You are respon-
sible for braking in good time. X
Stop the vehicle when the parking space sym-
bol shows the desired parking space in the
instrument cluster. X
Shift the transmission to position R .
The Start Park Assist? Yes: OK No:
�8 message appears in the multifunction
display. X
To cancel the procedure: press the �8
button on the multifunction steering wheel or
pull away.
or X
To park using Active Parking Assist: press
the �v button on the multifunction steering
wheel.
The Park Assist Active Accelerate
and Brake Observe Surroundings mes-
sage appears in the multifunction display. X
Let go of the multifunction steering wheel. X
Back up the vehicle, being ready to brake at all
times. When backing up, drive at a speed
below approximately 6 mph (10 km/h). Oth-
erwise Active Parking Assist will be canceled.
Active Parking Assist brakes the vehicle to a
standstill when the vehicle approaches the
rear border of the parking space.
Maneuvering may be required in tight parking
spaces.
The Park Assist Active Select D
Observe Surroundings message appears in
the multifunction display. X
Shift the transmission to position D while the
vehicle is stationary.
Active Parking Assist immediately steers in
the other direction.
The Park Assist Active Accelerate
and Brake Observe Surroundings mes-
sage appears in the multifunction display.
i You will achieve the best results by waiting
for the steering procedure to complete before
pulling away. X
Drive forwards and be ready to brake at all
times.
Active Parking Assist brakes the vehicle to a
standstill when the vehicle is in the parking
space.
The Park Assist Active Select R
Observe Surroundings message appears in
the multifunction display.
Further transmission shifts may be necessary.
As soon as the parking procedure is complete,
the Park Assist Disabled message appearsDriving systems 175
Driving and parking Z
Page 187 of 342
Important safety notes ATTENTION ASSIST is only an aid. It might no t
always recognize fatigue or increasing inatten -
tiveness in time or fail to recognize them at all.
The system is no t a substitut e for a well-reste d
and attentive driver.
The functionalit y of ATTENTION ASSIST is
restricted and warning s may be delaye d or no t
occur at all: R
if th e lengt h of th e journey is less than approx -
imately 30 minute sR
if th e road condition is poor , e.g. if th e surfac e
is uneven or if there are pothole sR
if there is a stron g side win dR
if you have adopted a sport y driving style wit h
high cornerin g speeds or high rates of accel-
eration R
if you are predominantly driving at a spee d
belo w 37 mph (60 km/ h) or above 124 mph
(200 km/ h)R
if you are driving with the DISTRONIC PLUS
Steering Assist activated R
if the time has been set incorrectly R
in active driving situations, such as when you
change lanes or change your speed
The attention level evaluation is deleted and
restarts when the journey is continued, if: R
you switch off the engine R
you take off your seat belt and open the driv-
er's door, e.g. for a change of drivers or to
take a break
Displaying the attention level
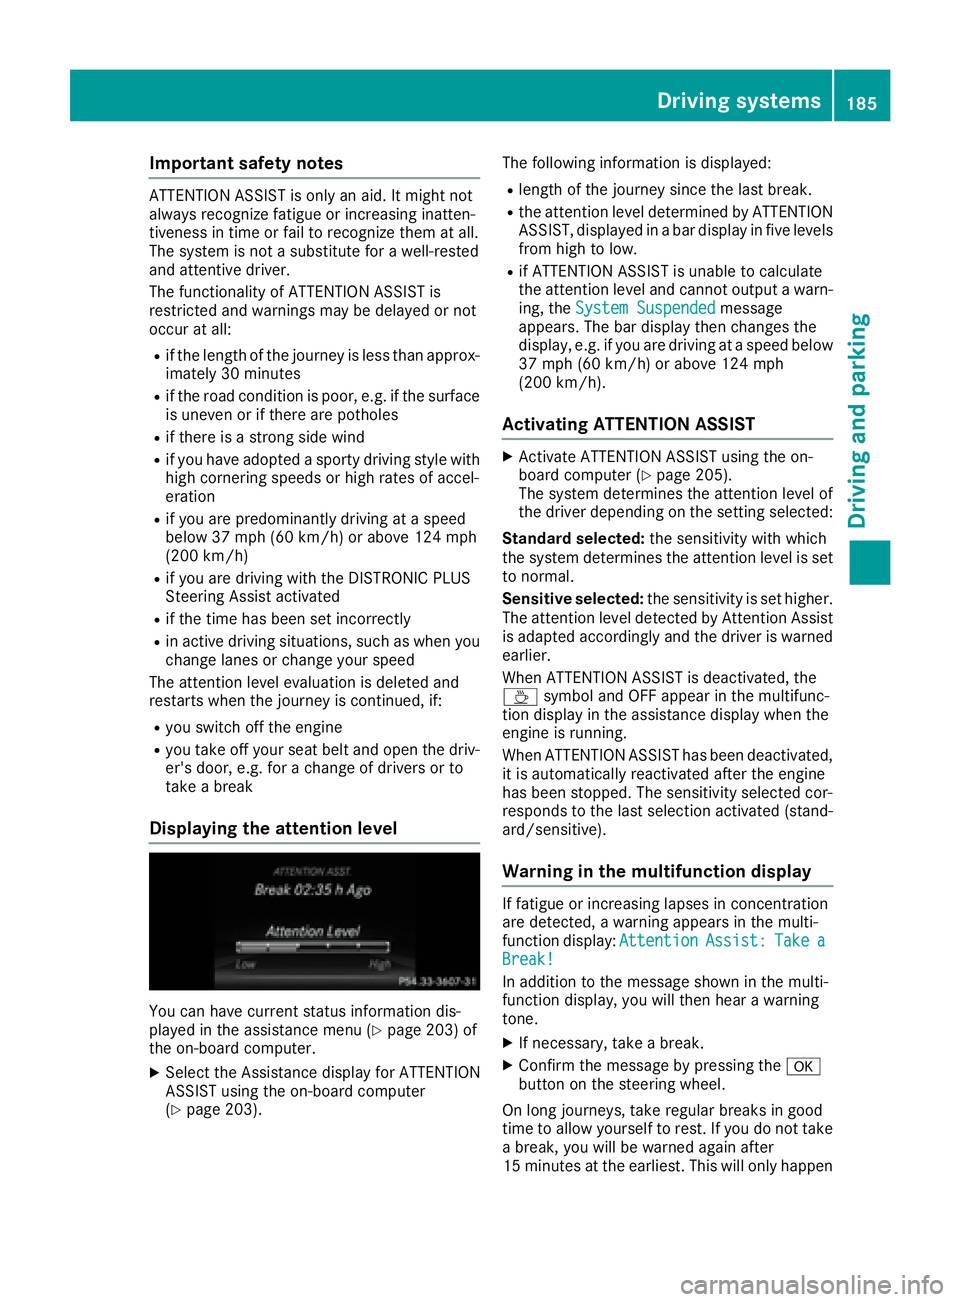
You can have current status information dis-
played in the assistance menu ( Y
page 203) of
the on-board computer. X
Select the Assistance display for ATTENTION
ASSIST using the on-board computer
( Y
page 203). The following information is displayed: R
length of the journey since the last break. R
the attention level determined by ATTENTION
ASSIST, displayed in a bar display in five levels
from high to low. R
if ATTENTION ASSIST is unable to calculate
the attention level and cannot output a warn-
ing, the System Suspended message
appears. The bar display then changes the
display, e.g. if you are driving at a speed below
37 mph (60 km/h) or above 124 mph
(200 km/h).
Activating ATTENTION ASSIST X
Activate ATTENTION ASSIST using the on-
board computer ( Y
page 205).
The system determines the attention level of
the driver depending on the setting selected:
Standard selected: the sensitivity with which
the system determines the attention level is set
to normal.
Sensitive selected: the sensitivity is set higher.
The attention level detected by Attention Assist
is adapted accordingly and the driver is warned
earlier.
When ATTENTION ASSIST is deactivated, the
�
Page 295 of 342
Mercedes-Benz. These batteries provide
increased impact protection to prevent vehicle
occupants from suffering acid burns should the
battery be damaged in the event of an accident.
In order for the battery to achieve the maximum
possible service life, it must always be suffi-
ciently charged.
Like other batteries, the vehicle battery may
discharge over time if you do not use the vehicle.
In this case, have the battery disconnected at a
qualified specialist workshop. You can also
charge the battery with a charger recommended
by Mercedes-Benz. Contact a qualified special-
ist workshop for further information.
Have the battery condition of charge checked
more frequently if you use the vehicle mainly for
short trips or if you leave it standing idle for a
lengthy period. Consult a qualified specialist
workshop if you wish to leave your vehicle
parked for a long period of time.
Remove the SmartKey if you park the vehicle
and do not require any electrical consumers.
The vehicle will then use very little energy, thus
conserving battery power.
If the power supply has been interrupted, e.g. if
you reconnect the battery, you will have to: R
set the clock. Information on setting the clock
can be found in the Digital Operator's Manual
On vehicles with a multimedia system, the
time is set automatically. R
reset the function for folding the exterior mir-
rors in/out automatically, by folding the mir-
rors out once ( Y
page 104)
Charging the battery
G WARNING
During charging and jump-starting, explosive
gases can escape from the battery. There is a
risk of an explosion.
Particularly avoid fire, open flames, creating
sparks and smoking. Ensure there is sufficient
ventilation while charging and jump-starting.
Do not lean over a battery.
G WARNING
Battery acid is caustic. There is a risk of injury.
Avoid contact with skin, eyes or clothing. Do
not inhale any battery gases. Do not lean over the battery. Keep children away from batter-
ies. Wash away battery acid immediately with
plenty of clean water and seek medical atten-
tion.
G WARNING
A discharged battery can freeze at tempera-
tures below freezing point. When jump-start-
ing the vehicle or charging the battery, gases
can escape from the battery. There is a risk of
an explosion.
Allow the frozen battery to thaw out before
charging it or jump-starting.
! Only use battery chargers with a maximum
charging voltage of 14.8 V.
! Only charge the battery using the jump-
starting connection point.
The jump-starting connection point is in the
engine compartment ( Y
page 294).X
Open the hood. X
Connect the battery charger to the positive
terminal and ground point in the same order
as when connecting the donor battery in the
jump-starting procedure ( Y
page 294).
If the indicator/warning lamps do not light up at
low temperatures, it is very likely that the dis-
charged battery has frozen. In this case, you
may neither charge the battery nor jump-start
the vehicle. The service life of a thawed-out bat-
tery may be shorter. The starting characteristics
may be impaired, especially at low tempera-
tures. Have the thawed-out battery checked at a
qualified specialist workshop.
Never charge a battery still installed in the vehi-
cle unless a battery charger unit approved by
Mercedes-Benz is being used . A battery charger
unit specially adapted for Mercedes-Benz vehi-
cles and tested and approved by Mercedes-
Benz is available as an accessory. It permits the
charging of the battery in its installed position.
Contact an authorized Mercedes-Benz Center
for further information and availability. Read the
battery charger's operating instructions before
charging the battery.Battery (vehicle) 293
Breakdown assistance Z
Page 296 of 342
Jump-starting For the jump-starting procedure, use only the jump-starting connection point in the engine com-
partment, consisting of a positive terminal and a ground point.
G WARNING
Battery acid is caustic. There is a risk of injury.
Avoid contact with skin, eyes or clothing. Do not inhale any battery gases. Do not lean over the
battery. Keep children away from batteries. Wash away battery acid immediately with plenty of
clean water and seek medical attention.
G WARNING
During charging and jump-starting, explosive gases can escape from the battery. There is a risk
of an explosion.
Particularly avoid fire, open flames, creating sparks and smoking. Ensure there is sufficient ven-
tilation while charging and jump-starting. Do not lean over a battery.
G WARNING
During the charging process, a battery produces hydrogen gas. If a short circuit occurs or sparks
are created, the hydrogen gas can ignite. There is a risk of an explosion. R
Make sure that the positive terminal of a connected battery does not come into contact with
vehicle parts. R
Never place metal objects or tools on a battery. R
It is important that you observe the described order of the battery terminals when connecting
and disconnecting a battery. R
When jump-starting, make sure that the battery poles with identical polarity are connected. R
It is particularly important to observe the described order when connecting and disconnecting
the jumper cables. R
Never connect or disconnect the battery terminals while the engine is running.
G WARNING
A discharged battery can freeze at temperatures below freezing point. When jump-starting the
vehicle or charging the battery, gases can escape from the battery. There is a risk of an explosion.
Allow the frozen battery to thaw out before charging it or jump-starting.
! Avoid repeated and lengthy starting attempts. Otherwise, the catalytic converter could be
damaged by the non-combusted fuel.
If, at low temperatures, the indicator lamps/warning lamps in the instrument cluster do not light up,
it is highly likely that the discharged battery has frozen. In this case, you may neither charge the
battery nor jump-start the vehicle. The service life of a thawed-out battery may be shorter. The
starting characteristics can be impaired, particularly at low temperatures. Have the thawed-out
battery checked at a qualified specialist workshop.294
Jump-starting
Breakdown assistance
Page 339 of 342
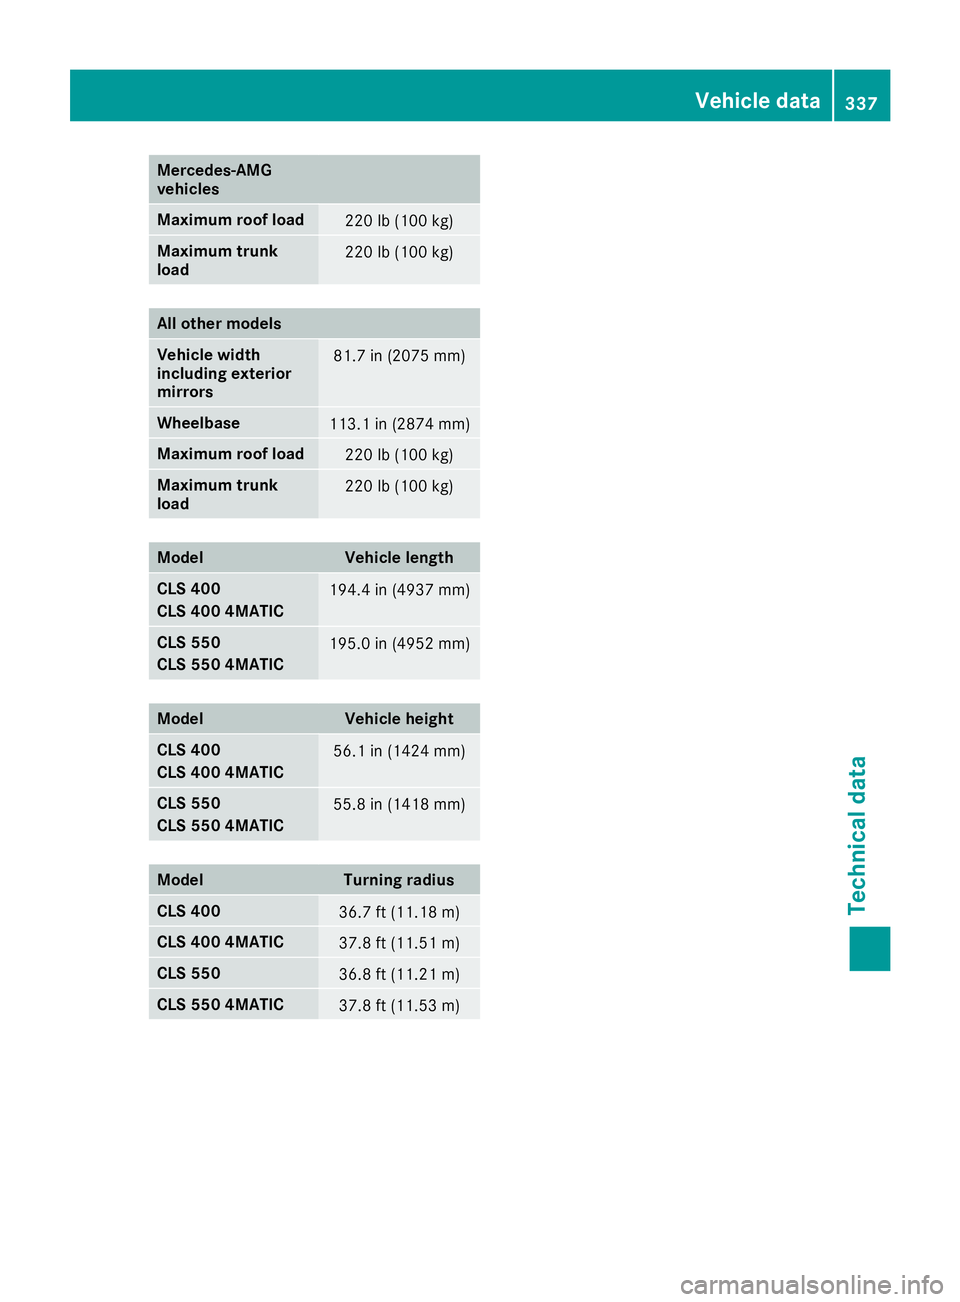
Mercedes ‑ AMG
vehicles
Maximum roof load
220 lb (100 kg)
Maximum trunk
load 220 lb (100 kg)
All other models
Vehicle width
including exterior
mirrors 81.7 in (2075 mm)
Wheelbase
113.1 in (2874 mm)
Maximum roof load
220 lb (100 kg)
Maximum trunk
load 220 lb (100 kg)
Model Vehicle length
CLS 400
CLS 400 4MATIC 194.4 in (4937 mm)
CLS 550
CLS 550 4MATIC 195.0 in (4952 mm)
Model Vehicle height
CLS 400
CLS 400 4MATIC 56.1 in (1424 mm)
CLS 550
CLS 550 4MATIC 55.8 in (1418 mm)
Model Turning radius
CLS 400
36.7 ft (11.18 m)
CLS 400 4MATIC
37.8 ft (11.51 m)
CLS 550
36.8 ft (11.21 m)
CLS 550 4MATIC
37.8 ft (11.53 m) Vehicle data 337
Technical data Z