2016 MERCEDES-BENZ CLS wheel bolt torque
[x] Cancel search: wheel bolt torquePage 23 of 342

Reporting problem s ........................ .2 9
Securing from rolling away ............ 321
Towing away .................................. 296
Transporting .................................. 298
Unlocking (in an emergency) ........... 83
Unlocking (SmartKey) ...................... 76
Vehicle data ................................... 336
Vehicle data ....................................... 336
Vehicle dimensions ........................... 336
Vehicle emergency locking ................ 83
Vehicle identification number
see VIN
Vehicle identification plate .............. 330
Vehicle level
AIRMATIC ...................................... 166
Vehicle level (display message) ....... 224
Vehicle tool kit .................................. 286
Video
Operating the DVD ......................... 202
see also Digital Operator's Man-
ual .................................................. 245
VIN
Seat ............................................... 331
Type plate ...................................... 330
Voice Control System
see Separate operating instructions
W
Warning and indicator lamps
ABS ................................................ 238
Brakes ........................................... 237
Check Engine ................................. 241
Coolant .......................................... 241
Distance warning ........................... 243
ESP ®
.............................................. 238
ESP ®
OFF ....................................... 239
Fuel tank ........................................ 241
General notes ................................ 235
Overview .......................................... 34
PASSENGER AIR BAG OFF ............... 42
Reserve fuel ................................... 241
Restraint system ............................ 240
Seat belt ........................................ 236
SPORT handling mode ................... 240
Tire pressure monitor .................... 244
Warranty .............................................. 26 Washer fluid
Display message ............................ 234
Wheel and tire combinations
Tires ............................................... 325
Wheel bolt tightening torque ........... 324
Wheel chock ...................................... 321
Wheels
Changing a wheel .......................... 320
Checking ........................................ 301
Cleaning ......................................... 281
Emergency spare wheel ................. 326
Important safety notes .................. 301
Information on driving .................... 301
Interchanging/changing ................ 320
Mounting a new wheel ................... 324
Mounting a wheel .......................... 321
Removing a wheel .......................... 323
Storing ........................................... 321
Tightening torque ........................... 324
Wheel size/tire size ....................... 325
Window curtain air bag
Operation ......................................... 49
Windows
see Side windows
Windshield
Defrosting ...................................... 122
Windshield washer fluid
see Windshield washer system
Windshield washer system
Adding washer fluid ....................... 277
Important safety notes .................. 335
Windshield wipers
Problem (malfunction) ................... 113
Replacing the wiper blades ............ 112
Switching on/off ........................... 111
Winter driving
Important safety notes .................. 303
Slippery road surfaces ................... 152
Snow chains .................................. 303
Winter tires
M+S tires ....................................... 303
Wiper blades
Cleaning ......................................... 282
Important safety notes .................. 112
R e
placing ....................................... 112
Wooden trim (cleaning instruc-
tions) .................................................. 284 Index 21
Page 326 of 342

Mounting a new wheel
G WARNING
Oiled or greased wheel bolts or damaged
wheel bolts/hub threads can cause the wheel
bolts to come loose. As a result, you could
lose a wheel while driving. There is a risk of
accident.
Never oil or grease wheel bolts. In the event of
damage to the threads, contact a qualified
specialist workshop immediately. Have the
damaged wheel bolts or hub threads
replaced/renewed. Do not continue driving.
G WARNING
If you tighten the wheel bolts or wheel nuts
when the vehicle is raised, the jack could tip
over. There is a risk of injury.
Only tighten the wheel bolts or wheel nuts
when the vehicle is on the ground.
Always pay attention to the instructions and
safety notes in the "Changing a wheel" section
( Y
page 320).
Only use wheel bolts that have been designed
for the wheel and the vehicle. For safety rea-
sons, Mercedes-Benz recommends that you
only use wheel bolts which have been approved
for Mercedes-Benz vehicles and the respective
wheel.
! Mercedes-AMG vehicles with ceramic-
brake disc: during removal and repositioning
of the wheel, the wheel rim can strike the
ceramic-brake disc and damage it. Therefore,
you should proceed carefully and get a sec-
ond person assist to you. Alternatively, you
can use a second alignment bolt.
! To prevent damage to the paintwork, hold
the wheel securely against the wheel hub
while screwing in the first wheel bolt. X
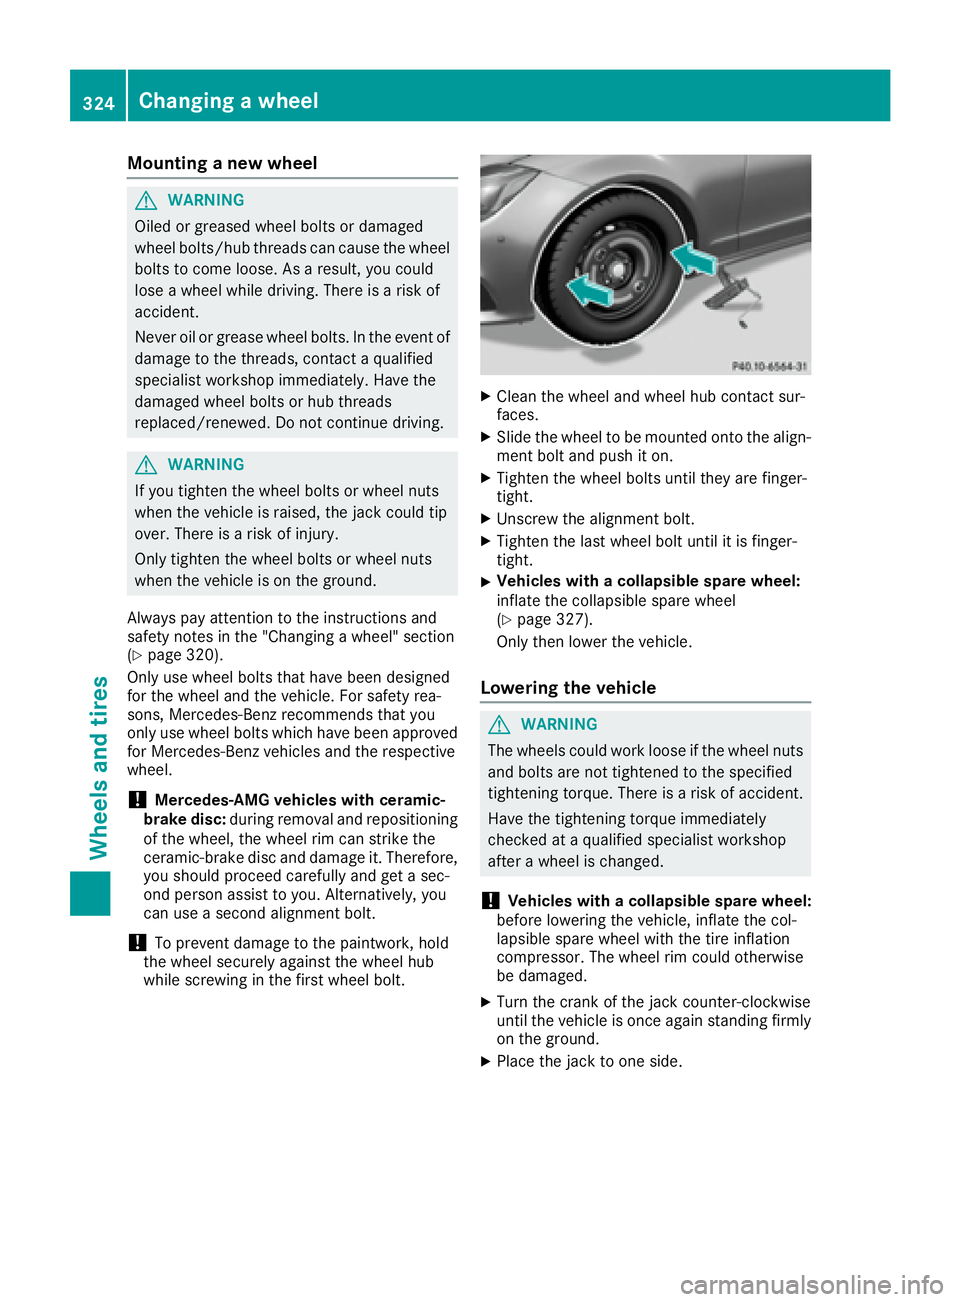
Clean the wheel and wheel hub contact sur-
faces. X
Slide the wheel to be mounted onto the align-
ment bolt and push it on. X
Tighten the wheel bolts until they are finger-
tight. X
Unscrew the alignment bolt. X
Tighten the last wheel bolt until it is finger-
tight. X
Vehicles with a collapsible spare wheel:
inflate the collapsible spare wheel
( Y
page 327).
Only then lower the vehicle.
Lowering the vehicle
G WARNING
The wheels could work loose if the wheel nuts
and bolts are not tightened to the specified
tightening torque. There is a risk of accident.
Have the tightening torque immediately
checked at a qualified specialist workshop
after a wheel is changed.
! Vehicles with a collapsible spare wheel:
before lowering the vehicle, inflate the col-
lapsible spare wheel with the tire inflation
compressor. The wheel rim could otherwise
be damaged. X
Turn the crank of the jack counter-clockwise
until the vehicle is once again standing firmly
on the ground. X
Place the jack to one side.324
Changing a wheel
Wheels and tires