2016 MERCEDES-BENZ CLA COUPE steering wheel
[x] Cancel search: steering wheelPage 254 of 345
Warning/
indicator
lamp
N N
Signal type
Possible causes/consequences and M
MSolutions !
N
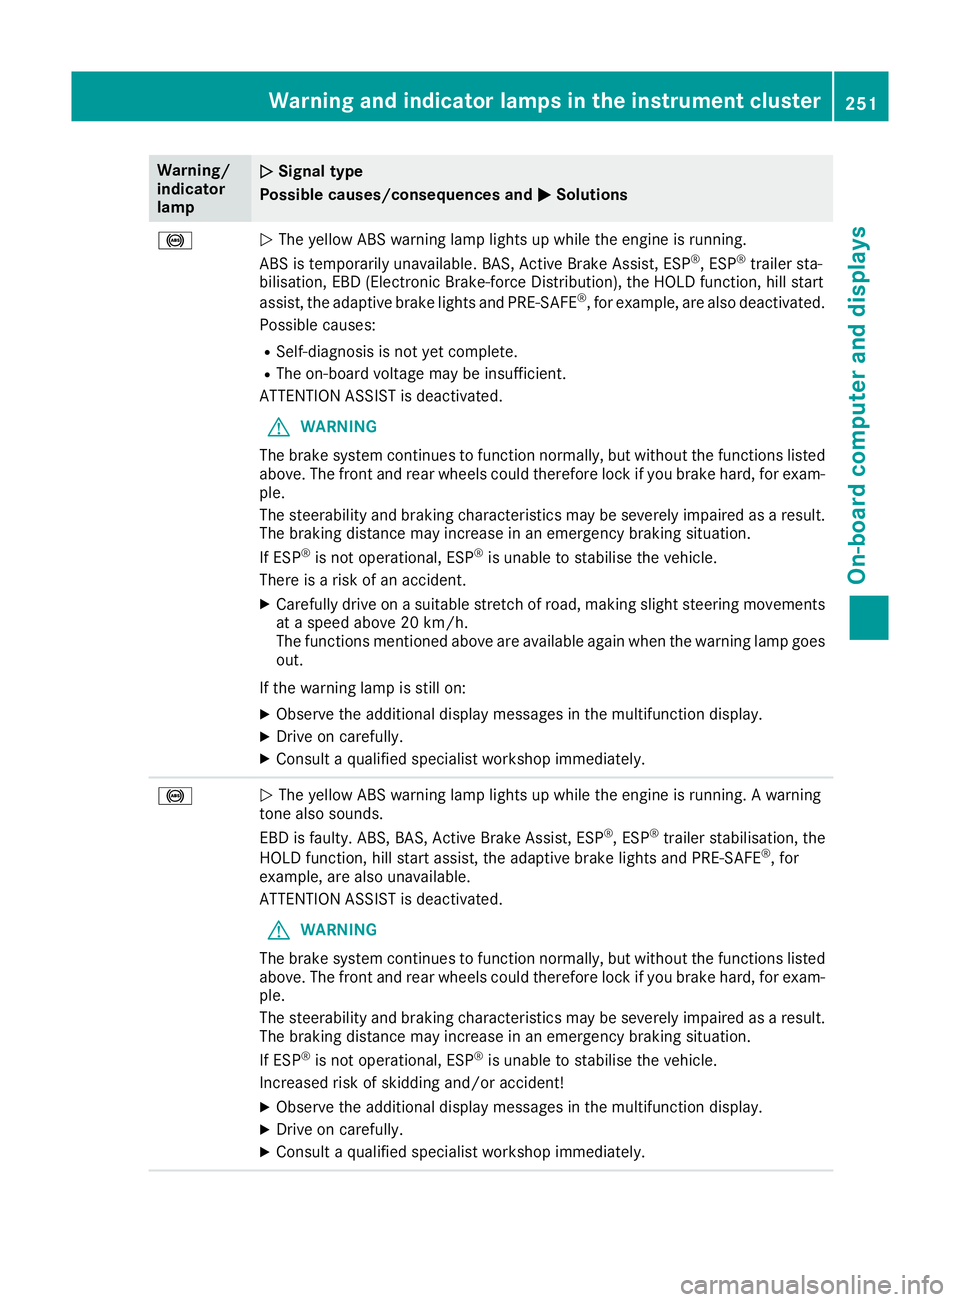
The yellow ABS warning lamp lights up while the engine is running.
ABS is temporarily unavailable. BAS, Active Brake Assist, ESP ®
, ESP ®
trailer sta-
bilisation, EBD (Electronic Brake-force Distribution), the HOLD function, hill start
assist, the adaptive brake lights and PRE ‑SAFE®
, for example, are also deactivated.
Possible causes:
R Self-diagnosis is not yet complete.
R The on-board voltage may be insufficient.
ATTENTION ASSIST is deactivated.
G WARNING
The brake system continues to function normally, but without the functions listed above. The front and rear wheels could therefore lock if you brake hard, for exam-
ple.
The steerability and braking characteristics may be severely impaired as a result. The braking distance may increase in an emergency braking situation.
If ESP ®
is not operational, ESP ®
is unable to stabilise the vehicle.
There is a risk of an accident.
X Carefully drive on a suitable stretch of road, making slight steering movements
at a speed above 20 km/h.
The functions mentioned above are available again when the warning lamp goes out.
If the warning lamp is still on: X Observe the additional display messages in the multifunction display.
X Drive on carefully.
X Consult a qualified specialist workshop immediately. !
N
The yellow ABS warning lamp lights up while the engine is running. A warning
tone also sounds.
EBD is faulty. ABS, BAS, Active Brake Assist, ESP ®
, ESP ®
trailer stabilisation, the
HOLD function, hill start assist, the adaptive brake lights and PRE‑SAFE ®
, for
example, are also unavailable.
ATTENTION ASSIST is deactivated.
G WARNING
The brake system continues to function normally, but without the functions listed above. The front and rear wheels could therefore lock if you brake hard, for exam-
ple.
The steerability and braking characteristics may be severely impaired as a result. The braking distance may increase in an emergency braking situation.
If ESP ®
is not operational, ESP ®
is unable to stabilise the vehicle.
Increased risk of skidding and/or accident!
X Observe the additional display messages in the multifunction display.
X Drive on carefully.
X Consult a qualified specialist workshop immediately. Warning and indicator lamps in the instrument cluster
251On-board computer and displays Z
Page 281 of 345
X
Open the telephone compartment
(Y page 270).
X Place the mobile phone bracket into the pre-
installed fitting; see the separate installation
instructions for the mobile phone fitting.
X Insert the mobile phone into the mobile phone
bracket; see the separate installation instruc- tions for the mobile phone fitting.
i The mobile phone can also be operated
without being in the bracket. However, the
charging function and aerial function are not
available.
In order to use Bluetooth ®
(SAP profile) on your
telephone module, you must first insert the tele-
phone module into the pre-installed fitting. This connects it to the exterior aerial. If you wish to
charge the mobile phone, you must connect it to
a USB port.
Further information on the telephone module
with Bluetooth ®
(SAP profile) can be found in the
Digital Owner's Manual.
Operating the mobile phone You can operate the phone using the
6and
~ buttons on the multifunction steering
wheel. You can operate other mobile phone
functions via the on-board computer
(Y page 207).
When you remove the key from the ignition lock, the mobile phone is disconnected from the vehi-cle. You can then no longer make calls using the
hands-free system.
If a call is active and you remove the key from
the ignition lock, the conversation is transferred
over to the mobile phone. It is then possible to
continue the conversation on the mobile phone. Mobile phone bracket in the stowage
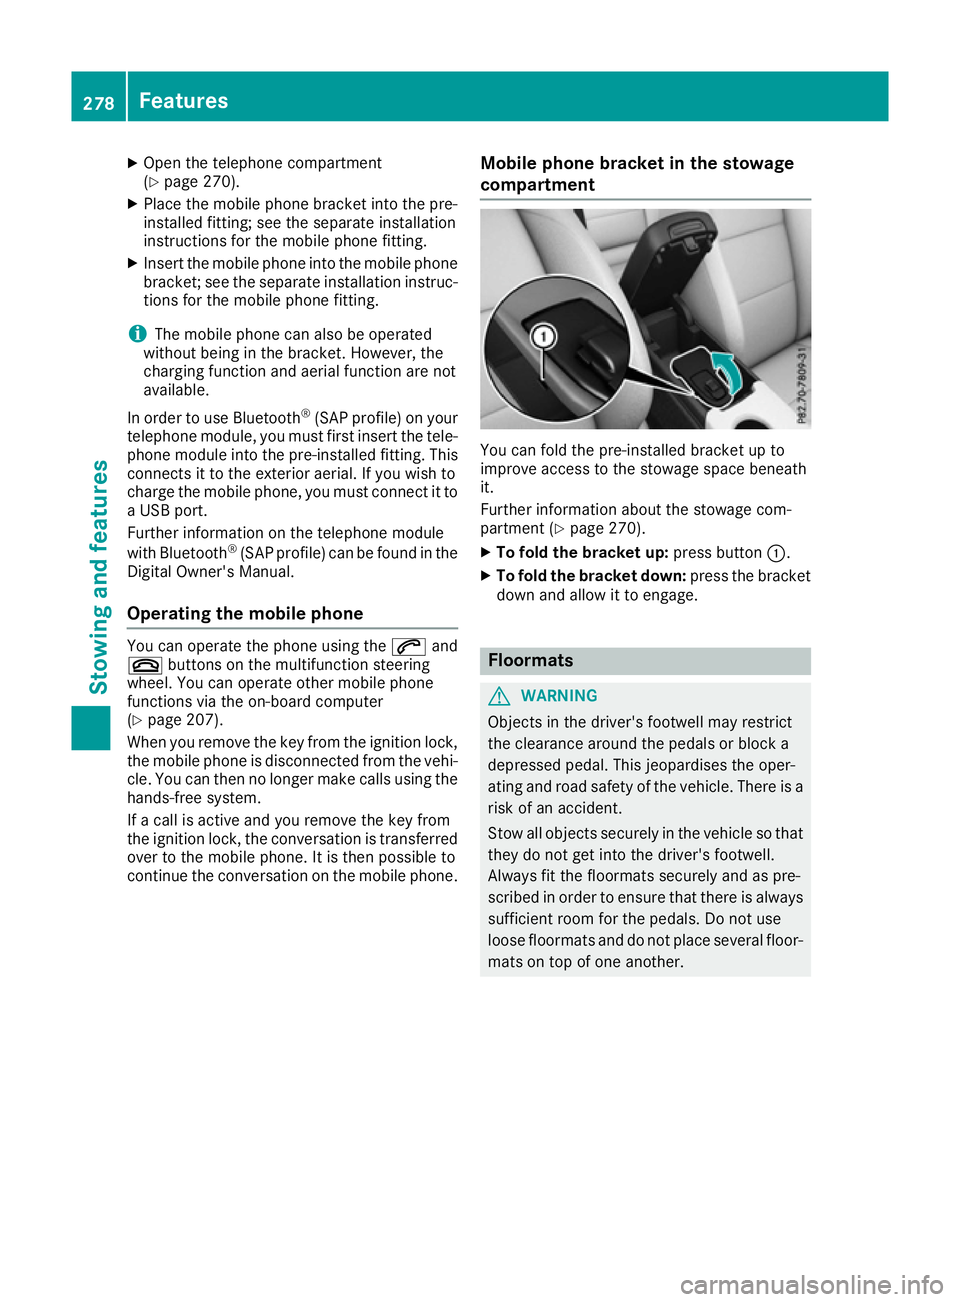
compartment You can fold the pre-installed bracket up to
improve access to the stowage space beneath
it.
Further information about the stowage com-
partment (Y page 270).
X To fold the bracket up: press button:.
X To fold the bracket down: press the bracket
down and allow it to engage. Floormats
G
WARNING
Objects in the driver's footwell may restrict
the clearance around the pedals or block a
depressed pedal. This jeopardises the oper-
ating and road safety of the vehicle. There is a risk of an accident.
Stow all objects securely in the vehicle so that
they do not get into the driver's footwell.
Always fit the floormats securely and as pre-
scribed in order to ensure that there is always sufficient room for the pedals. Do not use
loose floormats and do not place several floor-mats on top of one another. 278
FeaturesStowing and features
Page 288 of 345
The multifunction display shows a service mes-
sage for a few seconds, e.g.:
R Service A in .. days
Service A in .. days
R Service A due
Service A due
R Service A overdue by .. days
Service A overdue by .. days
Depending on the operating conditions of the
vehicle, the remaining time or distance until the
next service due date is displayed.
The letter indicates which service is due. A
A
stands for a minor service and B Bfor a major ser-
vice. A number or another letter may be dis-
played after the letter.
For certain countries only: the position after the
letter A
A or B Bindicates any necessary additional
maintenance work. If you notify a qualified spe- cialist workshop of this display, you will receive
a statement on the associated costs.
The ASSYST PLUS service interval display does
not take into account any periods of time during
which the battery is disconnected.
Maintaining the time-dependent service sched-
ule:
X Note down the service due date displayed in
the multifunction display before disconnect-
ing the battery.
or
X After reconnecting the battery, subtract the
battery disconnection periods from the ser-
vice date shown on the display. Hiding service messages
X Press the aor% button on the steering
wheel. Displaying service messages
X Switch the ignition on.
X Press the =or; button to select the
Serv. Serv. menu.
X Press the 9or: button to select the
ASSYST
ASSYST PLUS
PLUSsubmenu and confirm by press-
ing the abutton.
The service due date appears in the multi-
function display. Information about service
Resetting the ASSYST PLUS service
interval display !
If the ASSYST PLUS service interval display
has been inadvertently reset, this setting can
be corrected at a qualified specialist work-
shop.
Have service work carried out as described in the Service Booklet. This may otherwise lead
to increased wear and damage to the major
assemblies or the vehicle.
A qualified specialist workshop, e.g. a
Mercedes-Benz Service Centre, will reset the
ASSYST PLUS service interval display after the
service work has been carried out. You can also
obtain further information on maintenance
work, for example.
Special service requirements The prescribed service interval is based on nor-
mal operation of the vehicle. Service work will
need to be performed more often if the vehicle is
operated under arduous conditions or increased loads, for example:
R Regular city driving with frequent intermedi-
ate stops
R If the vehicle is primarily used to travel short
distances
R For frequent use in mountainous terrain or on
poor road surfaces
R If the engine is often left idling for long periods
R In particularly dusty conditions, or if air-recir-
culation mode is frequently used.
In these or similar operating conditions, have
the interior filter, engine air cleaner, engine oil
and oil filter, for example, changed more fre-
quently. The tyres must be checked more fre-
quently if the vehicle is operated under
increased loads. Further information can be
obtained at a qualified specialist workshop, e.g.
a Mercedes-Benz Service Centre.
Driving abroad An extensive Mercedes-Benz Service network is
also available in other countries. You can obtain further information from any Mercedes-Benz
Service Centre. ASSYST PLUS
285Maintenance and care Z
Page 294 of 345

become porous. This could result in plastic
parts breaking away when the airbags are
deployed. There is a danger of injury.
Do not use care products and cleaning agents containing solvents to clean the cockpit.
! Do not affix the following to plastic surfaces:
R stickers
R films
R scented oil bottles or similar items
You could otherwise damage the plastic.
! Do not allow cosmetics, insect repellent or
sunscreen to come in contact with the plastic trim. This maintains the high-quality look of
the surfaces.
X Wipe the plastic trim with a damp, lint-free
cloth, e.g. a microfibre cloth.
X Heavy soiling: use car care and cleaning
products recommended and approved by
Mercedes-Benz.
The surface may change colour temporarily.
Wait until the surface is dry again.
Cleaning the steering wheel and gear or selector lever X
Thoroughly wipe with a damp cloth or use
leather care agents that have been recom-
mended and approved by Mercedes-Benz.
Cleaning wood trim and trim elements !
Do not use solvent-based cleaning agents
such as tar remover, wheel cleaners, polishes
or waxes. There is otherwise a risk of damag- ing the surface.
X Wipe the wooden trim and trim elements with
a damp, lint-free cloth, e.g. a microfibre cloth.
X Heavy soiling: use car care and cleaning
products recommended and approved by
Mercedes-Benz.
Cleaning the seat covers General notes
! Do not use a microfibre cloth to clean covers
made out of real leather, artificial leather or
DINAMICA. If used frequently, this can dam-
age the cover. Note that regular care is essential to make sure
that the appearance and comfort of the covers
are retained over time.
Genuine leather seat covers
! To retain the natural appearance of the
leather, observe the following cleaning
instructions:
R Clean genuine leather covers carefully with
a damp cloth and then wipe the covers
down with a dry cloth.
R Make sure that the leather does not
become soaked. It may otherwise become
rough and cracked.
R Only use leather care agents that have
been tested and approved by Mercedes-
Benz. You can obtain these from a qualified
specialist workshop.
Leather is a natural product.
It has natural surface properties, e.g.:
R unevenness in structure
R marks caused by growth and injury
R subtle colour differences
These are characteristics of leather and not
material faults.
Seat covers from other materials
! Observe the following when cleaning:
R clean artificial leather covers with a cloth
moistened with a solution containing 1%
detergent (e.g. washing-up liquid).
R clean cloth covers with a microfibre cloth
moistened with a solution containing 1%
detergent (e.g. washing-up liquid). Rub
carefully, and always wipe entire seat sec-
tions to avoid leaving visible lines. Leave
the seat to dry afterwards. Cleaning results depend on the type of dirt and how long it
has been there.
R Clean DINAMICA covers with a damp cloth.
Make sure that you wipe entire seat sec-
tions to avoid leaving visible lines.
Cleaning the seat belts G
WARNING
Seat belts may be severely weakened if
bleached or coloured. This may lead to the
seat belts, for example, tearing or failing in an Care
291Maintenance and care
Z
Page 298 of 345
X
If possible, bring the front wheels into the
straight-ahead position.
X Switch off the engine.
X Vehicles without KEYLESS-GO: remove the
key from the ignition lock.
X Vehicles with KEYLESS-GO start-function
or KEYLESS-GO: open the driver's door.
The vehicle electronics now have status 0.
This is the same as the key having been
removed.
X Vehicles with KEYLESS-GO start function
or KEYLESS-GO: remove the Start/Stop but-
ton from the ignition lock (Y page 133).
X Make sure that the passengers are not endan-
gered as they get out of the vehicle. Make
sure that no one is near the danger area while
a wheel is being changed. Anyone who is not directly assisting in the wheel change should, for example, stand behind the barrier.
X Get out of the vehicle. Pay attention to traffic
conditions when doing so.
X Close the driver's door.
X Place the warning triangle a suitable distance
away (Y page 293). Observe legal require-
ments. MOExtended tyres (tyres with run-flat
characteristics)
General notes With MOExtended tyres (tyres with run-flat char-
acteristics), you can continue to drive your vehi- cle even if there is a total loss of pressure in one
or more tyres. The affected tyre must not show
any clearly visible damage.
You can recognise MOExtended tyres by the
"MOExtended" marking that appears on the tyre sidewall. You will find this marking next to the
tyre size designation, the load-bearing capacity
and the speed index.
MOExtended tyres may be used only in conjunc- tion with an activated tyre pressure loss warning
system or tyre pressure monitor.
If a pressure loss warning message appears in the multifunction display:
R observe the instructions in the display mes-
sages (Y page 239)
R check the tyre for damage
R if driving on, observe the following notes The driving distance possible in run-flat mode is
approximately 80 km when the vehicle is parti-
ally laden and approximately 30 km when the
vehicle is fully laden.
In addition to the vehicle load, the driving dis-
tance possible in run-flat mode depends on the:
R vehicle speed
R road condition
R outside temperature
The driving distance possible in run-flat mode
may be reduced by extreme driving conditions/ manoeuvres, or it can be increased through a
moderate style of driving.
The driving distance possible in run-flat mode is
counted from the moment the tyre pressure loss warning appears on the multifunction display.
You must not exceed a maximum speed of
80 km/h.
When replacing one or all tyres, observe the fol-
lowing specifications for your vehicle's tyres:
R size
R type and
R the "MOExtended" marking
If a tyre has gone flat and cannot be replaced
with an MOExtended tyre, a standard tyre may
be used as a temporary measure. Make sure
that you use the proper size and type (summer
or winter tyre).
Vehicles with MOExtended tyres are not equip-
ped with a TIREFIT kit at the factory. It is there-
fore recommended that you additionally equip
your vehicle with a TIREFIT kit if you fit tyres that do not feature run-flat characteristics, e.g. win-
ter tyres. A TIREFIT kit can be obtained from a
qualified specialist workshop.
Important safety notes G
WARNING
When driving in emergency mode, the driving characteristics deteriorate, e.g. when corner-
ing, accelerating quickly and when braking.
There is a risk of accident.
Do not exceed the stated maximum speed.
Avoid abrupt steering and driving manoeu-
vres, and driving over obstacles (kerbs, pot-
holes, off-road). This applies in particular to a laden vehicle. Flat tyre
295Breakdown assistance
Z
Page 307 of 345
i
Jump-starting cables and further information regarding jump-starting can be obtained at any
qualified specialist workshop. Towing away and tow-starting
Important safety notes
G
WARNING
Safety relevant functions are restricted or no
longer available if:
R the engine is not running
R the brake system or power steering is mal-
functioning
R there is a malfunction in the voltage supply
or the vehicle's electrical system
When your vehicle is towed away or towed
started, you may require considerably more
effort to steer and brake. There is a risk of an
accident.
In such cases use a rigid towing bar. Before
being towed away or tow started, make sure
the steering moves freely. G
WARNING
If the steering wheel lock is engaged, the vehi- cle can no longer be steered. There is a risk of
an accident.
Always switch on the ignition when towing
with a tow rope or a towing bar. G
WARNING
When towing or tow-starting another vehicle
and its weight is greater than the permissible gross weight of your vehicle, the:
R towing eye may be torn off
R car/trailer combination may swerve or
even overturn
There is a risk of an accident.
When towing or tow-starting another vehicle,
its weight should not be greater than the per- missible gross weight of your vehicle.
Details on the permissible gross vehicle weight
of your vehicle can be found on the vehicle iden-
tification plate (Y page 326). !
When Active Brake Assist, Distance Pilot
DISTRONIC or the HOLD function is activated, the vehicle brakes automatically in certain
situations.
To avoid damage to the vehicle, deactivate
these systems in the following or similar sit-
uations:
R when towing away
R in a car wash
! Make sure that the electric parking brake is
released. If the electric parking brake is faulty, visit a qualified specialist workshop.
! Only secure the tow cable or tow bar to the
towing eyes or, if available, to the trailer tow
hitch. You could otherwise damage the vehi-
cle.
! Observe the following points when towing
with a tow rope:
R Secure the tow rope on the same side on
both vehicles.
R Make sure that the tow rope is not longer
than legally permitted. Mark the tow rope in
the middle, e.g. with a white cloth
(30 x 30 cm). This will make other road
users aware that a vehicle is being towed.
R Only secure the tow cable to the towing
eyes or, if available, to the trailer tow hitch.
R Observe the brake lamps of the towing
vehicle while driving. Always maintain a dis-
tance a distance so that the tow rope does not sag.
R Do not use steel cables or chains to tow
your vehicle. You could otherwise damage
the vehicle.
! Do not use the towing eyes for recovery pur-
poses as this could damage the vehicle. If in
doubt, recover the vehicle with a crane.
! Pull away smoothly when towing away or
tow-starting a vehicle. If the tractive power is
too high, the vehicles could be damaged.
! You may tow the vehicle for a maximum of
50km. A towing speed of 50 km/h must not
be exceeded. 304
Towing away and tow-startingBreakdown assistance
Page 310 of 345
Transporting the vehicle
4MATIC vehicles or vehicles with auto-
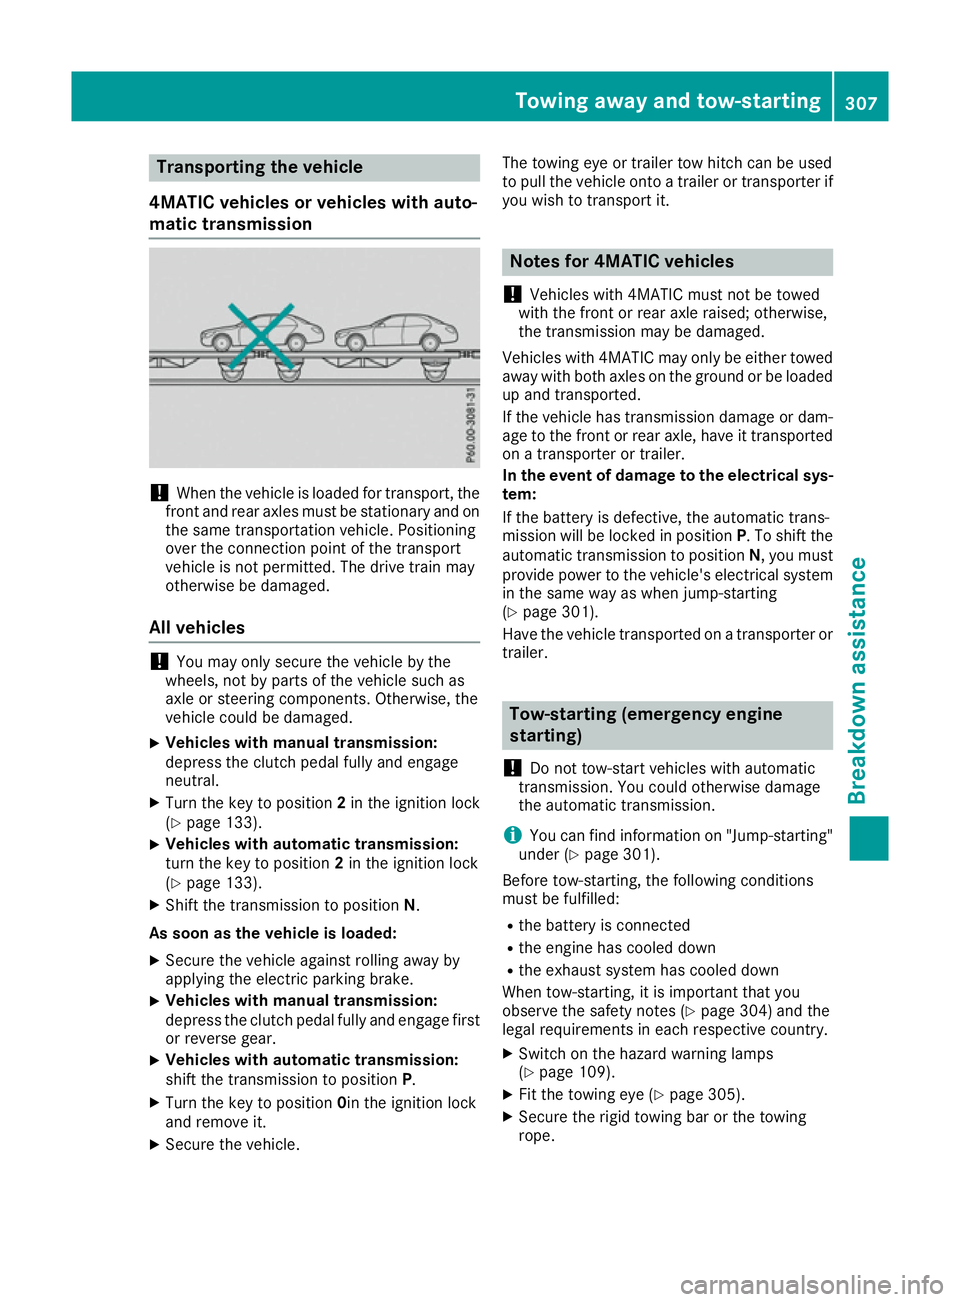
matic transmission !
When the vehicle is loaded for transport, the
front and rear axles must be stationary and on the same transportation vehicle. Positioning
over the connection point of the transport
vehicle is not permitted. The drive train may
otherwise be damaged.
All vehicles !
You may only secure the vehicle by the
wheels, not by parts of the vehicle such as
axle or steering components. Otherwise, the
vehicle could be damaged.
X Vehicles with manual transmission:
depress the clutch pedal fully and engage
neutral.
X Turn the key to position 2in the ignition lock
(Y page 133).
X Vehicles with automatic transmission:
turn the key to position 2in the ignition lock
(Y page 133).
X Shift the transmission to position N.
As soon as the vehicle is loaded:
X Secure the vehicle against rolling away by
applying the electric parking brake.
X Vehicles with manual transmission:
depress the clutch pedal fully and engage first
or reverse gear.
X Vehicles with automatic transmission:
shift the transmission to position P.
X Turn the key to position 0in the ignition lock
and remove it.
X Secure the vehicle. The towing eye or trailer tow hitch can be used
to pull the vehicle onto a trailer or transporter if
you wish to transport it. Notes for 4MATIC vehicles
! Vehicles with 4MATIC must not be towed
with the front or rear axle raised; otherwise,
the transmission may be damaged.
Vehicles with 4MATIC may only be either towed away with both axles on the ground or be loadedup and transported.
If the vehicle has transmission damage or dam-
age to the front or rear axle, have it transported on a transporter or trailer.
In the event of damage to the electrical sys-
tem:
If the battery is defective, the automatic trans-
mission will be locked in position P. To shift the
automatic transmission to position N, you must
provide power to the vehicle's electrical system in the same way as when jump-starting
(Y page 301).
Have the vehicle transported on a transporter or
trailer. Tow-starting (emergency engine
starting)
! Do not tow-start vehicles with automatic
transmission. You could otherwise damage
the automatic transmission.
i You can find information on "Jump-starting"
under (Y page 301).
Before tow-starting, the following conditions
must be fulfilled: R the battery is connected
R the engine has cooled down
R the exhaust system has cooled down
When tow-starting, it is important that you
observe the safety notes (Y page 304) and the
legal requirements in each respective country.
X Switch on the hazard warning lamps
(Y page 109).
X Fit the towing eye (Y page 305).
X Secure the rigid towing bar or the towing
rope. Towing away and tow-starting
307Breakdown assistance Z
Page 318 of 345
You can recognise the tyre pressure loss warn-
ing by the Run Flat Indicator active
Run Flat Indicator active
Restart with OK
Restart with OK message which appears in
the multifunction display in the Serv.
Serv.menu.
Information on the message display can be
found in the "Restarting the tyre pressure loss
warning system" section (Y page 315).
Important safety notes The tyre pressure warning system does not warn
you of an incorrectly set tyre pressure. Observe the notes on the recommended tyre pressure
(Y page 313).
The tyre pressure loss warning system does not
replace the need to regularly check the tyre
pressure. An even loss of pressure on several
tyres at the same time cannot be detected by
the tyre pressure loss warning system.
The tyre pressure loss warning system is not
able to warn you of a sudden loss of air, e.g. if the
tyre is penetrated by a foreign object. In the
event of a sudden loss of air, bring the vehicle to a halt by braking carefully. Avoid abrupt steering
manoeuvres.
The function of the tyre pressure loss warning
system is limited or delayed if:
R snow chains are fitted on your vehicle
R road conditions are wintry
R you are driving on a loose surface (e.g. sand or
gravel)
R you adopt a very sporty driving style (corner-
ing at high speeds or driving with high rates of acceleration)
R you are towing a very heavy or large trailer
R you are driving with a heavy load (in the vehi-
cle or on the roof)
Restarting the tyre pressure loss warn-
ing system Restart the tyre pressure loss warning system if
you have:
R changed the tyre pressure
R changed the wheels or tyres
R fitted new wheels or tyres
X Before restarting, make sure that the tyre
pressures are set properly on all four tyres for
the respective operating conditions. The rec-
ommended tyre pressures can be found in the
tyre pressure table on the fuel filler flap. The tyre pressure loss warning system can
only give reliable warnings if you have set the correct tyre pressure. If an incorrect tyre
pressure is set, this incorrect value will be
monitored.
X Observe the notes in the section on tyre pres-
sures (Y page 313).
X Make sure that the key is in position 2in the
ignition lock (Y page 133).
X Press =or; on the steering wheel to
select the Serv.
Serv.menu.
X Press the 9or: button to select
Tyre pressure Tyre pressure .
X Press the abutton.
The Run Flat Indicator active
Run Flat Indicator active
Restart with OK
Restart with OK message appears in the
multifunction display.
If you wish to confirm the restart:
X Press the abutton.
The Tyre
Tyre press.
press. now
nowOK?
OK?message appears
in the multifunction display.
X Press the 9or: button to select Yes
Yes.
X Press the abutton.
The Run Flat Indicator restarted
Run Flat Indicator restarted mes-
sage appears in the multifunction display.
After a teach-in period, the tyre pressure loss warning system will monitor the set tyre pres-
sures of all four tyres.
If you wish to cancel the restart: X Press the %button.
or X If the Tyre press. now OK? Tyre press. now OK? message
appears, press the 9or: button to
select Cancel
Cancel.
X Press the abutton.
The tyre pressure values stored at the last
restart will continue to be monitored. Tyre pressure monitor
General notes If a tyre pressure monitor system is fitted, the
vehicle's wheels have sensors fitted that moni-
tor the tyre pressures in all four tyres. The tyre
pressure monitor warns you if the pressure
drops in one or more of the tyres. The tyre pres- sure monitor functions only if the corresponding
sensors are fitted to all wheels. Tyre pressure
315Wheels and tyres Z