2016 MERCEDES-BENZ CLA COUPE buttons
[x] Cancel search: buttonsPage 125 of 345
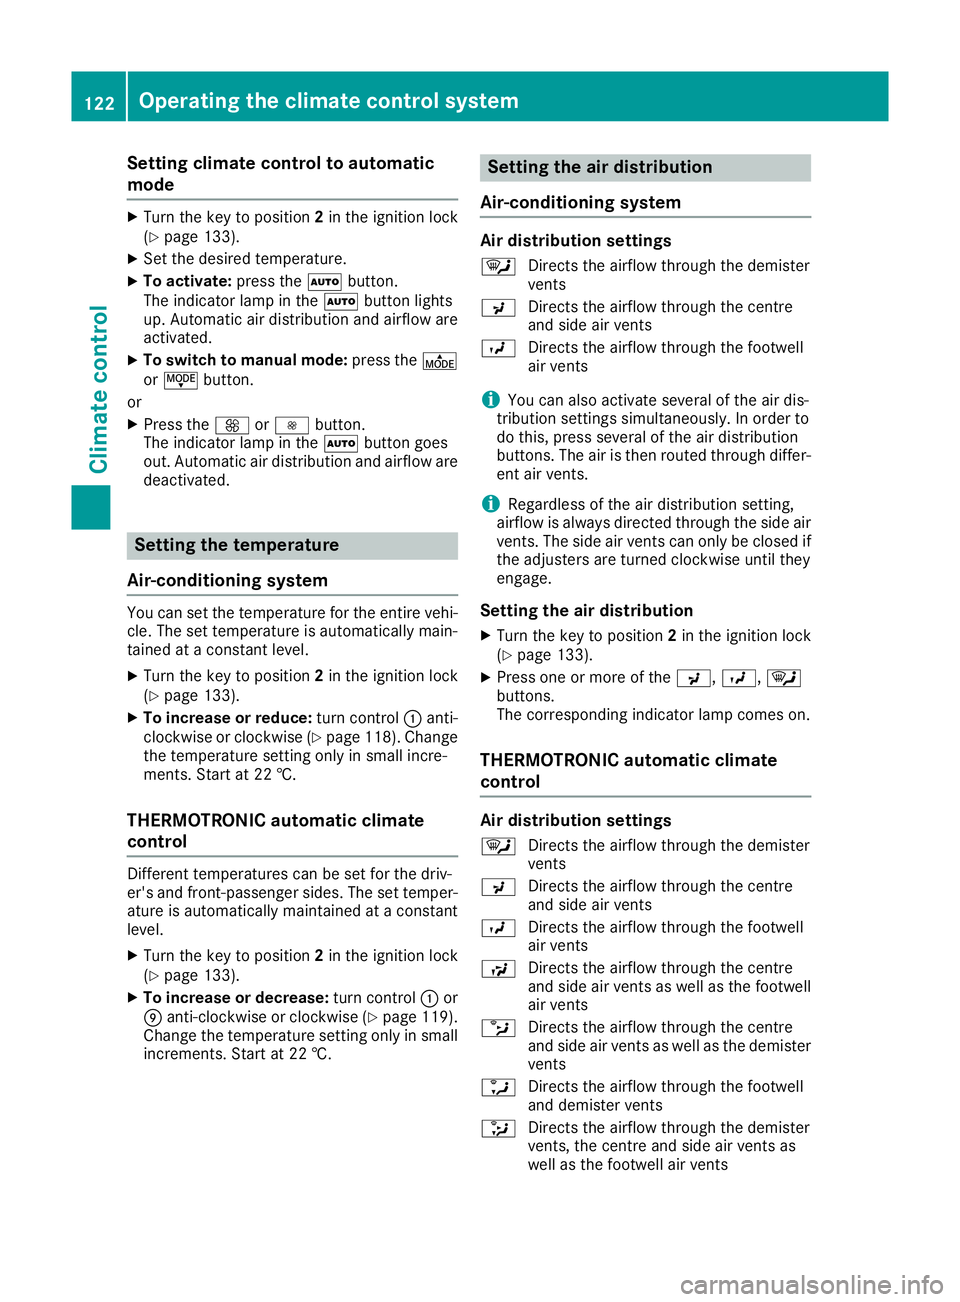
Setting climate control to automatic
mode X
Turn the key to position 2in the ignition lock
(Y page 133).
X Set the desired temperature.
X To activate: press theÃbutton.
The indicator lamp in the Ãbutton lights
up. Automatic air distribution and airflow are
activated.
X To switch to manual mode: press theÉ
or Ë button.
or
X Press the KorI button.
The indicator lamp in the Ãbutton goes
out. Automatic air distribution and airflow are deactivated. Setting the temperature
Air-conditioning system You can set the temperature for the entire vehi-
cle. The set temperature is automatically main-
tained at a constant level.
X Turn the key to position 2in the ignition lock
(Y page 133).
X To increase or reduce: turn control:anti-
clockwise or clockwise (Y page 118). Change
the temperature setting only in small incre-
ments. Start at 22 †.
THERMOTRONIC automatic climate
control Different temperatures can be set for the driv-
er's and front-passenger sides. The set temper- ature is automatically maintained at a constant
level.
X Turn the key to position 2in the ignition lock
(Y page 133).
X To increase or decrease: turn control:or
E anti-clockwise or clockwise (Y page 119).
Change the temperature setting only in small
increments. Start at 22 †. Setting the air distribution
Air-conditioning system Air distribution settings
¯ Directs the airflow through the demister
vents
P Directs the airflow through the centre
and side air vents
O Directs the airflow through the footwell
air vents
i You can also activate several of the air dis-
tribution settings simultaneously. In order to
do this, press several of the air distribution
buttons. The air is then routed through differ-
ent air vents.
i Regardless of the air distribution setting,
airflow is always directed through the side air vents. The side air vents can only be closed if
the adjusters are turned clockwise until they
engage.
Setting the air distribution X Turn the key to position 2in the ignition lock
(Y page 133).
X Press one or more of the P,O,¯
buttons.
The corresponding indicator lamp comes on.
THERMOTRONIC automatic climate
control Air distribution settings
¯ Directs the airflow through the demister
vents
P Directs the airflow through the centre
and side air vents
O Directs the airflow through the footwell
air vents
S Directs the airflow through the centre
and side air vents as well as the footwell
air vents
b Directs the airflow through the centre
and side air vents as well as the demister
vents
a Directs the airflow through the footwell
and demister vents
_ Directs the airflow through the demister
vents, the centre and side air vents as
well as the footwell air vents 122
Operating the climate control systemClimate control
Page 132 of 345
time and at an unsuitable location. When setting
the departure time, observe the important
safety notes (Y page 126).
X Briefly press the ubutton.
X Press the ,or. button repeatedly
until the time to be changed appears in the
display.
X Press the uand^ buttons at the same
time.
The Îsymbol in the remote control display
flashes.
X Press the ,or. button to set the
desired departure time.
i The longer you press the
,or. but-
ton, the faster the time changes.
X Press the uand^ buttons at the same
time.
The new departure time is stored.
Activating the set departure time X Briefly press the ubutton.
X Press the ,or. button repeatedly
until the desired departure time appears in
the display.
X Press the ubutton.
The Ísymbol, the departure time and,
depending on the selected departure time,
the letter A, BorCappear in the display.
Deactivating the set departure time
X Briefly press the ubutton.
The status of the auxiliary heating is shown on
the display.
X Press the .button.
The first departure time stored appears on the
display.
X Press the ^button.
OFF is shown in the remote control display.
Replacing the remote control battery Important safety notes
G
WARNING
Batteries contain toxic and corrosive substan- ces. If batteries are swallowed, it can result in
severe health problems. There is a risk of fatal injury. Keep batteries out of the reach of children. If
a battery is swallowed, seek medical attention
immediately. H
Environmental note Batteries contain pollutants.
It is illegal to dispose of them
with the household rubbish.
They must be collected sep-
arately and disposed of in anenvironmentally responsible
recycling system. Dispose of batteries in an
environmentally responsible
manner. Take discharged
batteries to a qualified spe-
cialist workshop or to a col-
lection point for used batter-
ies.
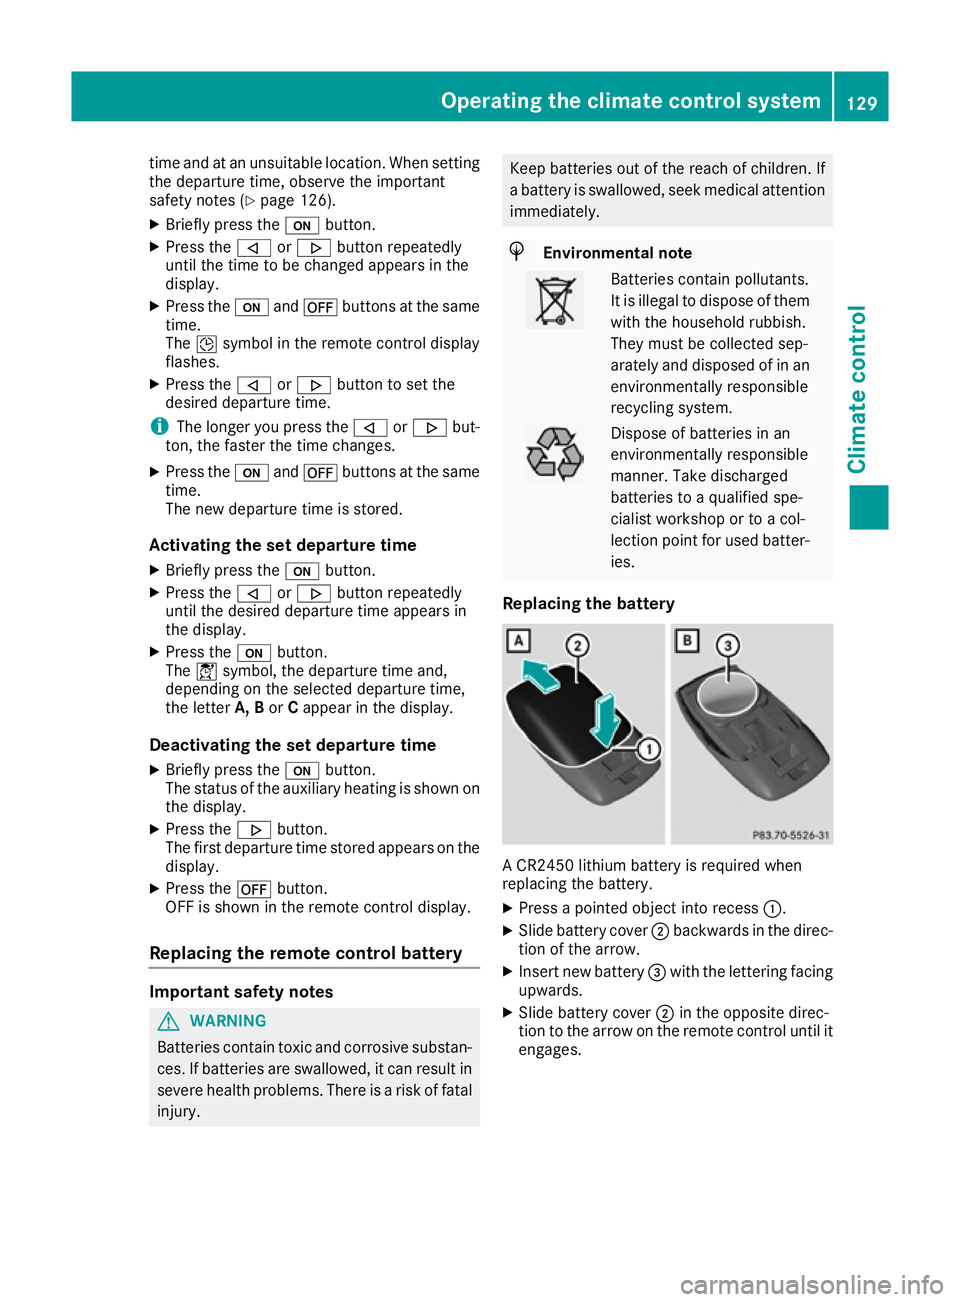
Replacing the battery A CR2450 lithium battery is required when
replacing the battery.
X Press a pointed object into recess :.
X Slide battery cover ;backwards in the direc-
tion of the arrow.
X Insert new battery =with the lettering facing
upwards.
X Slide battery cover ;in the opposite direc-
tion to the arrow on the remote control until it engages. Operating the climate control system
129Climate control Z
Page 204 of 345
There is a short delay before a change in outside
temperature appears in the multifunction dis-
play. Coolant temperature gauge
G
WARNING
If you open the bonnet while the engine is
overheating or while there is a fire in the
engine compartment, you could come into
contact with hot gases or other leaking ser-
vice products. There is a danger of injury.
Allow an overheating engine to cool down
before opening the bonnet. If there is a fire in the engine compartment, leave the bonnet
closed and notify the fire brigade.
The coolant temperature gauge is in the instru-
ment cluster on the right-hand side (Y page 32).
Under normal operating conditions and with the correct coolant level, the coolant temperature
may rise to 120 †.
At high outside temperatures and when driving
in mountainous terrain, the coolant temperature may rise to the end of the scale. Operating the on-board computer
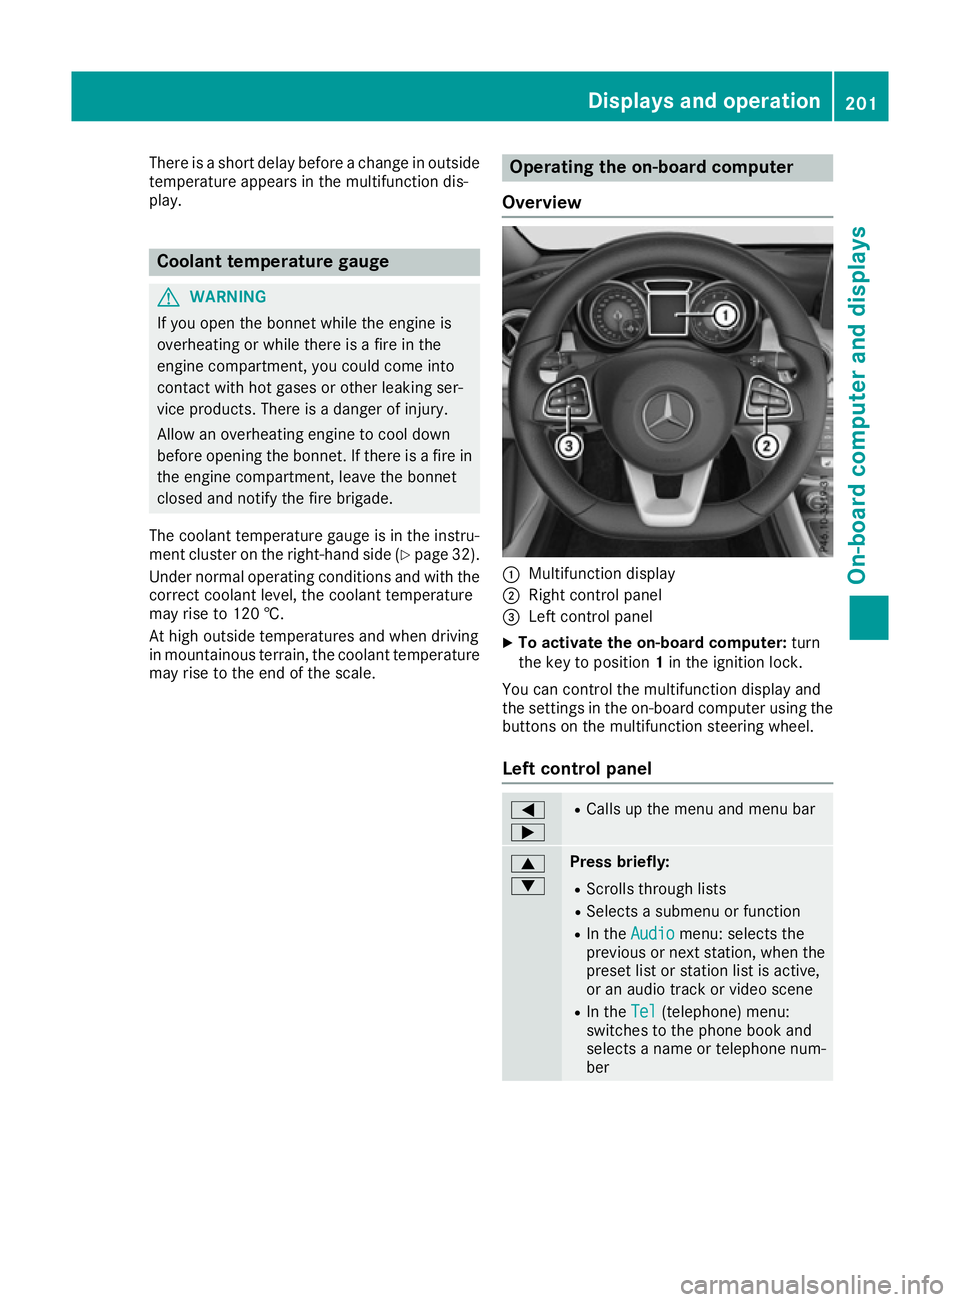
Overview :
Multifunction display
; Right control panel
= Left control panel
X To activate the on-board computer: turn
the key to position 1in the ignition lock.
You can control the multifunction display and
the settings in the on-board computer using the buttons on the multifunction steering wheel.
Left control panel =
; R
Calls up the menu and menu bar 9
: Press briefly:
R Scrolls through lists
R Selects a submenu or function
R In the Audio Audio menu: selects the
previous or next station, when the preset list or station list is active,
or an audio track or video scene
R In the Tel Tel(telephone) menu:
switches to the phone book and
selects a name or telephone num-
ber Displays and operation
201On-board computer and displays Z
Page 205 of 345
9
: Press and hold:
R
In the Audio Audio menu: selects a pre-
set list or a station list in the
desired frequency range, or an
audio track or video scene using
rapid scrolling
R In the Tel Tel(Telephone) menu:
starts rapid scrolling if the phone
book is open a R
Confirms the selection or display
message
R In the Tel
Tel(Telephone) menu:
switches to the telephone book
and starts dialling the selected
number % Press briefly:
R Back
R Vehicles with Audio 20: switches
off voice-operated control of the
navigation (see manufacturer's
operating instructions)
R Vehicles with COMAND Online:
switches off LINGUATRONIC (see
the separate operating instruc-
tions)
R Hides display messages or calls up
the last Trip
Trip menu function used
R Exits the telephone book/redial
memory % Press and hold:
R
Calls up the standard display in the
Trip Trip menu Right control panel
ó R
Vehicles with Audio 20:
Switches on voice-operated con-
trol for navigation (see manufac-
turer's operating instructions)
R Vehicles with COMAND Online:
Switches off LINGUATRONIC (see
the separate operating instruc-
tions) 8 R
Mute W
X R
Adjusts the volume ~ R
Rejects or ends a call
R Exits the telephone book/redial
memory 6 R
Makes or accepts a call
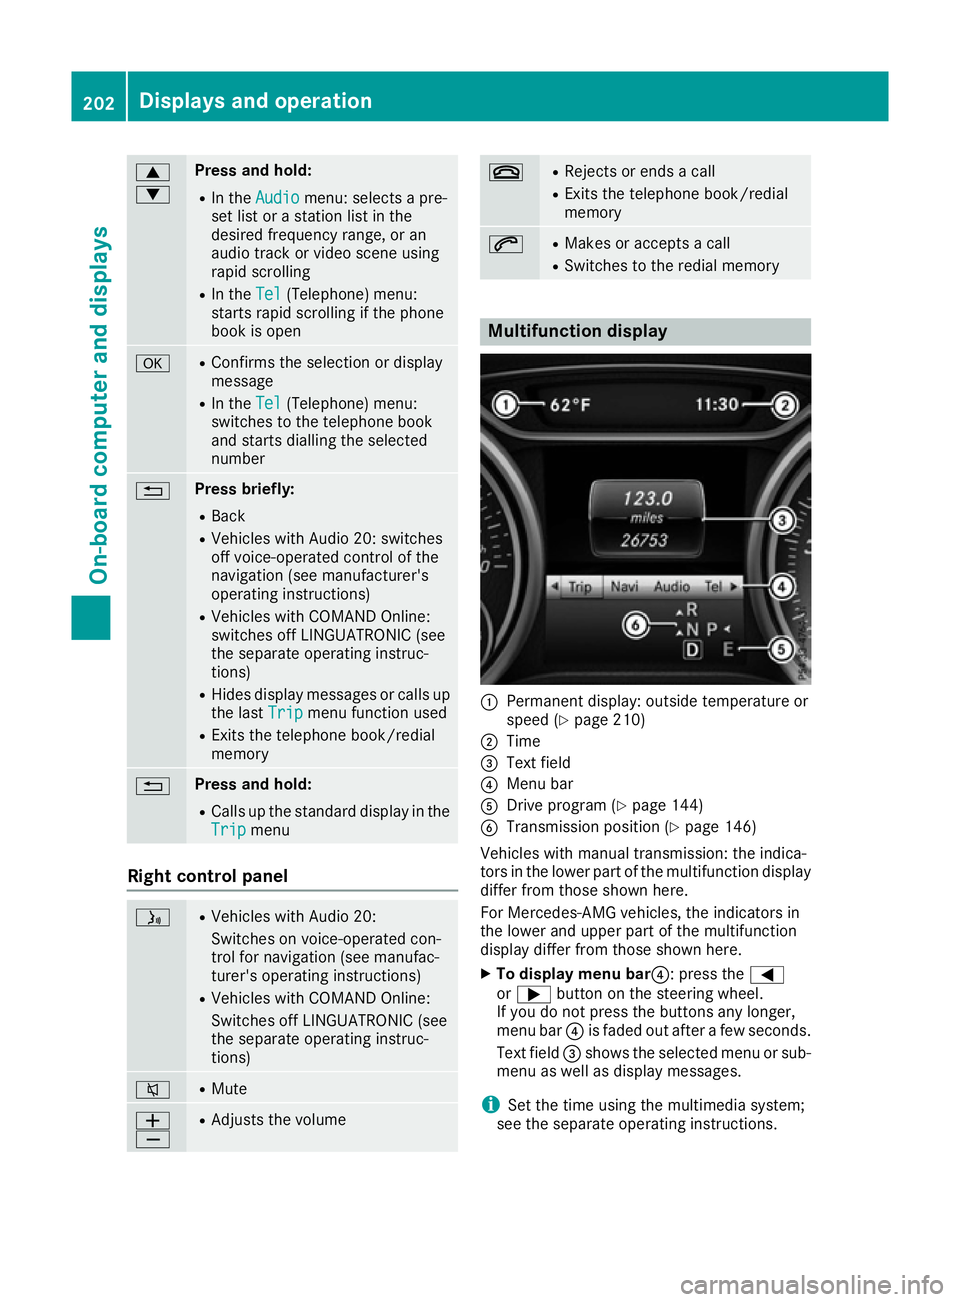
R Switches to the redial memory Multifunction display
:
Permanent display: outside temperature or
speed (Y page 210)
; Time
= Text field
? Menu bar
A Drive program (Y page 144)
B Transmission position (Y page 146)
Vehicles with manual transmission: the indica-
tors in the lower part of the multifunction display
differ from those shown here.
For Mercedes-AMG vehicles, the indicators in
the lower and upper part of the multifunction
display differ from those shown here.
X To display menu bar?: press the =
or ; button on the steering wheel.
If you do not press the buttons any longer,
menu bar ?is faded out after a few seconds.
Text field =shows the selected menu or sub-
menu as well as display messages.
i Set the time using the multimedia system;
see the separate operating instructions. 202
Displays and operationOn-board computer and displays
Page 281 of 345
X
Open the telephone compartment
(Y page 270).
X Place the mobile phone bracket into the pre-
installed fitting; see the separate installation
instructions for the mobile phone fitting.
X Insert the mobile phone into the mobile phone
bracket; see the separate installation instruc- tions for the mobile phone fitting.
i The mobile phone can also be operated
without being in the bracket. However, the
charging function and aerial function are not
available.
In order to use Bluetooth ®
(SAP profile) on your
telephone module, you must first insert the tele-
phone module into the pre-installed fitting. This connects it to the exterior aerial. If you wish to
charge the mobile phone, you must connect it to
a USB port.
Further information on the telephone module
with Bluetooth ®
(SAP profile) can be found in the
Digital Owner's Manual.
Operating the mobile phone You can operate the phone using the
6and
~ buttons on the multifunction steering
wheel. You can operate other mobile phone
functions via the on-board computer
(Y page 207).
When you remove the key from the ignition lock, the mobile phone is disconnected from the vehi-cle. You can then no longer make calls using the
hands-free system.
If a call is active and you remove the key from
the ignition lock, the conversation is transferred
over to the mobile phone. It is then possible to
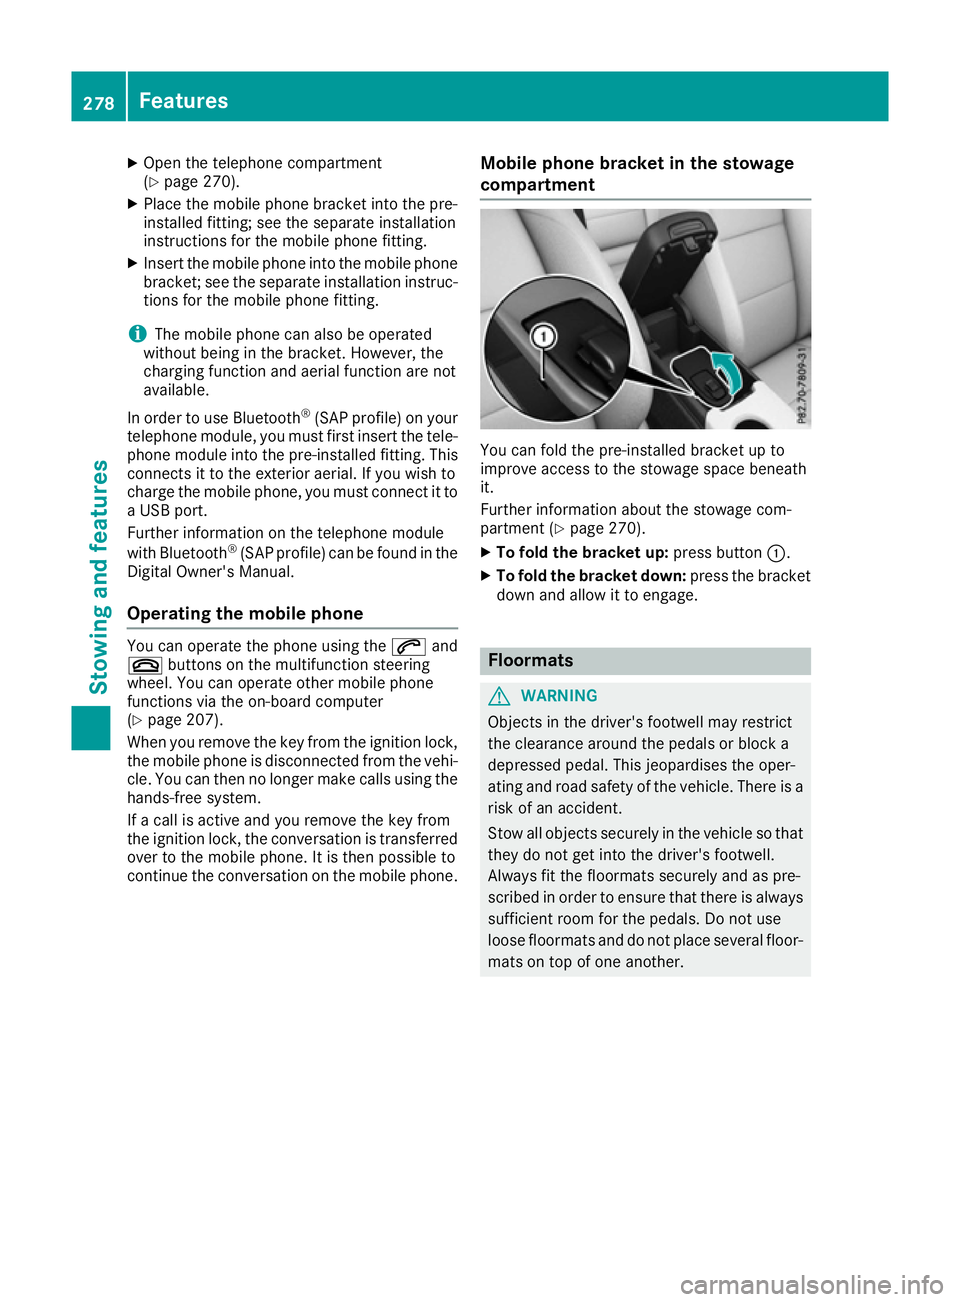
continue the conversation on the mobile phone. Mobile phone bracket in the stowage
compartment You can fold the pre-installed bracket up to
improve access to the stowage space beneath
it.
Further information about the stowage com-
partment (Y page 270).
X To fold the bracket up: press button:.
X To fold the bracket down: press the bracket
down and allow it to engage. Floormats
G
WARNING
Objects in the driver's footwell may restrict
the clearance around the pedals or block a
depressed pedal. This jeopardises the oper-
ating and road safety of the vehicle. There is a risk of an accident.
Stow all objects securely in the vehicle so that
they do not get into the driver's footwell.
Always fit the floormats securely and as pre-
scribed in order to ensure that there is always sufficient room for the pedals. Do not use
loose floormats and do not place several floor-mats on top of one another. 278
FeaturesStowing and features