2016 MERCEDES-BENZ B-Class ELECTRIC weight
[x] Cancel search: weightPage 214 of 342

Display messagesPossible causes/consequences andMSolutions
Front Passenger
Airbag Disabled
SeeOperator'sMan‐
ual
The front-passenger air bag is deactivated during the journey, even
though:
Ran adult
or
Ra person of the corresponding stature is on the front-passenger
seat
If additional forces are applied to the seat, the system may inter-
pret the occupant's weight as lower than it actually is.
GWARNING
The front-passenger air bag does not deploy during an accident.
There is an increased risk of injury.
XPull over and stop the vehicle safely as soon as possible, paying
attention to road and traffic conditions.
XSecur eth e vehicle against rolling away (Ypage 153).
XSwitc hth e ignition off.
XHave the occupant get out of the vehicle.
XKeep the seat unoccupied, close the front-passenger door and
switch on the ignition.
XObserve thePASSENGER AI RBA G indicator lamps in the center
console and th e multifunction display and check the following:
Seat unoccupied and ignition switched on:
Ra self-diagnosis is carried out. The PASSENGER AIR BAG OFF
and PASSENGER AI RBA G ON indicator lamps must light up
simultaneously for approximately six seconds
Rth ePASSENGER AI RBA G OFF indicator lamp must then light
up and remain lit after the self-diagnosis. If the indicator lamp
is on, OCS (Occupant Classification System) has disabled the
front-passenger front air bag (
Ypage 50)
Rth eFront Passenger Air Bag Enabled See Opera‐
tor's Manualor Front Passenger Air Bag Disabled
See Operator's Manualdisplay messages must not be
shown in the multifunction display
XWait fo raperiod of at least 60 seconds until the necessary sys-
te m checks have been completed.
XMake sure that the display messages do not appear in the mul-
tifunction display.
If these conditions are fulfilled, the front-passenger seat can be
occupied again. Whether the PASSENGER AIRBA G OFF or ON
indicator lamp remains lit or goes out depends on how OCS clas-
sifies the occupant.
212Display messages
On-board computer and displays
Page 215 of 342

Display messagesPossible causes/consequences andMSolutions
If the conditions are not fulfilled, the system is not operating cor-
rectly.
XVisit a qualified specialist workshop immediately.
Fo r further information about the Occupant Classification System,
see (
Ypage 50).
Front Passenger
AirbagEnabledSee
Operator's Manual
The front-passenger air bag is enabled during the journey, even
though:
Ra child, a small adult or an object weighing less than the sys-
tem' s weight threshold is located on the front-passenger seat
or
Rth e front-passenger seat is unoccupied
The system may detect objects or forces applying additional
weight on the seat.
GWARNING
The air bag may deploy unintentionally.
There is an increased risk of injury.
XPull over and stop the vehicle safely as soon as possible, paying
attention to road and traffic conditions.
XSecur eth e vehicle against rolling away (Ypage 153).
XSwitc hth e ignition off.
XOpen the front-passenger door.
XRemove th e child and the child restraint system from the front-
passenger seat.
XMake sure that there are no objects on the seat adding to the
weight.
The system may otherwise detect the additional weight and
interpret the seat occupant's weight as greater than it actually
is.
XKeep the seat unoccupied, close the front-passenger door and
switch on the ignition.
XObserve thePASSENGER AI RBA G indicator lamps in the center
console and th e multifunction display and check the following:
Se at unoccupied and ignition switched on:
Ra self-diagnosis is carried out. The PASSENGER AIR BAG OFF
and PASSENGER AI RBA G ON indicator lamps must light up
simultaneously for approximately six seconds
Rth ePASSENGER AI RBA G OFF indicator lamp must then light
up and remain lit after the self-diagnosis. If the indicator lamp
Display messages21 3
On-board computer and displays
Z
Page 244 of 342

Useful information
i
This Operator's Manual describes all
models and all standard and optional equip-
ment of your vehicle available at the time of
publication of the Operator's Manual.
Country-specific differences are possible.
Please note that your vehicle may not be
equipped with all features described. This
also applies to safety-related systems and
functions.
iRead the information on qualified special-
ist workshops (
Ypage 26).
Loading guidelines
GWARNING
If objects, luggage or loads are not secured or
not secured sufficiently, they could slip, tip
over or be flung around and thereby hit vehicle
occupants. There is a risk of injury, particu-
larly in the event of sudden braking or a sud-
den change in direction.
Always store objects so that they cannot be
flung around. Secure objects, luggage or
loads against slipping or tipping before the
journey.
The handling characteristics of a laden vehi-
cle are dependent on the distribution of the
load within the vehicle. For this reason, you
should observe the following notes when
transporting a load:
RNever exceed the maximum permissible
gross vehicle mass or the gross axle weight
rating for the vehicle (including occupants).
The values are specified on the vehicle
identification plate on the B-pillar of the
driver's door.
RThe cargo compartment is the preferred
place to carry objects.
RPosition heavy loads as far forwards as pos-
sible and as low down in the cargo com-
partment as possible.
RThe load must not protrude above the
upper edge of the seat backrests.
RAlways place the load against the rear or
front seat backrests. Make sure that the
seat backrests are securely locked into
place.
RAlways place the load behind unoccupied
seats if possible.
RUse the cargo tie-down rings and the parcel
nets to transport loads and luggage.
RUse cargo tie-down rings and fastening
materials appropriate for the weight and
size of the load.
RHook in the cargo net when loading.
RThe maximum load capacity of the stowage
well under the cargo compartment floor is
55 lbs (25 kg).
RSecure the load with sufficiently strong and
wear-resistant tie-downs. Pad sharp edges
for protection.
!Do not position the load on one part of the
folding cargo compartment floor only. The
maximum load capacity of the folding cargo
compartment floor is 220 lbs (100 kg). Dis-
tribute the weight evenly to avoid damaging
the cargo compartment floor. Place a solid
board under the load if necessary. Please
note that the load on the cargo compart-
ment floor will be increased when the load
is lashed down.
Stowage areas
Stowage spaces
Important safety notes
GWARNING
If objects in the passenger compartment are
stowed incorrectly, they can slide or be
thrown around and hit vehicle occupants.
There is a risk of injury, particularly in the
event of sudden braking or a sudden change
in direction.
242Stowage areas
Stowage and features
Page 254 of 342

There is a risk of injury, particularly in the
event of sudden braking or a sudden change
in direction.
RAlways stow objects so that they cannot be
thrown around in such situations.
RAlways make sure that objects do not pro-
trude from stowage spaces, parcel nets or
stowage nets.
RClose the lockable stowage spaces before
starting a journey.
RStow and secure objects that are heavy,
hard, pointed, sharp-edged, fragile or too
large in the cargo compartment.
!Only use the cup holders for containers of
the right size and which have lids. The
drinks could otherwise spill.
Observe the loading guidelines (
Ypage 242).
The stowage compartments in the doors pro-
vide space for bottles:
Rfront: capacity up to 51 fl. oz. (1.5 l)
Rrear: capacity up to 17 fl. oz. (0.5 l)
Cup holder in the front-compartment
center console
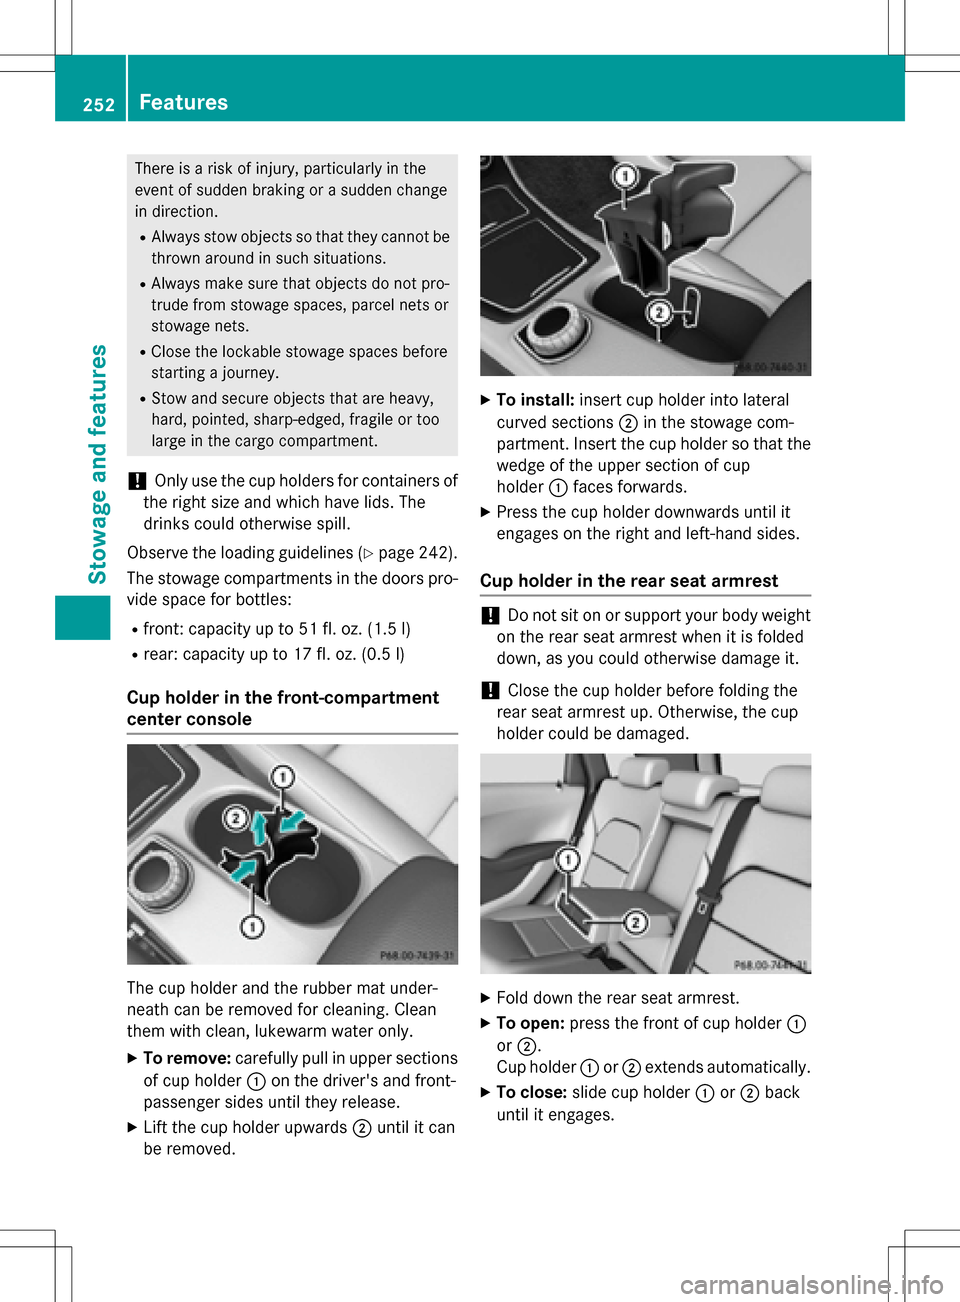
The cup holder and the rubber mat under-
neath can be removed for cleaning. Clean
them with clean, lukewarm water only.
XTo remove:carefully pull in upper sections
of cup holder :on the driver's and front-
passenger sides until they release.
XLift the cup holder upwards ;until it can
be removed.
XTo install: insert cup holder into lateral
curved sections ;in the stowage com-
partment. Insert the cup holder so that the wedge of the upper section of cup
holder :faces forwards.
XPress the cup holder downwards until it
engages on the right and left-hand sides.
Cup holder in the rear seat armrest
!Do not sit on or support your body weight
on the rear seat armrest when it is folded
down, as you could otherwise damage it.
!Close the cup holder before folding the
rear seat armrest up. Otherwise, the cup
holder could be damaged.
XFold down the rear seat armrest.
XTo open: press the front of cup holder :
or ;.
Cup holder :or; extends automatically.
XTo close: slide cup holder :or; back
until it engages.
252Features
Stowage and features
Page 296 of 342

iJumper cables and further information regarding jump-starting can be obtained at any
qualified specialist workshop.
Towing
Important safety notes
GWARNING
Functions relevant to safety are restricted or
no longer available if:
Rthe ignition is switched off
Rthe brake system or the power steering is
malfunctioning
Rthere is a malfunction in the power supply
or the vehicle's electrical system
If your vehicle is being towed, much more
force may be necessary to steer or brake.
There is a risk of an accident.
In such cases, use a tow bar. Before towing,
make sure that the steering moves freely.
GWARNING
You can no longer steer the vehicle if the
steering wheel lock has been engaged. There
is a risk of an accident.
Always switch off the ignition when towing the
vehicle with a tow cable or a tow bar.
GWARNING
When towing or tow-starting another vehicle
and its weight is greater than the permissible
gross weight of your vehicle, the:
Rthe towing eye could detach itself
Rthe vehicle/trailer combination could roll-
over.
There is a risk of an accident.
When towing or tow-starting another vehicle,
its weight should not be greater than the per- missible gross weight of your vehicle.
Details on the permissible gross vehicle
weight of your vehicle can be found on the
vehicle identification plate (
Ypage 334).
!When COLLISION PREVENTION ASSIST
PLUS or the HOLD function is activated, the
vehicle brakes automatically in certain sit-
uations. To avoid damage to the vehicle,
deactivate these systems in the following
or similar situations:
Rwhen towing the vehicle
Rin the car wash
!Make sure that the electric parking brake
is released. If the electric parking brake is
faulty, visit a qualified specialist workshop.
Mercedes-Benz recommends that you use
an authorized Mercedes-Benz Center for
this purpose.
!Only secure the tow rope or tow bar at the
towing eyes. Otherwise, the vehicle could
be damaged.
!Observe the following points when towing
with a tow rope:
RSecure the tow rope on the same side on
both vehicles.
REnsure that the t ow cable is not longer
than legally permitted. Mark the tow
cable in the middle, e.g. with a white
cloth (30 x 30 cm). This will make other
road users aware that the vehicle is being
towed.
ROnly secure the tow cable to the towing
eye.
RObserve the brake lamps of the towing
vehicle while driving. Always maintain a
distance so that the tow rope does not
sag.
RDo not use steel cables or chains to tow
your vehicle. You could otherwise dam-
age the vehicle.
!Do not use the towing eyes for recovery
purposes as this could damage the vehicle. If in doubt, recover the vehicle with a crane.
294Towing
Breakdown assistance
Page 314 of 342

pressure will be displayed after
driving a few minutesmessage.
XPress the:button.
The multifunction display shows the Use
CurrentPressuresasNewReference
Valuesmessage.
If you wish to confirm the restart:
XPress the abutton.
The Tire Press. Monitor Restarted
message appears in the multifunction dis-
play.
After driving for a few minutes, the system
checks whether the current tire pressures
are within the specified range. The new tire
pressures are then accepted as reference
values and monitored.
If you wish to cancel the restart:
XPress the %button.
The tire pressure values stored at the last
restart will continue to be monitored.
Radio type approval for the tire pres-
sure monitor
CountryRadio type approval number
USAFCC ID: MRXMW2433A
FCC ID: MRXGG4
FCC ID: MRXMC34MA4
CanadaIC: 2546A-MW2433A
IC: 2546A-GG4
IC: 2546A-MC34MA4
Loading the vehicle
Instruction labels for tires and loads
GWARNING
Overloaded tires can overheat, causing a
blowout. Overloaded tires can also impair the steering and driving characteristics and lead
to brake failure. There is a risk of accident.
Observe the load rating of the tires. The load
rating must be at least half of the GAWR of
your vehicle. Never overload the tires by
exceeding the maximum load.
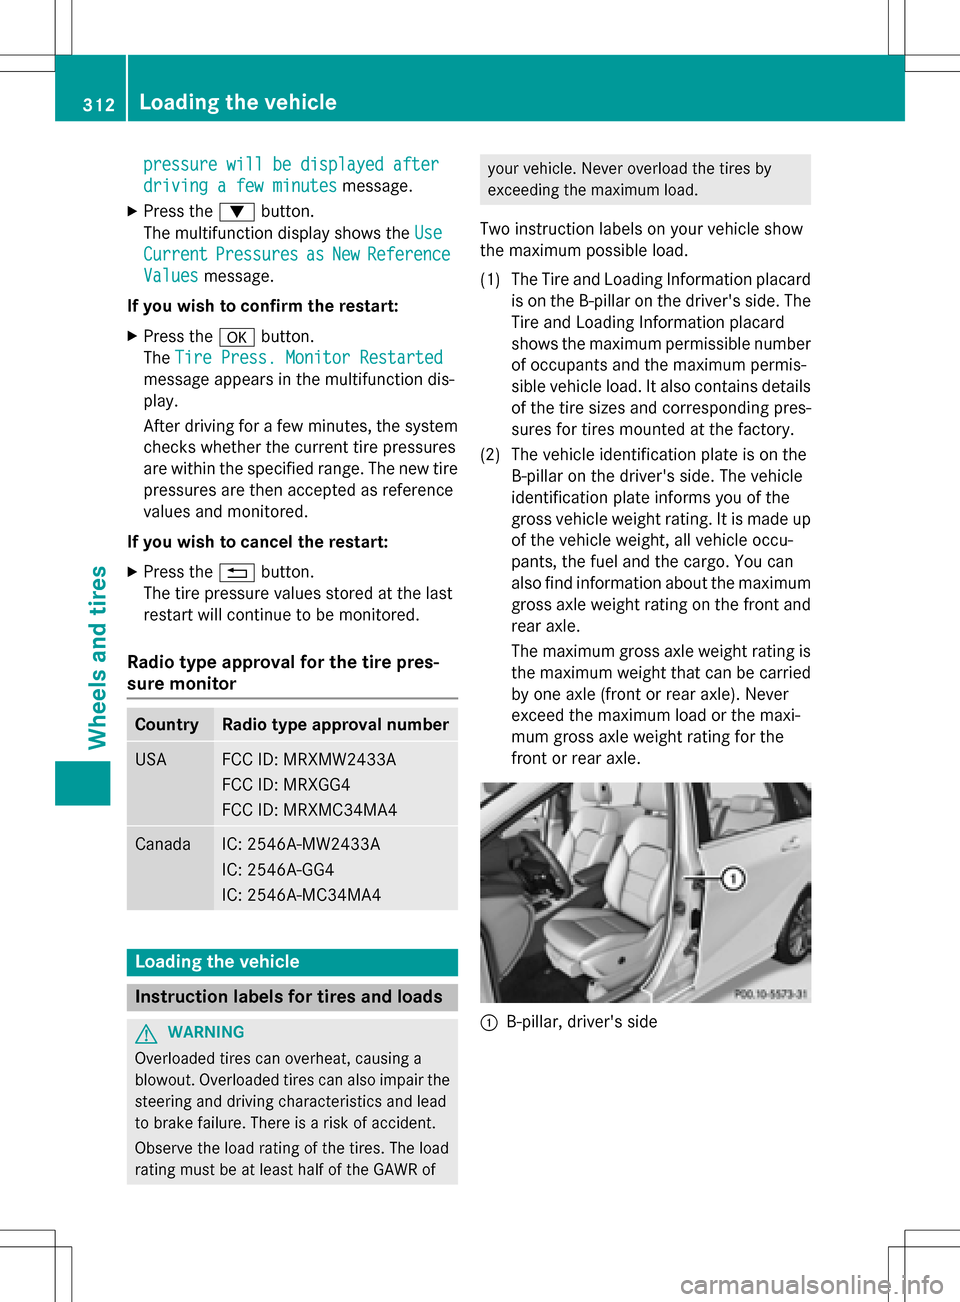
Two instruction labels on your vehicle show
the maximum possible load.
(1) The Tire and Loading Information placard is on the B-pillar on the driver's side. The
Tire and Loading Information placard
shows the maximum permissible numberof occupants and the maximum permis-
sible vehicle load. It also contains details
of the tire sizes and corresponding pres-
sures for tires mounted at the factory.
(2) The vehicle identification plate is on the B-pillar on the driver's side. The vehicle
identification plate informs you of the
gross vehicle weight rating. It is made up
of the vehicle weight, all vehicle occu-
pants, the fuel and the cargo. You can
also find information about the maximum
gross axle weight rating on the front and
rear axle.
The maximum gross axle weight rating is
the maximum weight that can be carried
by one axle (front or rear axle). Never
exceed the maximum load or the maxi-
mum gross axle weight rating for the
front or rear axle.
:B-pillar, driver's side
312Loading the vehicle
Wheels and tires
Page 315 of 342

Maximum permissible gross vehicle
weight rating
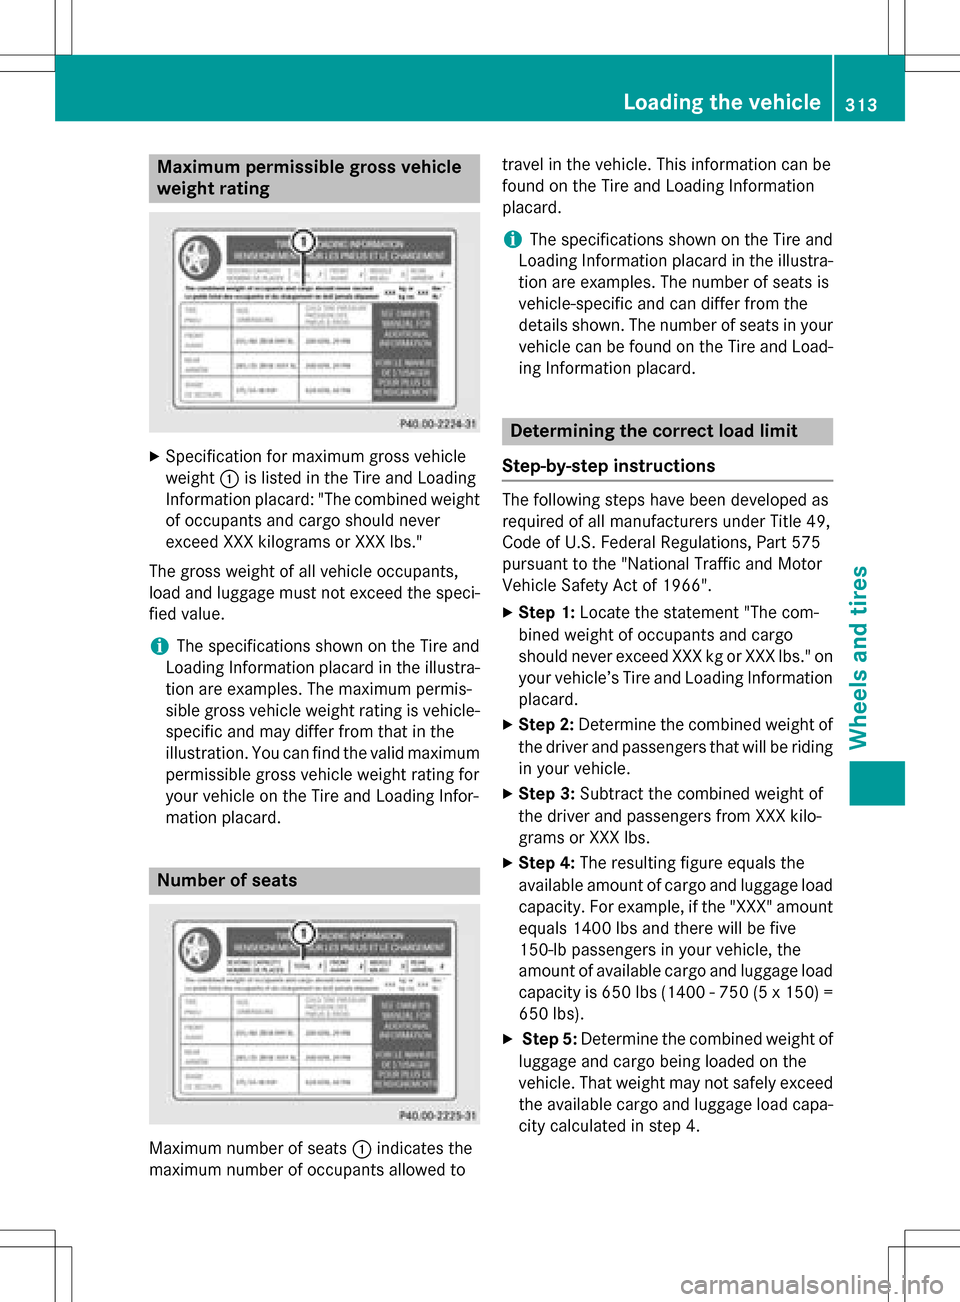
XSpecification for maximum gross vehicle
weight:is listed in the Tire and Loading
Information placard: "The combined weight of occupants and cargo should never
exceed XXX kilograms or XXX lbs."
The gross weight of all vehicle occupants,
load and luggage must not exceed the speci-
fied value.
iThe specifications shown on the Tire and
Loading Information placard in the illustra-
tion are examples. The maximum permis-
sible gross vehicle weight rating is vehicle- specific and may differ from that in the
illustration. You can find the valid maximum
permissible gross vehicle weight rating for
your vehicle on the Tire and Loading Infor-
mation placard.
Number of seats
Maximum number of seats :indicates the
maximum number of occupants allowed to travel in the vehicle. This information can be
found on the Tire and Loading Information
placard.
iThe specifications shown on the Tire and
Loading Information placard in the illustra-
tion are examples. The number of seats is
vehicle-specific and can differ from the
details shown. The number of seats in your vehicle can be found on the Tire and Load-
ing Information placard.
Determining the correct load limit
Step-by-step instructions
The following steps have been developed as
required of all manufacturers under Title 49,
Code of U.S. Federal Regulations, Part 575
pursuant to the "National Traffic and Motor
Vehicle Safety Act of 1966".
XStep 1: Locate the statement "The com-
bined weight of occupants and cargo
should never exceed XXX kg or XXX lbs." on
your vehicle’s Tire and Loading Information
placard.
XStep 2: Determine the combined weight of
the driver and passengers that will be riding
in your vehicle.
XStep 3: Subtract the combined weight of
the driver and passengers from XXX kilo-
grams or XXX lbs.
XStep 4: The resulting figure equals the
available amount of cargo and luggage load capacity. For example, if the "XXX" amount
equals 1400 lbs and there will be five
150-lb passengers in your vehicle, the
amount of available cargo and luggage load
capacity is 650 lbs (1400 - 750 (5 x 150) =
650 lbs).
XStep 5: Determine the combined weight of
luggage and cargo being loaded on the
vehicle. That weight may not safely exceed the available cargo and luggage load capa-
city calculated in step 4.
Loading the vehicle313
Wheels and tires
Z
Page 316 of 342

Example: steps 1 to 3
The following table shows examples on how to calculate total and cargo load capacities with
varying seating configurations and number and size of occupants. The following examples use
a load limit of 1500 lbs (680 kg).This is for illustration purposes only. Make sure you are
using the actual load limit for your vehicle stated on your vehicle's Tire and Loading Information
placard (
Ypage 312).
The greater the combined weight of the occupants, the lower the maximum luggage load.
Step 1
Example 1Example 2Example 3
Combined maximum
weight of occupants
and cargo (data from
the Tire and Loading
Information placard)1500 lbs (680 kg)1500 lbs (680 kg)1500 lbs (680 kg)
Step 2
Example 1Example 2Example 3
Number of people in
the vehicle (driver
and occupants)531
Distribution of the
occupantsFront: 2
Rear: 3Front: 1
Rear: 2Front: 1
Weight of the occu-
pantsOccupant 1: 150 lbs
(68 kg)
Occupant 2: 180 lbs
(82 kg)
Occupant 3: 160 lbs (73 kg)
Occupant 4: 140 lbs
(63 kg)
Occupant 5: 120 lbs
(54 kg)Occupant 1: 200 lbs
(91 kg)
Occupant 2: 190 lbs
(86 kg)
Occupant 3: 150 lbs(68 kg)Occupant 1: 150 lbs
(68 kg)
Gross weight of all
occupants750 lbs (340 kg)540 lbs (245 kg)150 lbs (68 kg)
314Loading the vehicle
Wheels and tires