Page 185 of 246

COMAND does not support WMA files of the
followin g types:
RDRM (Digit al Rights Management) encryp-
ted files
Rvar iable bit rate
RWMA Pro
R5.1 surround sound
iOnlyuse tracks with a bit rate of at least
128 kb it/sand a sampling rate of at least
44.1 kH z.Lower rates can cause a notice-
able deterioration in quality. This is espe-
cially the case if you have activated a sur-
round sound function.
Selecting an active partition (USB mass storage devices only)
You can select this function for USB storage
devices when the storage device is parti-
tioned. Up to 9 partitions (primary or logical,
FAT, FAT32, exFAT and NTFS) are supported.
Selecting an active partition
XTo select Optionsin the media menu bar:
turn and press the controller.
XSelect Select Active Partition.
Notes on copyright
Audio/video files that you create or repro-
duce yourself for playback are generally sub-
ject to copyright protection.
In many countries, reproductions, even for
private use, are not permitted without the
prior consent of the copyright holder.
Make sure that you know about the applicable
copyright regulations and that you comply
with these.
Notes on CDs/DVDs
!COMAND is designed to play discs that
comply with the EN 60908 standard. There-
fore, you can only use discs with a maxi-
mum thickness of 1.3 mm.
If you insert thicker discs, e.g. those that
contain data on both sides (DVD on one side and audio data on the other), they can-
not be ejected and can damage the device.
Only use round discs with a diameter of
12 cm. Do not use discs with a diameter of
8 cm, even with an adapter.
Discs with copy protection are not compati-
ble with the audio CD standard and therefore
may not be able to be played by COMAND.
Playback problems may occur when playing
copied discs.
There may be playback problems if you play
CDs that you have copied yourself with a stor- age capacity of more than 700 MB.
Menu overview
CD mode basic display
:
Main function bar
;Display for the active data medium
=Media menu bar
?Title display in the media list
ACurrent track and number in the track list
BNumerical time display
CGraphic time display
DAlbum cover (if available)
Audio/video mode183
Media
Z
Page 186 of 246

Inserting and removing a disc from
the single CD/DVD drive
XTo insert:press theþbutton on the
single drive.
If there isadisc already inserted, itwill be
ejecte d.
XInsert a discinto the disc slot with the prin-
ted side facing upwards.
The drive closes and the disc isplayed.
If the CD/DVD is operated in Media mode,
the corresponding basic menu willbe
shown. Ifthe CD/DVD isstarted using
another application (e.g. navigation), the
disp laywill not change.
iThe drive may not beable to play discs
wit h co pyprotection.
XTo remove: press theþbutton.
The drive ejects the disc.
XRemove the ejected disc from the slot.
Ifyou donot take the disc out of the slot, it
is drawn inagain automatical lyafter a short
while .
Inserting discs into the DVD changer
The DVD changer has a magazine with six
trays.
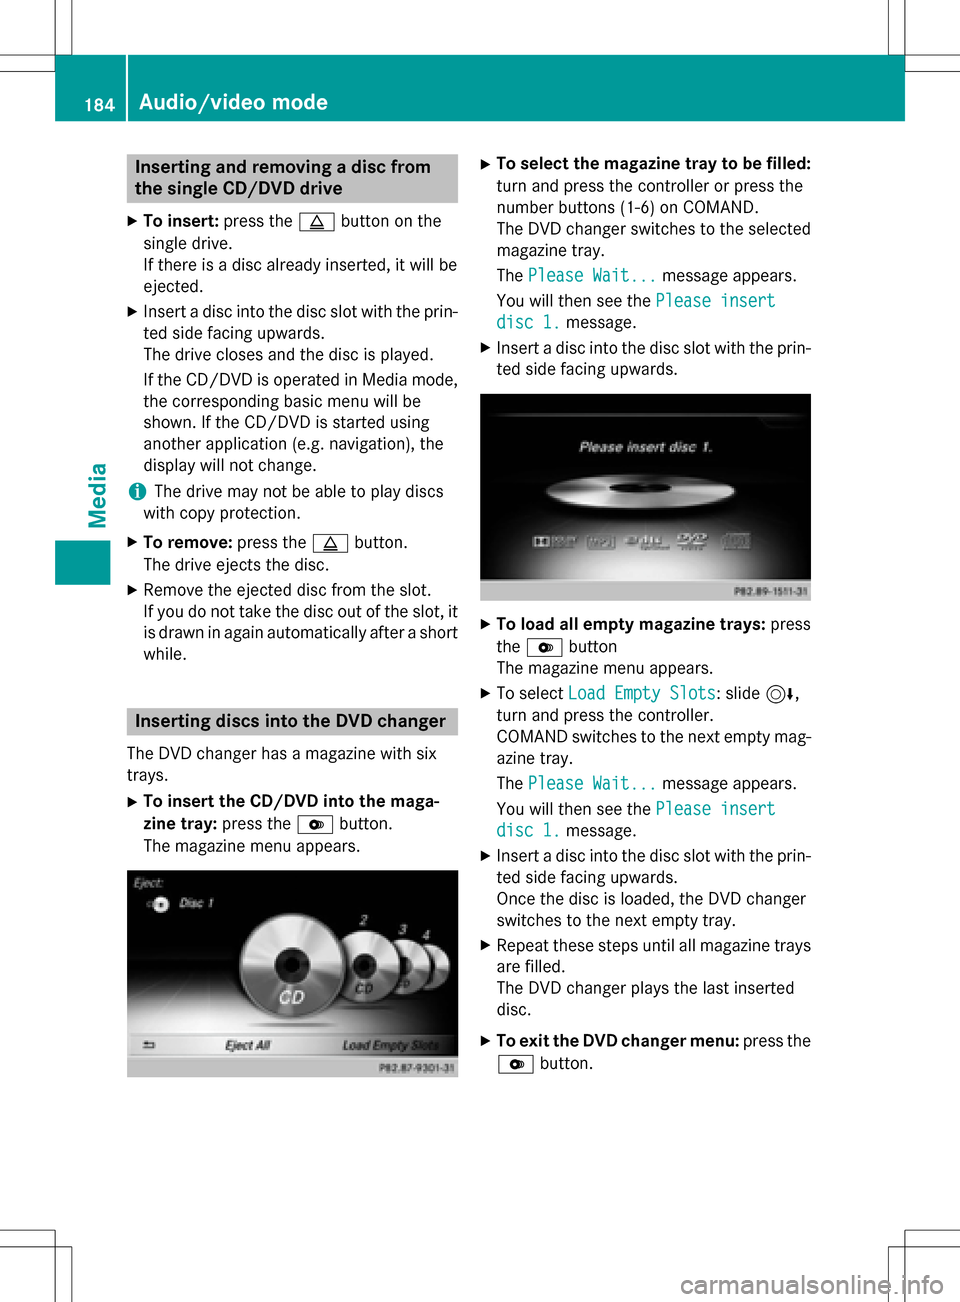
XTo insert the CD/DVD into the maga-
zine tray: press theVbutton.
The magazine menu appears.
XTo select thema gazine tray tobe filled:
turn and press the controller or press the
number buttons (1-6) on COMAND.
The DVD changer switches to the selected
magazine tray.
The Please Wait...
message appears.
You willthen see the Please insert
disc 1.message.
XInsert a discinto the discslot with the prin-
ted side facing upwards.
XTo load all emp ty magazine trays: press
the V button
The magazine menu appears.
XTo select Load Empty Slots: slide6,
turn and press the controller.
COMAND switches to the next empty mag-
azine tray.
The Please Wait...
message appears.
You willthen see the Please insert
disc 1.message.
XInsert a discinto the discslot with the prin-
ted side facing upwards.
Once the disc isloaded, the DVD changer
swit ches to the next empty tray.
XRepeat these steps unt ilall magazine trays
are filled.
The DVD changer plays the last inserted
disc .
XTo exit the DVD changer menu: press the
V button.
184Audio/video mode
Media
Page 187 of 246

Ejecting discs from the DVD changer
i
If you remove one disc while playing
another disc, the DVD changer interrupts
playback. Playback continues once the disc has been ejected.
XTo eject a single CD/DVD: press theV
button.
The magazine menu appears. The current
disc is marked.
:Type of data medium
;Active ejection
=Disc name
?Empty tray no. 4
ACurrent disc
XTo select the data medium: turn and press
the controller or press the number buttons
(1-6) on COMAND.
The DVD changer ejects the disc.
XTake the disc out of the slot.
XTo eject all CDs/DVDs: press theV
button.
The magazine menu appears.
XSelect Eject All.
The last active disc is ejected.
The Please remove disc 1.
message
appears.
XRemove the disc.
The DVD changer ejects the disc.
XRepeat the last step until the magazine is
empty.
XTo exit the menu: press theVbutton. or
XSelect
%in the magazine menu.
Inserting/removing an SD memory
card
Important safety notes
GWARNING
SD memory cards are small parts. They can be
swallowed and cause asphyxiation. This
poses an increased risk of injury or even fatal injury.
Keep SD memory cards out of the reach of
children. If an SD memory card is swallowed,
seek immediate medical attention.
!If you are no longer using the SD memory
card, you should remove it and take it out of
the vehicle. High temperatures can dam-
age the card.
COMAND supports SD memory cards
(Secure Digital), SDHC memory cards
(Secure DigitalHighCapacity), and SDXC
memory cards ( SecureDigital e Xtended
Capacity.
Inserting an SD memory card
XInsert the SD memory card into the slot on
the control panel until it engages in place.
The side with the contacts must face down-
wards.
The music is played while the files are loa-
ded in the background. If there are no sup- ported audio/video files, you will see a
message to this effect.
Ejecting an SD memory card
XPress the memory card.
The memory card is ejected.
XRemove the memory card.
Audio/video mode185
Media
Z
Page 188 of 246

Connecting USB devices
There are two USB ports in the stowage space
under the armrest.
XConnect the USB device with a suitable
USB port.
If the corresponding media display is visi-
ble, the medium is played and the files are
loaded in the background. Otherwise, the
system does not automatically switch to
USB. If there are no supported audio or
video files, you will see a message to this
effect.
iMP3 players must support Media Transfer
Protocol (MTP).
Playback options
XIn media mode, slide 6the controller.
The media menu bar is shown.
XTo select Options: turn and press the con-
troller.
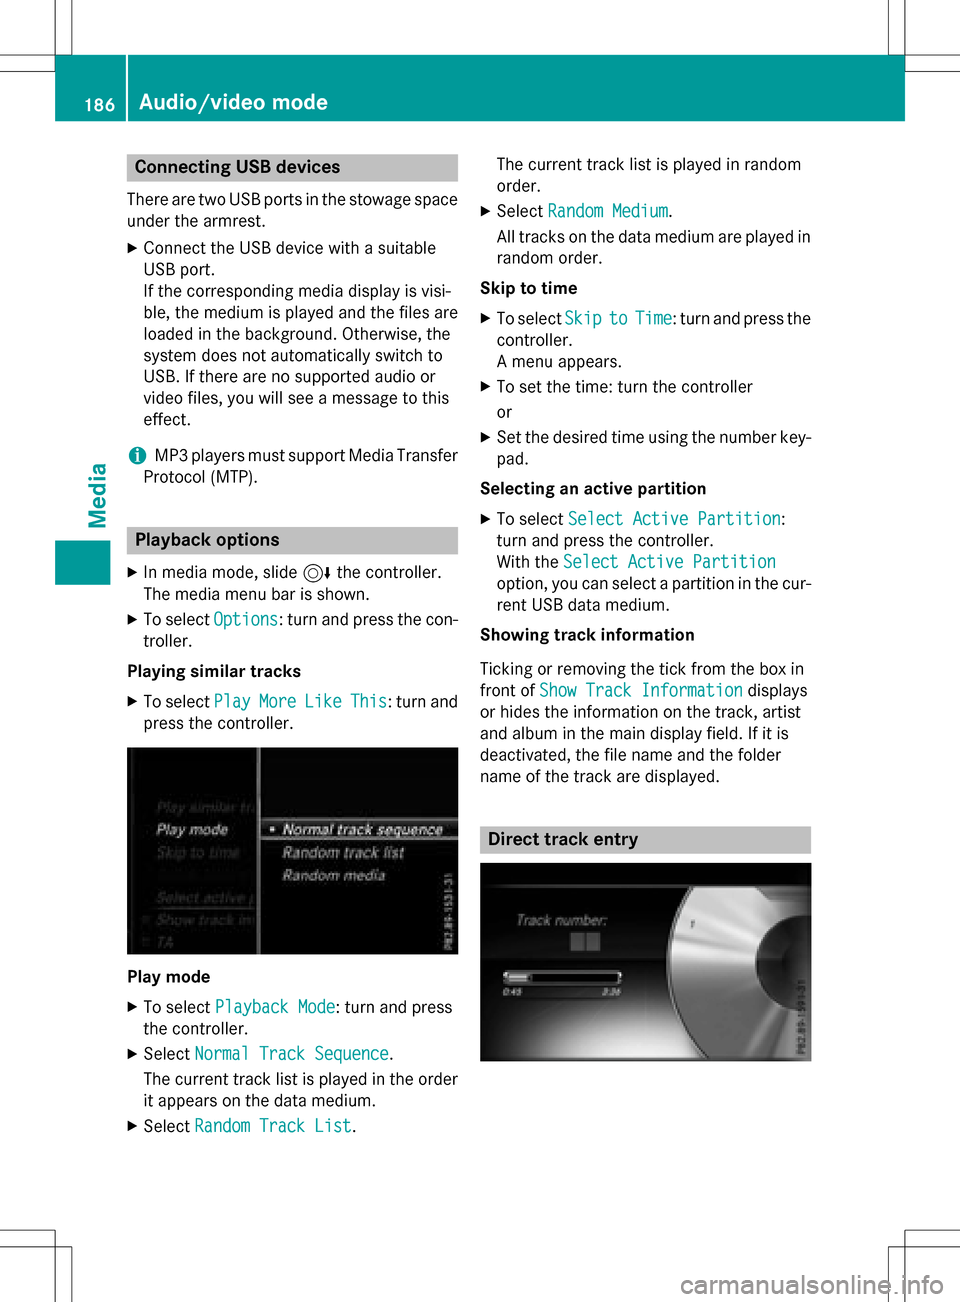
Playing similar tracks
XTo select PlayMoreLikeThis: turn and
press the controller.
Play mode
XTo select Playback Mode: turn and press
the controller.
XSelect Normal Track Sequence.
The current track list is played in the order
it appears on the data medium.
XSelect Random Track List. The current track list is played in random
order.
XSelect
Random Medium.
All tracks on the data medium are played in
random order.
Skip to time
XTo select SkiptoTime: turn and press the
controller.
A menu appears.
XTo set the time: turn the controller
or
XSet the desired time using the number key- pad.
Selecting an active partition
XTo select Select Active Partition:
turn and press the controller.
With the Select Active Partition
option, you can select a partition in the cur-
rent USB data medium.
Showing track information
Ticking or removing the tick from the box in
front of Show Track Information
displays
or hides the information on the track, artist
and album in the main display field. If it is
deactivated, the file name and the folder
name of the track are displayed.
Direct track entry
186Audio/video mode
Media
Page 189 of 246

XTo enter the track number:press the
g button.
A menu appears.
XUse the number keypad to enter the
desired track number.
The track is played.
Pause and playback function
XTo pause playback: in audio/video mode,
slide 6the controller.
The media menu bar is shown.
XTo activate Ëin the Media menu bar:
turn and press the controller.
Playback is interrupted here. The display
changes to Ì.
XTo continue playback: in audio/video
mode, slide 6the controller.
The media menu bar is shown.
XTo activate Ìin the Media menu bar:
turn and press the controller.
Playback is continued from the point of
interruption. The symbol changes to Ë.
Selecting a track
Selecting using the current track list
XTo display the current track list: press
the controller in the basic display.
The category list appears.
Select the current track list.
XTo select a track: turn the controller and
press to confirm.
Selecting by skipping to a track
XTo skip forwards or backwards to a track:
turn or briefly slide 1the controller in
the media basic display.
or
XPress the EorF button.
Fast forwarding/rewinding
XIn the media basic display, press and hold
theE orF button until the desired
position is reached.
Search
XIn Media mode, slide 6the controller.
The media menu bar is shown.
XTo select Search: turn and press the con-
troller.
The category list is shown.
XSelect a category, e.g. Genres.
After the category has been chosen, sub-
categories appear depending on the avail-
able music tracks.
XSelect a sub-category, e.g. Rock.
XSelect a track in the sub-category for play-
ing.
All of the tracks in this sub-category are
played.
Gracenote®Media Database
General notes
This function is available in CD audio, MP3
and iPod®mode.
There is a version of Gracenote
®music rec-
ognition technology, Emeryville, California,
USA on the COMAND hard disk. You will rec-
ognize this by the logo in the bottom right-
hand corner of certain audio displays. If the
audio CD does not contain any CD text infor-
Audio/video mode187
Media
Z
Page 190 of 246

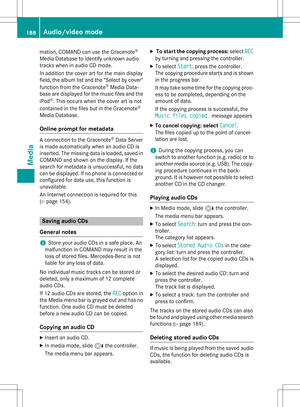
mation, COMAND can use the Gracenote®
Media Database to identify unknown audio
tracks when in audio CD mode.
In addition the cover art for the main display
field, the album list and the "Select by cover"function from the Gracenote
®Media Data-
base are displayed for the music files and the
iPod
®. This occurs when the cover art is not
contained in the files but in the Gracenote®
Media Database.
Online prompt for metadata
A connection to the Gracenote®Data Server
is made automatically when an audio CD is
inserted. The missing data is loaded, saved in
COMAND and shown on the display. If the
search for metadata is unsuccessful, no data
can be displayed. If no phone is connected or
configured for data use, this function is
unavailable.
An Internet connection is required for this
(
Ypage 154).
Saving audio CDs
General notes
iStore your audio CDs in a safe place. An
malfunction in COMAND may result in the
loss of stored files. Mercedes-Benz is not
liable for any loss of data.
No individual music tracks can be stored or
deleted, only a maximum of 12 complete
audio CDs.
If 12 audio CDs are stored, the REC
option in
the Media menu bar is grayed out and has no
function. One audio CD must be deleted
before a new audio CD can be copied.
Copying an audio CD
XInsert an audio CD.
XIn media mode, slide 6the controller.
The media menu bar appears.
XTo start the copying process: selectREC
by turning and pressing the controller.
XTo select Start: press the controller.
The copying procedure starts and is shown
in the progress bar.
It may take some time for the copying proc-
ess to be completed, depending on the
amount of data.
If the copying process is successful, the
Music files copied.
message appears
XTo cancel copying: select Cancel.
The files copied up to the point of cancel-
lation are lost.
iDuring the copying process, you can
switch to another function (e.g. radio) or to
another media source (e.g. USB). The copy-
ing procedure continues in the back-
ground. It is however not possible to select
another CD in the CD changer.
Playing audio CDs
XIn Media mode, slide 6the controller.
The media menu bar appears.
XTo select Search: turn and press the con-
troller.
The category list appears.
XTo select Stored Audio CDsin the cate-
gory list: turn and press the controller.
A selection list for the copied audio CDs is
displayed.
XTo select the desired audio CD: turn and
press the controller.
The track list is displayed.
XTo select a track: turn the controller and
press to confirm.
The tracks on the stored audio CDs can also
be found and played using other media search functions (
Ypage 189).
Deleting stored audio CDs
If music is being played from the saved audio
CDs, the function for deleting audio CDs is
available.
188Audio/video mode
Media
Page 191 of 246

XIn media mode, slide6the controller.
The media menu bar appears.
XTo select Options: turn and press the con-
troller.
XTo select Delete Stored Audio CDs:
press the controller.
A selection list for the stored audio CDs is
displayed.
XTo select the desired audio CD: turn and
press the controller.
The audio CD is deleted.
Media search
General notes
COMAND plays back files from the following
data media:
RDisc (CD/DVD)
RMemory card
RUSB storage device
RApple®devices (folder, year and photos are
not available)
The categories are shown according to the
data available, whereby a database is created
for iPod
®and for all the other media sources
(CD, USB, SD card) respectively. During the
search the relevant database is accessed
depending on the active media source.
Starting the media search
XIn Media mode, slide 6the controller.
The media menu bar appears.
XTo select Search: turn and press the con-
troller.
The category list appears.
Category list
XIn Media mode, slide 6the controller.
The media menu bar is shown.
XTo select Search: turn and press the con-
troller.
The category list is shown.
Depending on the connected media sources
and files, the following categories are listed:
RCurrent Tracklist
RFolder
RSelect By Cover
RKeyword Search
RPlaylists
RArtists
RAlbums
RTracks
RGenres
RYear
RComposers
RStored Audio CDs
RVideos
RPhotos
iThe categories are available as soon as
the entire media content has been read and
analyzed.
If the same device is reconnected with
unchanged media content, these catego-
ries are available more quickly.
When connecting Apple
®devices, the cat-
egories “Folder”, “Year” and “Photos” are
not available.
Media search189
Media
Z
Page 192 of 246

Searching by current track list
XTo selectCurrent Tracklistin the cat-
egory list: turn and press the controller.
The selection list appears.
XSelect the required track.
Searching by folder
Playable files can be searched for in the active
data medium's directories.
XTo select Folderin the category list: turn
and press the controller.
The folder list appears.
XSelect the required folder.
Either the desired track list appears or con-
tinue searching in the folder directory until
the desired track list has been found.
XSelect the required track.
Selecting by cover
XTo select SelectByCoverin the category
list: turn and press the controller.
A menu with cover views appears.
XSelect the required cover.
The track list appears.
XSelect the required track.
iThere is a database for iPod®and for each
of the other media sources (CD, USB, SD
card). During the search the relevant data-
base is accessed depending on the active
media source.
Searching by genre
XTo select Genresin the category list: turn
and press the controller.
COMAND searches all media sources. A
selection list with Genres
and media sour-
ces appears.
XSelect the desired Genres.
A selection list with music tracks from the
selected genre appears.
XSelect a music track.
The track is played. The basic menu for the
active media source is shown.
XTo exit the selection list: press the %
button.
iThe list is closed automatically once a
selection has been made.
190Media search
Media