2016 MERCEDES-BENZ AMG GT ROADSTER stop start
[x] Cancel search: stop startPage 260 of 289

the middle, e.g. with a white cloth
(30 x 30 cm). This makes other road users
aware that a vehicle is being towed.
R only secure the tow rope to the towing eye.
R observe the brake lamps of the towing vehi-
cle while driving. Always maintain a dis-
tance so that the tow rope does not sag.
R do not use steel cables or chains to tow
your vehicle. You could otherwise damage
the vehicle.
! Do not use the towing eyes for recovery pur-
poses as this could damage the vehicle. If in
doubt, recover the vehicle with a crane.
! When towing, pull away slowly and
smoothly. If the tractive power is too high, the
vehicles could be damaged.
! Shift the automatic transmission to
Nand
do not open the driver's or front passenger's
door during towing. The automatic transmis-
sion may otherwise shift to position P, which
could damage both vehicles.
! You may tow the vehicle for a maximum of
50km. A towing speed of 50 km/h must not
be exceeded.
For towing distances over 50 km, the entire
vehicle must be lifted up and transported.
! Observe the transmission fluid temperature
(AMG menu) in the on-board computer when
towing. The transmission fluid temperature
must not exceed 120 †. If this occurs, you
must stop towing immediately.
! Tow-starting the vehicle is not permitted.
The transmission may otherwise be damaged.
Also observe the following notes: R Observe the legal requirements in each indi-
vidual country when towing.
R If the engine does not start, try jump-starting
it (Y page 253). Tow-starting the vehicle is not
permitted.
R If it is not possible to jump-start the vehicle,
have it transported to the nearest qualified
specialist workshop, e.g. a Mercedes-Benz
Service Centre.
If the vehicle can no longer be driven because of an accident or breakdown, you have the follow-
ing options:
R transporting the vehicle As a rule, you should have the vehicle trans-
ported.
R towing the vehicle with a tow rope or tow bar
Only tow the vehicle in exceptional cases. The
engine must be running if you tow the vehicle with a tow rope or tow bar.
If the vehicle has suffered transmission damage, have it transported on a transporter or trailer.
Observe the display messages in the instrument
cluster.
The battery must be connected and charged.
Otherwise, you:
R will not be able to switch on the ignition with
the Start/Stop button
R cannot start the engine
R cannot release the electric parking brake
R cannot shift the automatic transmission to
position N
Deactivate the automatic locking feature before
towing the vehicle (Y page 70). You could oth-
erwise be locked out when pushing or towing
the vehicle.
Deactivate tow-away protection before the vehi-
cle is towed away (Y page 61). Fitting/removing the towing eye
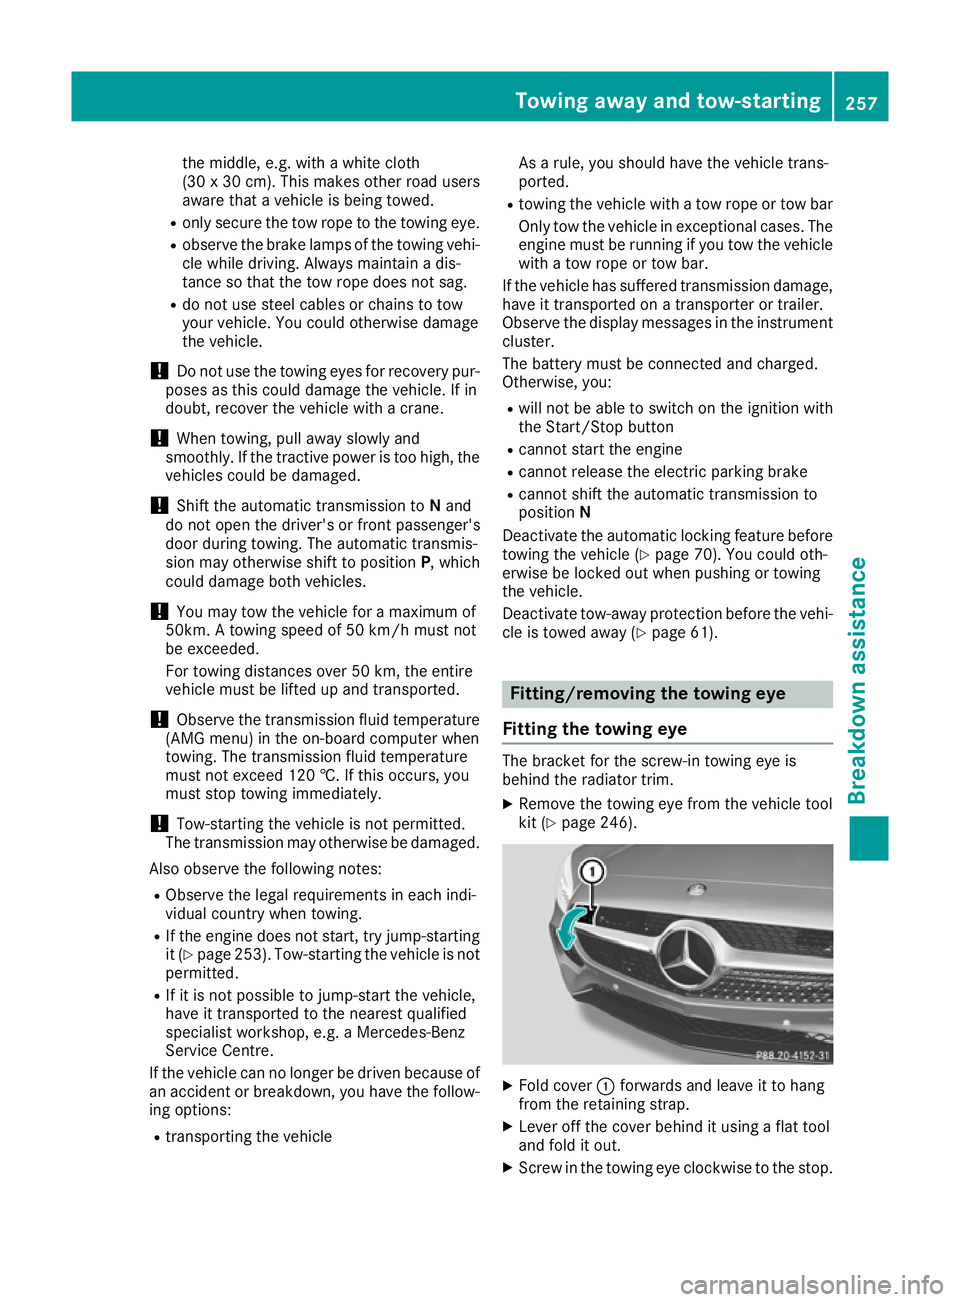
Fitting the towing eye The bracket for the screw-in towing eye is
behind the radiator trim.
X Remove the towing eye from the vehicle tool
kit (Y page 246). X
Fold cover :forwards and leave it to hang
from the retaining strap.
X Lever off the cover behind it using a flat tool
and fold it out.
X Screw in the towing eye clockwise to the stop. Towing away and tow-starting
257Breakdown assistance Z
Page 261 of 289

Removing the towing eye
X
Loosen the towing eye and unscrew it.
X Fold down the inner cover until it engages.
X Attach cover at the bottom and press it in at
the top until it engages.
X Put the towing eye back into the vehicle tool
kit. Towing the vehicle with all wheels on
the ground
It is important that you observe the safety
instructions when towing away your vehicle
(Y page 256).
The automatic transmission automatically shifts to position Pwhen you open the driver's or front-
passenger door or when you remove the key
from the ignition lock. In order to ensure that the automatic transmission stays in position N
when towing away the vehicle, you must
observe the following points:
X Insert the key into the ignition lock. You must
use the key instead of the Start/Stop button
(Y page 103).
X Start the engine and leave it running during
the entire towing procedure.
X Depress the brake pedal and keep it
depressed.
X Move the transmission to position Nwith the
E-SELECT lever.
X Check the transmission position using the
indicator in the multifunction display
(Y page 111).
X Release the brake pedal.
X Release the electric parking brake.
X Switch on the hazard warning lamps
(Y page 90).
In order to signal a change of direction when
towing the vehicle with the hazard warning
lamps switched on, use the combination switch as usual. In this case, only the turn signals for
the desired direction flash. When you reset the
combination switch, the hazard warning lamps
start flashing again. Transporting the vehicle
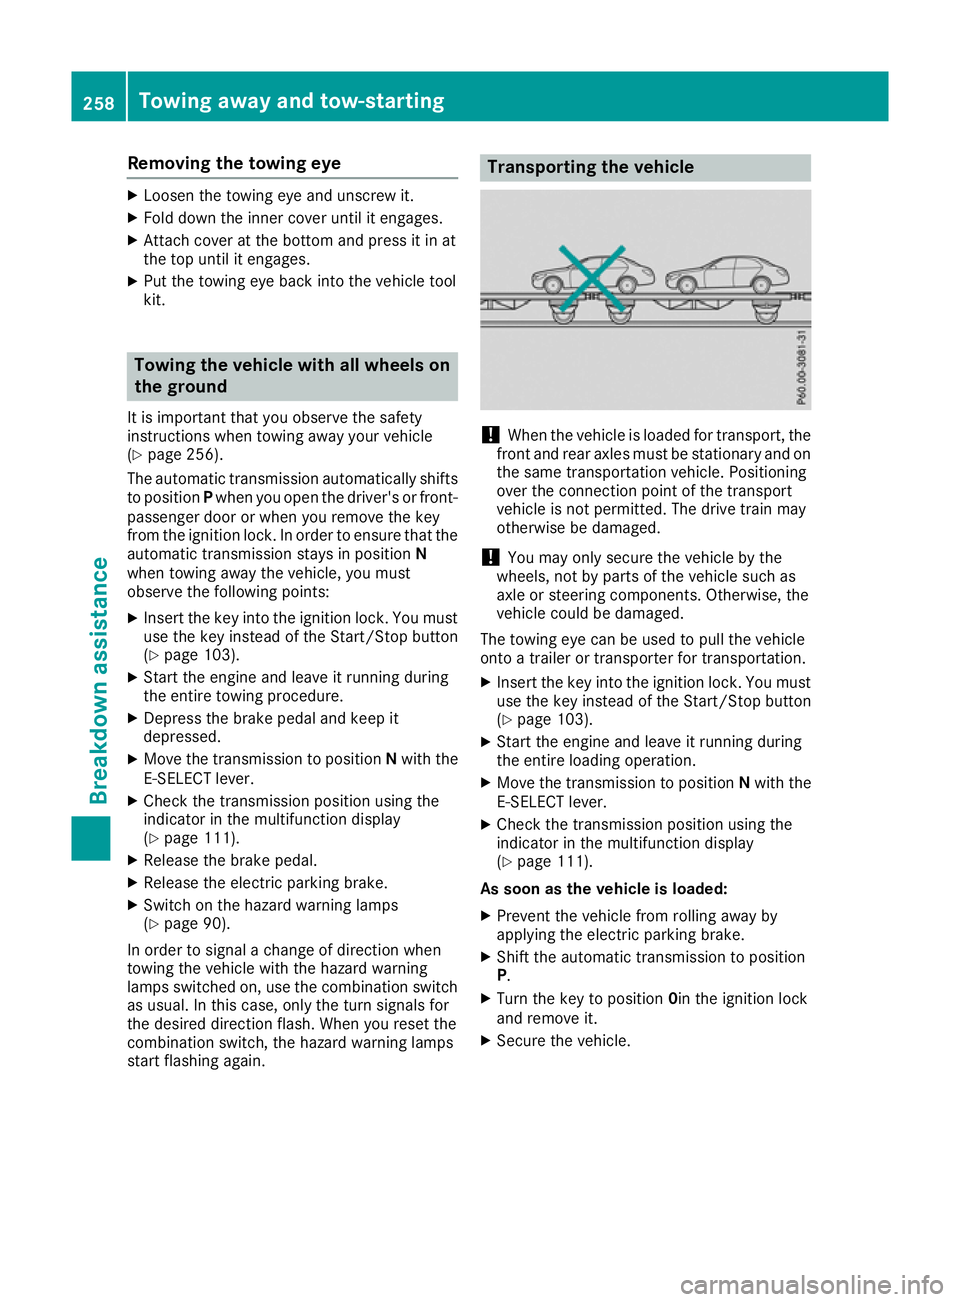
!
When the vehicle is loaded for transport, the
front and rear axles must be stationary and on the same transportation vehicle. Positioning
over the connection point of the transport
vehicle is not permitted. The drive train may
otherwise be damaged.
! You may only secure the vehicle by the
wheels, not by parts of the vehicle such as
axle or steering components. Otherwise, the
vehicle could be damaged.
The towing eye can be used to pull the vehicle
onto a trailer or transporter for transportation.
X Insert the key into the ignition lock. You must
use the key instead of the Start/Stop button
(Y page 103).
X Start the engine and leave it running during
the entire loading operation.
X Move the transmission to position Nwith the
E-SELECT lever.
X Check the transmission position using the
indicator in the multifunction display
(Y page 111).
As soon as the vehicle is loaded:
X Prevent the vehicle from rolling away by
applying the electric parking brake.
X Shift the automatic transmission to position
P.
X Turn the key to position 0in the ignition lock
and remove it.
X Secure the vehicle. 258
Towing away and tow-startingBreakdown assistance
Page 277 of 289

X
Unhook retaining spring hooks =of tension-
ing strap ;from the retainers.
X Remove emergency spare wheel bag :with
the collapsible emergency spare wheel.
X Open emergency spare wheel bag :and
remove the collapsible emergency spare
wheel.
Observe the instructions and safety notes in the "Fitting a wheel" section (Y page 268).Inflating the collapsible emergency
spare wheel
! Inflate the collapsible emergency spare
wheel using the tyre inflation compressor
before lowering the vehicle. The wheel rim
could otherwise be damaged.
! Do not operate the tyre inflation compres-
sor for longer than ten minutes at a time with-
out a break. It may otherwise overheat.
The tyre inflation compressor can be oper-
ated again once it has cooled down.
Comply with the manufacturer's safety instruc-
tions on the tyre inflation compressor label and
on the tyre sealant bottle.
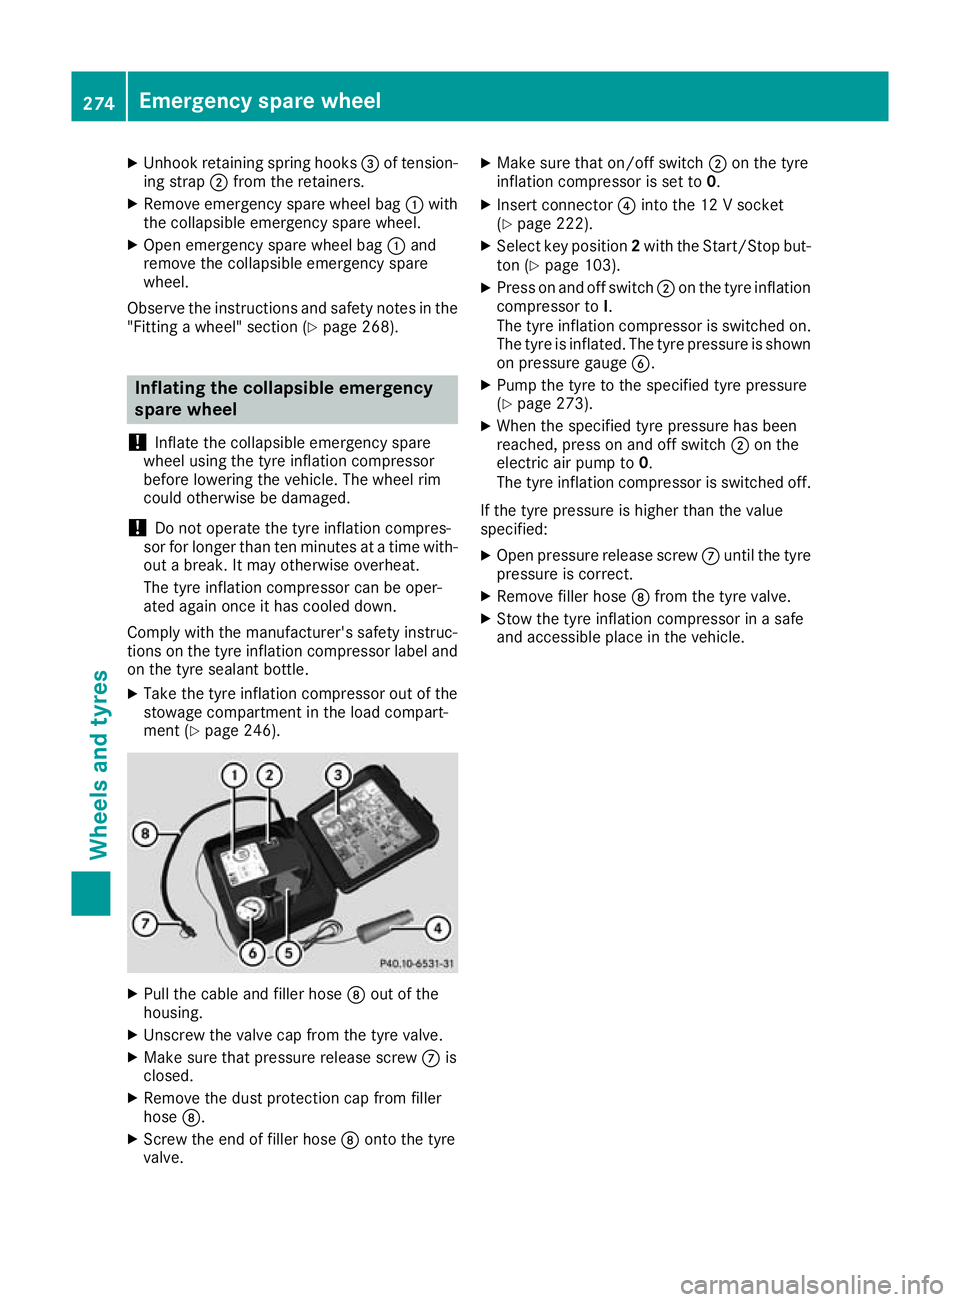
X Take the tyre inflation compressor out of the
stowage compartment in the load compart-
ment (Y page 246). X
Pull the cable and filler hose Dout of the
housing.
X Unscrew the valve cap from the tyre valve.
X Make sure that pressure release screw Cis
closed.
X Remove the dust protection cap from filler
hose D.
X Screw the end of filler hose Donto the tyre
valve. X
Make sure that on/off switch ;on the tyre
inflation compressor is set to 0.
X Insert connector ?into the 12 V socket
(Y page 222).
X Select key position 2with the Start/Stop but-
ton (Y page 103).
X Press on and off switch ;on the tyre inflation
compressor to I.
The tyre inflation compressor is switched on.
The tyre is inflated. The tyre pressure is shown
on pressure gauge B.
X Pump the tyre to the specified tyre pressure
(Y page 273).
X When the specified tyre pressure has been
reached, press on and off switch ;on the
electric air pump to 0.
The tyre inflation compressor is switched off.
If the tyre pressure is higher than the value
specified:
X Open pressure release screw Cuntil the tyre
pressure is correct.
X Remove filler hose Dfrom the tyre valve.
X Stow the tyre inflation compressor in a safe
and accessible place in the vehicle. 274
Emergency spare wheelWheels and tyres