Page 7 of 524

Introduction
21
This vehicle is equipped with an
event data recorder (EDR). The
main purpose of an EDR is to
record, in certain crash or near
crash-like situations, such as an
air bag deployment or hitting a
road obstacle, data that will assist
in understanding how a vehicle's
systems performed. The EDR is
designed to record data related to
vehicle dynamics and safety sys-
tems for a short period of time,
typically 30 seconds or less. The
EDR in this vehicle is designed to
record such data as:
• How various systems in yourvehicle were operating;
Whether or not the driver and passenger safety belts were
buckled/ fastened;
How far (if at all) the driver was depressing the accelerator
and/or brake pedal; and,
How fast the vehicle was travel- ing. These data can help provide a bet-
ter understanding of the circum-
stances in which crashes and
injuries occur. NOTE: EDR data
are recorded by your vehicle only
if a non-trivial crash situation
occurs; no data are recorded by
the EDR under normal driving
conditions and no personal data
(e.g., name, gender, age, and
crash location) are recorded.
However, other parties, such as
law enforcement, could combine
the EDR data with the type of per-
sonally identifying data routinely
acquired during a crash investiga-
tion.
To read data recorded by an EDR,
special equipment is required, and
access to the vehicle or the EDR is
needed. In addition to the vehicle
manufacturer, other parties, such
as law enforcement, that have the
special equipment, can read the
information if they have access to
the vehicle or the EDR.
VEHICLE DATA COLLECTION AND EVENT DATA RECORDERS
Page 12 of 524

25
Your vehicle at a glance
INSTRUMENT PANEL OVERVIEW
1. Audio remote control buttons..............4-127
2. Driver’s front air bag .............................3-46
3. Horn ......................................................4-32
4. Instrument cluster .................................4-40
5.Wiper and washer control lever .............4-87
6. Cruise control button ............................5-32
7. POWER button .......................................5-5
8. AVN(Audio/Video/Navigation)
9. Hazard warning flasher...........................6-2
10. Climate control system .......................4-94
11. Front seat warmer /Seat air ventilation .................4-118, 4-120
12. Power outlet ......................................4-121
13. Shift Lever...........................................5-11
14. Center console storage box..............4-115
15. Glove box ..........................................4-115
16. Passenger’s front air bag ....................3-46
17. Electronic parking brake .....................5-18
18. Parking assist system button ..............4-76
19. Active ECO button ..............................5-10
OPSE014003N❈ The actual shape may differ from the illustration.
Page 13 of 524
Your vehicle at a glance
62
MOTOR ROOM COMPARTMENT
OPSE015005
1. Coolant reservoir ..................................7-20
2. Brake fluid reservoir ..............................7-23
3. Fuse box................................................7-47
4. Positive battery terminal ........................7-31
5. Negative battery terminal ......................7-31
6. Radiator cap ..........................................7-22
7. Windshield washer fluid reservoir ........7-24
❈The actual motor compartment in the vehicle may differ from the illustration.
Page 23 of 524

Safety features of your vehicle
10
3
WARNING- Headrest
removal/adjustment
Do not operate the vehicle with the headrests removed.
Headrests can provide critical
neck and head support in a
crash.
Do not adjust the headrest height while the vehicle is in
motion. Driver may lose con-
trol of the vehicle.
Make sure the vehicle is off, the
reduction gear is in P (Park) position,
and the parking brake is securely
applied whenever loading or unload-
ing cargo. Failure to take these steps
may allow the vehicle to move if the
shift lever is inadvertently moved to
another position.
Headrest
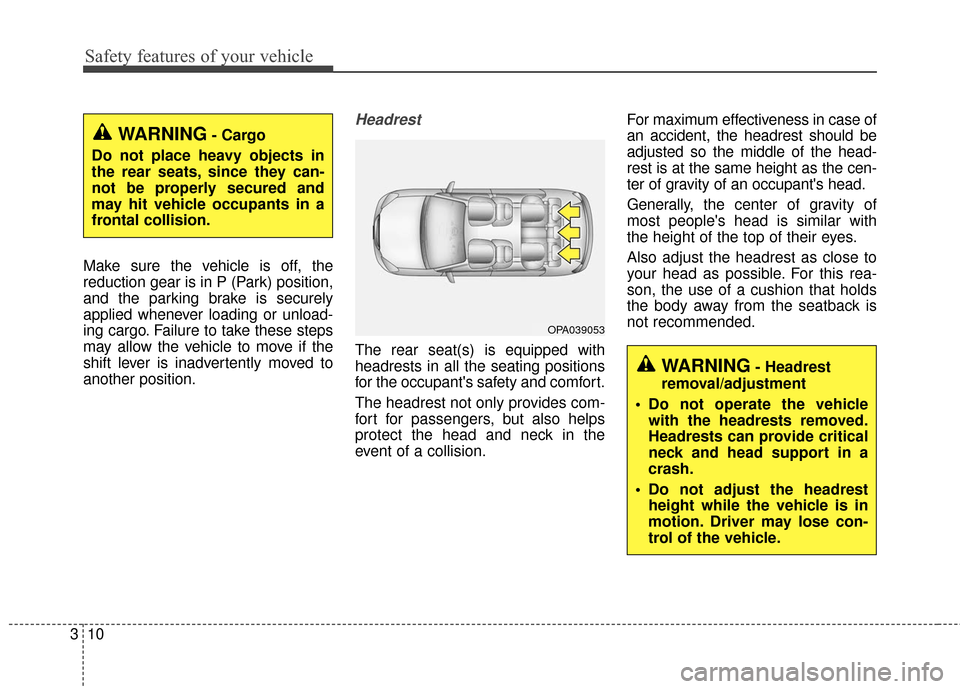
The rear seat(s) is equipped with
headrests in all the seating positions
for the occupant's safety and comfort.
The headrest not only provides com-
fort for passengers, but also helps
protect the head and neck in the
event of a collision. For maximum effectiveness in case of
an accident, the headrest should be
adjusted so the middle of the head-
rest is at the same height as the cen-
ter of gravity of an occupant's head.
Generally,
the center of gravity of
most people's head is similar with
the height of the top of their eyes.
Also adjust the headrest as close to
your head as possible. For this rea-
son, the use of a cushion that holds
the body away from the seatback is
not recommended.
OPA039053
WARNING- Cargo
Do not place heavy objects in
the rear seats, since they can-
not be properly secured and
may hit vehicle occupants in a
frontal collision.
Page 68 of 524
355
Safety features of your vehicle
In an angled collision, the force ofimpact may direct the occupants in
a direction where the air bags
would not be able to provide any
additional benefit, and thus the
sensors may not deploy any air
bags. Just before impact, drivers often
brake heavily. Such heavy braking
lowers the front portion of the vehi-
cle causing it to “ride” under a vehi-
cle with a higher ground clearance.
Air bags may not inflate in this
"under-ride" situation because
deceleration forces that are detect-
ed by sensors may be significantly
reduced by such “under-ride” colli-
sions. Front air bags may not inflate in
rollover accidents because front
airbag deployment would not pro-
vide additional occupant protection.
1VQA20901VQA20911VQA2089
Page 81 of 524

411
Features of your vehicle
DOOR LOCKS
.Operating door locks from
outside the vehicle
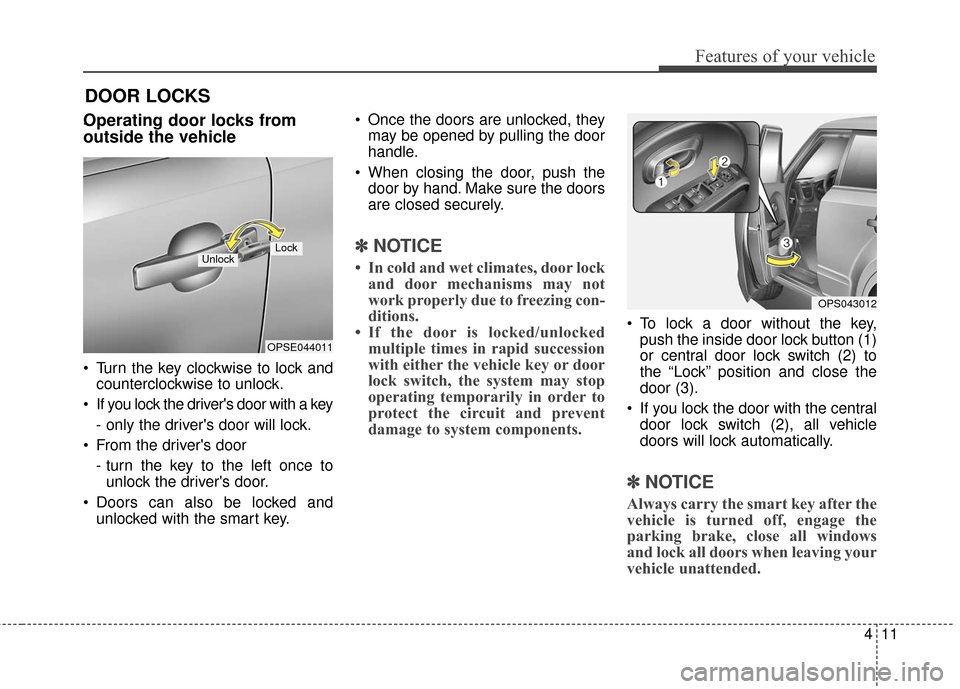
Turn the key clockwise to lock andcounterclockwise to unlock.
If you lock the driver's door with a key
- only the driver's door will lock.
From the driver's door
- turn the key to the left once tounlock the driver's door.
Doors can also be locked and unlocked with the smart key. Once the doors are unlocked, they
may be opened by pulling the door
handle.
When closing the door, push the door by hand. Make sure the doors
are closed securely.
✽ ✽ NOTICE
• In cold and wet climates, door lock
and door mechanisms may not
work properly due to freezing con-
ditions.
• If the door is locked/unlocked multiple times in rapid succession
with either the vehicle key or door
lock switch, the system may stop
operating temporarily in order to
protect the circuit and prevent
damage to system components.
To lock a door without the key,
push the inside door lock button (1)
or central door lock switch (2) to
the “Lock” position and close the
door (3).
If you lock the door with the central door lock switch (2), all vehicle
doors will lock automatically.
✽ ✽ NOTICE
Always carry the smart key after the
vehicle is turned off, engage the
parking brake, close all windows
and lock all doors when leaving your
vehicle unattended.
OPSE044011
LockUnlock
OPS043012
Page 92 of 524
Features of your vehicle
22
4
Opening the hood
1. Pull the release lever to unlatch
the hood. The hood should pop
open slightly.
Open the hood after turning off the
vehicle on a flat surface, shifting the
shift lever to the P (Park) position
and setting the parking brake. 2. Go to the front of the vehicle, raise
the hood slightly, pull the second-
ary latch (1) inside of the hood
center and lift the hood (2).
3. Raise the hood. It will completely rise by itself after it has been
raised about halfway.
Closing the hood
1. Before closing the hood, check thefollowing:
partment must be correctly
installed.
2. Lower the hood halfway and push down to securely lock in place.
HOOD
OPS043024
OPSE044025WARNING
Before closing the hood, ensure
that all obstructions are removed
from the hood opening. Closing
the hood with an obstruction
present in the hood opening may
result in severe personal injury.
Page 112 of 524
Features of your vehicle
42
4
Gauges
Speedometer
The speedometer indicates the
speed of the vehicle and is calibrated
in miles per hour (mph) or kilometers
per hour (km/h).
Motor operation gauge
It shows the energy consumption rate
of the vehicle and the charge/dis-
charge status of the regenerative
brakes.
: It shows the energy con-
sumption rate of the
vehicle when driving
uphill or accelerating.
The more electric energy
is used, the higher the
gauge level.
: It shows the energy
consumption rate
during normal driv-
ing condition.
: It shows the charging
status of the battery
when it is being charged
by the regenerative
brakes (decelerating or
driving on a downhill
road). The more electric
energy is charged, the
lower the gauge level.OPSE044101
OPSE044102