Page 164 of 406

487
Features of your vehicle
To signal a lane change, move the turn
signal lever slightly and hold it in position
(B). The lever will return to the OFF posi-
tion when released.
If an indicator stays on and does not
flash or if it flashes abnormally, one of the
turn signal bulbs may be burned out and
will require replacement.One-touch triple turn signal
(One Touch Turn Signal) (if equipped)
To activate the one-touch lane change
function, move the turn signal lever
slightly and then release it. The lane
change signals will blink 3 (5 or 7, if
equipped) times.
You can activate/deactivate the One
Touch Turn Signal function or choose the
number of blinking (3, 5, or 7) from the
User Settings Mode on the LCD display
(if equipped).
✽NOTICE
If an indicator flash is abnormally quick
or slow, a bulb may be burned out or
have a poor electrical connection in the
circuit.
Front fog light (if equipped)
Fog lights are used to provide improved
visibility when visibility is poor due to fog,
rain or snow etc. The fog lights will turn
on when fog light switch (1) is turned to
ON after the headlights are turned on.
To turn off the fog lights, turn the switch
to OFF.
CAUTION
When in operation, the fog lights
consume large amounts of vehicle
electrical power. Only use the fog
lights when visibility is poor or
unnecessary battery and generator
drain could occur.
OAM049046
Page 182 of 406

4105
Features of your vehicle
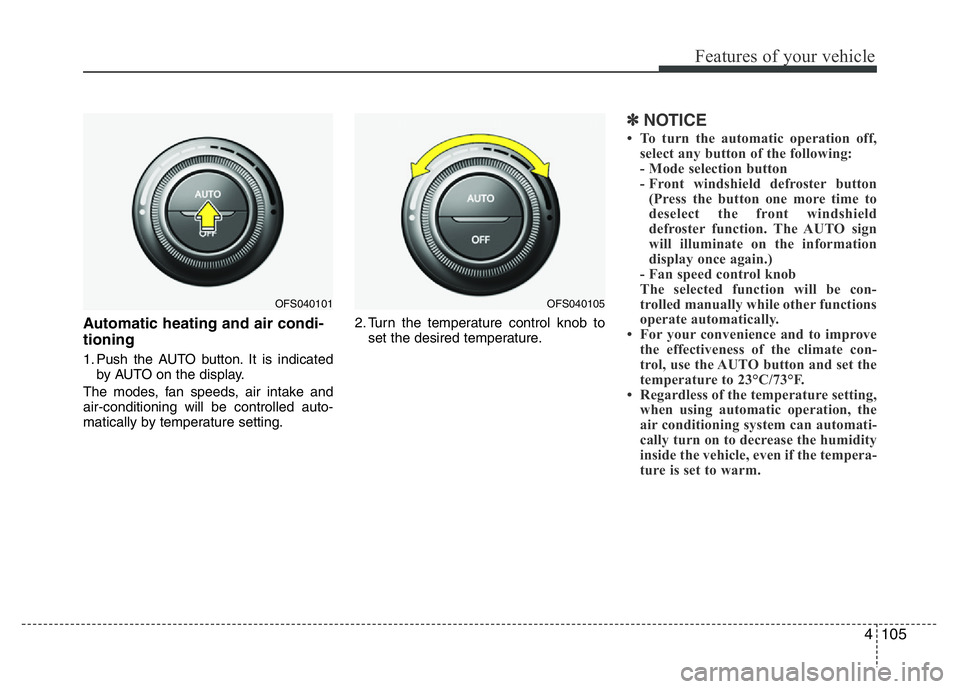
Automatic heating and air condi-
tioning
1. Push the AUTO button. It is indicated
by AUTO on the display.
The modes, fan speeds, air intake and
air-conditioning will be controlled auto-
matically by temperature setting.2. Turn the temperature control knob to
set the desired temperature.
✽NOTICE
• To turn the automatic operation off,
select any button of the following:
- Mode selection button
- Front windshield defroster button
(Press the button one more time to
deselect the front windshield
defroster function. The AUTO sign
will illuminate on the information
display once again.)
- Fan speed control knob
The selected function will be con-
trolled manually while other functions
operate automatically.
• For your convenience and to improve
the effectiveness of the climate con-
trol, use the AUTO button and set the
temperature to 23°C/73°F.
• Regardless of the temperature setting,
when using automatic operation, the
air conditioning system can automati-
cally turn on to decrease the humidity
inside the vehicle, even if the tempera-
ture is set to warm.
OFS040101OFS040105
Page 187 of 406
Features of your vehicle
110 4
Fan speed control
The fan speed can be set to the desired
speed by pressing the fan speed control
switch. To change the fan speed, press
( ) the switch for higher speed, or
push ( ) the switch for lower speed.
To turn the fan speed control off, press
the front blower OFF button.
Air conditioning
Press the A/C button to turn the air con-
ditioning system on (indicator light will
illuminate).
Press the button again to turn the air
conditioning system off.
OFF mode
Push the OFF button to turn off the air cli-
mate control system. However you can
still operate the mode and air intake but-
tons as long as the ignition switch is in
the ON position.
✽NOTICE
If you push the “CLIMATE” button, the
climate information will be displayed on
screen.
OFS040109OFS040108OFS040107
Page 191 of 406

Features of your vehicle
114 4
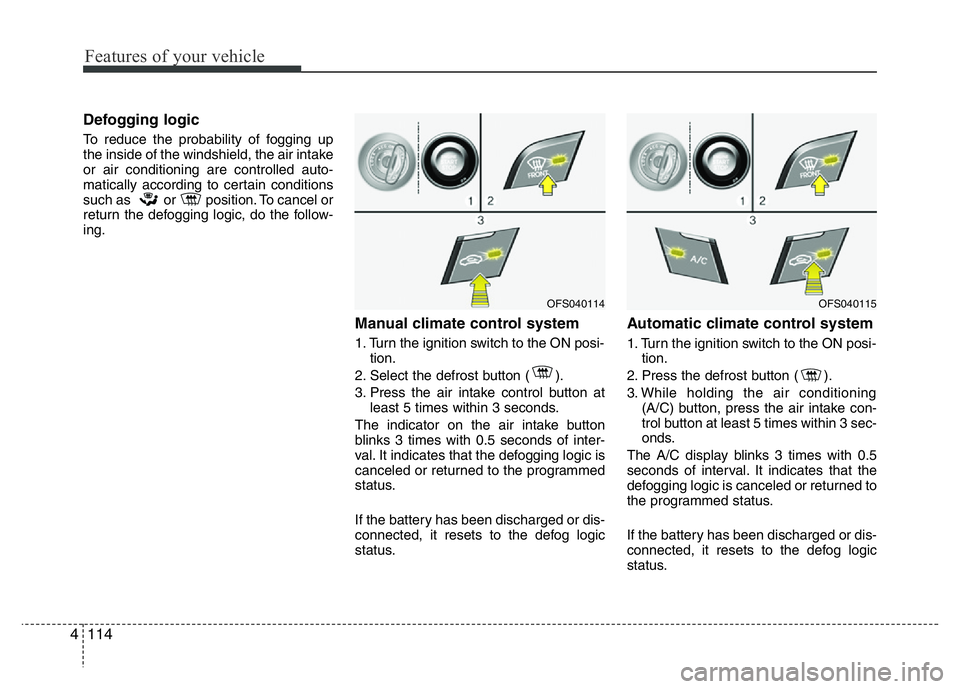
Defogging logic
To reduce the probability of fogging up
the inside of the windshield, the air intake
or air conditioning are controlled auto-
matically according to certain conditions
such as or position. To cancel or
return the defogging logic, do the follow-
ing.
Manual climate control system
1. Turn the ignition switch to the ON posi-
tion.
2. Select the defrost button ( ).
3. Press the air intake control button at
least 5 times within 3 seconds.
The indicator on the air intake button
blinks 3 times with 0.5 seconds of inter-
val. It indicates that the defogging logic is
canceled or returned to the programmed
status.
If the battery has been discharged or dis-
connected, it resets to the defog logic
status.
Automatic climate control system
1. Turn the ignition switch to the ON posi-
tion.
2. Press the defrost button ( ).
3. While holding the air conditioning
(A/C) button, press the air intake con-
trol button at least 5 times within 3 sec-
onds.
The A/C display blinks 3 times with 0.5
seconds of interval. It indicates that the
defogging logic is canceled or returned to
the programmed status.
If the battery has been discharged or dis-
connected, it resets to the defog logic
status.
OFS040114OFS040115
Page 233 of 406
525
Driving your vehicle
(Continued)
• When the clutch is overheated,
the safe protection mode oper-
ates. According to the safe pro-
tection mode, the transmission
indicator blinks with a chime
sound. In this time, the LCD warn-
ing about safe protection mode
also displays.
If this occurs, the transmission
may not shift smoothly due to
clutch overheating. To prevent
damage to the transmission
clutches, shift into Park and wait
for several seconds before driv-
ing again.
(Continued)(Continued)
❈Do not hold the vehicle on a hill
in Drive or Reverse by applying
the accelerator pedal because
the clutch may be overheated.
Instead, use the foot brake or
parking brake.
When the transmission shifts
automaticaly or manually, the
gear shifts may be noticeable;
however, this is characteristic of
the dual-clutch transmission and
does not indicate a transmission
concern.
Page 241 of 406

533
Driving your vehicle
CAUTION
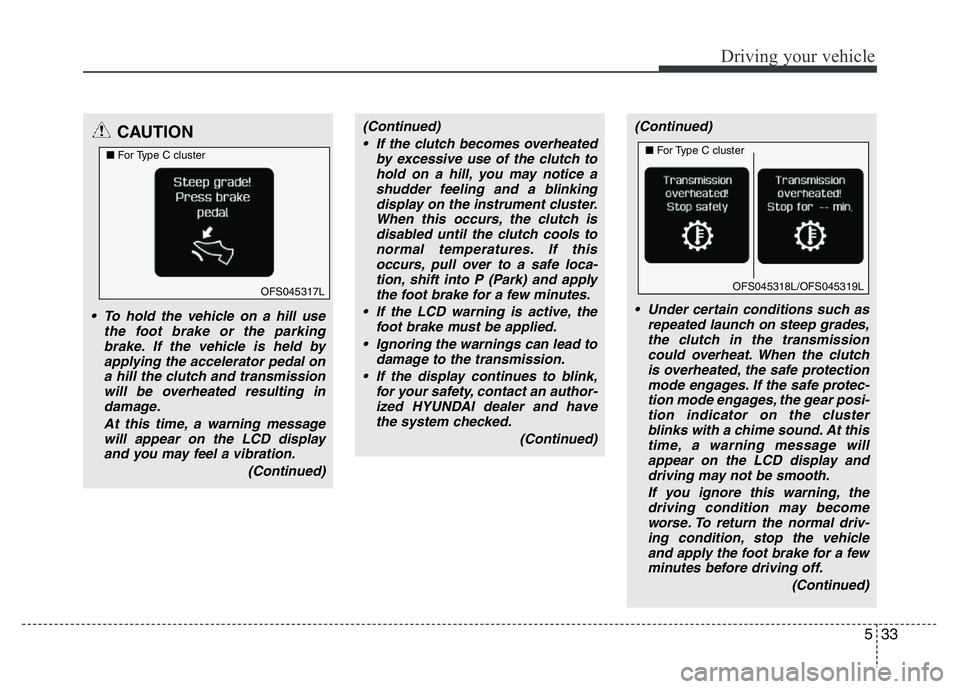
• To hold the vehicle on a hill use
the foot brake or the parking
brake. If the vehicle is held by
applying the accelerator pedal on
a hill the clutch and transmission
will be overheated resulting in
damage.
At this time, a warning message
will appear on the LCD display
and you may feel a vibration.
(Continued)
(Continued)
• If the clutch becomes overheated
by excessive use of the clutch to
hold on a hill, you may notice a
shudder feeling and a blinking
display on the instrument cluster.
When this occurs, the clutch is
disabled until the clutch cools to
normal temperatures. If this
occurs, pull over to a safe loca-
tion, shift into P (Park) and apply
the foot brake for a few minutes.
• If the LCD warning is active, the
foot brake must be applied.
• Ignoring the warnings can lead to
damage to the transmission.
• If the display continues to blink,
for your safety, contact an author-
ized HYUNDAI dealer and have
the system checked.
(Continued)(Continued)
• Under certain conditions such as
repeated launch on steep grades,
the clutch in the transmission
could overheat. When the clutch
is overheated, the safe protection
mode engages. If the safe protec-
tion mode engages, the gear posi-
tion indicator on the cluster
blinks with a chime sound. At this
time, a warning message will
appear on the LCD display and
driving may not be smooth.
If you ignore this warning, the
driving condition may become
worse. To return the normal driv-
ing condition, stop the vehicle
and apply the foot brake for a few
minutes before driving off.
(Continued)
OFS045317L
■For Type C cluster
OFS045318L/OFS045319L
■For Type C cluster
Page 242 of 406

Driving your vehicle
34 5
Transmission ranges
The indicator in the instrument cluster
displays the shift lever position when the
ignition switch is in the ON position.
P (Park)
Always come to a complete stop before
shifting into P (Park).
To shift from P (Park), you must depress
firmly on the brake pedal and make sure
your foot is off the accelerator pedal.
The shift lever must be in P (Park) before
turning the engine off.R (Reverse)
Use this position to drive the vehicle
backward.(Continued)
• Gear shifts may be more notice-
able than a conventional automat-
ic transmission. This is a normal
characteristic of this type of
EcoShift dual clutch transmis-
sion.
• During the first 1,000 miles, you
may feel that the vehicle may not
be smooth when accelerating at
low speed. During this break-in
period, the shift quality and per-
formance of your new vehicle is
continuously optimized.
• Always come to a complete stop
before shifting into D (Drive) or R
(Reverse).
• Do not put the shift lever in N
(Neutral) while driving.
WARNING
• Shifting into P (Park) while the
vehicle is in motion may cause
you to lose control of the vehicle.
• After the vehicle has stopped,
always make sure the shift lever
is in P (Park), apply the parking
brake, and turn the engine off.
• Do not use the P (Park) position
in place of the parking brake.
CAUTION
Always come to a complete stop
before shifting into or out of R
(Reverse); you may damage the
transmission if you shift into R
(Reverse) while the vehicle is in
motion.
Page 301 of 406
623
What to do in an emergency
0. Speed restriction label
1. Sealant bottle and label with
speed restriction
2. Filling hose from sealant bottle to
wheel
3. Connectors and cable for the
power outlet direct connection4. Holder for the sealant bottle
5. Compressor
6. On/off switch
7. Pressure gauge for displaying the
tire inflation pressure
8. Button for reducing tire inflation
pressure9. Hose to connect compressor and
sealant bottle or compressor and
wheel
Connectors, cable and connection
hose are stored in the compressor
housing.
Strictly follow the specified
sequence, otherwise the sealant
may escape under high pressure.
WARNING- Expired
sealant
Do not use the Tire sealant after
the sealant has expired (i.e.
found date on the sealant con-
tainer). This can increase the
risk of tire failure.
WARNING - Sealant
• Keep out of reach of children.
• Avoid contact with eyes.
• Do not swallow.
Components of the Tire Mobility Kit
OEL069020