Page 18 of 699
Your vehicle at a glance
6 2
INSTRUMENT PANEL OVERVIEW
1. Lighting control lever ......................4-134
2. Audio remote control buttons ..........4-203
3. Bluetooth hands-free buttons ..........4-253
4. Cruise control button ........................5-61
5. LCD display control buttons ..............4-69
6. Horn ..................................................4-55
7. Driver’s front air bag ..........................3-58
8. Wiper and washer control lever ......4-143
9. Ignition switch or Engine start/stop
button ........................................5-6, 5-10
10. Audio ............................................4-202
11. Hazard warning flasher ................4-132
12. Climate control system ......4-156, 4-167
13. Passenger’s front air bag ................3-58
14. Glove box ......................................4-186
ODMEIN2004R❈The actual shape may differ from the illustration.
Page 19 of 699
27
Your vehicle at a glance
ENGINE COMPARTMENT
1. Engine coolant reservoir ...................7-17
2. Engine oil filler cap ...........................7-16
3. Brake/clutch fluid reservoir ...............7-20
4. Air cleaner.........................................7-25
5. Fuse box ...........................................7-47
6. Negative battery terminal..................7-32
7. Positive battery terminal ...................7-32
8. Radiator cap .....................................7-19
9. Engine oil dipstick .............................7-15
10. Windscreen washer fluid reservoir..7-22
ODMEMC2001R
■Petrol 2.4L - GDI
❈The actual shape may differ from the illustration.
Page 20 of 699
Your vehicle at a glance
8 2
ODMNMC2023R
1. Engine coolant reservoir ...................7-17
2. Engine oil filler cap ...........................7-16
3. Brake/clutch fluid reservoir ...............7-20
4. Air cleaner.........................................7-25
5. Fuse box ...........................................7-47
6. Negative battery terminal..................7-32
7. Positive battery terminal ...................7-32
8. Radiator cap .....................................7-19
9. Engine oil dipstick .............................7-15
10. Windscreen washer fluid reservoir..7-22
11. Fuel filter .........................................7-24
■Diesel 2.0L/2.2L
❈The actual shape may differ from the illustration.
Page 26 of 699
Safety features of your vehicle
6 3
Front seat adjustment - power
(if equipped)
The front seat can be adjusted by
using the control switches located on
the outside of the seat cushion.
Before driving, adjust the seat to the
proper position so as to easily con-
trol the steering wheel, pedals and
switches on the instrument panel.
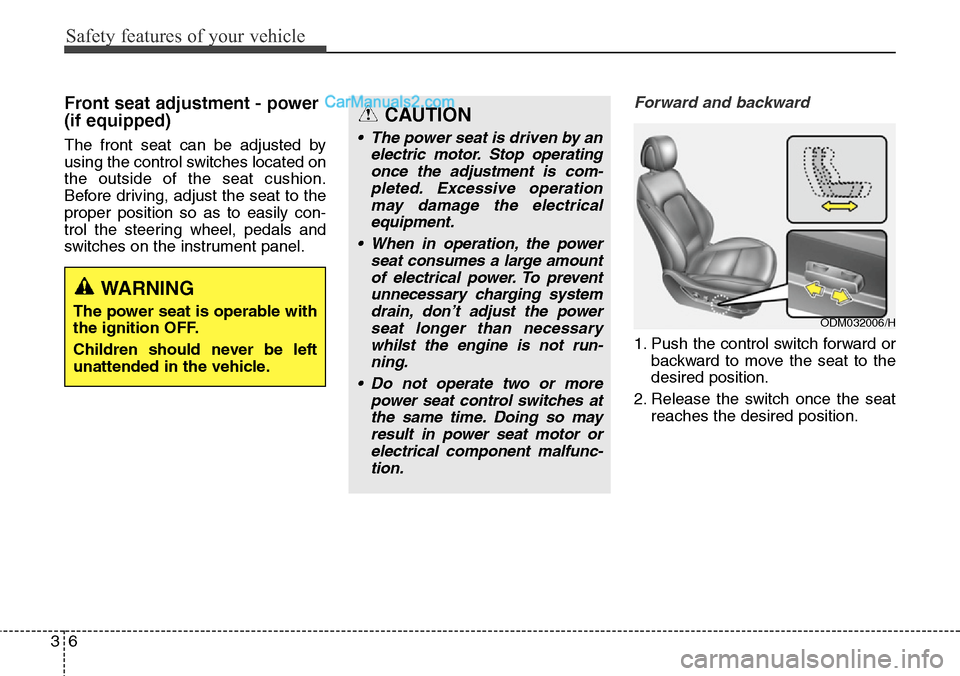
Forward and backward
1. Push the control switch forward or
backward to move the seat to the
desired position.
2. Release the switch once the seat
reaches the desired position.
WARNING
The power seat is operable with
the ignition OFF.
Children should never be left
unattended in the vehicle.
CAUTION
• The power seat is driven by an
electric motor. Stop operating
once the adjustment is com-
pleted. Excessive operation
may damage the electrical
equipment.
• When in operation, the power
seat consumes a large amount
of electrical power. To prevent
unnecessary charging system
drain, don’t adjust the power
seat longer than necessary
whilst the engine is not run-
ning.
• Do not operate two or more
power seat control switches at
the same time. Doing so may
result in power seat motor or
electrical component malfunc-
tion.
ODM032006/H
Page 28 of 699
Safety features of your vehicle
8 3
Driver position memory system
(if equipped, for power seat)
A driver position memory system is
provided to store and recall the driv-
er seat and outside rearview mirror
position with a simple button opera-
tion. By saving the desired position
into the system memory, different
drivers can reposition the driver seat
based upon their driving preference.
If the battery is disconnected, the posi-
tion memory will be erased and the
driving position should be restored in
the system.
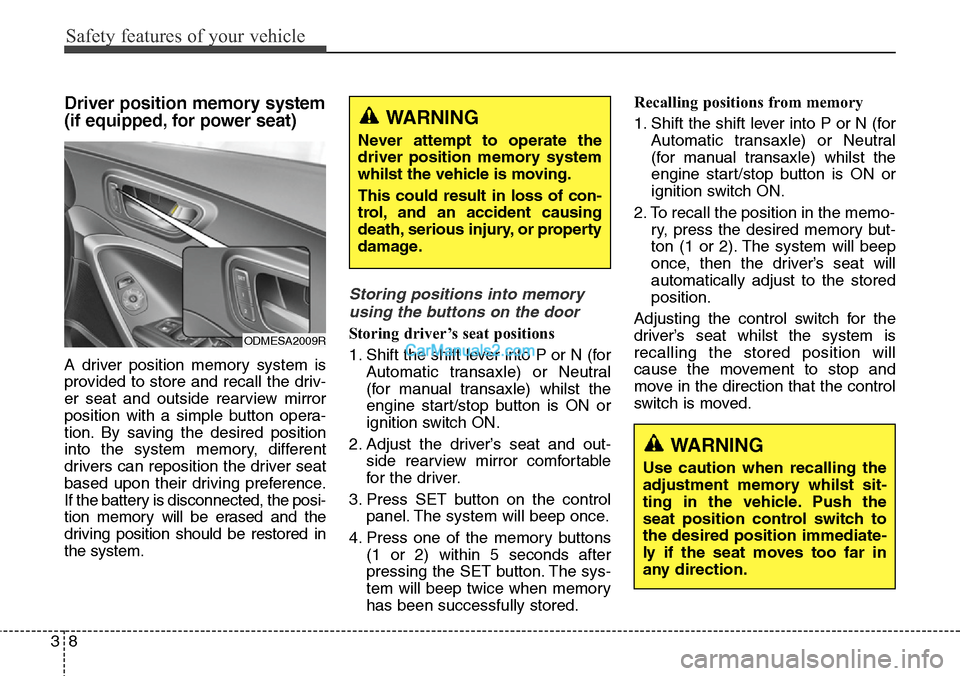
Storing positions into memory
using the buttons on the door
Storing driver’s seat positions
1. Shift the shift lever into P or N (for
Automatic transaxle) or Neutral
(for manual transaxle) whilst the
engine start/stop button is ON or
ignition switch ON.
2. Adjust the driver’s seat and out-
side rearview mirror comfortable
for the driver.
3. Press SET button on the control
panel. The system will beep once.
4. Press one of the memory buttons
(1 or 2) within 5 seconds after
pressing the SET button. The sys-
tem will beep twice when memory
has been successfully stored.Recalling positions from memory
1. Shift the shift lever into P or N (for
Automatic transaxle) or Neutral
(for manual transaxle) whilst the
engine start/stop button is ON or
ignition switch ON.
2. To recall the position in the memo-
ry, press the desired memory but-
ton (1 or 2). The system will beep
once, then the driver’s seat will
automatically adjust to the stored
position.
Adjusting the control switch for the
driver’s seat whilst the system is
recalling the stored position will
cause the movement to stop and
move in the direction that the control
switch is moved.
WARNING
Never attempt to operate the
driver position memory system
whilst the vehicle is moving.
This could result in loss of con-
trol, and an accident causing
death, serious injury, or property
damage.
ODMESA2009R
WARNING
Use caution when recalling the
adjustment memory whilst sit-
ting in the vehicle. Push the
seat position control switch to
the desired position immediate-
ly if the seat moves too far in
any direction.
Page 29 of 699
39
Safety features of your vehicle
Easy access function
(if equipped)
The system will move the driver's
seat automatically as follows:
• Without smart key system
- It will move the driver’s seat rear-
ward when the ignition key is
removed and front driver’s door is
opened.
- It will move the driver’s seat for-
ward when the ignition key is
inserted.
• With smart key system
- It will move the driver’s seat rear-
ward when the engine start/stop
button is changed to the OFF
position and front driver’s door is
opened.
- It will move the driver’s seat for-
ward when the engine start/stop
button is changed to the ACC or
START position.
You can activate or deactivate this
feature. Refer to "User settings" in
section 4.
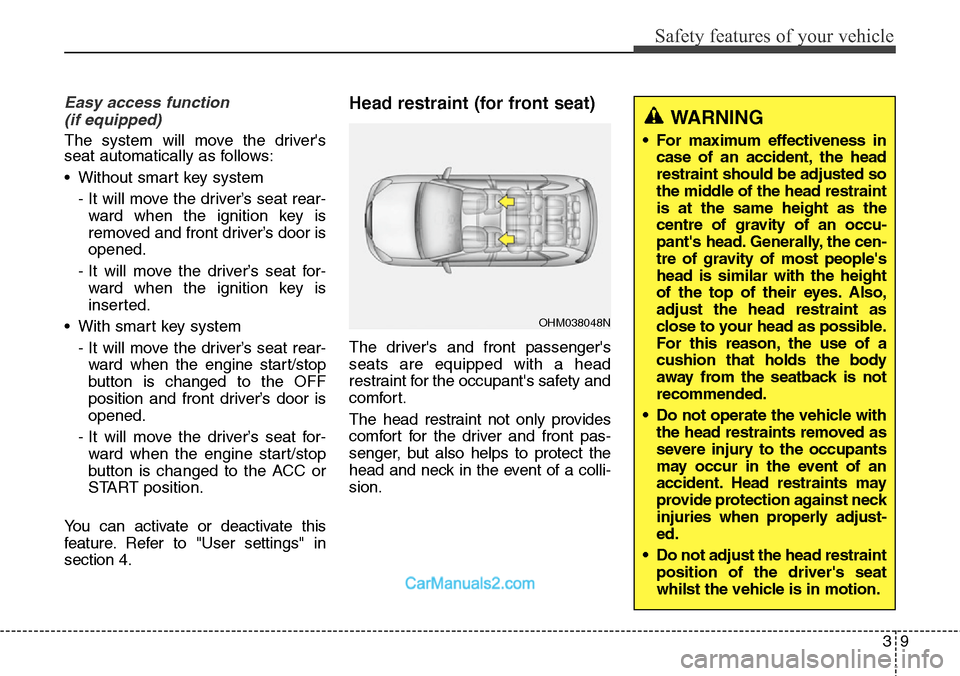
Head restraint (for front seat)
The driver's and front passenger's
seats are equipped with a head
restraint for the occupant's safety and
comfort.
The head restraint not only provides
comfort for the driver and front pas-
senger, but also helps to protect the
head and neck in the event of a colli-
sion.
OHM038048N
WARNING
• For maximum effectiveness in
case of an accident, the head
restraint should be adjusted so
the middle of the head restraint
is at the same height as the
centre of gravity of an occu-
pant's head. Generally, the cen-
tre of gravity of most people's
head is similar with the height
of the top of their eyes. Also,
adjust the head restraint as
close to your head as possible.
For this reason, the use of a
cushion that holds the body
away from the seatback is not
recommended.
• Do not operate the vehicle with
the head restraints removed as
severe injury to the occupants
may occur in the event of an
accident. Head restraints may
provide protection against neck
injuries when properly adjust-
ed.
• Do not adjust the head restraint
position of the driver's seat
whilst the vehicle is in motion.
Page 41 of 699
321
Safety features of your vehicle
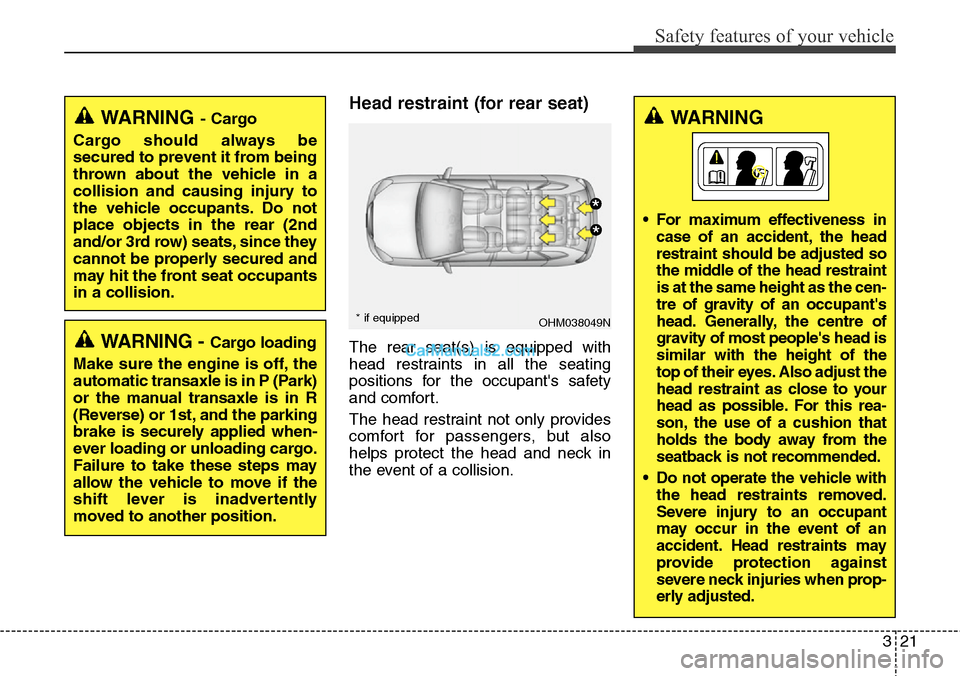
Head restraint (for rear seat)
The rear seat(s) is equipped with
head restraints in all the seating
positions for the occupant's safety
and comfort.
The head restraint not only provides
comfort for passengers, but also
helps protect the head and neck in
the event of a collision.
WARNING- Cargo
Cargo should always be
secured to prevent it from being
thrown about the vehicle in a
collision and causing injury to
the vehicle occupants. Do not
place objects in the rear (2nd
and/or 3rd row) seats, since they
cannot be properly secured and
may hit the front seat occupants
in a collision.
WARNING - Cargo loading
Make sure the engine is off, the
automatic transaxle is in P (Park)
or the manual transaxle is in R
(Reverse) or 1st, and the parking
brake is securely applied when-
ever loading or unloading cargo.
Failure to take these steps may
allow the vehicle to move if the
shift lever is inadvertently
moved to another position.
OHM038049N
*
*
* if equipped
WARNING
• For maximum effectiveness in
case of an accident, the head
restraint should be adjusted so
the middle of the head restraint
is at the same height as the cen-
tre of gravity of an occupant's
head. Generally, the centre of
gravity of most people's head is
similar with the height of the
top of their eyes. Also adjust the
head restraint as close to your
head as possible. For this rea-
son, the use of a cushion that
holds the body away from the
seatback is not recommended.
• Do not operate the vehicle with
the head restraints removed.
Severe injury to an occupant
may occur in the event of an
accident. Head restraints may
provide protection against
severe neck injuries when prop-
erly adjusted.
Page 77 of 699
357
Safety features of your vehicle
WARNING
• If an air bag deploys, there
may be a loud noise followed
by a fine dust released in the
vehicle. These conditions are
normal and are not hazardous
- the air bags are packed in
this fine powder. The dust
generated during air bag
deployment may cause skin
or eye irritation as well as
aggravate asthma for some
persons. Always wash all
exposed skin areas thorough-
ly with lukewarm water and a
mild soap after an accident in
which the air bags were
deployed.
(Continued)
(Continued)
• When installing a container of
liquid air freshener inside the
vehicle, do not place it near
the instrument cluster nor on
the instrument panel surface.
It may become dangerous pro-
jectiles and cause injury if the
passenger's air bag inflates.(Continued)
• The SRS can function only
when the ignition key is in the
"ON" position. If the SRS air
bag warning light does not
illuminate, or continuously
remains on after illuminating
for about 6 seconds when the
ignition key is turned to the
ON position, or after the
engine is started, comes on
whilst driving, the SRS is not
working properly.
If this occurs, we recommend
that the system be inspected
by a HYUNDAI authorised
repairer.
• Before you replace a fuse or
disconnect a battery terminal,
turn the ignition switch to the
LOCK position and remove
the ignition key. Never remove
or replace the air bag related
fuse(s) when the ignition
switch is in the ON position.
Failure to heed this warning
will cause the SRS air bag
warning light to illuminate.