Page 413 of 473

7-50
Maintenance
4. Tire ply composition andmaterial
The number of layers or plies of rub-
ber-coated fabric are in the tire. Tire
manufacturers also must indicate the
materials in the tire, which include
steel, nylon, polyester, and others.
The letter "R" means radial ply con-
struction; the letter "D" means diago-
nal or bias ply construction; and theletter "B" means belted-bias ply con-
struction.
5. Maximum permissible infla-tion pressure
This number is the greatest amountof air pressure that should be put in
the tire. Do not exceed the maximum
permissible inflation pressure. Refer
to the Tire and Loading Information
label for recommended inflation
pressure.
6. Maximum load rating
This number indicates the maximum
load in kilograms and pounds that
can be carried by the tire. When
replacing the tires on the vehicle,
always use a tire that has the same
load rating as the factory installed
tire.
A vehicle’s electrical system is pro-
tected from electrical overload dam-
age by fuses.
This vehicle has 3 fuse panels, one
located in the driver’s side panel bol-
ster, the other in the engine compart-
ment near the battery.
If any of your vehicle’s lights, acces-
sories, or controls do not work, check
the appropriate circuit fuse. If a fuse
has blown, the element inside thefuse will be melted.
FFUU SSEE SS
1VQA4037
Normal
Normal Normal
Blown
Blown
Blown
Page 415 of 473
7-52
Maintenance
Inner panel fuse replacement1.Turn the ignition switch and allother switches off.
2.Open the fuse panel cover.
3.Pull the suspected fuse straightout. Use the removal tool provided
in the engine compartment fusepanel.
4.Check the removed fuse; replace it if it is blown.
5.Push in a new fuse of the same rat- ing, and make sure it fits tightly in
the clips.
If it fits loosely, we recommend that
you consult an authorized HYUNDAI
dealer.
If you do not have a spare, use a
fuse of the same rating from a circuit
you may not need for operating the
vehicle, such as the cigar lighter
fuse.
OEU074027
OEU074026
OEU074028
■ Driver’s seat side
■Driver’s side panel
■Main battery
OEU074029
Page 416 of 473
7-53
7
Maintenance
If the headlights or other electrical
components do not work and the
fuses are OK, check the fuse block in
the engine compartment. If a fuse is
blown, it must be replaced.Engine compartment panel fusereplacement
1.Turn the ignition switch and all other switches off.
2.Remove the fuse box cover by pressing the tap and pulling up.
3.Check the removed fuse; replace it if it is blown. To remove or insert
the fuse, use the fuse puller in the
engine compartment fuse panel.
4.Push in a new fuse of the same rat- ing, and make sure it fits tightly in
the clips.
If it fits loosely, we recommend that
you consult an authorized
HYUNDAI dealer.
OEU074029 After checking the fuse box in
the engine compartment,
securely install the fuse box
cover. If not, electrical failures
may occur from water leakingin.
CAUTION
Page 427 of 473
7-64
Maintenance
No.Fuse ratingFuse Name Circuit Protected
2515AB/A HORNBurglar Alarm Horn
2625AC/LIGHTERP/OUTLET RRCigar Lighter, luggage Room Power Outlet
2725AP/OUTLETCTR & RHPower Outlet (Center, front Right)
2820ADEICERDEICER
2940ACONDENSER FANA/C Condenser Fan Motor Left/Right
3030AWIPER FRTFront Wiper Motor
3150A4
PTC
HEATERPTC Heater EXTN (PTC4+)
3250A3
PTC
HEATERPTC Heater EXTN (PTC3+)
3350A2
PTC
HEATERPTC Heater EXTN (PTC2+)
3450A1
PTC
HEATERPTC Heater EXTN (PTC1+)
Page 430 of 473

7-67
7
MaintenanceUse only the bulbs of the specifiedwattage.
After heavy, driving rain or wash-
ing, headlight and taillight lenses
could appear frosty. This condi-
tion is caused by the temperature
difference between the lamp
inside and outside. This is similar
to the condensation on your win-
dows inside your vehicle duringthe rain and doesn’t indicate a
problem with your vehicle. If
water leaks into the lamp bulb cir-
cuitry, we recommend that the
system be checked by an author-
ized HYUNDAI dealer.
NOTICE
LL IIGG HH TT BB UU LLBB SS
Working on the lights
Prior to working on the light,
firmly apply the parking brake,
ensure that the ignition switch
is turned to the “LOCK” position
and turn off the lights to avoid
sudden movement of the vehi-
cle and burning your fingers or
receiving an electric shock.
WARNING
Be sure to replace the burned-
out bulb with one of the same
wattage rating. Otherwise, it
may cause damage to the fuseor electric wiring system.
CAUTION
If you don’t have necessary
tools, the correct bulbs and the
expertise, we recommend that
you consult an authorized
HYUNDAI dealer. In many cases,
it is difficult to replace vehicle
light bulbs because other parts
of the vehicle must be removed
before you can get to the bulb.
This is especially true if you
have to remove the headlight
assembly to get to the bulb(s).
Removing/installing the head-
light assembly can result in
damage to the vehicle.
CAUTION
Page 431 of 473
7-68
Maintenance
Headlight, position light, turn
signal light, front fog light bulbreplacement(1) Front turn signal light
(2) Headlight (Low)(3) Headlight (High)(4) Position light and DRL (LED)
(if equipped)
(5) Front fog light (if equipped)Headlight (Replacement)
MFR type (High / Low) and projec-
tion type (High)
1.Open the hood.
2.Remove the headlight bulb cover by turning it counterclockwise.
3.Disconnect the headlight bulb socket-connector.
4.Unsnap the headlight bulb retain- ing wire by depressing the end and
pushing it upward.
5.Remove the bulb from the head- light assembly.
OEU074048
OEU074047
OEU074070
■■MFR type
■■Projection type
Page 432 of 473

7-69
7
Maintenance
6.Install a new headlight bulb andsnap the headlight bulb retaining
wire into position by aligning the
wire with the groove on the bulb.
7.Connect the headlight bulb socket- connector.
8.Install the headlight bulb cover by turning it clockwise.
Projection type (Low)
1.Open the hood.
2.Remove the headlight bulb coverby turning it counterclockwise.
3.Remove the bulb socket by turning it counterclockwise and remove by
pulling the bulb.
4.Install is the reverse order of removal.
We recommend that the headlightaiming be adjusted after an acci-dent or after the headlight assem-
bly is reinstalled at an authorized
HYUNDAI dealer.
NOTICE
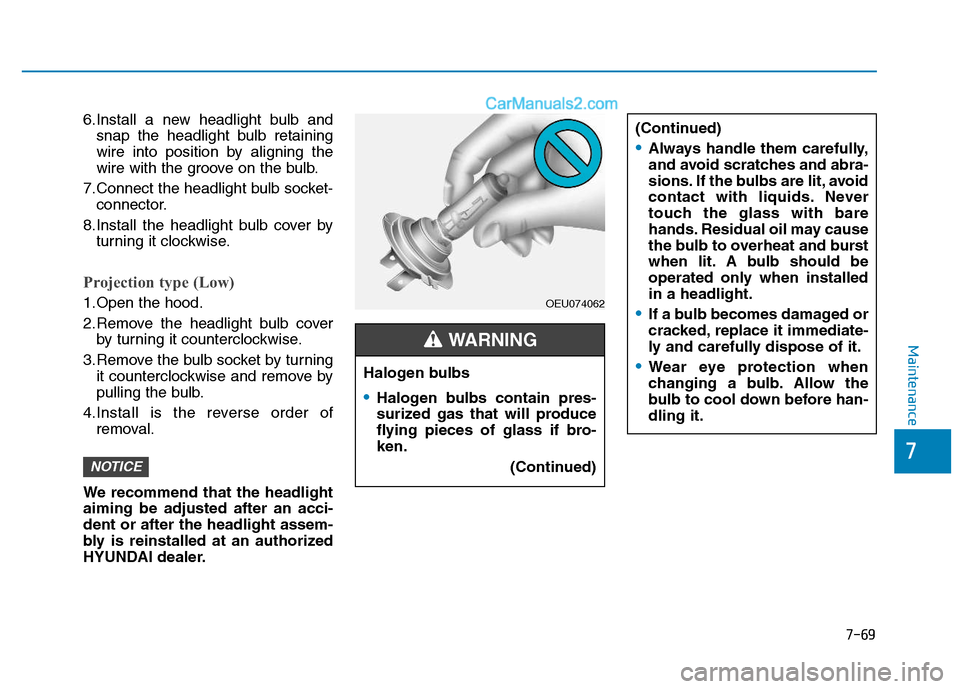
Halogen bulbs
Halogen bulbs contain pres-
surized gas that will produce
flying pieces of glass if bro-ken. (Continued)
(Continued)
Always handle them carefully,
and avoid scratches and abra-
sions. If the bulbs are lit, avoid
contact with liquids. Never
touch the glass with bare
hands. Residual oil may cause
the bulb to overheat and burst
when lit. A bulb should be
operated only when installedin a headlight.
If a bulb becomes damaged or
cracked, replace it immediate-
ly and carefully dispose of it.
Wear eye protection when
changing a bulb. Allow the
bulb to cool down before han-dling it.
WARNING
OEU074062
Page 433 of 473

7-70
Maintenance
Turn signal light/Position light
Turn signal light
1.Turn off the engine and open thehood.
2.Remove the socket from the assembly by turning the socket
counterclockwise until the tabs on
the socket align with the slots on
the assembly.
3.Remove the bulb from the socket by pressing it in and rotating it
counterclockwise until the tabs on
the bulb align with the slots in the
socket. Pull the bulb out of the
socket
4.Insert a new bulb by inserting it into the socket and rotating it until it
locks into place.
5.Install the socket in the assembly by aligning the tabs on the socket
with the slots in the assembly.
Push the socket into the assembly
and turn the socket clockwise.
Position light
If the light bulb does not operate, we recommend that the system be
checked by an authorized HYUNDAI
dealer.
Front fog light bulbs
(if equipped)
1.Remove the front bumper under cover.
2.Reach your hand into the back of the front bumper.
3.Disconnect the power connector from the socket.
4.Remove the bulb-socket from the housing by turning the socket
counter clockwise until the tabs on
the socket align with the slots onthe housing.
5.Install the new bulb-socket into the housing by aligning the tabs on the
socket with the slots in the hous-
ing. Push the socket into the hous-
ing and turn the socket clockwise.
6.Connect the power connector to the socket.
7.Reinstall the front bumper under cover.
Headlight and front fog light
aiming (for Europe)
Headlight aiming
1.Inflate the tires to the specified
pressure and remove any loads
from the vehicle except the driver,
spare tire, and tools.
OEU074061
OEU074049■■Projection type
■■MFR type