2016 Hyundai H350 light
[x] Cancel search: lightPage 322 of 473

5-51
Driving your vehicle
5
To keep locks from freezing
To keep the locks from freezing,
squirt an approved de-icer fluid or
glycerin into the key opening. If a
lock is covered with ice, squirt it with
an approved de-icing fluid to remove
the ice. If the lock is frozen internally,
you may be able to thaw it out by
using a heated key. Handle the heat-
ed key with care to avoid injury.
Use approved window washeranti-freeze in system
To keep the water in the window
washer system from freezing, add an
approved window washer anti-freeze
solution in accordance with instruc-
tions on the container. Window wash-
er anti-freeze is available from an
authorized HYUNDAI dealer and
most auto parts outlets. Do not useengine coolant or other types of anti-
freeze as these may damage thepaint finish.
Don't let your parking brakefreeze
Under some conditions your parking
brake can freeze in the engaged
position. This is most likely to hap-
pen when there is an accumulation
of snow or ice around or near the
rear brakes or if the brakes are wet.
If there is a risk the parking brake
may freeze, apply it only temporarily
while you put the shift lever in first or
reverse gear and block the rear
wheels so the vehicle cannot roll.
Then release the parking brake.
Don't let ice and snow accumu-
late underneath
Under some conditions, snow and
ice can build up under the fenders
and interfere with the steering. When
driving in severe winter conditions
where this may happen, you should
periodically check underneath the
vehicle to be sure the movement of
the front wheels and the steering
components is not obstructed.
Carry emergency equipment
Depending on the severity of the
weather, you should carry appropri-
ate emergency equipment. Some of
the items you may want to carry
include tire chains, tow straps or
chains, flashlight, emergency flares,
sand, a shovel, jumper cables, a win-
dow scraper, gloves, ground cloth,
coveralls, a blanket, etc.
Page 326 of 473

5-55
Driving your vehicle
Driving with a trailer
Towing a trailer requires a certain
amount of experience. Before setting
out for the open road, you must get
to know your trailer. Acquaint your-
self with the feel of handling and
braking with the added weight of the
trailer. And always keep in mind that
the vehicle you are driving is now a
good deal longer and not nearly so
responsive as your vehicle is by
itself.
Before you start, check the trailer
hitch and platform, safety chains,
electrical connector(s), lights, tires
and mirror adjustment. If the trailer
has electric brakes, start your vehicle
and trailer moving and then apply the
trailer brake controller by hand to be
sure the brakes are working. This lets
you check your electrical connection
at the same time.
During your trip, check occasionally
to be sure that the load is secure,
and that the lights and any trailer
brakes are still working.
Following distance
Stay at least twice as far behind the
vehicle ahead as you would when
driving your vehicle without a trailer.
This can help you avoid situations
that require heavy braking and sud-
den turns.
Passing
You’ll need more passing distance
up ahead when you’re towing a trail-
er. And, because of the increased
vehicle length, you’ll need to go
much farther beyond the passed
vehicle before you can return to your
lane.
Backing up
Hold the bottom of the steering
wheel with one hand. Then, to move
the trailer to the left, just move your
hand to the left. To move the trailer to
the right, move your hand to the
right. Always back up slowly and, if
possible, have someone guide you.
Making turns
When you’re turning with a trailer,
make wider turns than normal. Do
this so your trailer won’t strike soft
shoulders, curbs, road signs, trees,
or other objects. Avoid jerky or sud-
den maneuvers. Signal well in
advance.
5
Page 327 of 473

5-56
Driving your vehicle
Turn signals when towing atrailer
When you tow a trailer, your vehicle
has to have a different turn signal
flasher and extra wiring. The green
arrows on your instrument panel will
flash whenever you signal a turn or
lane change. Properly connected,
the trailer lights will also flash to alert
other drivers you’re about to turn,
change lanes, or stop.
When towing a trailer, the green
arrows on your instrument panel will
flash for turns even if the bulbs on
the trailer are burned out. Thus, you
may think drivers behind you are
seeing your signals when, in fact,
they are not. It’s important to check
occasionally to be sure the trailer
bulbs are still working. You must also
check the lights every time you dis-connect and then reconnect the
wires.
The ECU of the tow bar wiring har-
ness warns the driver about the
burned-out bulbs on the trailer by
flashing the green arrows on the
instrument panel with the warningsound. Do not connect a trailer lighting sys-
tem directly to your vehicle’s lighting
system. Use only an approved trailer
wiring harness.
An authorized HYUNDAI dealer can
assist you in installing the wiring har-
ness.
Driving on grades
Reduce speed and shift to a lower
gear before you start down a long or
steep downgrade. If you don’t shift
down, you might have to use your
brakes so much that they would get
hot and no longer operate efficiently.
On a long uphill grade, shift down
and reduce your speed to around 70km/h (45 mph) to reduce the possi-
bility of engine and transmission
overheating.
If your trailer weighs more than the
maximum trailer weight without trail-
er brakes.
Failure to use an approved trail-er wiring harness could result
in damage to the vehicle electri-
cal system and/or personal
injury.
WARNING
Page 335 of 473

5-64
Driving your vehicle
The following procedures can be
used to confirm that the locking dif-
ferential is functioning properly:
(1) Position the vehicle so that onewheel is on a dry paved surface
and the other on ice, snow, mud,
etc. Drive the vehicle, and
observe the operation of the lock-
ing differential. The vehicle
should not become stuck if the
differential is functioning properly.
(2) Depress the accelerator pedal
gradually, and then when traction
is good, depress it forcefully. If
the vehicle accelerates well, the
differential is functioning properly.
Information
Usually a locking differential will
operate and release automatically but
occasionally it may not release auto-
matically.
At this time you will feel the tire is
dragged when you are driving or cor-
nering. You can release it manually by
slightly turning the steering wheel
right and left while the vehicle is mov-
ing slowly.
i
Never start the engine with
the gearshift lever placed in
the forward or reverse whileone of the rear wheels is
jacked up and the other in
contact with the ground;
doing so may cause the vehi-
cle to jump forward.
If one of the rear wheels
begins to spin in mud, snow,
etc., the vehicle can some-
times be driven out bydepressing the accelerator
pedal further; however, avoid
running the engine continu-
ously at high rpm because
doing so could damage the
locking differential.
CAUTION
Page 337 of 473

6-2
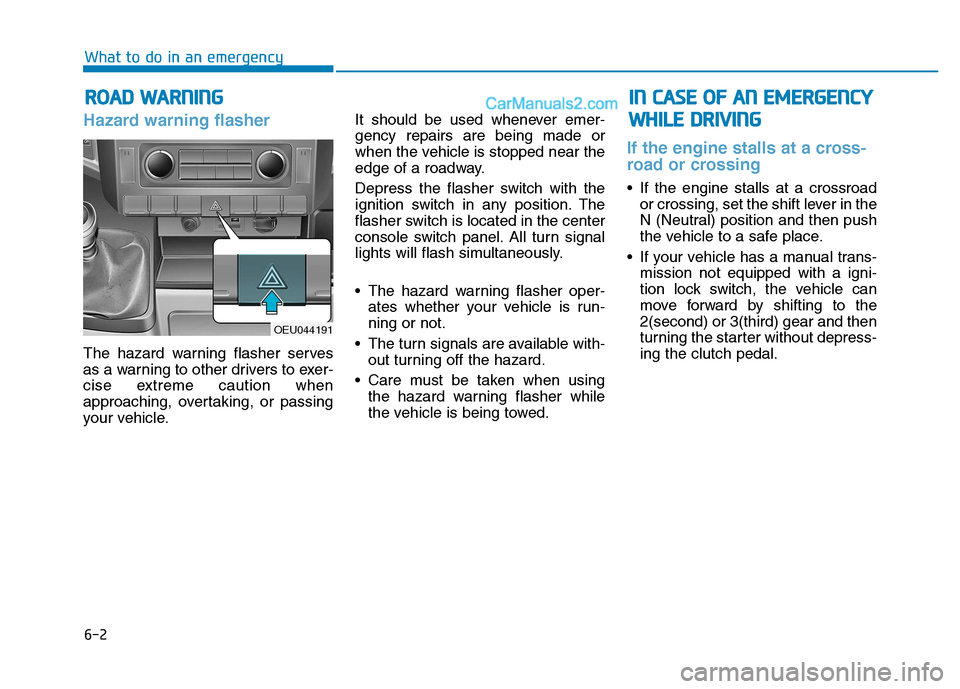
Hazard warning flasher
The hazard warning flasher serves
as a warning to other drivers to exer-
cise extreme caution when
approaching, overtaking, or passing
your vehicle.It should be used whenever emer-gency repairs are being made or
when the vehicle is stopped near the
edge of a roadway.
Depress the flasher switch with the
ignition switch in any position. The
flasher switch is located in the center
console switch panel. All turn signal
lights will flash simultaneously.
• The hazard warning flasher oper-
ates whether your vehicle is run- ning or not.
The turn signals are available with- out turning off the hazard.
Care must be taken when using the hazard warning flasher while
the vehicle is being towed.
If the engine stalls at a cross-
road or crossing
If the engine stalls at a crossroador crossing, set the shift lever in the
N (Neutral) position and then push
the vehicle to a safe place.
If your vehicle has a manual trans- mission not equipped with a igni-
tion lock switch, the vehicle can
move forward by shifting to the2(second) or 3(third) gear and then
turning the starter without depress-ing the clutch pedal.
RROO AADD WW AARRNN IINN GG
What to do in an emergency
I
INN CC AA SSEE OO FF AA NN EE MM EERR GG EENN CCYY
W
W HHIILL EE DD RRIIVV IINN GG
OEU044191
Page 338 of 473

6-3
What to do in an emergency
If you have a flat tire while driving
If a tire goes flat while you are driv- ing:
1.Take your foot off the acceleratorpedal and let the vehicle slow
down while driving straight ahead.
Do not apply the brakes immedi-ately or attempt to pull off the road
as this may cause a loss of control.
When the vehicle has slowed to
such a speed that it is safe to do
so, brake carefully and pull off the
road. Drive off the road as far as
possible and park on firm, level
ground. If you are on a divided
highway, do not park in the median
area between the two traffic lanes.
2.When the vehicle is stopped, turn on your emergency hazard flash-
ers, set the parking brake and put
the transmission in reverse.
3.Have all passengers get out of the vehicle. Be sure they all get out on
the side of the vehicle that is away
from traffic.
4.When changing a flat tire, follow the instruction provided later in thissection.
If engine stalls while driving
1.Reduce your speed gradually,keeping a straight line. Move cau-
tiously off the road to a safe place.
2.Turn on your emergency flashers.
3.Try to start the engine again. If your vehicle will not start, we recom-
mend that you contact an author-
ized HYUNDAI dealer.If engine doesn't turn over or
turns over slowly
1.Check the battery connections tobe sure they are clean and tight.
2.Turn on the interior light. If the light dims or goes out when you operate
the starter, the battery is dis-charged.
3.Check the starter connections to be sure they are securely tight-ened.
4.Do not push or pull the vehicle to start it. See instructions for "Jump
starting".
6
IIFF TT HH EE EE NN GGIINN EE WW IILL LL NN OO TT
S
S TT AA RRTT
If the engine will not start, do
not push or pull the vehicle to
start it. This could result in acollision or cause other dam-
age. In addition, push or pull
starting may cause the catalytic
converter to be overloaded and
create a fire hazard.
WARNING
Page 352 of 473

6-17
What to do in an emergency
6
10. Changing wheels
Loosen the wheel nuts and remove
them with your fingers. Slide the
wheel off the studs and lay it flat so it
cannot roll away. To put the wheel on
the hub, pick up the spare tire, lineup the holes with the studs and slide
the wheel onto them. If this is diffi-cult, tip the wheel slightly and get thetop hole in the wheel lined up with
the top stud. Then jiggle the wheel
back and forth until the wheel can be
slid over the other studs.
On a double-tire vehicle, first
remove the outside tire, then
remove the inner tire.
NOTICE
Use only the jack included
with the vehicle and use it
only for changing a wheel.
Position the jack on a hard
level surface.
If the release valve is loos-
ened by turning it 2 or more
times in the counterclockwise
direction, the jack cannot beused.
This jack is hydraulic, and the
ram is a two-stage type. Whenboth rams are raised and thestop mark of the upper ram
becomes visible, stop jacking
immediately.
Further extension of the ram
may damage the jack.
When jacking up the vehicle,
do so only until the tires are
slightly lifted from the ground.
It is dangerous to jack up the
vehicle more than that much.(Continued)
CAUTION(Continued)
It is very dangerous if the jack
somehow slips, so never
leave the vehicle in the
jacked-up position, and never
shake the vehicle while it israised.
Do not get under the vehicle
when it is supported by the
jack! This is very dangerous as
the vehicle could fall and cause
serious injury or death. No one
should stay in the vehicle while
the jack is being used.
WARNING
Page 365 of 473

7
Tire rotation ....................................................................7-44
Wheel alignment and tire balance ..............................7-45
Tire replacement .............................................................7-46
Wheel replacement ........................................................7-47
Tire traction ......................................................................7-47
Tire maintenance ...........................................................7-47
Tire sidewall labeling ......................................................7-48
Fuses ......................................................................7-50 Inner panel fuse replacement ......................................7-52
Alternator fuse ................................................................7-54
Multi fuse ..........................................................................7-54
Fuse/Relay panel description ......................................7-55
Light bulbs.............................................................7-67 Headlight, position light, turn signal light, front fog
light bulb replacement ...................................................7-68Headlight and front fog light aiming (for Europe) ..7-70
Side marker lamp ............................................................7-75
Rear combination light bulbs replacement ...............7-75
High mounted stop light bulb replacement ..............7-78
License plate light bulb replacement .........................7-78
Interior light bulb replacement ....................................7-78
Appearance care ..................................................7-79 Exterior care ....................................................................7-79
Interior care......................................................................7-85 Emission control system .....................................7-87
Crankcase emission control system ...........................7-87
Evaporative emission control system.........................7-87
Exhaust emission control system ...............................7-88