2016 FORD F450 SUPER DUTY warning
[x] Cancel search: warningPage 247 of 507
BRAKE FLUID CHECK
Fluid levels between the MIN and MAXlines are within the normal operating range;there is no need to add fluid. If the fluidlevels are outside of the normal operatingrange, the performance of the systemcould be compromised; seek service fromyour authorized dealer immediately.
POWER STEERING FLUID
CHECK
Check the power steering fluid. SeeScheduled Maintenance (page 453). Ifadding fluid is necessary, use onlyMERCON LV ATF
Note:This procedure is for vehicles withgasoline engines. Vehicles with dieselengines are similar. See Under HoodOverview in your diesel supplement.
Check the fluid level when it is at ambienttemperature.
1. Check the fluid level in the reservoir. Itshould be between the MIN and MAXrange. Do not add fluid if the level iswithin this range.
2.If the fluid level is low, add fluid to bringthe fluid level up to between the MINand MAX range.
3. Switch the engine on.
4.While the engine idles, turn the steeringwheel left and right several times.
5. Switch the engine off.
6. Recheck the fluid level in the reservoir.Do not add fluid if the level is betweenthe MIN and MAX range.
7. If the fluid is low, add fluid in smallamounts, continuously checking thelevel until it is between the MIN andMAX range. For proper fluid type, SeeCapacities and Specifications (page303). Be sure to put the cap back on thereservoir.
WASHER FLUID CHECK
WARNING
If you operate your vehicle intemperatures below 40°F (5°C), usewasher fluid with antifreezeprotection. Failure to use washer fluid withantifreeze protection in cold weather couldresult in impaired windshield vision andincrease the risk of injury or accident.
Add fluid to fill the reservoir if the level islow. Only use a washer fluid that meetsFord specifications. See Capacities andSpecifications (page 303).
State or local regulations on volatileorganic compounds may restrict the useof methanol, a common windshield washerantifreeze additive. Washer fluidscontaining non-methanol antifreezeagents should be used only if they providecold weather protection without damagingthe vehicle’s paint finish, wiper blades orwasher system.
FUEL FILTER
Your vehicle is equipped with a lifetimefuel filter that is integrated with the fueltank. Regular maintenance or replacementis not needed.
244
Super Duty (TFA) Canada/United States of America, enUSA, First Printing
Maintenance
Page 248 of 507
CHANGING THE 12V BATTERY
WARNINGS
This vehicle may be equipped withmore than one battery, removal ofcable from only one battery does notdisconnect the vehicle electrical system.Be sure to disconnect cables from allbatteries when disconnecting power.Failure to do so may cause seriouspersonal injury or property damage.
Batteries normally produce explosivegases which can cause personalinjury. Therefore, do not allowflames, sparks or lighted substances tocome near the battery. When working nearthe battery, always shield your face andprotect your eyes. Always provide properventilation.
When lifting a plastic-cased battery,excessive pressure on the end wallscould cause acid to flow through thevent caps, resulting in personal injury anddamage to the vehicle or battery. Lift thebattery with a battery carrier or with yourhands on opposite corners.
Keep batteries out of reach ofchildren. Batteries contain sulfuricacid. Avoid contact with skin, eyes orclothing. Shield your eyes when workingnear the battery to protect against possiblesplashing of acid solution. In case of acidcontact with skin or eyes, flushimmediately with water for a minimum of15 minutes and get prompt medicalattention. If acid is swallowed, call aphysician immediately.
Note:If your battery has a cover/shield,make sure it is reinstalled after the batteryhas been cleaned or replaced.
Note:Battery posts, terminals and relatedaccessories contain lead and leadcompounds. Wash hands after handling.
Note:Electrical or electronic accessoriesor components added to the vehicle by thedealer or the owner may adversely affectbattery performance and durability.
Your vehicle is equipped with a Motorcraftmaintenance-free battery which normallydoes not require additional water duringits life of service.
For longer, trouble-free operation, keep thetop of the battery clean and dry. Also,make certain the battery cables are alwaystightly fastened to the battery terminals.
If you see any corrosion on the battery orterminals, remove the cables from theterminals and clean with a wire brush. Youcan neutralize the acid with a solution ofbaking soda and water.
It is recommended that the negativebattery cable terminal be disconnectedfrom the battery if you plan to store yourvehicle for an extended period of time.
Because your vehicle’s engine iselectronically controlled by a computer,some control conditions are maintainedby power from the battery. When thebattery is disconnected or a new batteryis installed, the engine must relearn its idleand fuel trim strategy for optimumdriveability and performance. Flexible fuelvehicles (FFV) must also relearn theethanol content of the fuel for optimumdriveability and performance. To begin thisprocess
1. With the vehicle at a complete stop,set the parking brake.
2. Put the gearshift in P, turn off allaccessories.
3. Start the engine. Run the engine untilit reaches normal operatingtemperature.
4.Allow the engine to idle for at least oneminute.
5. Turn the A/C on and allow the engineto idle for at least one minute.
245
Super Duty (TFA) Canada/United States of America, enUSA, First Printing
Maintenance
Page 252 of 507
REMOVING A HEADLAMP
WARNING
Handle a halogen headlamp bulbcarefully and keep out of children’sreach. Grasp the bulb only by itsplastic base and do not touch the glass.The oil from your hand could cause thebulb to break the next time the headlampsare operated.
Note:If the bulb is accidentally touched, itshould be cleaned with rubbing alcoholbefore being used.
Note:This procedure is for replacing theheadlamps, park lamps or turn lamps.
1. Make sure the headlamp control is inthe off position and open the hood.
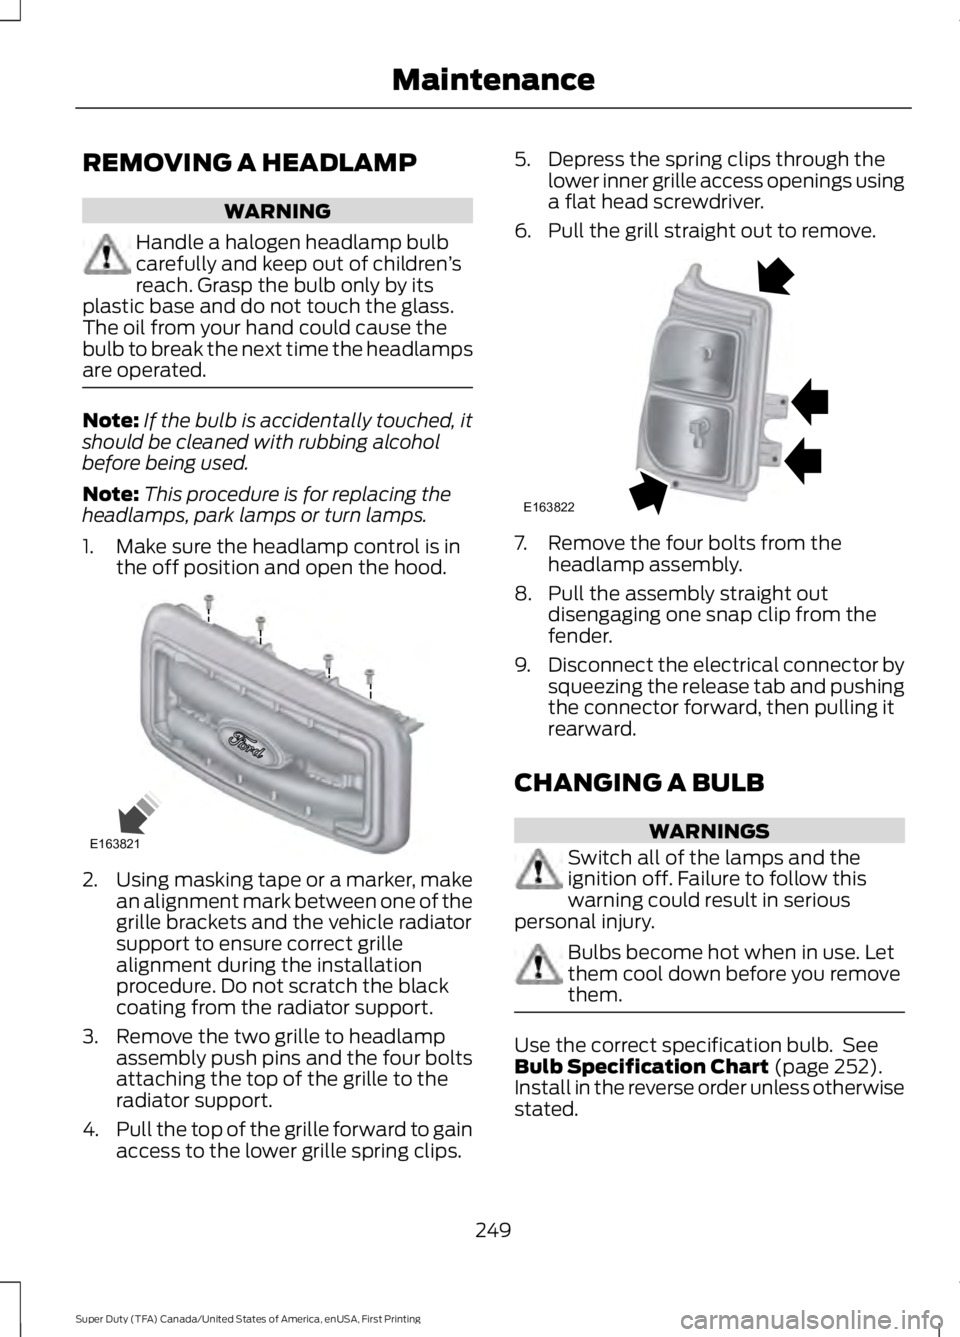
2.Using masking tape or a marker, makean alignment mark between one of thegrille brackets and the vehicle radiatorsupport to ensure correct grillealignment during the installationprocedure. Do not scratch the blackcoating from the radiator support.
3. Remove the two grille to headlampassembly push pins and the four boltsattaching the top of the grille to theradiator support.
4.Pull the top of the grille forward to gainaccess to the lower grille spring clips.
5. Depress the spring clips through thelower inner grille access openings usinga flat head screwdriver.
6. Pull the grill straight out to remove.
7. Remove the four bolts from theheadlamp assembly.
8. Pull the assembly straight outdisengaging one snap clip from thefender.
9.Disconnect the electrical connector bysqueezing the release tab and pushingthe connector forward, then pulling itrearward.
CHANGING A BULB
WARNINGS
Switch all of the lamps and theignition off. Failure to follow thiswarning could result in seriouspersonal injury.
Bulbs become hot when in use. Letthem cool down before you removethem.
Use the correct specification bulb. SeeBulb Specification Chart (page 252).Install in the reverse order unless otherwisestated.
249
Super Duty (TFA) Canada/United States of America, enUSA, First Printing
MaintenanceE163821 E163822
Page 257 of 507
CHANGING THE ENGINE AIR
FILTER
WARNING
To reduce the risk of vehicle damageand personal burn injuries, do notstart your engine with the air cleanerremoved and do not remove it while theengine is running.
Note: Failure to use the correct air filterelement may result in severe enginedamage. Resulting component damagemay not be covered by the vehicle Warranty.
When changing the air filter element, useonly the air filter element listed. SeeMotorcraft Parts (page 304).
Change the air filter element at the correctinterval. See Scheduled Maintenance(page 453).
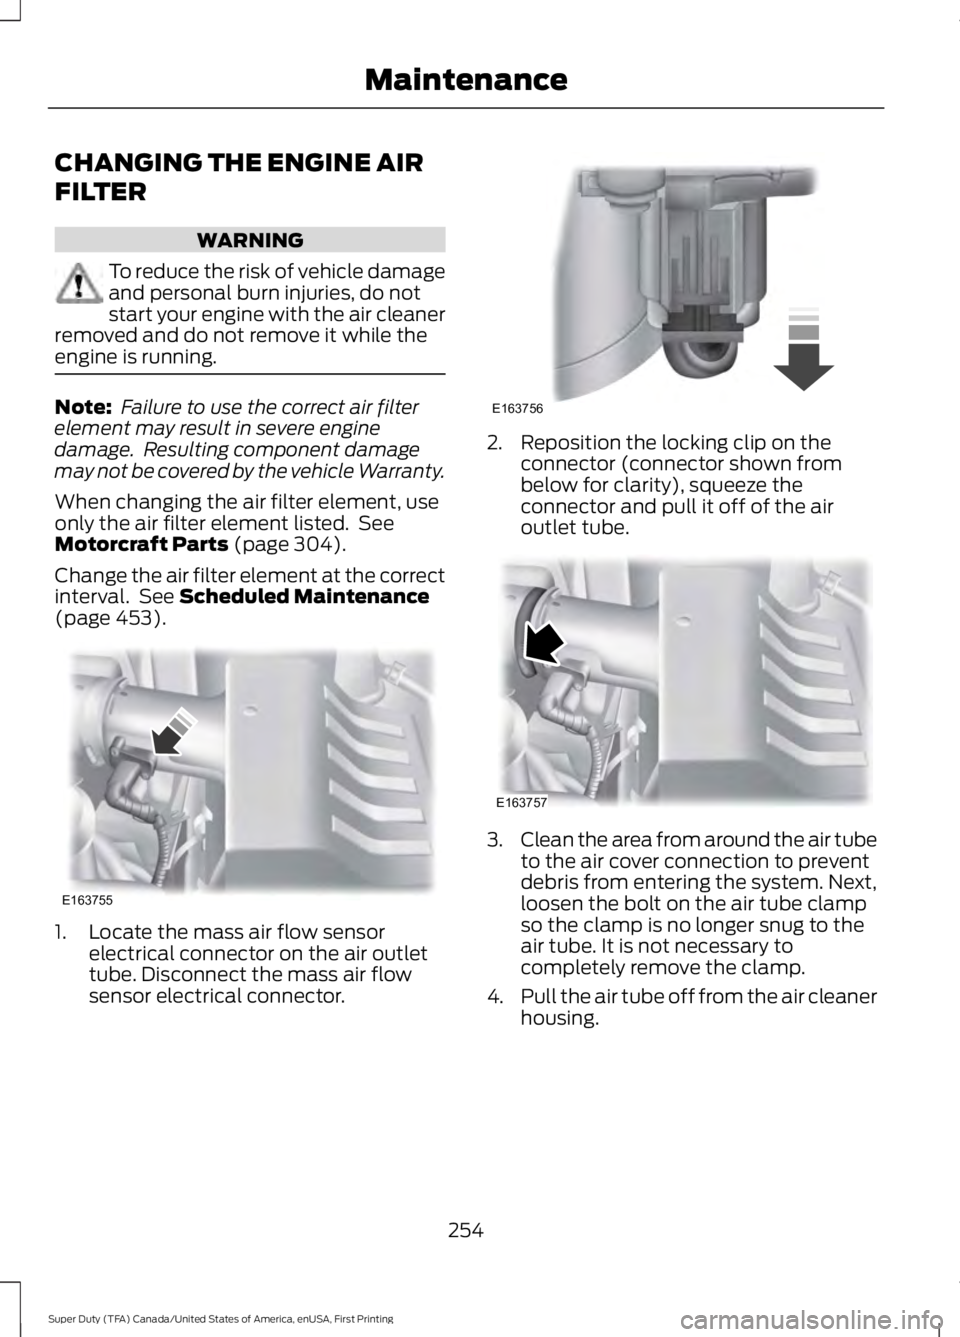
1. Locate the mass air flow sensorelectrical connector on the air outlettube. Disconnect the mass air flowsensor electrical connector.
2. Reposition the locking clip on theconnector (connector shown frombelow for clarity), squeeze theconnector and pull it off of the airoutlet tube.
3.Clean the area from around the air tubeto the air cover connection to preventdebris from entering the system. Next,loosen the bolt on the air tube clampso the clamp is no longer snug to theair tube. It is not necessary tocompletely remove the clamp.
4.Pull the air tube off from the air cleanerhousing.
254
Super Duty (TFA) Canada/United States of America, enUSA, First Printing
MaintenanceE163755 E163756 E163757
Page 261 of 507
•Never wash or rinse any ignition coil,spark plug wire or spark plug well, orthe area in and around these locations.
•Cover the battery, power distributionbox, and air filter assembly to preventwater damage when cleaning theengine.
CLEANING THE WINDOWS AND
WIPER BLADES
Car wash chemicals and environmentalfallout can result in windshield and wiperblade contamination. Dirty windshield andwipers will result in poor windshield wiperoperation. Keep the windshield and wiperblades clean to maintain windshield wiperperformance.
To clean the windshield and wiper blades:
•Clean the windshield with anon-abrasive glass cleaner. Whencleaning the interior of the windshield,avoid getting any glass cleaner on theinstrument panel or door panels. Wipeany glass cleaner off these surfacesimmediately.
•For windshields contaminated withtree sap, chemicals, wax or bugs, cleanthe entire windshield using steel wool(no greater than 0000 grade) in acircular motion and rinse with water.
•Clean the wiper blades with isopropylrubbing alcohol or windshield washerconcentrate.
Note: Do not use razor blades or othersharp objects to clean or remove decalsfrom the inside of the heated rear window.The vehicle warranty does not coverdamage caused to the heated rear windowgrid lines.
CLEANING THE INTERIOR
WARNINGS
Do not use cleaning solvents, bleachor dye on the vehicle’s safety belts,as these actions may weaken thebelt webbing.
On vehicles equipped withseat-mounted airbags, do not usechemical solvents or strongdetergents. Such products couldcontaminate the side airbag system andaffect performance of the side airbag in acollision.
For fabric, carpets, cloth seats, safety beltsand seats equipped with side airbags:
•Remove dust and loose dirt with avacuum cleaner.
•Remove light stains and soil withMotorcraft Professional StrengthCarpet & Upholstery Cleaner.
•If grease or tar is present on thematerial, spot-clean the area first withMotorcraft Spot and Stain Remover. InCanada, use Motorcraft Multi-PurposeCleaner.
•If a ring forms on the fabric after spotcleaning, clean the entire areaimmediately (but do not oversaturate)or the ring will set.
•Do not use household cleaningproducts or glass cleaners, which canstain and discolor the fabric and affectthe flame retardant abilities of the seatmaterials.
258
Super Duty (TFA) Canada/United States of America, enUSA, First Printing
Vehicle Care
Page 262 of 507
CLEANING THE INSTRUMENT
PANEL AND INSTRUMENT
CLUSTER LENS
WARNING
Do not use chemical solvents orstrong detergents when cleaning thesteering wheel or instrument panelto avoid contamination of the airbagsystem.
Note:Follow the same procedure ascleaning leather seats for cleaning leatherinstrument panels and leather interior trimsurfaces. See Cleaning Leather Seats(page 259).
Clean the instrument panel and clusterlens with a clean, damp and soft cloth,then use a clean, dry and soft cloth to drythese areas.
•Avoid cleaners or polishes that increasethe gloss of the upper portion of theinstrument panel. The dull finish in thisarea helps protect you fromundesirable windshield reflection.
•Do not use any household cleaningproducts or glass cleaners as thesemay damage the finish of theinstrument panel, interior trim andcluster lens.
•Wash or wipe your hands clean if youhave been in contact with certainproducts such as insect repellent andsuntan lotion to avoid possible damageto the interior painted surfaces.
•Do not allow air fresheners and handsanitizers to spill onto interior surfaces.If a spill occurs, wipe off immediately.Your warranty may not cover thesedamages.
If a staining liquid like coffee or juice hasbeen spilled on the instrument panel or oninterior trim surfaces:
1. Wipe up spilled liquid using a clean,soft cloth as quickly as possible.
2. Use Motorcraft Premium Leather andVinyl Cleaner or a commerciallyavailable leather cleaning product forautomotive interiors. Test any cleaneror stain remover on an inconspicuousarea.
3. Alternatively, wipe the surface with aclean, soft cloth and a mild soap andwater solution. Dry the area with aclean, soft cloth.
4. If necessary, apply more soap andwater solution or cleaning product toa clean, soft cloth and press it onto thesoiled area. Allow this to set at roomtemperature for 30 minutes.
5. Remove the soaked cloth, then with aclean, damp cloth, use a rubbingmotion for 60 seconds on the soiledarea.
6. Dry the area with a clean, soft cloth.
CLEANING LEATHER SEATS (If
Equipped)
Without King Ranch Edition
Note:Follow the same procedure ascleaning leather seats for cleaning leatherinstrument panels and leather interior trimsurfaces.
For routine cleaning, wipe the surface witha soft, damp cloth and a mild soap andwater solution. Dry the area with a clean,soft cloth.
For cleaning and removing spots and stainssuch as dye transfer, use MotorcraftPremium Leather and Vinyl Cleaner or acommercially available leather cleaningproduct for automotive interiors.
Note:Test any cleaner or stain remover onan inconspicuous area.
259
Super Duty (TFA) Canada/United States of America, enUSA, First Printing
Vehicle Care
Page 267 of 507
GENERAL INFORMATION
Use only approved wheel and tire sizes,using other sizes could damage yourvehicle. If you change the diameter of thetires from that fitted at the factory, thespeedometer may not display the correctspeed. Take your vehicle to an authorizedFord dealer to have the systemreprogrammed. If you intend to change thesize of the wheels from that fitted by themanufacturer, you can check the suitabilitywith an authorized dealer.
Additional information related to thefunctionality and maintenance of your tirescan be found later in this chapter. See TireCare (page 267).
The Ford recommended tire inflationpressures can be found on the Tire Label,which is located on the B-pillar or the edgeof the driver's door. This information canalso be found on the Safety ComplianceCertification Label (affixed to either thedoor hinge pillar, door-latch post, or thedoor edge that meets the door last post;next to the driver’s seating position).
Ford strongly recommends maintainingthese tire pressures at all times. Failure tofollow the tire pressure recommendationscan cause uneven treadwear patterns,reduced fuel economy, and adverselyaffect the way your vehicle handles.
Note:Check and set the tire pressure at theambient temperature in which you areintending to drive your vehicle and when thetires are cold.
Note:Check your tire pressures at leastonce per month.
Set the pressure for your spare tire to thehighest value given for your vehicle and tiresize combination (if equipped).
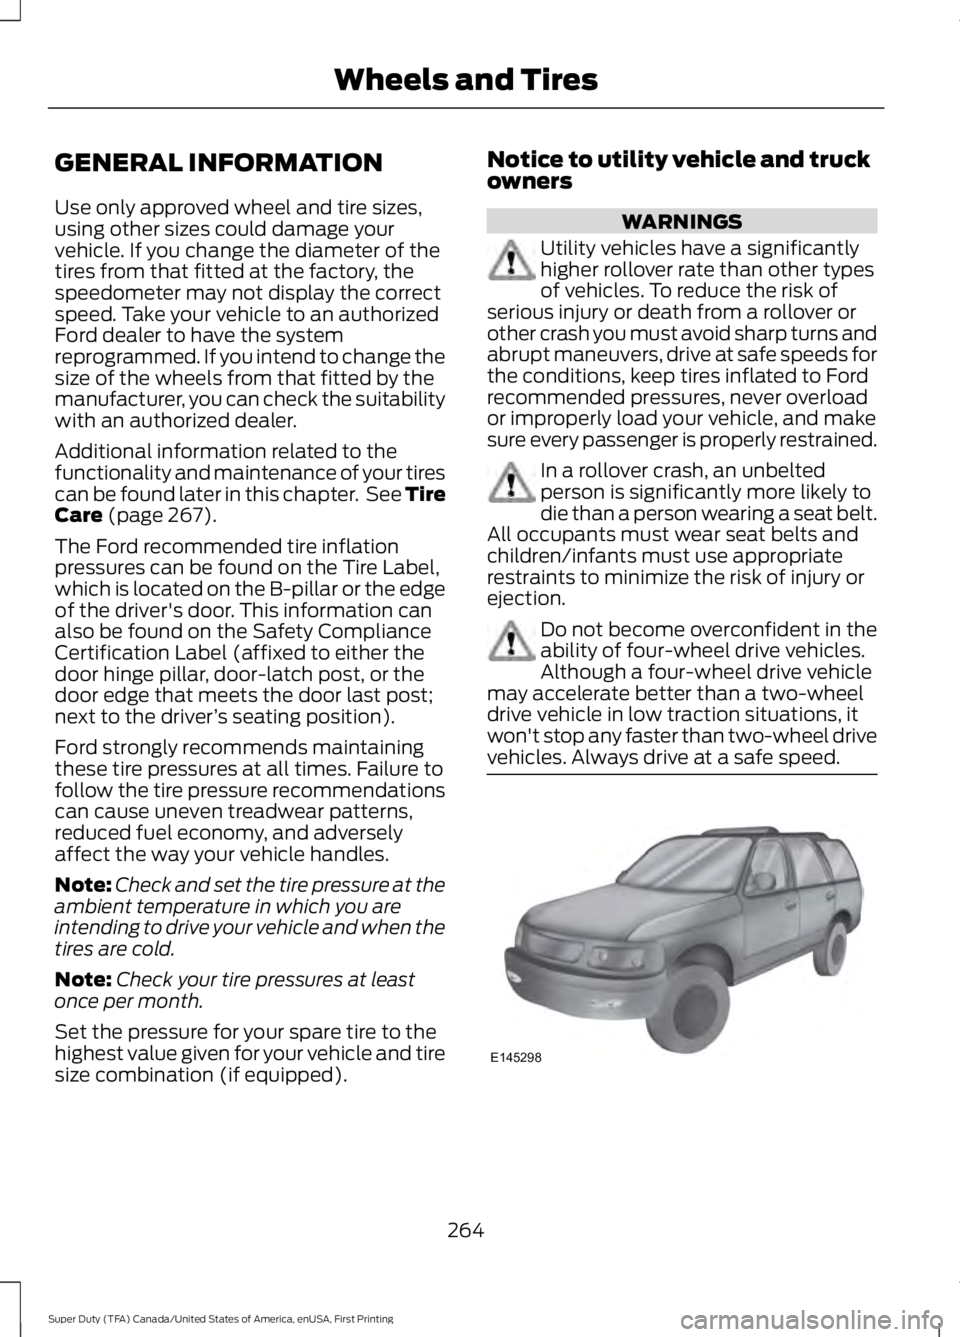
Notice to utility vehicle and truckowners
WARNINGS
Utility vehicles have a significantlyhigher rollover rate than other typesof vehicles. To reduce the risk ofserious injury or death from a rollover orother crash you must avoid sharp turns andabrupt maneuvers, drive at safe speeds forthe conditions, keep tires inflated to Fordrecommended pressures, never overloador improperly load your vehicle, and makesure every passenger is properly restrained.
In a rollover crash, an unbeltedperson is significantly more likely todie than a person wearing a seat belt.All occupants must wear seat belts andchildren/infants must use appropriaterestraints to minimize the risk of injury orejection.
Do not become overconfident in theability of four-wheel drive vehicles.Although a four-wheel drive vehiclemay accelerate better than a two-wheeldrive vehicle in low traction situations, itwon't stop any faster than two-wheel drivevehicles. Always drive at a safe speed.
264
Super Duty (TFA) Canada/United States of America, enUSA, First Printing
Wheels and TiresE145298
Page 268 of 507
Utility vehicles and trucks handledifferently than passenger cars in thevarious driving conditions that areencountered on streets, highways andoff-road. Utility vehicles and trucks are notdesigned for cornering at speeds as highas passenger cars any more than low-slungsports cars are designed to performsatisfactorily under off-road conditions.
Study your owner's manual and anysupplements for specific information aboutequipment features, instructions for safedriving and additional precautions toreduce the risk of an accident or seriousinjury.
Four-wheel drive system (If Equipped)
WARNING
Do not become overconfident in theability of four-wheel drive vehicles.Although a four-wheel drive vehiclemay accelerate better than a two-wheeldrive vehicle in low traction situations, itwon't stop any faster than two-wheel drivevehicles. Always drive at a safe speed.
A vehicle equipped with four-wheel drive(when selected) has the ability to use allfour wheels to power itself. This increasestraction which may enable you to safelydrive over terrain and road conditions thata conventional two-wheel drive vehiclecannot.
Power is supplied to all four wheelsthrough a transfer case or power transferunit. Four-wheel drive vehicles allow youto select different modes as necessary. Forinformation on transfer case operation andshifting procedures, See Four-WheelDrive (page 158). For information ontransfer case maintenance, SeeMaintenance (page 232). You shouldbecome thoroughly familiar with thisinformation before you operate yourvehicle.
On some four-wheel drive vehicles, theinitial shift from two-wheel to four-wheeldrive while the vehicle is moving can causea momentary clunk and ratcheting sound.These sounds are normal and are notcause for concern.
For four-wheel drive vehicles, a spare tireof a different size other than the tireprovided should never be used. A dissimilarspare tire size (other than the spare tireprovided) or major dissimilar tire sizedbetween the front and rear axles couldcause the four-wheel drive system to stopfunctioning and default to front-wheeldrive. See Using Four-Wheel Drive (page158).
How your vehicle differs fromother vehicles
Sport utility vehicles and trucks can differfrom some other vehicles in a fewnoticeable ways. Your vehicle may be:
265
Super Duty (TFA) Canada/United States of America, enUSA, First Printing
Wheels and Tires