2016 FORD EXPEDITION EL light
[x] Cancel search: lightPage 105 of 421
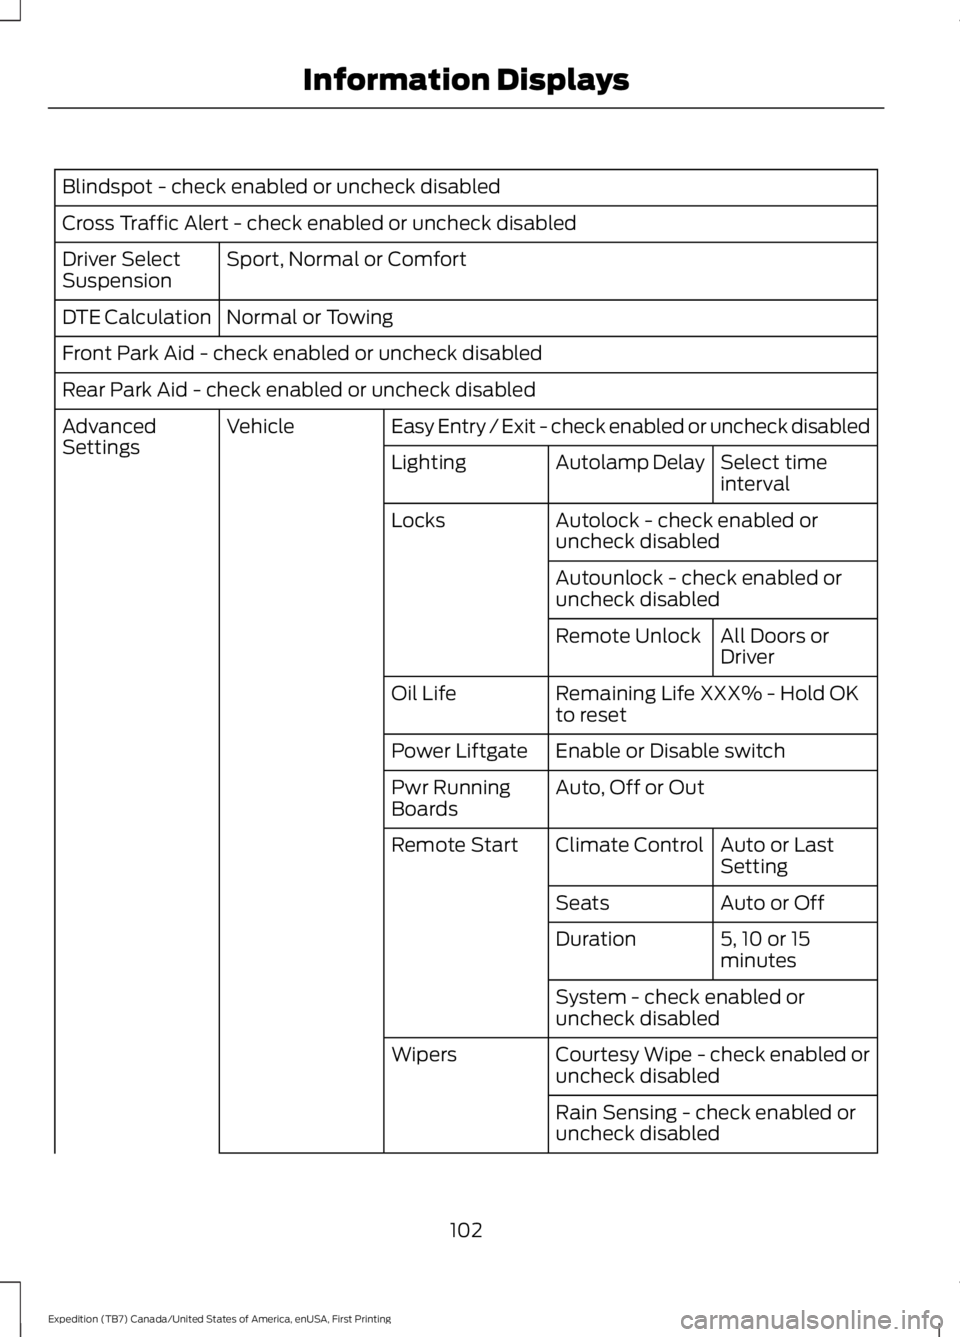
Blindspot - check enabled or uncheck disabled
Cross Traffic Alert - check enabled or uncheck disabled
Sport, Normal or ComfortDriver SelectSuspension
Normal or TowingDTE Calculation
Front Park Aid - check enabled or uncheck disabled
Rear Park Aid - check enabled or uncheck disabled
Easy Entry / Exit - check enabled or uncheck disabledVehicleAdvancedSettingsSelect timeintervalAutolamp DelayLighting
Autolock - check enabled oruncheck disabledLocks
Autounlock - check enabled oruncheck disabled
All Doors orDriverRemote Unlock
Remaining Life XXX% - Hold OKto resetOil Life
Enable or Disable switchPower Liftgate
Auto, Off or OutPwr RunningBoards
Auto or LastSettingClimate ControlRemote Start
Auto or OffSeats
5, 10 or 15minutesDuration
System - check enabled oruncheck disabled
Courtesy Wipe - check enabled oruncheck disabledWipers
Rain Sensing - check enabled oruncheck disabled
102
Expedition (TB7) Canada/United States of America, enUSA, First Printing
Information Displays
Page 114 of 421
ActionMessage
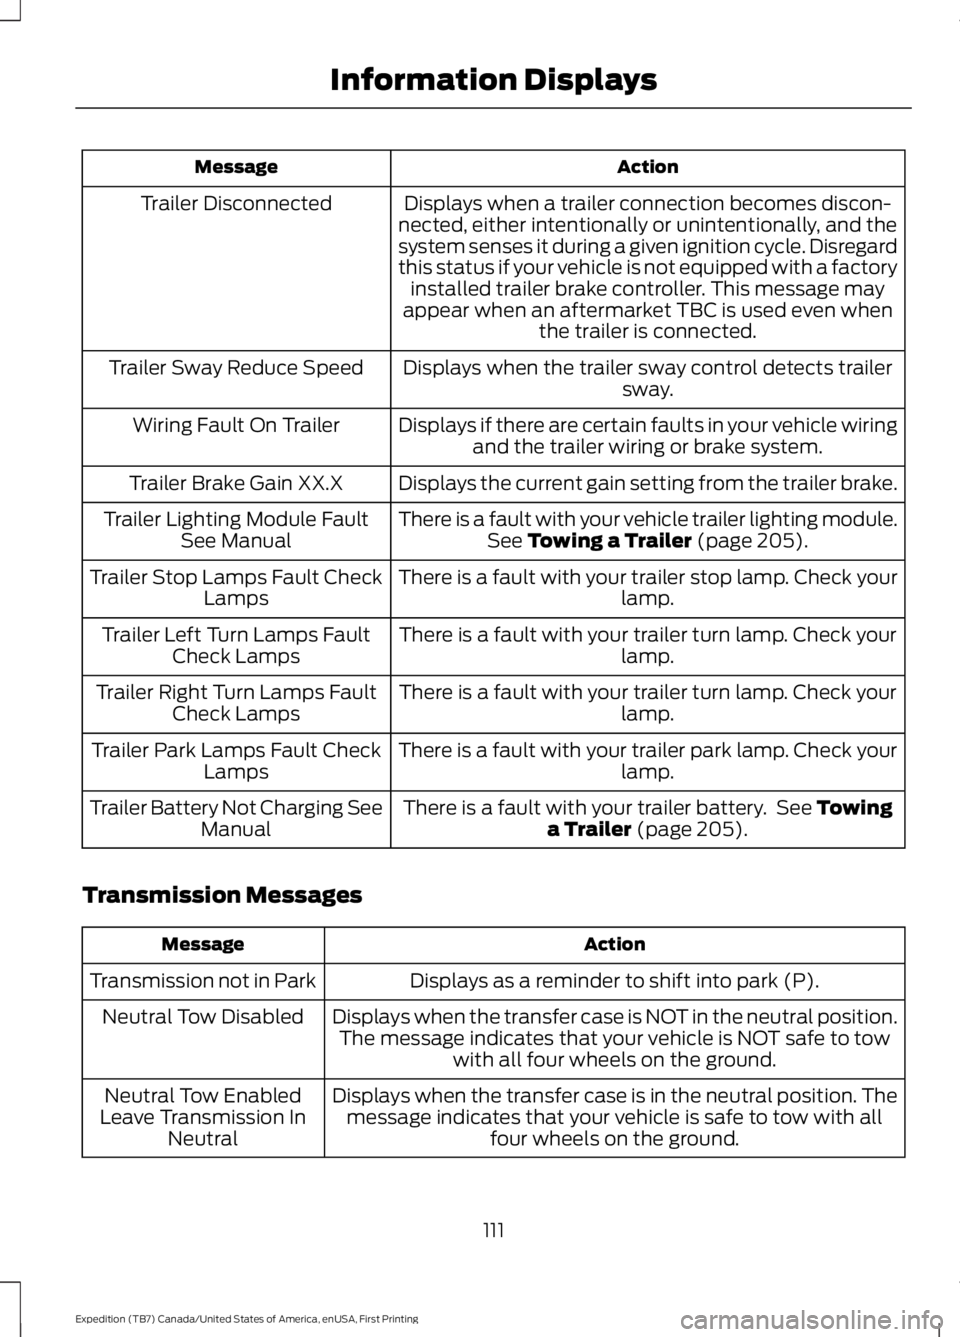
Displays when a trailer connection becomes discon-nected, either intentionally or unintentionally, and thesystem senses it during a given ignition cycle. Disregardthis status if your vehicle is not equipped with a factoryinstalled trailer brake controller. This message mayappear when an aftermarket TBC is used even whenthe trailer is connected.
Trailer Disconnected
Displays when the trailer sway control detects trailersway.Trailer Sway Reduce Speed
Displays if there are certain faults in your vehicle wiringand the trailer wiring or brake system.Wiring Fault On Trailer
Displays the current gain setting from the trailer brake.Trailer Brake Gain XX.X
There is a fault with your vehicle trailer lighting module.See Towing a Trailer (page 205).Trailer Lighting Module FaultSee Manual
There is a fault with your trailer stop lamp. Check yourlamp.Trailer Stop Lamps Fault CheckLamps
There is a fault with your trailer turn lamp. Check yourlamp.Trailer Left Turn Lamps FaultCheck Lamps
There is a fault with your trailer turn lamp. Check yourlamp.Trailer Right Turn Lamps FaultCheck Lamps
There is a fault with your trailer park lamp. Check yourlamp.Trailer Park Lamps Fault CheckLamps
There is a fault with your trailer battery. See Towinga Trailer (page 205).Trailer Battery Not Charging SeeManual
Transmission Messages
ActionMessage
Displays as a reminder to shift into park (P).Transmission not in Park
Displays when the transfer case is NOT in the neutral position.The message indicates that your vehicle is NOT safe to towwith all four wheels on the ground.
Neutral Tow Disabled
Displays when the transfer case is in the neutral position. Themessage indicates that your vehicle is safe to tow with allfour wheels on the ground.
Neutral Tow EnabledLeave Transmission InNeutral
111
Expedition (TB7) Canada/United States of America, enUSA, First Printing
Information Displays
Page 125 of 421
SITTING IN THE CORRECT
POSITION
WARNINGS
Sitting improperly, out of position orwith the seatback reclined too farcan take weight off the seat cushionand affect the decision of the passengersensing system, resulting in serious injuryor death in the event of a crash. Always situpright against your seat back, with yourfeet on the floor.
Do not recline the seatback as thiscan cause the occupant to slideunder the safety belt, resulting inserious injury in the event of a crash.
Do not place objects higher than theseatback to reduce the risk of seriousinjury in the event of a crash or duringheavy braking.
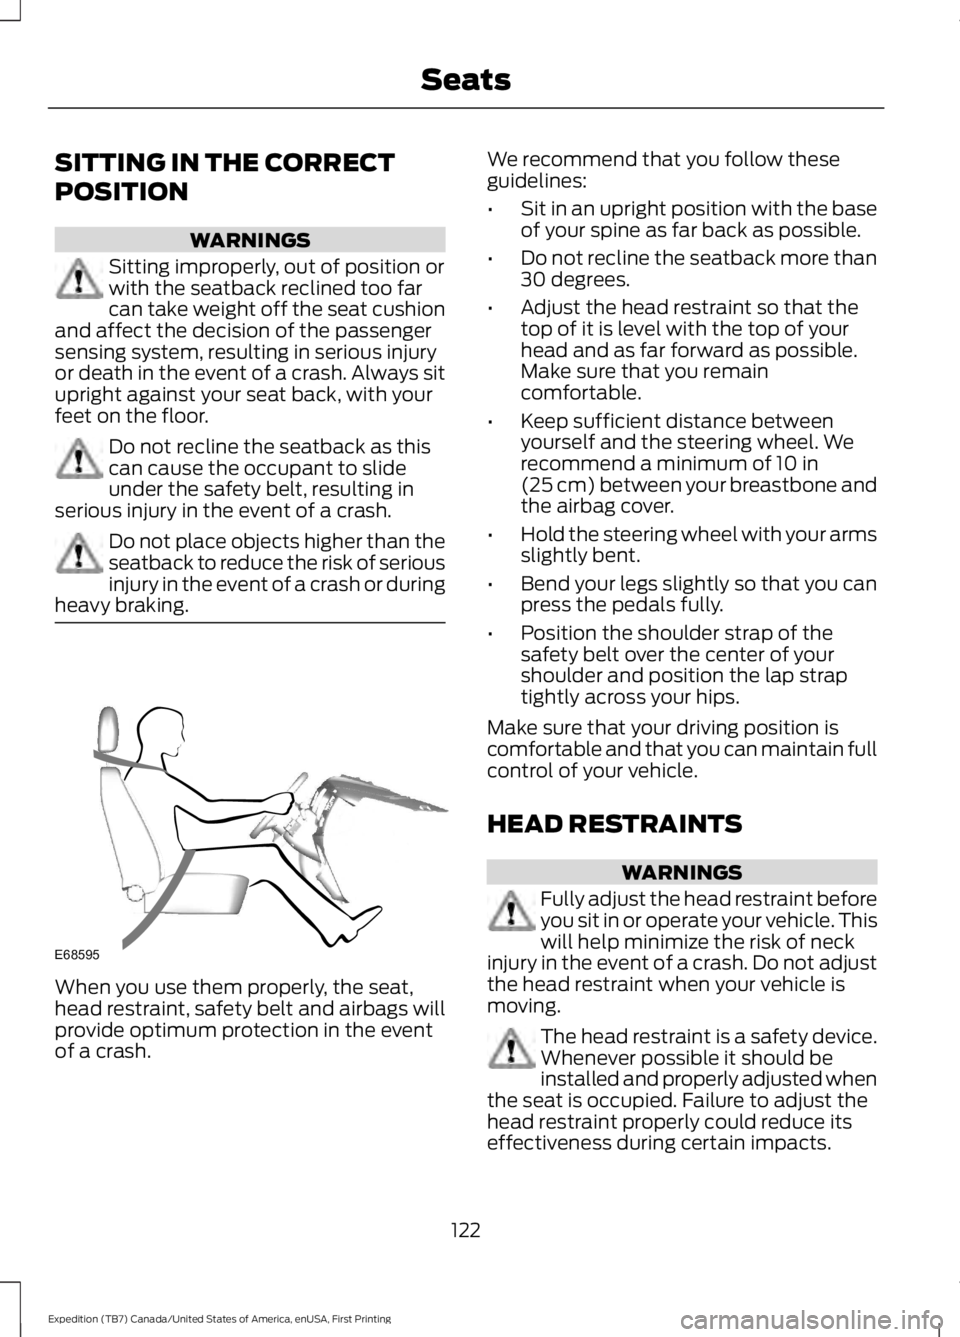
When you use them properly, the seat,head restraint, safety belt and airbags willprovide optimum protection in the eventof a crash.
We recommend that you follow theseguidelines:
•Sit in an upright position with the baseof your spine as far back as possible.
•Do not recline the seatback more than30 degrees.
•Adjust the head restraint so that thetop of it is level with the top of yourhead and as far forward as possible.Make sure that you remaincomfortable.
•Keep sufficient distance betweenyourself and the steering wheel. Werecommend a minimum of 10 in(25 cm) between your breastbone andthe airbag cover.
•Hold the steering wheel with your armsslightly bent.
•Bend your legs slightly so that you canpress the pedals fully.
•Position the shoulder strap of thesafety belt over the center of yourshoulder and position the lap straptightly across your hips.
Make sure that your driving position iscomfortable and that you can maintain fullcontrol of your vehicle.
HEAD RESTRAINTS
WARNINGS
Fully adjust the head restraint beforeyou sit in or operate your vehicle. Thiswill help minimize the risk of neckinjury in the event of a crash. Do not adjustthe head restraint when your vehicle ismoving.
The head restraint is a safety device.Whenever possible it should beinstalled and properly adjusted whenthe seat is occupied. Failure to adjust thehead restraint properly could reduce itseffectiveness during certain impacts.
122
Expedition (TB7) Canada/United States of America, enUSA, First Printing
SeatsE68595
Page 129 of 421
2. Continue pressing the control until itreaches the end of the seat track.
3.Continue pressing the control for abouttwo seconds. You will feel the seatbounce back slightly.
Power Lumbar (If Equipped)
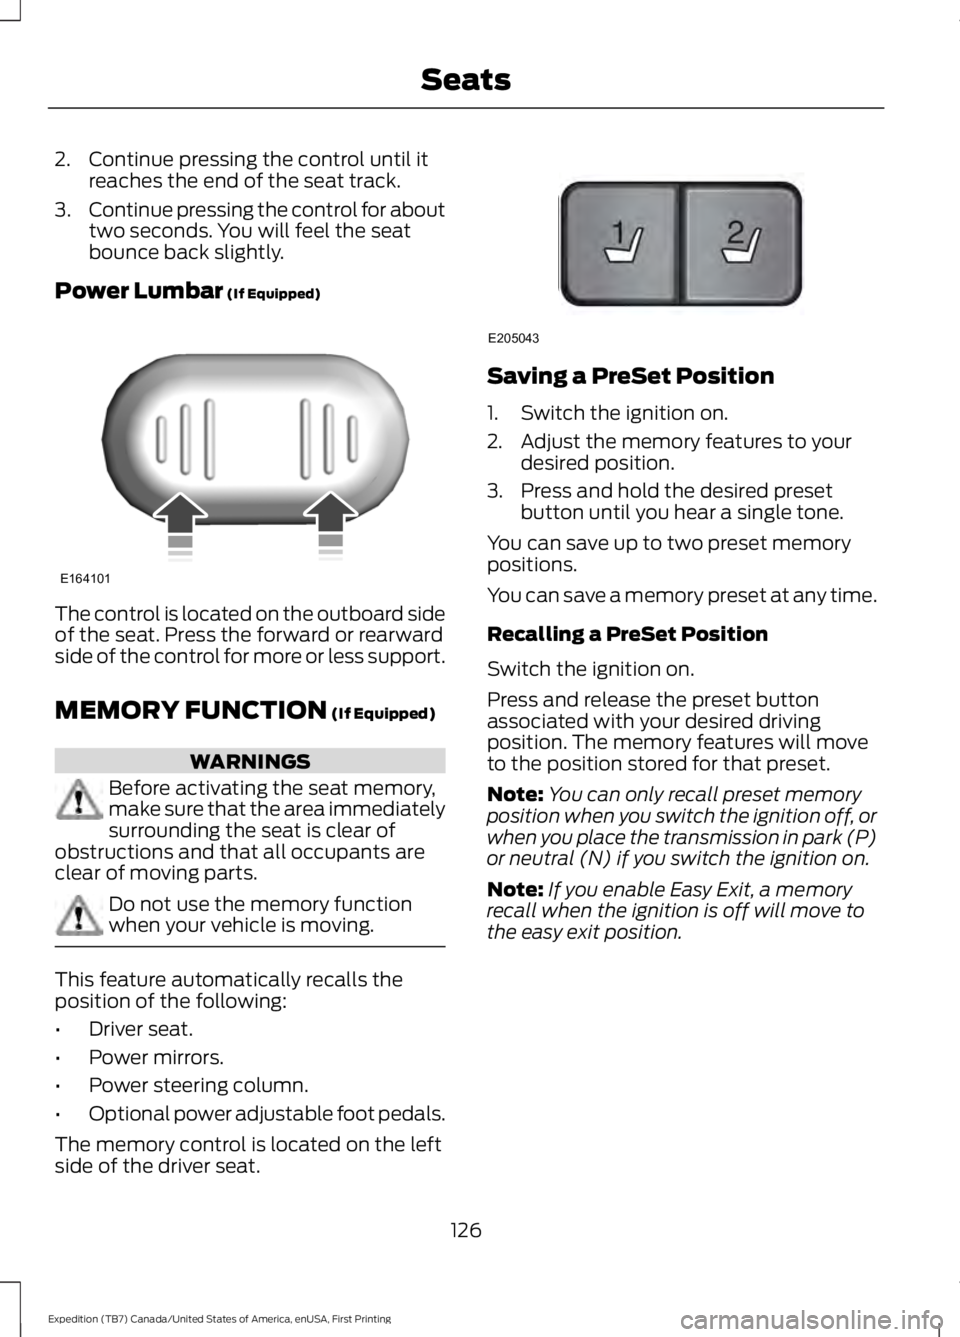
The control is located on the outboard sideof the seat. Press the forward or rearwardside of the control for more or less support.
MEMORY FUNCTION (If Equipped)
WARNINGS
Before activating the seat memory,make sure that the area immediatelysurrounding the seat is clear ofobstructions and that all occupants areclear of moving parts.
Do not use the memory functionwhen your vehicle is moving.
This feature automatically recalls theposition of the following:
•Driver seat.
•Power mirrors.
•Power steering column.
•Optional power adjustable foot pedals.
The memory control is located on the leftside of the driver seat.
Saving a PreSet Position
1. Switch the ignition on.
2. Adjust the memory features to yourdesired position.
3. Press and hold the desired presetbutton until you hear a single tone.
You can save up to two preset memorypositions.
You can save a memory preset at any time.
Recalling a PreSet Position
Switch the ignition on.
Press and release the preset buttonassociated with your desired drivingposition. The memory features will moveto the position stored for that preset.
Note:You can only recall preset memoryposition when you switch the ignition off, orwhen you place the transmission in park (P)or neutral (N) if you switch the ignition on.
Note:If you enable Easy Exit, a memoryrecall when the ignition is off will move tothe easy exit position.
126
Expedition (TB7) Canada/United States of America, enUSA, First Printing
SeatsE164101 21
E205043
Page 137 of 421
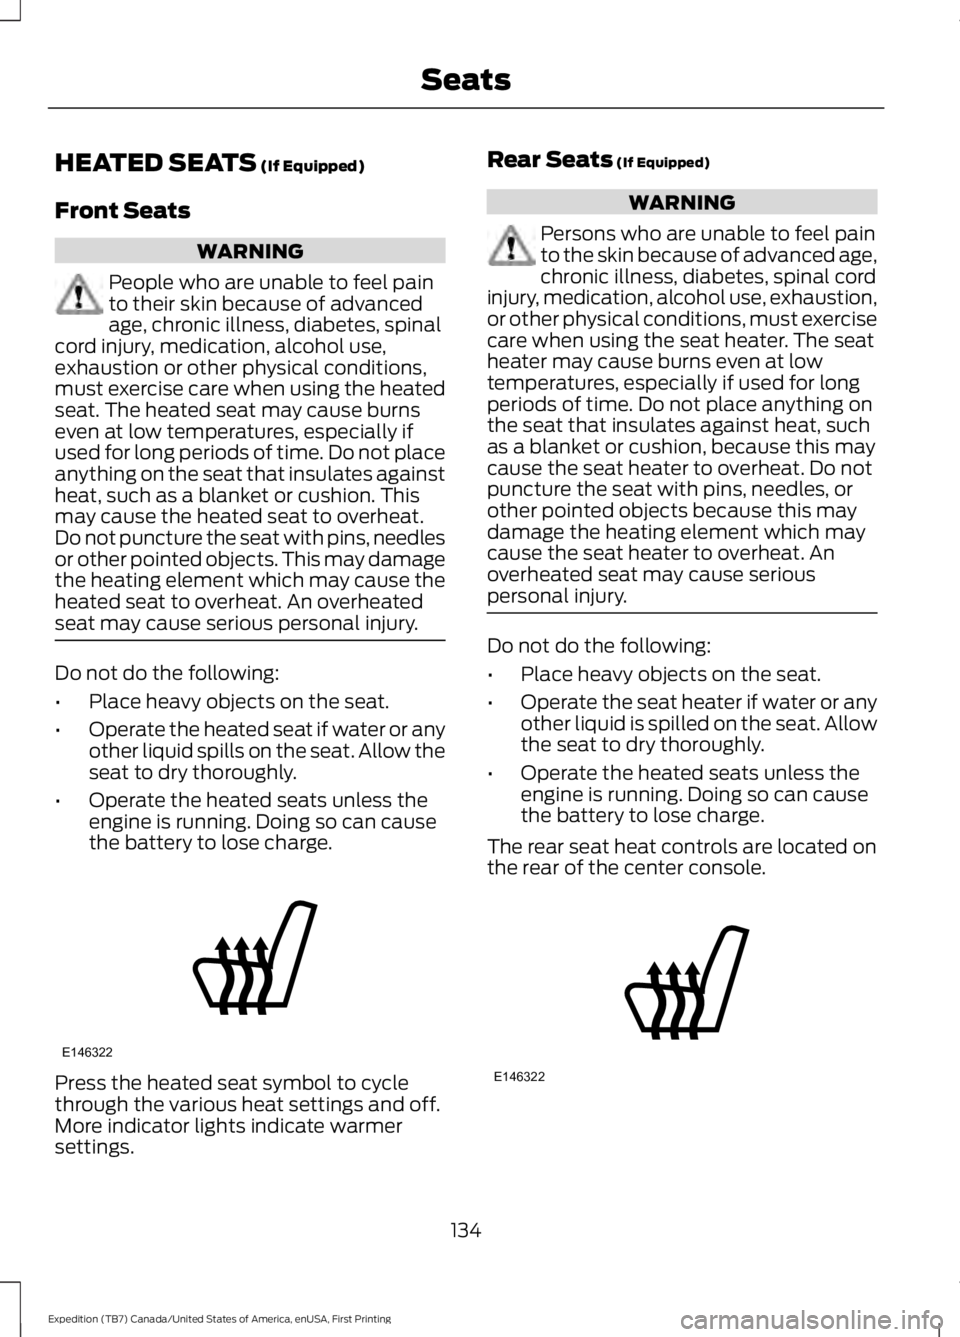
HEATED SEATS (If Equipped)
Front Seats
WARNING
People who are unable to feel painto their skin because of advancedage, chronic illness, diabetes, spinalcord injury, medication, alcohol use,exhaustion or other physical conditions,must exercise care when using the heatedseat. The heated seat may cause burnseven at low temperatures, especially ifused for long periods of time. Do not placeanything on the seat that insulates againstheat, such as a blanket or cushion. Thismay cause the heated seat to overheat.Do not puncture the seat with pins, needlesor other pointed objects. This may damagethe heating element which may cause theheated seat to overheat. An overheatedseat may cause serious personal injury.
Do not do the following:
•Place heavy objects on the seat.
•Operate the heated seat if water or anyother liquid spills on the seat. Allow theseat to dry thoroughly.
•Operate the heated seats unless theengine is running. Doing so can causethe battery to lose charge.
Press the heated seat symbol to cyclethrough the various heat settings and off.More indicator lights indicate warmersettings.
Rear Seats (If Equipped)
WARNING
Persons who are unable to feel painto the skin because of advanced age,chronic illness, diabetes, spinal cordinjury, medication, alcohol use, exhaustion,or other physical conditions, must exercisecare when using the seat heater. The seatheater may cause burns even at lowtemperatures, especially if used for longperiods of time. Do not place anything onthe seat that insulates against heat, suchas a blanket or cushion, because this maycause the seat heater to overheat. Do notpuncture the seat with pins, needles, orother pointed objects because this maydamage the heating element which maycause the seat heater to overheat. Anoverheated seat may cause seriouspersonal injury.
Do not do the following:
•Place heavy objects on the seat.
•Operate the seat heater if water or anyother liquid is spilled on the seat. Allowthe seat to dry thoroughly.
•Operate the heated seats unless theengine is running. Doing so can causethe battery to lose charge.
The rear seat heat controls are located onthe rear of the center console.
134
Expedition (TB7) Canada/United States of America, enUSA, First Printing
SeatsE146322 E146322
Page 138 of 421
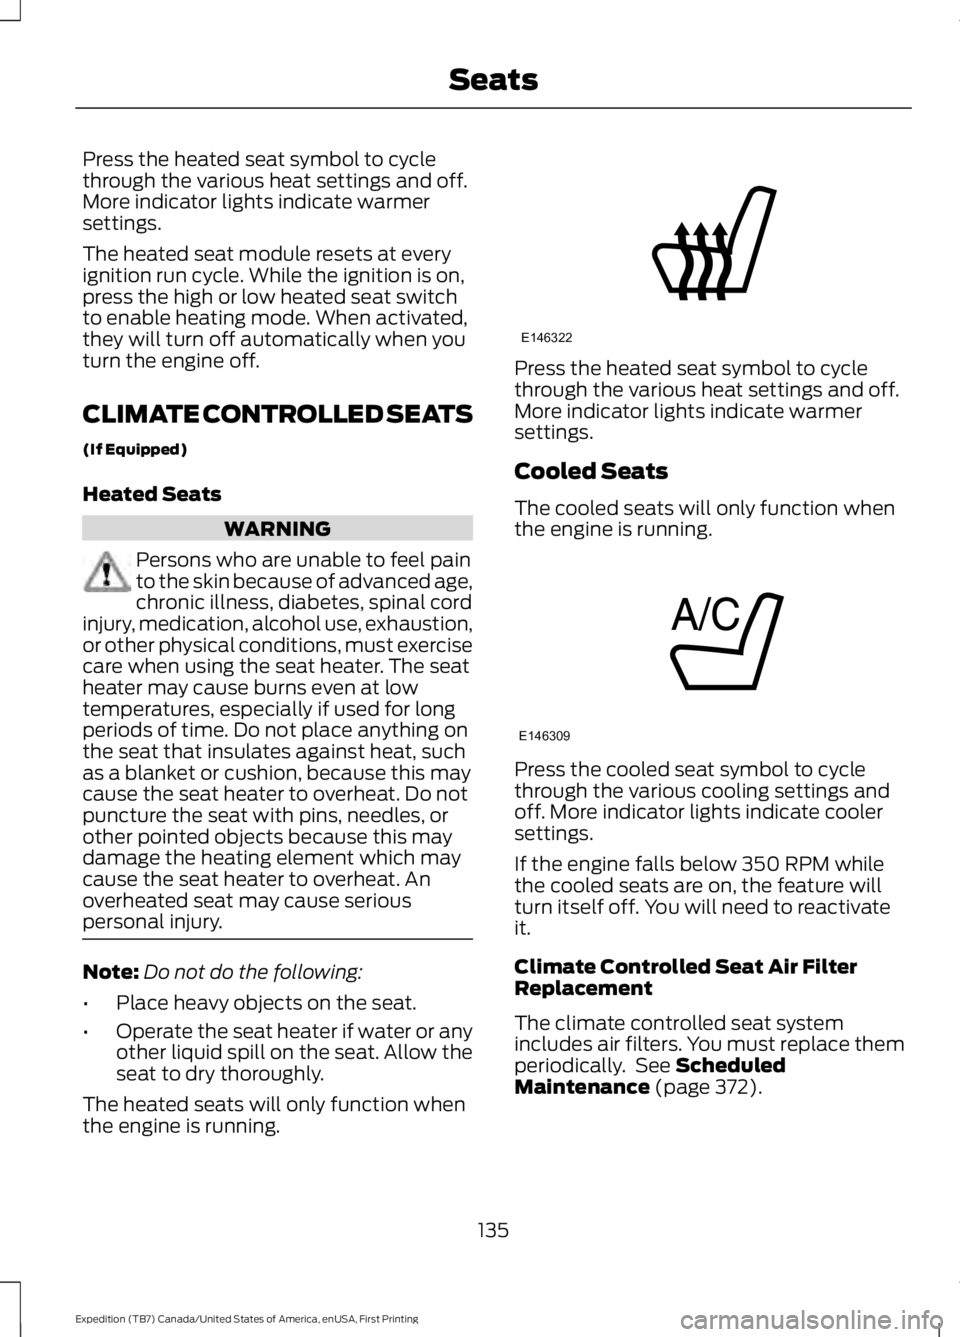
Press the heated seat symbol to cyclethrough the various heat settings and off.More indicator lights indicate warmersettings.
The heated seat module resets at everyignition run cycle. While the ignition is on,press the high or low heated seat switchto enable heating mode. When activated,they will turn off automatically when youturn the engine off.
CLIMATE CONTROLLED SEATS
(If Equipped)
Heated Seats
WARNING
Persons who are unable to feel painto the skin because of advanced age,chronic illness, diabetes, spinal cordinjury, medication, alcohol use, exhaustion,or other physical conditions, must exercisecare when using the seat heater. The seatheater may cause burns even at lowtemperatures, especially if used for longperiods of time. Do not place anything onthe seat that insulates against heat, suchas a blanket or cushion, because this maycause the seat heater to overheat. Do notpuncture the seat with pins, needles, orother pointed objects because this maydamage the heating element which maycause the seat heater to overheat. Anoverheated seat may cause seriouspersonal injury.
Note:Do not do the following:
•Place heavy objects on the seat.
•Operate the seat heater if water or anyother liquid spill on the seat. Allow theseat to dry thoroughly.
The heated seats will only function whenthe engine is running.
Press the heated seat symbol to cyclethrough the various heat settings and off.More indicator lights indicate warmersettings.
Cooled Seats
The cooled seats will only function whenthe engine is running.
Press the cooled seat symbol to cyclethrough the various cooling settings andoff. More indicator lights indicate coolersettings.
If the engine falls below 350 RPM whilethe cooled seats are on, the feature willturn itself off. You will need to reactivateit.
Climate Controlled Seat Air FilterReplacement
The climate controlled seat systemincludes air filters. You must replace themperiodically. See ScheduledMaintenance (page 372).
135
Expedition (TB7) Canada/United States of America, enUSA, First Printing
SeatsE146322 E146309
Page 140 of 421
HomeLink Wireless ControlSystem
WARNINGS
Make sure that the garage door andsecurity device are free fromobstruction when you areprogramming. Do not program the systemwith the vehicle in the garage.
Do not use the system with anygarage door opener that does nothave the safety stop and reversefeature as required by U.S. Federal SafetyStandards (this includes any garage dooropener manufactured before April 1, 1982).A garage door opener which cannot detectan object, signaling the door to stop andreverse, does not meet current federalsafety standards. Using a garage dooropener without these features increasesthe risk of serious injury or death.
Note:Make sure you keep the originalremote control transmitter for use in othervehicles as well as for future systemprogramming.
Note:We recommend that upon the saleor lease termination of your vehicle, youerase the programmed function buttons forsecurity reasons. See Erasing the FunctionButton Codes.
Note:You can program a maximum ofthree devices. To change or replace any ofthe three devices after it has been initiallyprogrammed, you must first erase thecurrent settings. See Erasing the FunctionButton Codes.
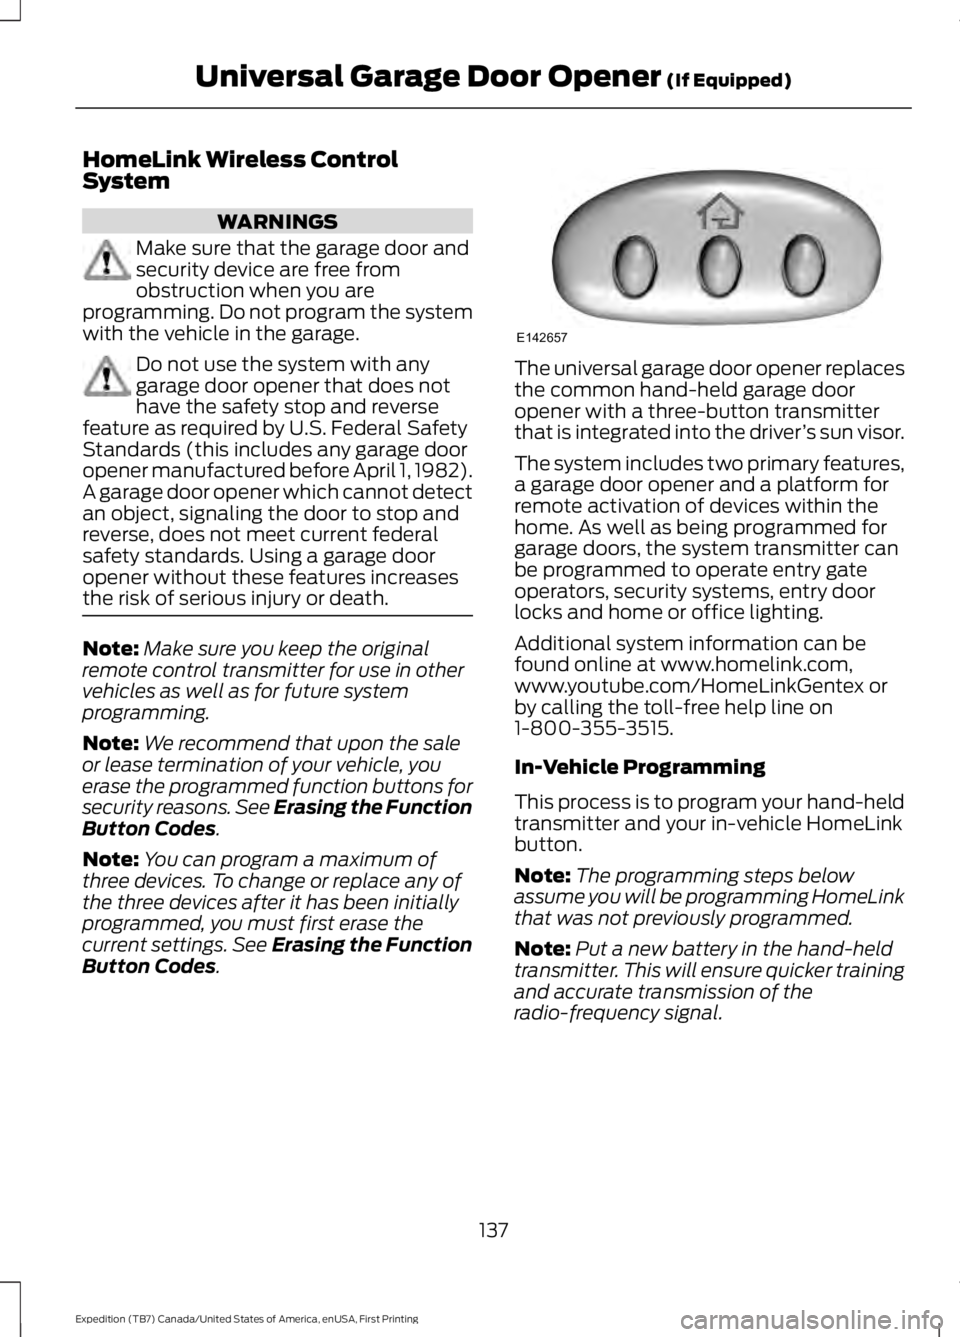
The universal garage door opener replacesthe common hand-held garage dooropener with a three-button transmitterthat is integrated into the driver’s sun visor.
The system includes two primary features,a garage door opener and a platform forremote activation of devices within thehome. As well as being programmed forgarage doors, the system transmitter canbe programmed to operate entry gateoperators, security systems, entry doorlocks and home or office lighting.
Additional system information can befound online at www.homelink.com,www.youtube.com/HomeLinkGentex orby calling the toll-free help line on1-800-355-3515.
In-Vehicle Programming
This process is to program your hand-heldtransmitter and your in-vehicle HomeLinkbutton.
Note:The programming steps belowassume you will be programming HomeLinkthat was not previously programmed.
Note:Put a new battery in the hand-heldtransmitter. This will ensure quicker trainingand accurate transmission of theradio-frequency signal.
137
Expedition (TB7) Canada/United States of America, enUSA, First Printing
Universal Garage Door Opener (If Equipped)E142657
Page 141 of 421
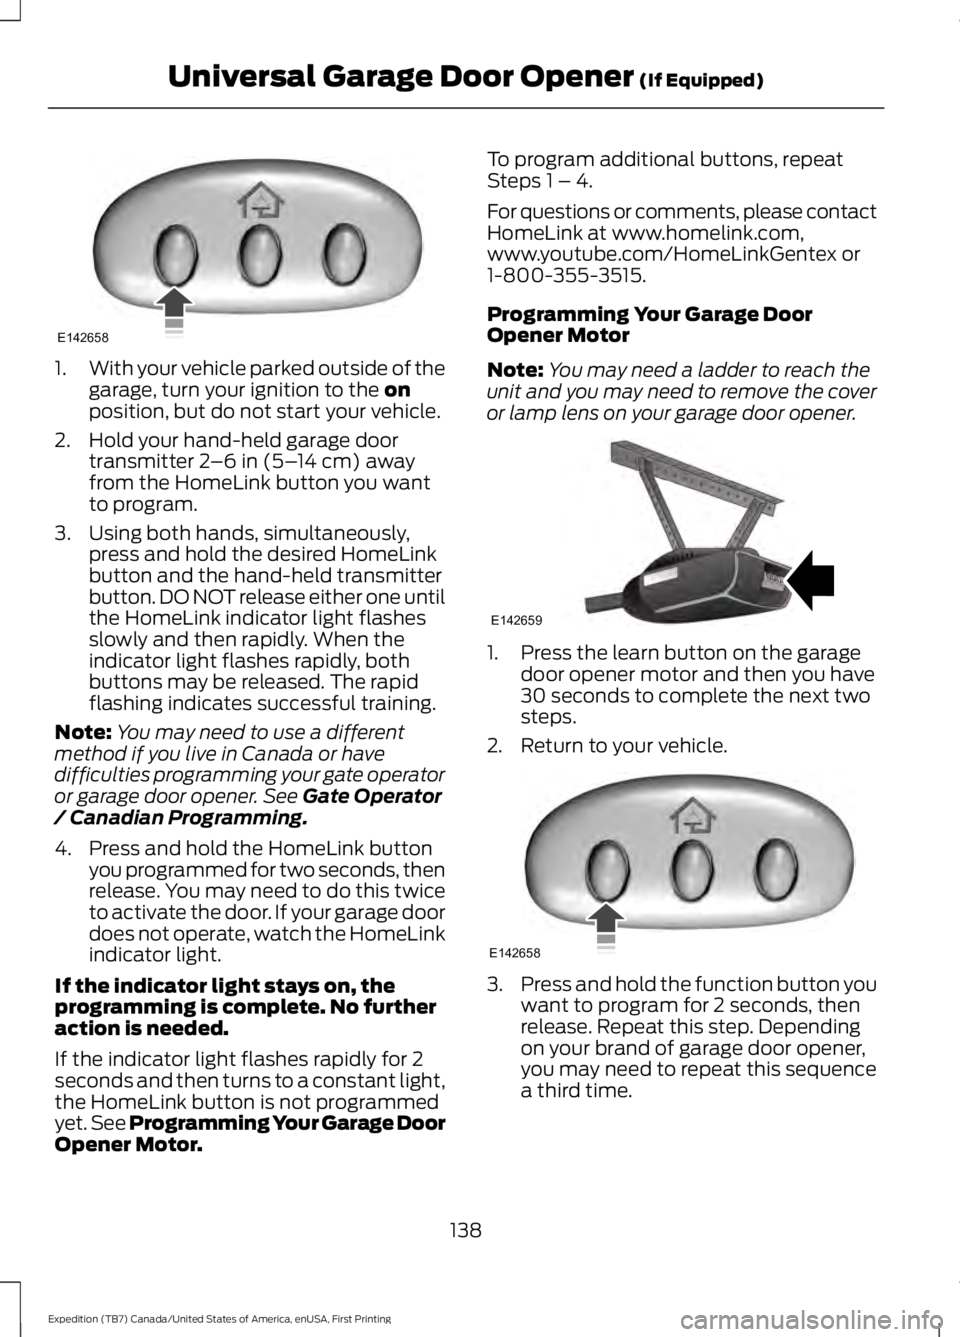
1.With your vehicle parked outside of thegarage, turn your ignition to the onposition, but do not start your vehicle.
2. Hold your hand-held garage doortransmitter 2–6 in (5–14 cm) awayfrom the HomeLink button you wantto program.
3. Using both hands, simultaneously,press and hold the desired HomeLinkbutton and the hand-held transmitterbutton. DO NOT release either one untilthe HomeLink indicator light flashesslowly and then rapidly. When theindicator light flashes rapidly, bothbuttons may be released. The rapidflashing indicates successful training.
Note:You may need to use a differentmethod if you live in Canada or havedifficulties programming your gate operatoror garage door opener. See Gate Operator/ Canadian Programming.
4. Press and hold the HomeLink buttonyou programmed for two seconds, thenrelease. You may need to do this twiceto activate the door. If your garage doordoes not operate, watch the HomeLinkindicator light.
If the indicator light stays on, theprogramming is complete. No furtheraction is needed.
If the indicator light flashes rapidly for 2seconds and then turns to a constant light,the HomeLink button is not programmedyet. See Programming Your Garage DoorOpener Motor.
To program additional buttons, repeatSteps 1 – 4.
For questions or comments, please contactHomeLink at www.homelink.com,www.youtube.com/HomeLinkGentex or1-800-355-3515.
Programming Your Garage DoorOpener Motor
Note:You may need a ladder to reach theunit and you may need to remove the coveror lamp lens on your garage door opener.
1. Press the learn button on the garagedoor opener motor and then you have30 seconds to complete the next twosteps.
2. Return to your vehicle.
3.Press and hold the function button youwant to program for 2 seconds, thenrelease. Repeat this step. Dependingon your brand of garage door opener,you may need to repeat this sequencea third time.
138
Expedition (TB7) Canada/United States of America, enUSA, First Printing
Universal Garage Door Opener (If Equipped)E142658 E142659 E142658