2016 FORD EXPEDITION EL clock
[x] Cancel search: clockPage 20 of 421
Use a child safety seat (sometimes calledan infant carrier, convertible seat, ortoddler seat) for infants, toddlers, orchildren weighing 40 pounds (18kilograms) or less (generally age four oryounger).
Using Lap and Shoulder Belts
WARNINGS
Airbags can kill or injure a child in achild seat. Never place a rear-facingchild seat in front of an active airbag.If you must use a forward-facing child seatin the front seat, move the vehicle seatupon which the seat is installed all the wayback.
Airbags can kill or injure a child in achild seat. Children 12 and undershould be properly restrained in therear seat whenever possible.
Depending on where you secure achild restraint, and depending on thechild restraint design, you may blockaccess to certain safety belt buckleassemblies and LATCH lower anchors,rendering those features potentiallyunusable. To avoid risk of injury, occupantsshould only use seating positions wherethey are able to be properly restrained.
When installing a child safety seat withcombination lap and shoulder belts:
•Use the correct safety belt buckle forthat seating position.
•Insert the belt tongue into the properbuckle until you hear a snap and feel itlatch. Make sure the tongue is securelyfastened in the buckle.
•Keep the buckle release buttonpointing up and away from the safetyseat, with the tongue between the childseat and the release button, to preventaccidental unbuckling.
•Place the vehicle seat upon which thechild seat will be installed in the uprightposition.
•Put the safety belt in the automaticlocking mode. This vehicle does notrequire the use of a locking clip.
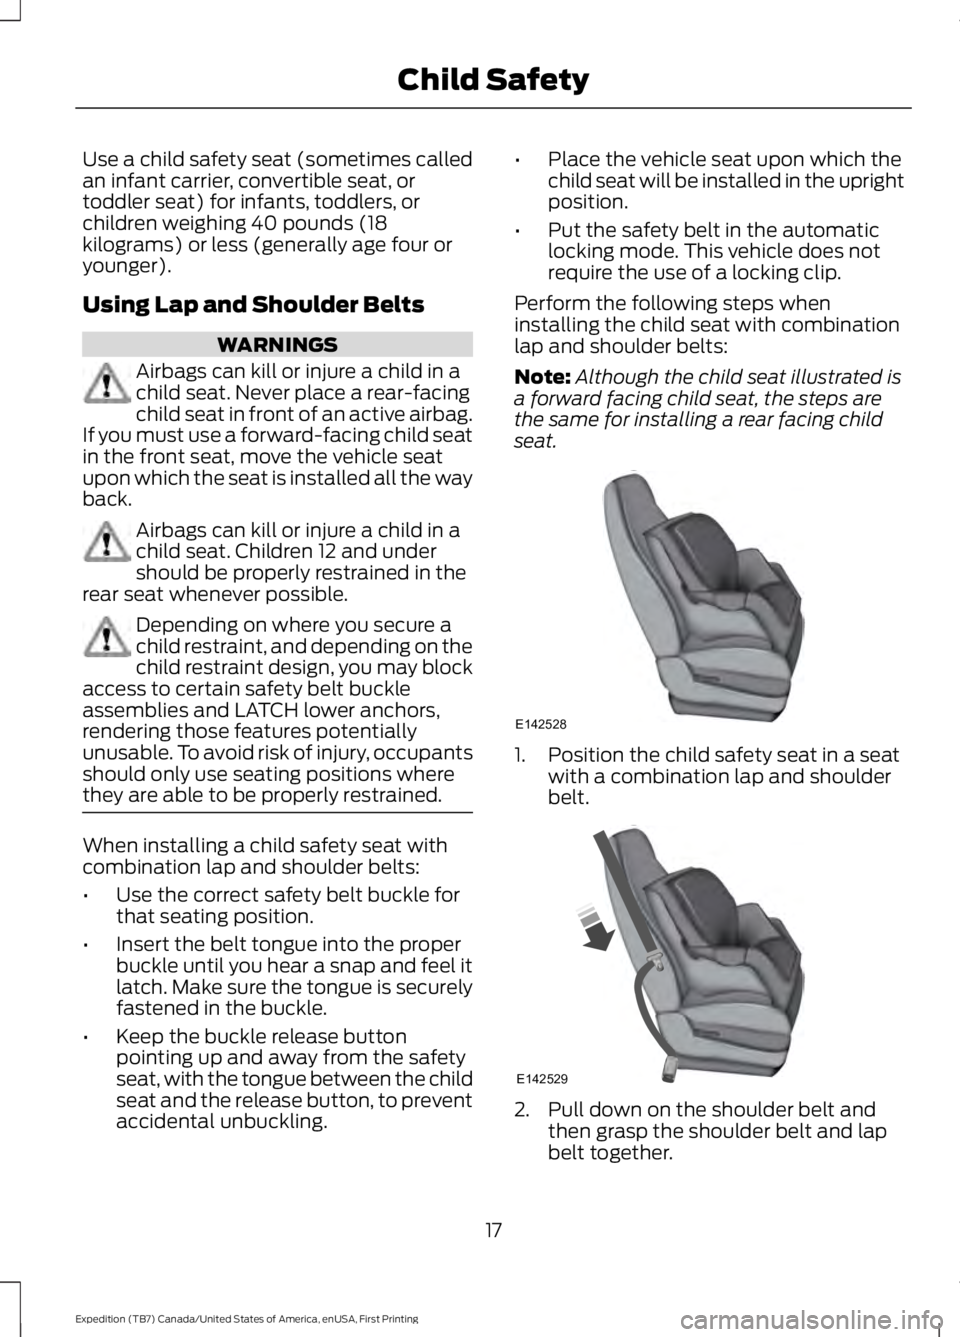
Perform the following steps wheninstalling the child seat with combinationlap and shoulder belts:
Note:Although the child seat illustrated isa forward facing child seat, the steps arethe same for installing a rear facing childseat.
1. Position the child safety seat in a seatwith a combination lap and shoulderbelt.
2. Pull down on the shoulder belt andthen grasp the shoulder belt and lapbelt together.
17
Expedition (TB7) Canada/United States of America, enUSA, First Printing
Child SafetyE142528 E142529
Page 21 of 421

3.While holding the shoulder and lap beltportions together, route the tonguethrough the child seat according to thechild seat manufacturer's instructions.Be sure the belt webbing is not twisted.
4. Insert the belt tongue into the properbuckle (the buckle closest to thedirection the tongue is coming from)for that seating position until you heara snap and feel the latch engage. Makesure the tongue is latched securely bypulling on it.
5. To put the retractor in the automaticlocking mode, grasp the shoulderportion of the belt and pull downwarduntil all of the belt is pulled out.
Note:The automatic locking mode isavailable on the front passenger and rearseats. This vehicle does not require the useof a locking clip.
6. Allow the belt to retract to removeslack. The belt will click as it retractsto indicate it is in the automatic lockingmode.
7. Try to pull the belt out of the retractorto make sure the retractor is in theautomatic locking mode (you shouldnot be able to pull more belt out). If theretractor is not locked, unbuckle thebelt and repeat Steps 5 and 6.
18
Expedition (TB7) Canada/United States of America, enUSA, First Printing
Child SafetyE142530 E206121 E142875 E142533
Page 31 of 421

PRINCIPLE OF OPERATION
WARNINGS
Always drive and ride with yourseatback upright and the lap beltsnug and low across the hips.
To reduce the risk of injury, makesure children sit where they can beproperly restrained.
Never let a passenger hold a child onhis or her lap while the vehicle ismoving. The passenger cannotprotect the child from injury in a crash,which may result in serious injury or death.
All occupants of the vehicle,including the driver, should alwaysproperly wear their safety belts, evenwhen an airbag supplemental restraintsystem is provided. Failure to properly wearyour safety belt could seriously increasethe risk of injury or death.
It is extremely dangerous to ride in acargo area, inside or outside of avehicle. In a crash, people riding inthese areas are more likely to be seriouslyinjured or killed. Do not allow people to ridein any area of your vehicle that is notequipped with seats and safety belts. Besure everyone in your vehicle is in a seatand using a safety belt properly.
In a rollover crash, an unbeltedperson is significantly more likely todie than a person wearing a safetybelt.
Each seating position in your vehiclehas a specific safety belt assemblywhich is made up of one buckle andone tongue that are designed to be usedas a pair. 1) Use the shoulder belt on theoutside shoulder only. Never wear theshoulder belt under the arm. 2) Neverswing the safety belt around your neck overthe inside shoulder. 3) Never use a singlebelt for more than one person.
WARNINGS
When possible, all children 12 yearsold and under should be properlyrestrained in a rear seating position.Failure to follow this could seriouslyincrease the risk of injury or death.
Safety belts and seats can becomehot in a vehicle that has been closedup in sunny weather; they could burna small child. Check seat covers andbuckles before you place a child anywherenear them.
Front and rear seat occupants,including pregnant women, shouldwear safety belts for optimumprotection in an accident.
All seating positions in this vehicle havelap and shoulder safety belts. Alloccupants of the vehicle should alwaysproperly wear their safety belts, even whenan airbag supplemental restraint systemis provided.
The safety belt system consists of:
•Lap and shoulder safety belts.
•Shoulder safety belt with automaticlocking mode, (except driver safetybelt).
•Height adjuster at the front outboardseating positions.
•Safety belt pretensioner at the frontoutboard seating positions.
•Safety belt warning light and chime.
•Crash sensors and monitoring systemwith readiness indicator.
28
Expedition (TB7) Canada/United States of America, enUSA, First Printing
Seatbelts
Page 34 of 421
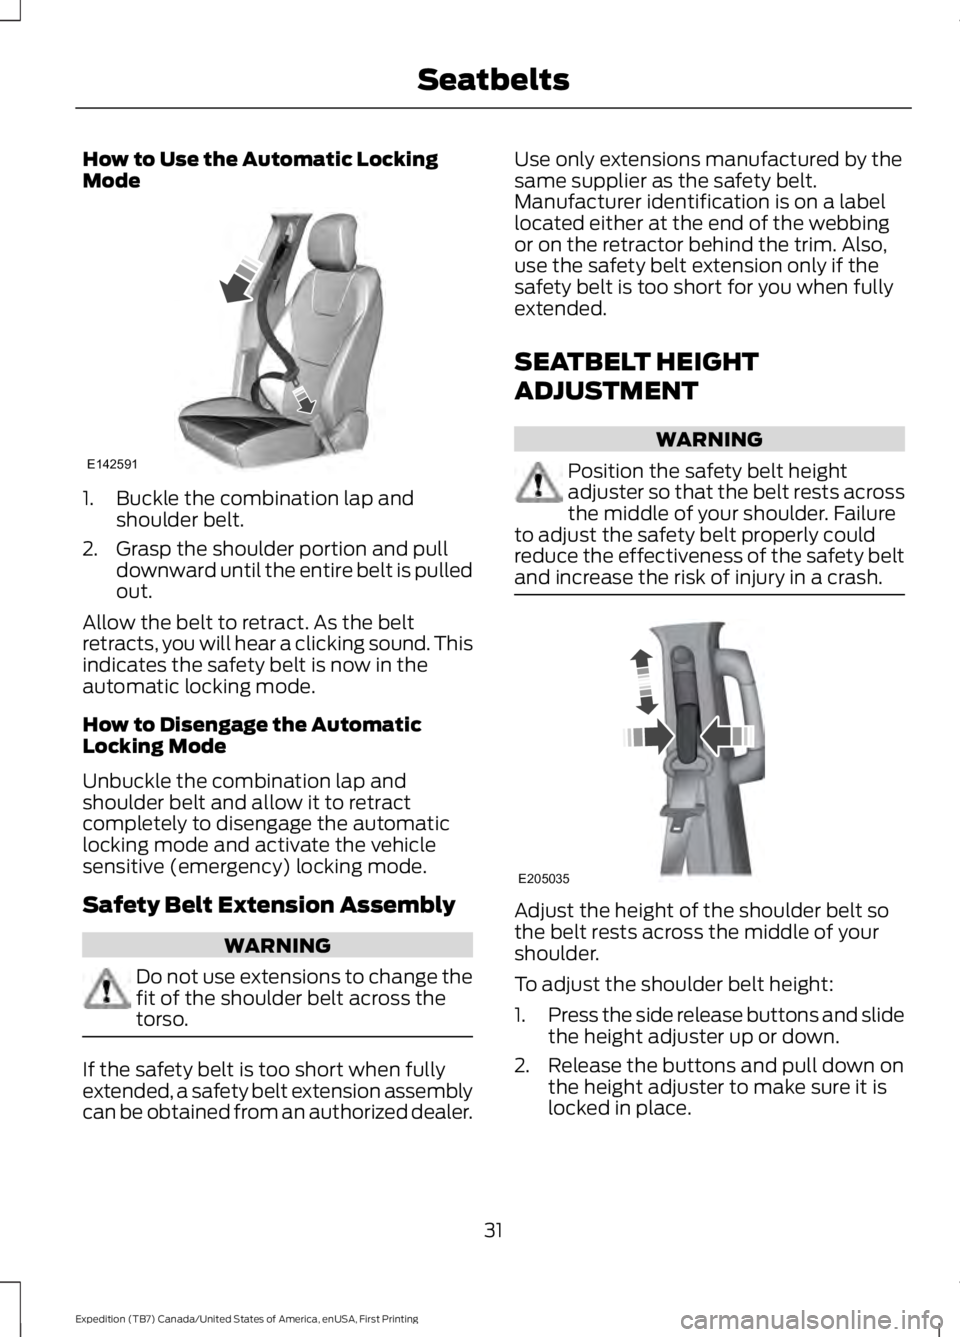
How to Use the Automatic LockingMode
1. Buckle the combination lap andshoulder belt.
2. Grasp the shoulder portion and pulldownward until the entire belt is pulledout.
Allow the belt to retract. As the beltretracts, you will hear a clicking sound. Thisindicates the safety belt is now in theautomatic locking mode.
How to Disengage the AutomaticLocking Mode
Unbuckle the combination lap andshoulder belt and allow it to retractcompletely to disengage the automaticlocking mode and activate the vehiclesensitive (emergency) locking mode.
Safety Belt Extension Assembly
WARNING
Do not use extensions to change thefit of the shoulder belt across thetorso.
If the safety belt is too short when fullyextended, a safety belt extension assemblycan be obtained from an authorized dealer.
Use only extensions manufactured by thesame supplier as the safety belt.Manufacturer identification is on a labellocated either at the end of the webbingor on the retractor behind the trim. Also,use the safety belt extension only if thesafety belt is too short for you when fullyextended.
SEATBELT HEIGHT
ADJUSTMENT
WARNING
Position the safety belt heightadjuster so that the belt rests acrossthe middle of your shoulder. Failureto adjust the safety belt properly couldreduce the effectiveness of the safety beltand increase the risk of injury in a crash.
Adjust the height of the shoulder belt sothe belt rests across the middle of yourshoulder.
To adjust the shoulder belt height:
1.Press the side release buttons and slidethe height adjuster up or down.
2. Release the buttons and pull down onthe height adjuster to make sure it islocked in place.
31
Expedition (TB7) Canada/United States of America, enUSA, First Printing
SeatbeltsE142591 E205035
Page 139 of 421
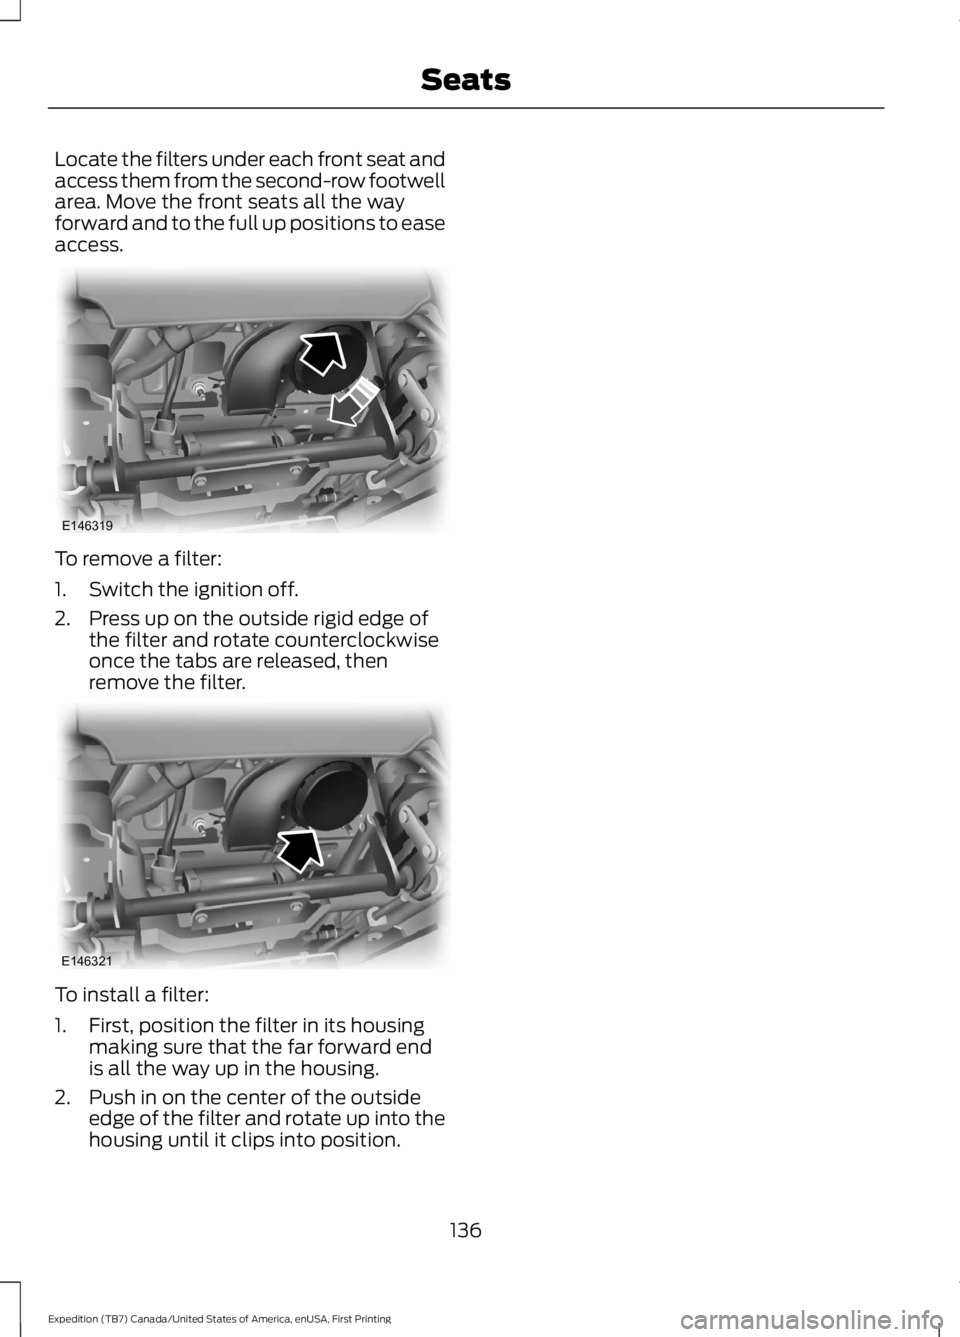
Locate the filters under each front seat andaccess them from the second-row footwellarea. Move the front seats all the wayforward and to the full up positions to easeaccess.
To remove a filter:
1. Switch the ignition off.
2. Press up on the outside rigid edge ofthe filter and rotate counterclockwiseonce the tabs are released, thenremove the filter.
To install a filter:
1. First, position the filter in its housingmaking sure that the far forward endis all the way up in the housing.
2. Push in on the center of the outsideedge of the filter and rotate up into thehousing until it clips into position.
136
Expedition (TB7) Canada/United States of America, enUSA, First Printing
SeatsE146319 E146321
Page 200 of 421
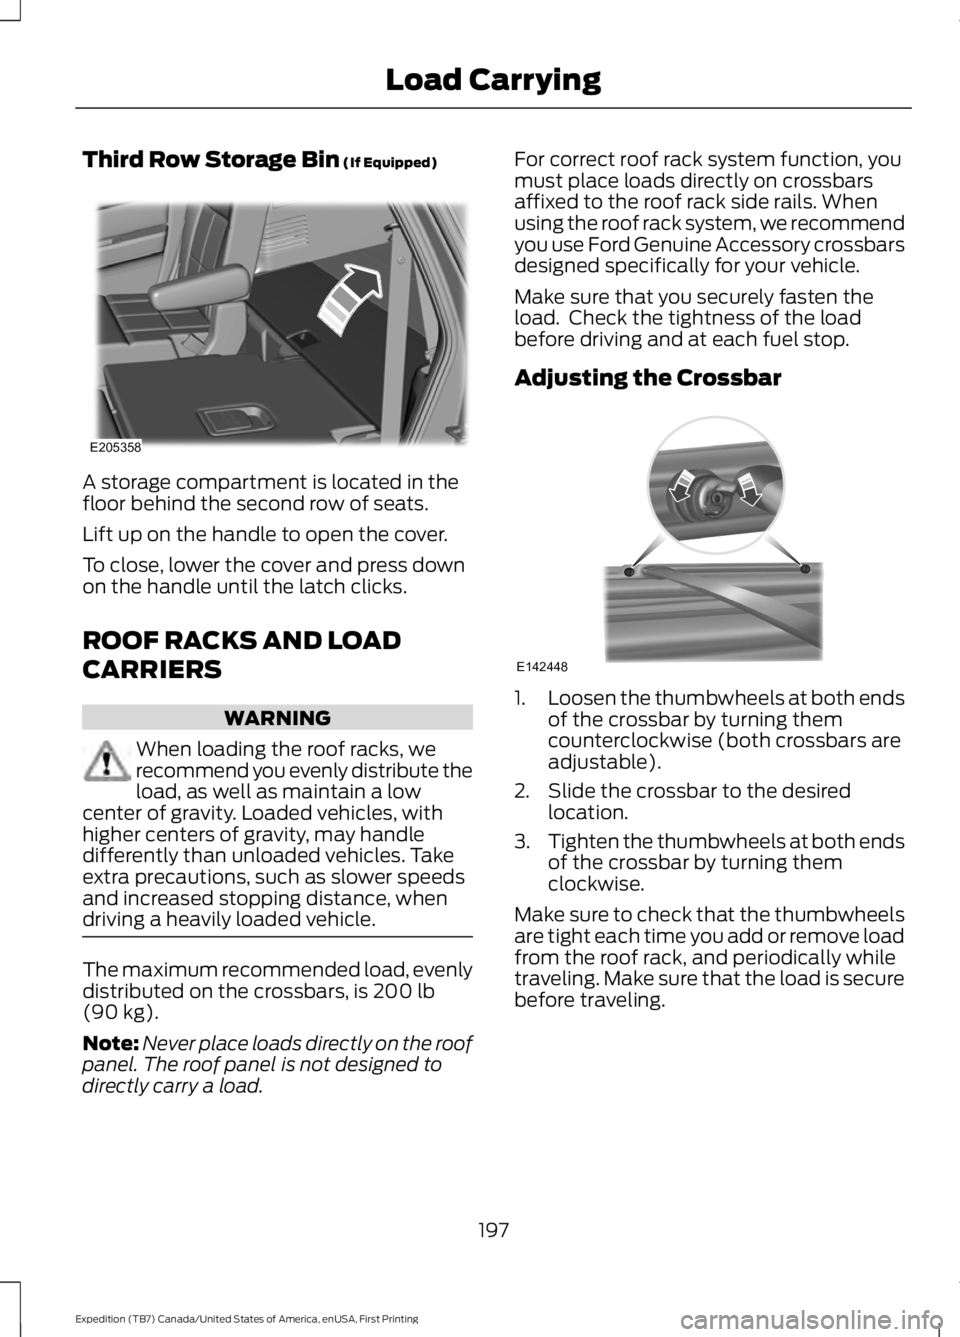
Third Row Storage Bin (If Equipped)
A storage compartment is located in thefloor behind the second row of seats.
Lift up on the handle to open the cover.
To close, lower the cover and press downon the handle until the latch clicks.
ROOF RACKS AND LOAD
CARRIERS
WARNING
When loading the roof racks, werecommend you evenly distribute theload, as well as maintain a lowcenter of gravity. Loaded vehicles, withhigher centers of gravity, may handledifferently than unloaded vehicles. Takeextra precautions, such as slower speedsand increased stopping distance, whendriving a heavily loaded vehicle.
The maximum recommended load, evenlydistributed on the crossbars, is 200 lb(90 kg).
Note:Never place loads directly on the roofpanel. The roof panel is not designed todirectly carry a load.
For correct roof rack system function, youmust place loads directly on crossbarsaffixed to the roof rack side rails. Whenusing the roof rack system, we recommendyou use Ford Genuine Accessory crossbarsdesigned specifically for your vehicle.
Make sure that you securely fasten theload. Check the tightness of the loadbefore driving and at each fuel stop.
Adjusting the Crossbar
1.Loosen the thumbwheels at both endsof the crossbar by turning themcounterclockwise (both crossbars areadjustable).
2. Slide the crossbar to the desiredlocation.
3.Tighten the thumbwheels at both endsof the crossbar by turning themclockwise.
Make sure to check that the thumbwheelsare tight each time you add or remove loadfrom the roof rack, and periodically whiletraveling. Make sure that the load is securebefore traveling.
197
Expedition (TB7) Canada/United States of America, enUSA, First Printing
Load CarryingE205358 E142448
Page 249 of 421
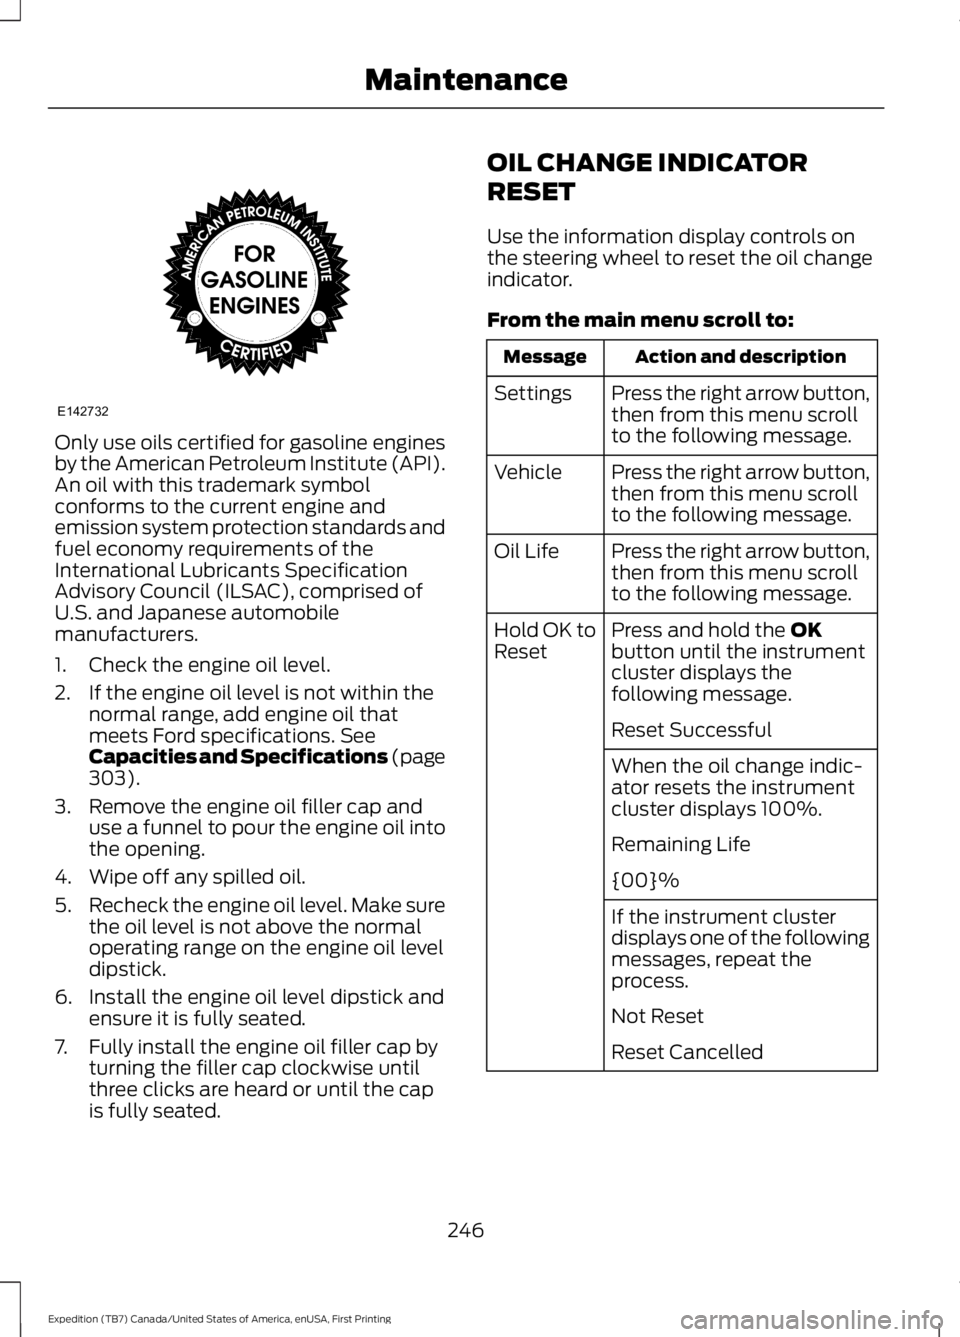
Only use oils certified for gasoline enginesby the American Petroleum Institute (API).An oil with this trademark symbolconforms to the current engine andemission system protection standards andfuel economy requirements of theInternational Lubricants SpecificationAdvisory Council (ILSAC), comprised ofU.S. and Japanese automobilemanufacturers.
1. Check the engine oil level.
2. If the engine oil level is not within thenormal range, add engine oil thatmeets Ford specifications. SeeCapacities and Specifications (page303).
3. Remove the engine oil filler cap anduse a funnel to pour the engine oil intothe opening.
4. Wipe off any spilled oil.
5.Recheck the engine oil level. Make surethe oil level is not above the normaloperating range on the engine oil leveldipstick.
6. Install the engine oil level dipstick andensure it is fully seated.
7. Fully install the engine oil filler cap byturning the filler cap clockwise untilthree clicks are heard or until the capis fully seated.
OIL CHANGE INDICATOR
RESET
Use the information display controls onthe steering wheel to reset the oil changeindicator.
From the main menu scroll to:
Action and descriptionMessage
Press the right arrow button,then from this menu scrollto the following message.
Settings
Press the right arrow button,then from this menu scrollto the following message.
Vehicle
Press the right arrow button,then from this menu scrollto the following message.
Oil Life
Press and hold the OKbutton until the instrumentcluster displays thefollowing message.
Hold OK toReset
Reset Successful
When the oil change indic-ator resets the instrumentcluster displays 100%.
Remaining Life
{00}%
If the instrument clusterdisplays one of the followingmessages, repeat theprocess.
Not Reset
Reset Cancelled
246
Expedition (TB7) Canada/United States of America, enUSA, First Printing
MaintenanceE142732
Page 256 of 421
WARNINGS
Keep batteries out of reach ofchildren. Batteries contain sulfuricacid. Avoid contact with skin, eyes orclothing. Shield your eyes when workingnear the battery to protect against possiblesplashing of acid solution. In case of acidcontact with skin or eyes, flushimmediately with water for a minimum of15 minutes and get prompt medicalattention. If acid is swallowed, call aphysician immediately.
Battery posts, terminals and relatedaccessories contain lead and leadcompounds. Wash hands afterhandling.
This vehicle may be fitted with morethan one battery. Removing thebattery cables from only one batterydoes not disconnect your vehicle electricalsystem. Make sure you disconnect thebattery cables from all batteries whendisconnecting power. Failure to do so maycause serious personal injury or propertydamage.
Your vehicle is fitted with a Motorcraftmaintenance-free battery which normallydoes not require additional water.
When a battery replacement is required,you must use a recommendedreplacement battery that matches theelectrical requirements of the vehicle.
Note:After cleaning or replacing thebattery, make sure you reinstall the batterycover or shield.
Note:If you add electrical accessories orcomponents to the vehicle, it may adverselyaffect the low voltage battery performanceand durability. This may also affect theperformance of other electrical systems inthe vehicle.
For longer, trouble-free operation, keep thetop of the battery clean and dry.
If you see any corrosion on the battery orterminals, remove the cables from theterminals and clean with a wire brush. Youcan neutralize the acid with a solution ofbaking soda and water.
Because your vehicle’s engine iselectronically controlled by a computer,some control conditions are maintainedby power from the battery. When thebattery is disconnected or a new batteryis installed, the engine must relearn its idleand fuel trim strategy for optimumdriveability and performance. Flexible fuelvehicles (FFV) must also relearn theethanol content of the fuel for optimumdriveability and performance.
To restore the settings, do the following:
1. Apply the parking brake.
2. Shift into park (P) or neutral (N).
3. Switch off all accessories.
4. Press the brake pedal and start yourvehicle.
5. Run the engine until it reaches normaloperating temperature. While theengine is warming up, complete thefollowing: Reset the clock. See AudioSystem (page 312). Reset the powerwindows bounce-back feature. SeeWindows and Mirrors (page 80).Reset the radio station presets. SeeAudio System (page 312).
6.Allow the engine to idle for at least oneminute.
7.Drive the vehicle at least 10 mi (16 km)to completely relearn the idle trim andfuel trim strategy.
Note:If you do not allow the engine torelearn the idle and fuel trim strategy, theidle quality of your vehicle may be adverselyaffected until the engine computereventually relearns the idle trim and fueltrim strategy.
253
Expedition (TB7) Canada/United States of America, enUSA, First Printing
Maintenance