2016 FORD EXPEDITION EL service indicator
[x] Cancel search: service indicatorPage 161 of 421
Readiness forInspection/Maintenance (I/M)Testing
Some state/provincial and localgovernments may haveInspection/Maintenance (I/M) programsto inspect the emission control equipmenton your vehicle. Failure to pass thisinspection could prevent you from gettinga vehicle registration.
If the service engine soonindicator is on or the bulb doesnot work, you may need to havethe vehicle serviced. See On-BoardDiagnostics (OBD-II).
Your vehicle may not pass the I/M test ifthe service engine soon indicator is on ornot working properly (bulb is burned out),or if the OBD-II system has determinedthat some of the emission control systemshave not been properly checked. In thiscase, your vehicle is not ready for I/Mtesting.
If the vehicle’s engine or transmission hasjust been serviced, or the battery hasrecently run down or been replaced, theOBD-II system may indicate that thevehicle is not ready for I/M testing. Todetermine if the vehicle is ready for I/Mtesting, turn the ignition key to the onposition for 15 seconds without crankingthe engine. If the service engine soonindicator blinks eight times, it means thatthe vehicle is not ready for I/M testing; ifthe service engine soon indicator stays onsolid, it means that the vehicle is ready forI/M testing.
The OBD-II system monitors the emissioncontrol system during normal driving. Acomplete check may take several days. Ifthe vehicle is not ready for I/M testing, youmay need to perform the following drivingcycle consisting of mixed city and highwaydriving:
Drive on an expressway or highway for asteady 15 minutes, followed by 20 minutesof stop-and-go driving with at least four30-second idle periods.
Allow the vehicle to sit for at least eighthours without starting the engine. Then,start the engine and complete the abovedriving cycle. The engine must warm up toits normal operating temperature. Oncestarted, do not turn off the engine until theabove driving cycle is complete. If thevehicle is still not ready for I/M testing, youwill have to repeat the above driving cycle.
158
Expedition (TB7) Canada/United States of America, enUSA, First Printing
Fuel and Refueling
Page 167 of 421
USING FOUR-WHEEL DRIVE
WARNING
For important information regardingsafe operation of this type of vehicle,see General Information in theWheels and Tires chapter.
Note:Do not use 4H or 4L mode on dry,hard surfaced roads. Doing so will produceexcessive noise, increase tire wear and maydamage drive components. 4H and 4L modeis only intended for consistently slippery orloose surfaces.
Note:If 4L mode is selected while yourvehicle is moving above 3 mph (5 km/h),the 4WD system will not perform a shift.This is normal and should be no reason forconcern. Refer to Shifting to or from 4L forproper operation.
4WD Indicator Lights
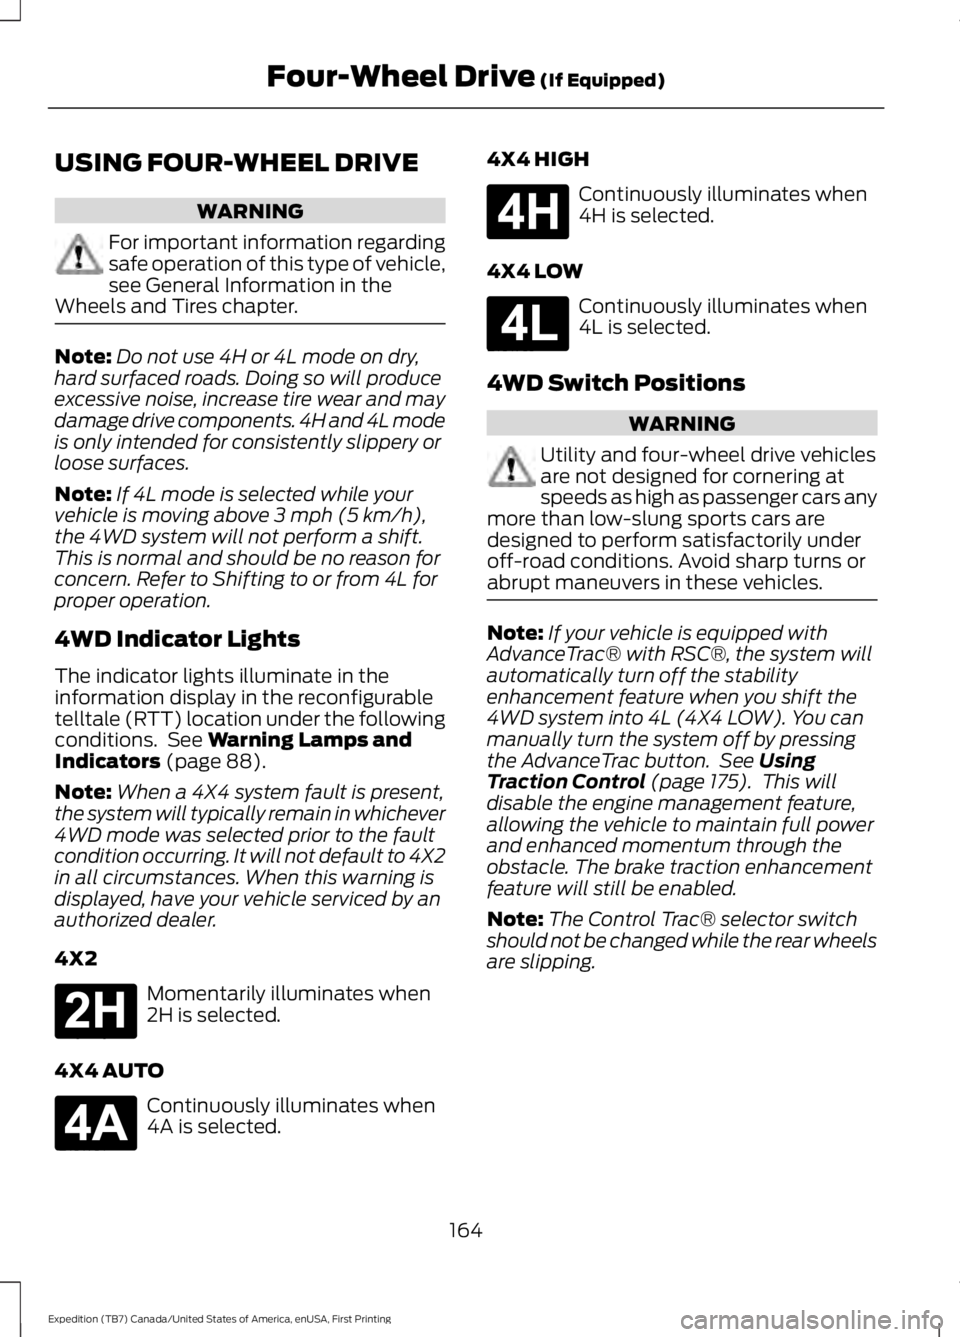
The indicator lights illuminate in theinformation display in the reconfigurabletelltale (RTT) location under the followingconditions. See Warning Lamps andIndicators (page 88).
Note:When a 4X4 system fault is present,the system will typically remain in whichever4WD mode was selected prior to the faultcondition occurring. It will not default to 4X2in all circumstances. When this warning isdisplayed, have your vehicle serviced by anauthorized dealer.
4X2
Momentarily illuminates when2H is selected.
4X4 AUTO
Continuously illuminates when4A is selected.
4X4 HIGH
Continuously illuminates when4H is selected.
4X4 LOW
Continuously illuminates when4L is selected.
4WD Switch Positions
WARNING
Utility and four-wheel drive vehiclesare not designed for cornering atspeeds as high as passenger cars anymore than low-slung sports cars aredesigned to perform satisfactorily underoff-road conditions. Avoid sharp turns orabrupt maneuvers in these vehicles.
Note:If your vehicle is equipped withAdvanceTrac® with RSC®, the system willautomatically turn off the stabilityenhancement feature when you shift the4WD system into 4L (4X4 LOW). You canmanually turn the system off by pressingthe AdvanceTrac button. See UsingTraction Control (page 175). This willdisable the engine management feature,allowing the vehicle to maintain full powerand enhanced momentum through theobstacle. The brake traction enhancementfeature will still be enabled.
Note:The Control Trac® selector switchshould not be changed while the rear wheelsare slipping.
164
Expedition (TB7) Canada/United States of America, enUSA, First Printing
Four-Wheel Drive (If Equipped)E181778 E181781 E181779 E181780
Page 175 of 421
GENERAL INFORMATION
Note:Occasional brake noise is normal. Ifa metal-to-metal, continuous grinding orcontinuous squeal sound is present, thebrake linings may be worn-out and anauthorized dealer should check them. If thevehicle has continuous vibration or shudderin the steering wheel while braking, anauthorized dealer should check your vehicle.
Note:Brake dust may accumulate on thewheels, even under normal drivingconditions. Some dust is inevitable as thebrakes wear and does not contribute tobrake noise. See Cleaning the AlloyWheels (page 269).
See Warning Lamps andIndicators (page 88).
Wet brakes result in reduced brakingefficiency. Gently press the brake pedal afew times when driving from a car wash orstanding water to dry the brakes.
Brake Over Accelerator
In the event the accelerator pedalbecomes stuck or entrapped, apply steadyand firm pressure to the brake pedal toslow the vehicle and reduce engine power.If you experience this condition, apply thebrakes and bring your vehicle to a safestop. Switch the engine off, move thetransmission to park (P) and apply theparking brake. Inspect the acceleratorpedal and the area around it for any itemsor debris that may be obstructing itsmovement. If none are found and thecondition persists, have your vehicle towedto the nearest authorized dealer.
Emergency Brake Assist
Emergency brake assist detects when youbrake heavily by measuring the rate atwhich you press the brake pedal. Itprovides maximum braking efficiency aslong as you press the pedal. Emergencybrake assist can reduce stopping distancesin critical situations.
Anti-lock Brake System
This system helps you maintain steeringcontrol during emergency stops by keepingthe brakes from locking.
This lamp momentarilyilluminates when you switch theignition on. If the light does notilluminate during start up, remains on orflashes, the anti-lock braking system maybe disabled. Have the system checked byan authorized dealer. If the anti-lock brakesystem is disabled, normal braking is stilleffective.
If the brake warning lampilluminates with the parkingbrake released, have your brakesystem serviced immediately.
HINTS ON DRIVING WITH
ANTI-LOCK BRAKES
Note:When the system is operating, thebrake pedal will pulse and may travelfurther. Maintain pressure on the brakepedal. You may also hear a noise from thesystem. This is normal.
The anti-lock braking system will noteliminate the risks when:
•You drive too closely to the vehicle infront of you.
•Your vehicle is hydroplaning.
•You take corners too fast.
•The road surface is poor.
172
Expedition (TB7) Canada/United States of America, enUSA, First Printing
BrakesE138644 E138644
Page 178 of 421
PRINCIPLE OF OPERATION
The traction control system helps avoiddrive wheel spin and loss of traction.
If your vehicle begins to slide, the systemapplies the brakes to individual wheelsand, when needed, reduces engine powerat the same time. If the wheels spin whenaccelerating on slippery or loose surfaces,the system reduces engine power in orderto increase traction.
USING TRACTION CONTROL
WARNING
The stability and traction controllight illuminates steadily if thesystem detects a failure. Make sureyou did not manually disable the tractioncontrol system using the switch. If thestability control and traction control lightis still illuminating steadily, have thesystem serviced by an authorized dealerimmediately. Operating your vehicle withtraction control disabled could lead to anincreased risk of loss of vehicle control,vehicle rollover, personal injury and death.
The system automatically turns on eachtime you switch the ignition on.
If your vehicle is stuck in mud or snow,switching traction control off may bebeneficial as this allows the wheels to spin.
Note:When you switch traction control off,stability control remains fully active.
Switching the System Off
The switch for the stability and tractioncontrol system is on the instrument panel.
When you switch the system off, amessage and an illuminated icon appearon the instrument cluster.
Use the switch again to return the tractioncontrol system to normal operation.
Your vehicle may have MyKey restrictionsregarding this feature. See Principle ofOperation (page 46).
System Indicator Lights andMessages
The stability and traction controllight temporarily illuminates onengine start-up and flasheswhen a driving condition activates eitherof the systems.
The stability and traction controloff light temporarily illuminateson engine start-up and stays on:
•When you switch the traction controlsystem off.
•If a problem occurs in either of thesystems.
175
Expedition (TB7) Canada/United States of America, enUSA, First Printing
Traction ControlE166706 E138639
Page 196 of 421

The following are other situations that maylimit the Cross Traffic Alert performance:
•Adjacently parked vehicles or objectsobstructing the sensors.
•Approaching vehicles passing atspeeds greater than 37 mph(60 km/h).
•Driving in reverse faster than 7 mph(12 km/h).
•Backing out of an angled parking spot.
False Alerts
Note:If your vehicle has a tow bar with afactory equipped trailer tow module and itis towing a trailer, the sensors willautomatically turn the Cross Traffic Alertoff. If your vehicle has a tow bar but nofactory equipped trailer tow module, it isrecommended to turn the Cross Traffic Alertoff manually. Operating Cross Traffic Alertwith a trailer attached will cause poor CrossTraffic Alert performance.
There may be certain instances when thereis a false alert by the Cross Traffic Alertsystem that illuminates the alert indicatorwith no vehicle in the coverage zone. Someamount of false alerts are normal; they aretemporary and self-correct.
System Errors
If Cross Traffic Alert senses a problem withthe left or right sensor a message willappear in the information display. SeeInformation Messages (page 103).
Switching the System Off and On
You can temporarily switch Cross TrafficAlert off in the information display. SeeGeneral Information (page 92). Whenyou switch Cross Traffic Alert off, you willnot receive alerts and the informationdisplay will display a system off message.
Note:The Cross Traffic Alert switches onwhenever the ignition is switched on andready to provide appropriate alerts whenthe transmission is in reverse (R). CrossTraffic Alert will not remember the lastselected on or off setting.
You can also have Cross Traffic Alertswitched off permanently at an authorizeddealer. Once switched off permanently,the system can only be switched back onat an authorized dealer.
STEERING
Electric Power Steering
WARNINGS
The electric power steering systemhas diagnostic checks thatcontinuously monitor the system. Ifa fault is detected, a message displays inthe information display. Stop your vehicleas soon as it is safe to do so. Switch theignition off. After at least 10 seconds,switch the ignition on and watch theinformation display for a steering systemwarning message. If a steering systemwarning message returns, have the systemchecked by an authorized dealer.
If the system detects an error, youmay not feel a difference in thesteering, however a serious conditionmay exist. Obtain immediate service froman authorized dealer, failure to do so mayresult in loss of steering control.
Your vehicle has an electric power steeringsystem. There is no fluid reservoir. Nomaintenance is required.
If your vehicle loses electrical power whileyou are driving, electric power steeringassistance is lost. The steering system stilloperates and you can steer your vehiclemanually. Manually steering your vehiclerequires more effort.
193
Expedition (TB7) Canada/United States of America, enUSA, First Printing
Driving Aids
Page 227 of 421
Canadian roadside coverage and benefitsmay differ from the U.S. coverage. If yourequire more information, please refer tothe coverage section of your warrantyguide, call us in Canada at1-800-665-2006, or visit our website atwww.ford.ca.
Sykes Assistance Services Corporationadministers the Roadside Assistanceprogram. You must receive coveredservices in Canada or the continentalUnited States. Coverage extends tovehicles that use public, non-seasonal,annually traveled roadways. RoadsideAssistance coverage does not extend tovehicles involved in cross-country driving,logging, autocross and any other form ofoff-road use. Well maintained roads andsurfaces help ensure safe travel for thesupplier, and allow their representativesto perform service as per the standardoperating procedures.
In Remote Locations
If our supplier cannot take your vehicle byroad to the nearest authorized dealership,transportation by rail or water may benecessary. The program covers a tow tothe dock or rail terminal and also to thedealership at the end of the trip.
For rail or water transportation, however,contact your authorized dealer to confirmif you are eligible for additional coveragebefore you authorize or pay for the service.
Call Ford Roadside Assistance at1-800-665-2006 for additionalinformation.
HAZARD WARNING FLASHERS
Note:If used when the vehicle is notrunning, the battery will lose charge. Theremay be insufficient power to restart yourvehicle.
The hazard warning button islocated on the instrument panel.Use it when your vehicle iscreating a safety hazard for othermotorists.
•Press the button to turn on the hazardwarning function, and the front andrear direction indicators will flash.
•Press the button again to turn themoff.
FUEL SHUTOFF
WARNING
Failure to inspect and, if necessary,repair fuel leaks after a collision mayincrease the risk of fire and seriousinjury. Ford Motor Company recommendsthat the fuel system be inspected by anauthorized dealer after any collision.
In the event of a moderate to severecollision, this vehicle includes a fuel pumpshutoff feature that stops the flow of fuelto the engine. Not every impact will causea shutoff.
Should your vehicle shut off after acollision, you may restart your vehicle. Forvehicles equipped with a key system:
1. Switch off the ignition.
2. Switch on the ignition.
3. Repeat Steps 1 and 2 to re-enable thefuel pump.
For vehicles equipped with a push buttonstart system:
1. Press the START/STOP button toswitch off the ignition.
2. Press the brake pedal and press theSTART/STOP button to switch on theignition.
224
Expedition (TB7) Canada/United States of America, enUSA, First Printing
Roadside Emergencies
Page 252 of 421
the service engine soon indicatorwill illuminate.
If the engine reaches a presetover-temperature condition, the engineautomatically switches to alternatingcylinder operation. Each disabled cylinderacts as an air pump and cools the engine.
When this occurs, your vehicle will stilloperate. However:
•The engine power will be limited.
•This will disable the air conditioningsystem.
Continued operation increases the enginetemperature, causing the engine tocompletely shut down. Your steering andbraking effort increases in this situation.
When the engine temperature cools, youcan re-start your engine. Take your vehicleto an authorized dealer as soon as possibleto minimize engine damage.
When Fail-Safe Mode Is Activated
WARNINGS
Fail-safe mode is for use duringemergencies only. Operate yourvehicle in fail-safe mode only as longas necessary to bring your vehicle to restin a safe location and seek immediaterepairs. When in fail-safe mode, yourvehicle will have limited power, will not beable to maintain high-speed operation, andmay completely shut down withoutwarning, potentially losing engine power,power steering assist, and power brakeassist, which may increase the possibilityof a crash resulting in serious injury.
Never remove the coolant reservoircap while the engine is running or hot.
You have limited engine power when in thefail-safe mode, so drive your vehicle withcaution. Your vehicle will not maintainhigh-speed operation and the engine willoperate poorly.
Remember that the engine is capable ofautomatically shutting down to preventengine damage. In this situation:
1. Pull off the road as soon as safelypossible and switch off the engine.
2. Tow your vehicle to an authorizeddealer.
3. If this is not possible, wait a shortperiod for the engine to cool.
4.Check the coolant level and add if low.
5. Re-start the engine and drive yourvehicle to an authorized dealer.
Note:Driving your vehicle without repairincreases the chance of engine damage.Contact an authorized dealer as soon aspossible.
Engine Fluid TemperatureManagement (If Equipped)
WARNINGS
To reduce the risk of crash and injury,be prepared that the vehicle speedmay reduce and the vehicle may notbe able to accelerate with full power untilthe fluid temperatures reduce.
Never remove the coolant reservoircap while the engine is running or hot.
Your vehicle can pull a trailer, but becauseof the added load, your vehicle’s enginemay temporarily reach highertemperatures during severe operatingconditions such as ascending a long orsteep grade while pulling a trailer in hightemperatures.
249
Expedition (TB7) Canada/United States of America, enUSA, First Printing
Maintenance
Page 263 of 421
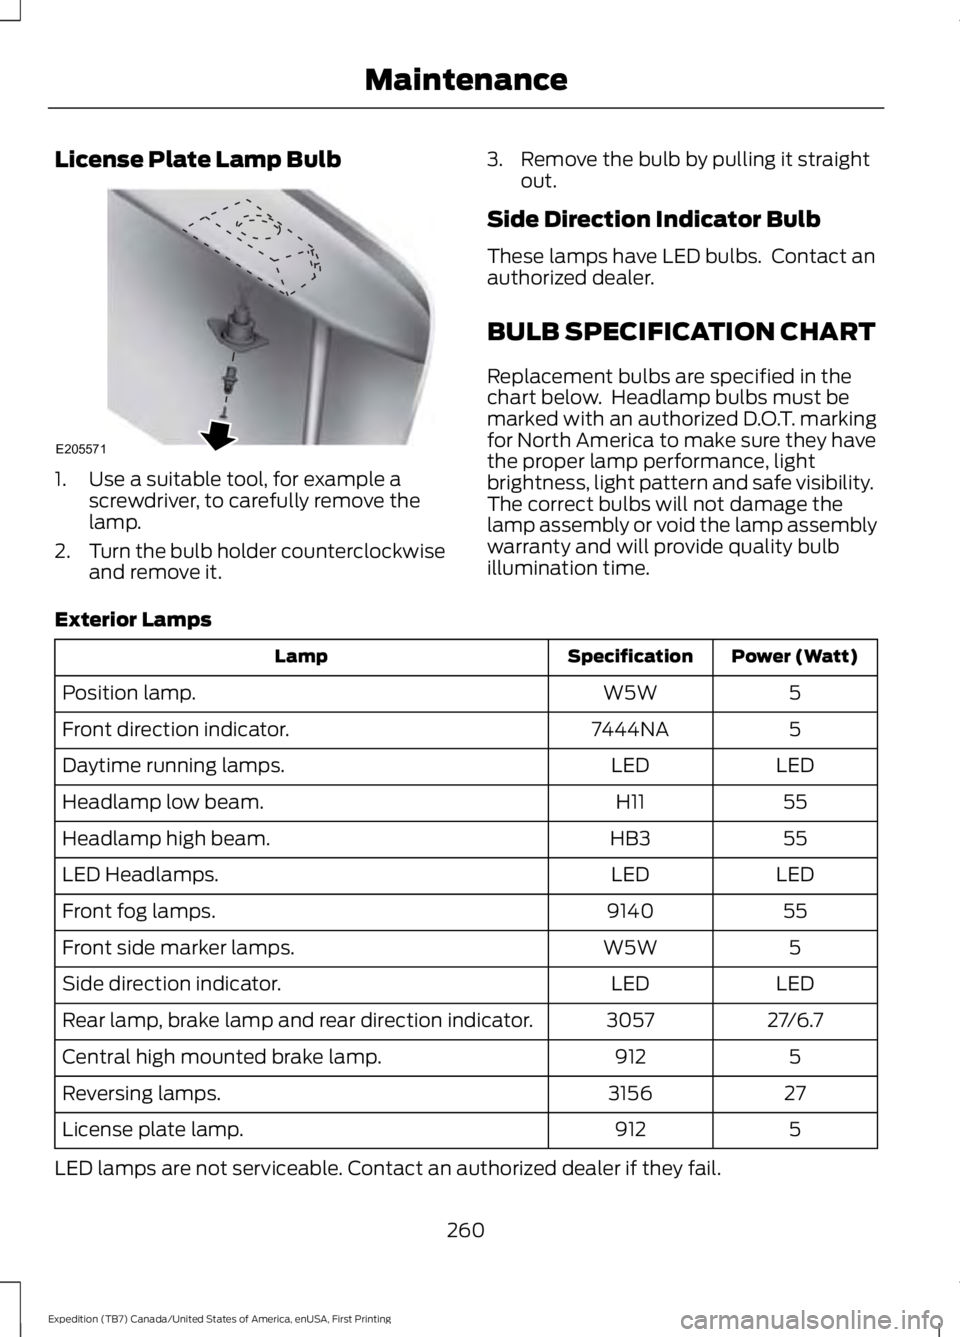
License Plate Lamp Bulb
1. Use a suitable tool, for example ascrewdriver, to carefully remove thelamp.
2.Turn the bulb holder counterclockwiseand remove it.
3. Remove the bulb by pulling it straightout.
Side Direction Indicator Bulb
These lamps have LED bulbs. Contact anauthorized dealer.
BULB SPECIFICATION CHART
Replacement bulbs are specified in thechart below. Headlamp bulbs must bemarked with an authorized D.O.T. markingfor North America to make sure they havethe proper lamp performance, lightbrightness, light pattern and safe visibility.The correct bulbs will not damage thelamp assembly or void the lamp assemblywarranty and will provide quality bulbillumination time.
Exterior Lamps
Power (Watt)SpecificationLamp
5W5WPosition lamp.
57444NAFront direction indicator.
LEDLEDDaytime running lamps.
55H11Headlamp low beam.
55HB3Headlamp high beam.
LEDLEDLED Headlamps.
559140Front fog lamps.
5W5WFront side marker lamps.
LEDLEDSide direction indicator.
27/6.73057Rear lamp, brake lamp and rear direction indicator.
5912Central high mounted brake lamp.
273156Reversing lamps.
5912License plate lamp.
LED lamps are not serviceable. Contact an authorized dealer if they fail.
260
Expedition (TB7) Canada/United States of America, enUSA, First Printing
MaintenanceE205571