2016 FIAT 500L LIVING run flat
[x] Cancel search: run flatPage 114 of 240
❒fit the standard wheel inserting the 5
stud bolts into the holes;
❒press-fit the wheel cap, aligning the
special splining (on the cap) with the
inflation valve;
❒using the spanner provided, tighten
the fixing stud bolts;
❒lower the vehicle and remove the
jack;
❒using the spanner provided, fully
tighten the stud bolts in the sequence
shown previously.
Versions with alloy wheels
❒insert the wheel on the hub and using
the spanner provided tighten the stud
bolts;
❒lower the vehicle and remove the
jack;
❒using the spanner provided, fully
tighten the 5 stud bolts in the sequence
shown;❒reinstall the hub cap, taking care to
position the three plastic pins in the
dedicated seats on the wheel. Slightly
press the cap to prevent any damage
to the plastic pins.
IMPORTANT If it is not fitted properly,
the hub cap may detach itself when the
car is running.
After tyre replacement
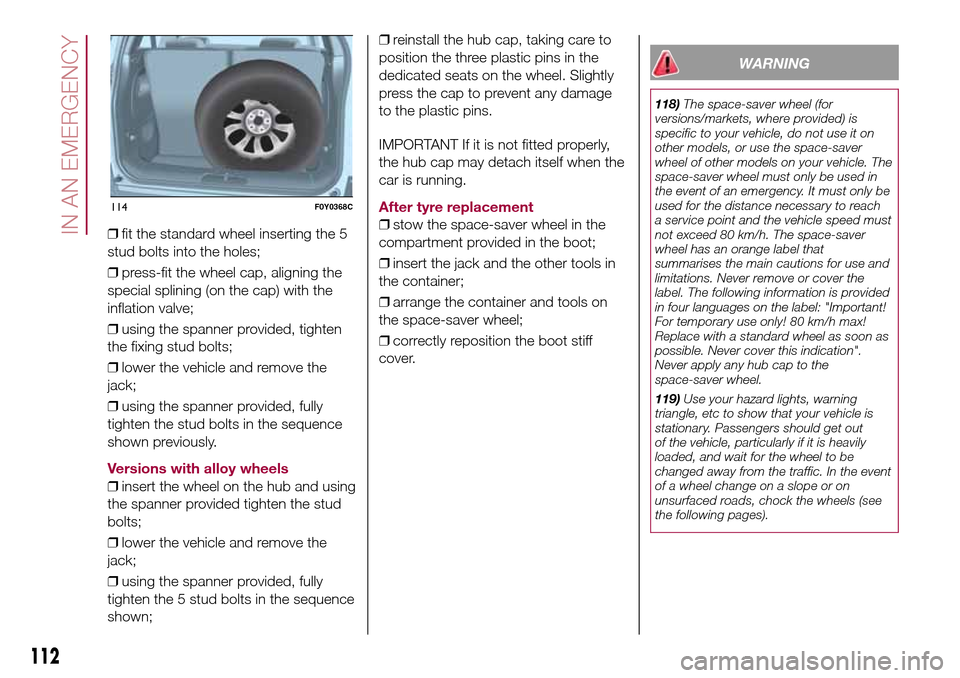
❒stow the space-saver wheel in the
compartment provided in the boot;
❒insert the jack and the other tools in
the container;
❒arrange the container and tools on
the space-saver wheel;
❒correctly reposition the boot stiff
cover.
WARNING
118)The space-saver wheel (for
versions/markets, where provided) is
specific to your vehicle, do not use it on
other models, or use the space-saver
wheel of other models on your vehicle. The
space-saver wheel must only be used in
the event of an emergency. It must only be
used for the distance necessary to reach
a service point and the vehicle speed must
not exceed 80 km/h. The space-saver
wheel has an orange label that
summarises the main cautions for use and
limitations. Never remove or cover the
label. The following information is provided
in four languages on the label: "Important!
For temporary use only! 80 km/h max!
Replace with a standard wheel as soon as
possible. Never cover this indication".
Never apply any hub cap to the
space-saver wheel.
119)Use your hazard lights, warning
triangle, etc to show that your vehicle is
stationary. Passengers should get out
of the vehicle, particularly if it is heavily
loaded, and wait for the wheel to be
changed away from the traffic. In the event
of a wheel change on a slope or on
unsurfaced roads, chock the wheels (see
the following pages).
114F0Y0368C
112
IN AN EMERGENCY
Page 116 of 240
❒instruction booklet to be used for
prompt and correct use of the kit and
then to be handed to the personnel
charged with handling the treated tyre;
❒a pair of protective gloves located
in the side compartment of the
compressor;
❒adapters for inflating different
elements.
IMPORTANT The sealing fluid is
effective with external temperatures of
between –20°C and +50°C. The sealing
fluid has an expiry date.
INFLATION PROCEDURE
Proceed as follows:
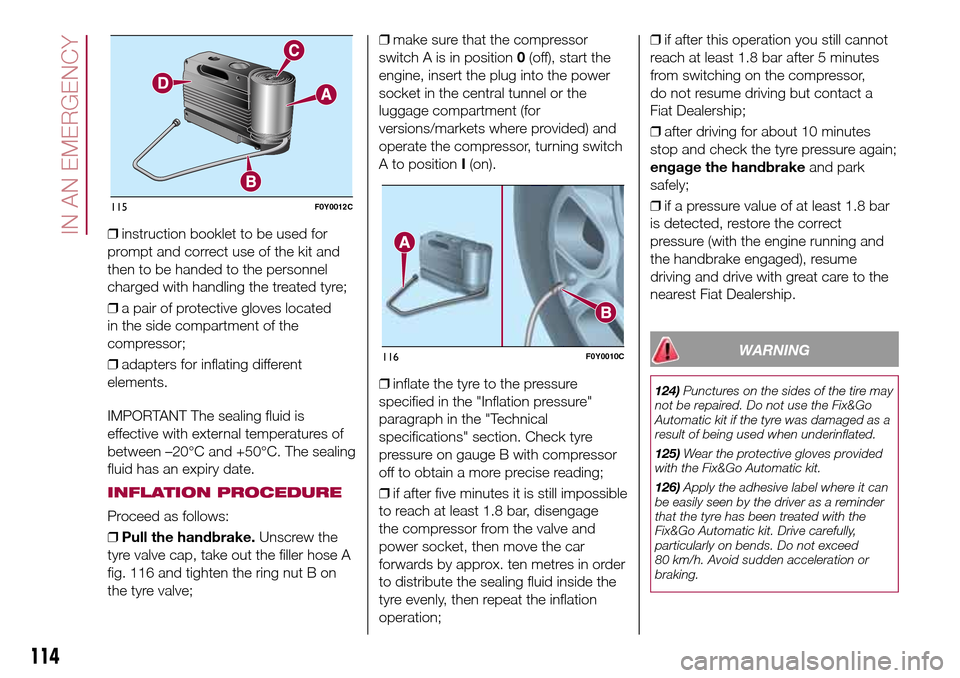
❒Pull the handbrake.Unscrew the
tyre valve cap, take out the filler hose A
fig. 116 and tighten the ring nut B on
the tyre valve;❒make sure that the compressor
switch A is in position0(off), start the
engine, insert the plug into the power
socket in the central tunnel or the
luggage compartment (for
versions/markets where provided) and
operate the compressor, turning switch
A to positionI(on).
❒inflate the tyre to the pressure
specified in the "Inflation pressure"
paragraph in the "Technical
specifications" section. Check tyre
pressure on gauge B with compressor
off to obtain a more precise reading;
❒if after five minutes it is still impossible
to reach at least 1.8 bar, disengage
the compressor from the valve and
power socket, then move the car
forwards by approx. ten metres in order
to distribute the sealing fluid inside the
tyre evenly, then repeat the inflation
operation;❒if after this operation you still cannot
reach at least 1.8 bar after 5 minutes
from switching on the compressor,
do not resume driving but contact a
Fiat Dealership;
❒after driving for about 10 minutes
stop and check the tyre pressure again;
engage the handbrakeand park
safely;
❒if a pressure value of at least 1.8 bar
is detected, restore the correct
pressure (with the engine running and
the handbrake engaged), resume
driving and drive with great care to the
nearest Fiat Dealership.
WARNING
124)Punctures on the sides of the tire may
not be repaired. Do not use the Fix&Go
Automatic kit if the tyre was damaged as a
result of being used when underinflated.
125)Wear the protective gloves provided
with the Fix&Go Automatic kit.
126)Apply the adhesive label where it can
be easily seen by the driver as a reminder
that the tyre has been treated with the
Fix&Go Automatic kit. Drive carefully,
particularly on bends. Do not exceed
80 km/h. Avoid sudden acceleration or
braking.
115F0Y0012C
116F0Y0010C
114
IN AN EMERGENCY
Page 130 of 240
JUMP STARTING
If the battery is flat, a jump starting can
be performed using the battery and
the cables of another vehicle, or using a
booster battery.
IMPORTANT
When a booster battery is used, comply
with the utilisation and precaution
instructions specified by the producer.
Do not use the booster battery or
any other source of external supply with
a voltage above 12 V: the battery, the
starter, the alternator and the electrical
system of the vehicle could be
damaged.
Do not attempt jump starting if the
battery is frozen. The battery could
break and explode!
PREPARATION TO JUMP
STARTING
140) 141) 142)68)
IMPORTANT The positive terminal (+) of
the battery is shielded by a protective
cover. Lift the cover to access the
positive terminal.
Proceed as follows:
❒engage the handbrake, move the
Dualogic gear lever to P (Park) or,
for versions with manual gearbox, to
neutral and bring the ignition key to
STOP;❒switch off all the other electrical
devices in the vehicle;
❒if another vehicle is ready for jump
starting, park the vehicle within the
reach of the cables to be used for
starting, operate the handbrake and
make sure that the ignition is
deactivated.
IMPORTANT Avoid contact between
the two vehicles since this could cause
a connection to earth and may result
in serious injury to any people nearby.
PROCEDURE FOR JUMP
STARTING
IMPORTANT If the procedure below is
carried out incorrectly, it can cause
severe injury to people or damage the
recharging system of one or both
vehicles. Carefully follow the
instructions given below.
Cable connection
Proceed as follows to carry out a jump
starting:
❒connect one end of the cable used
for positive (+) to the positive terminal
(+) of the vehicle with flat battery;
❒connect the other end of the cable
used for positive (+) to the positive
terminal (+) of the auxiliary battery;❒connect one end of the cable used
for negative (–) to the negative terminal
(–) of the auxiliary battery;
❒connect the other end of the cable
used for negative (–) to an engine earth
(the visible metal part of the vehicle
engine with flat battery) away from the
battery and the fuel injection system;
❒start the vehicle engine with the
auxiliary battery, let it run for a
few minutes at idling. Start the engine
of the vehicle with flat battery.
Cable disconnection
Once the engine has been started,
remove the cables proceeding as
follows:
❒disconnect the end of the cable used
for negative (–) from the engine earth
of the vehicle with flat battery;
❒disconnect the other end of the cable
used for negative (–) from the negative
terminal (–) of the auxiliary battery;
❒disconnect the end of the cable used
for positive (+) from the positive terminal
(+) of the auxiliary battery;
❒disconnect one end of the cable
used for positive (+) from the positive
terminal (+) of the vehicle with flat
battery.
128
IN AN EMERGENCY
Page 131 of 240
If it is often necessary to perform a
jump starting, have the vehicle battery
and the recharging system checked
by a Fiat Dealership.
IMPORTANT Any accessories (e.g.
mobile phones, etc.) connected to the
vehicle power sockets draw current
even if they are not used. These
devices, if left connected too much time
with engine off, may cause the battery
to drain with following reduction of
its life and/or failure to start the engine.
WARNING
140)Do not get too close to the radiator
cooling fan: the electric fan may start;
danger of injury. Scarves, ties and other
loose clothing may be pulled by moving
parts.
141)Remove any metal objects (e.g. rings,
watches, bracelets), that might cause an
accidental electrical contact and cause
serious injury.
142)Batteries contain acid which may burn
skin and eyes. Batteries produce
hydrogen, which is easily flammable and
explosive. Thus keep away flames or
devices which may cause sparks.
WARNING
68)Do not connect the cable to the
negative terminal (–) of the flat battery. The
following spark could lead to battery
explosion and cause serious harm. Only
use the specific earth point; do not use any
other exposed metallic part.
FUEL CUT-OFF
SYSTEM
143)This intervenes in the event of an
impact causing:
❒the interruption of the fuel supply with
the engine consequently cutting out
❒the automatic unlocking of the doors
❒the automatic switching on of the
interior lights
❒the switching on of the hazard
warning lights.
On some versions, the intervention of
the system is indicated by a message
shown on the display.
IMPORTANT Carefully check the car for
fuel leaks, for instance in the engine
compartment, under the car or near the
tank area. After a collision, turn the
ignition key to STOP to prevent the
battery from running down.
To restore the correct operation of the
car, proceed as follows:
❒turn the ignition key to the MAR
position;
❒activate the right direction indicator
and then stop it;
❒activate the left direction indicator
and then stop it;
❒activate the right direction indicator
and then stop it;
129
Page 237 of 240
Performance (top speed) ................ 177
Prescriptions for handling the
vehicle at the end of its life ........... 205
Pretensioners ................................. 74
Rain sensor .................................. 22
Rear seats...................................... 11
Rear view camera .......................... 103
Rear view mirrors ........................... 15
Rear window wiper/washer ............ 22
Reconfigurable multifunction
display ......................................... 42
Refuelling the vehicle ...................... 105
Rims and tyres provided................. 167
Roof lights...................................... 23
SBR (Seat Belt Reminder)
system ......................................... 73
Scheduled servicing ....................... 133
Seat belts....................................... 72
Seats ............................................. 11
Setup menu ................................... 43
Side bags....................................... 90side direction indicators (bulb
replacement) ................................ 119
Side lights/daytime running lights
(DRL) (bulb replacement) .............. 119
Side/taillights - dipped beam
headlights .................................... 20
Speed Limiter................................. 100
Starting the engine ......................... 93
Steering lock .................................. 10
Steering wheel ............................... 14
Stop/Start system .......................... 98
Supplementary Restraint System
(SRS) - Airbag .............................. 86
Supplies ......................................... 191
Symbols......................................... 4The keys ....................................... 8
Third-row rear seats ....................... 12
Tips, controls and general
information ................................... 207
Towing the vehicle .......................... 130
Towing trailers ................................ 104Traction Plus system ...................... 67
Tyre inflation pressure ..................... 171
Uconnect 5 Radio/Uconnect 5
Radio Nav .................................... 209
Use of the Owner Handbook.......... 3
Using the Dualogic gearbox ........... 96
Using the manual gearbox ............. 95
Version with LPG system .............. 33
Version with methane system
(Natural Power) ............................ 36
Warning lights and messages ....... 45
Weights.......................................... 180
Wheel (changing)............................ 109
Wheels and tyres ........................... 157
Wheels ........................................... 167
Window bag .................................. 90
Window cleaning............................ 21
Windscreen/rear window wiper ...... 155
Windscreen wiper/washer .............. 21