2016 Citroen JUMPER central
[x] Cancel search: centralPage 56 of 276

54
jumper_en_Chap03_Ergo-et-confort_ed01-2015
There are two methods of memorising a
speed higher than the previous one:
Without using the accelerator:
-
Move the switch up (+).
A
brief press increases the speed by 1 mph
(km/h).
A maintained press increases the speed in
steps of 5 mph (km/h).
Using the accelerator:
-
exceed the memorised speed until the
speed required is reached,
-
move the switch up (+) or down (-).
T
o memorise a speed lower than the
previous one:
-
move the switch down (-).
A
brief press decreases the speed by 1 mph
(km/h).
A maintained press decreases the speed in
steps of 5 mph (km/h).
changing the
programmed
speed Switching the system off
- Place the ring in the central
O position
or switch off the ignition to switch the
system off.
When the vehicle becomes stationary, after
switching off the ignition, the system no
longer memorises a speed.
Operating fault
in the event of a fault, the system
switches of f and the indicator
goes off. Contact a C
i T roën
dealer or a qualified workshop to
have the system checked.
Good practice
When changing the programmed reference
speed by means of a maintained press,
pay attention as the speed can increase or
decrease rapidly.
Do not use the cruise control on slippery
roads or in heavy traffic.
i
n the event of a steep slope, the cruise
control cannot prevent the vehicle from
exceeding the programmed speed.
i
n any event, the cruise control cannot
replace the need to observe the speed
limits, nor can it replace the need for
vigilance on the part of the driver.
i
t is advisable to leave your feet near the
pedals.
To avoid any jamming under the pedals:
-
ensure that the mat and its fixings on the
floor are positioned correctly,
-
never place one mat on top of another
.
Steering mounted controls
Page 59 of 276
57
jumper_en_Chap03_Ergo-et-confort_ed01-2015
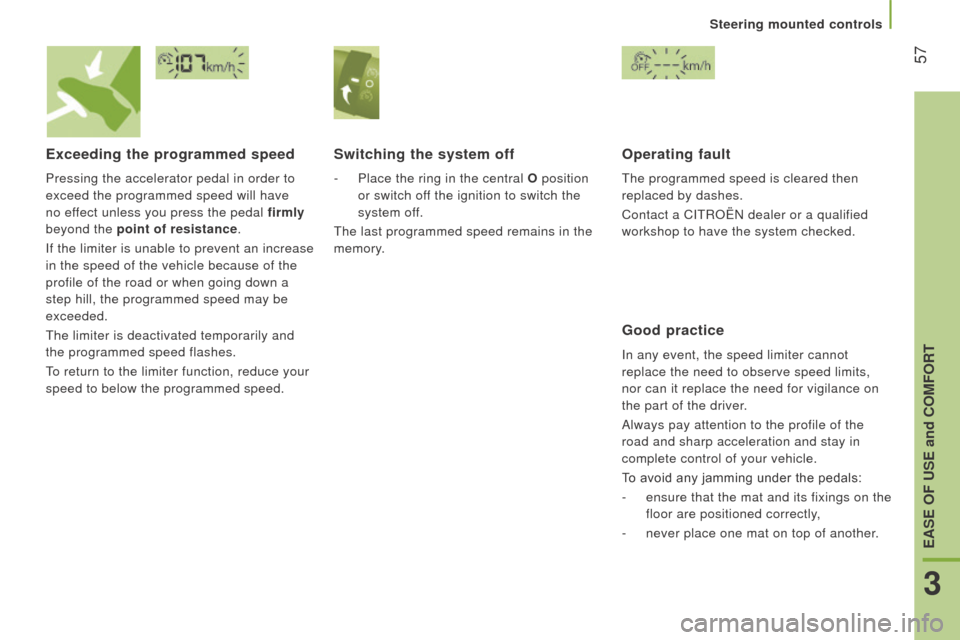
Exceeding the programmed speed
Pressing the accelerator pedal in order to
exceed the programmed speed will have
no effect unless you press the pedal firmly
beyond the point of resistance.
i
f the limiter is unable to prevent an increase
in the speed of the vehicle because of the
profile of the road or when going down a
step hill, the programmed speed may be
exceeded.
The limiter is deactivated temporarily and
the programmed speed flashes.
To return to the limiter function, reduce your
speed to below the programmed speed.
Switching the system off
- Place the ring in the central O position
or switch off the ignition to switch the
system off.
The last programmed speed remains in the
memory.
Operating fault
The programmed speed is cleared then
replaced by dashes.
Contact a C
i T roën dealer or a qualified
workshop to have the system checked.
Good practice
in any event, the speed limiter cannot
replace the need to observe speed limits,
nor can it replace the need for vigilance on
the part of the driver.
Always pay attention to the profile of the
road and sharp acceleration and stay in
complete control of your vehicle.
To avoid any jamming under the pedals:
-
ensure that the mat and its fixings on the
floor are positioned correctly,
-
never place one mat on top of another
.
3
EASE OF uSE and cOMFOrt
Steering mounted controls
Page 62 of 276
60
jumper_en_Chap03_Ergo-et-confort_ed01-2015
cOrrEct uSE OF tHE AIr
c O nd I t IO n I n G
in order to be effective, the air conditioning
should only be used with the windows
closed. However, if the interior temperature
remains high after a prolonged period
parked in the sun, first ventilate the
passenger compartment for a few minutes. For even air distribution, ensure that the
exterior air intake grille located at the base
of the windscreen, the side and central
vents, the air outlets on the floor and the air
extractor at the rear are not obstructed.
The air conditioning is useful in all seasons
as it eliminates condensation and air
humidity.
o perate the air conditioning system for
5 to 10 minutes, once or twice a month,
to keep it in good working order.
Have the filter elements (air filter and
passenger compartment filter) replaced
regularly. i f you drive in a dusty environment,
have them replaced twice as often.
i
t is normal that the condensation created by
the air conditioning system results in a flow
of water which may form a puddle under the
vehicle when parked.
i
f the system does not produce cold air,
do not use it and have it checked by a
C i T roën dealer or a qualified workshop.
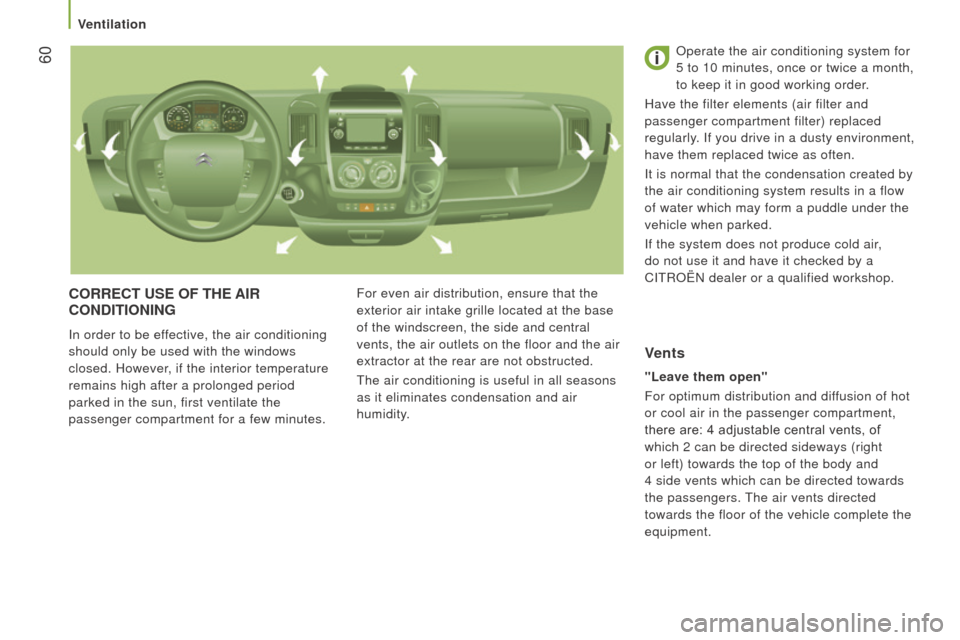
"Leave them open"
For optimum distribution and diffusion of hot
or cool air in the passenger compartment,
there are: 4 adjustable central vents, of
which 2 can be directed sideways (right
or left) towards the top of the body and
4
side vents which can be directed towards
the passengers. The air vents directed
towards the floor of the vehicle complete the
equipment.
Vents
Ventilation
Page 63 of 276
61
jumper_en_Chap03_Ergo-et-confort_ed01-2015
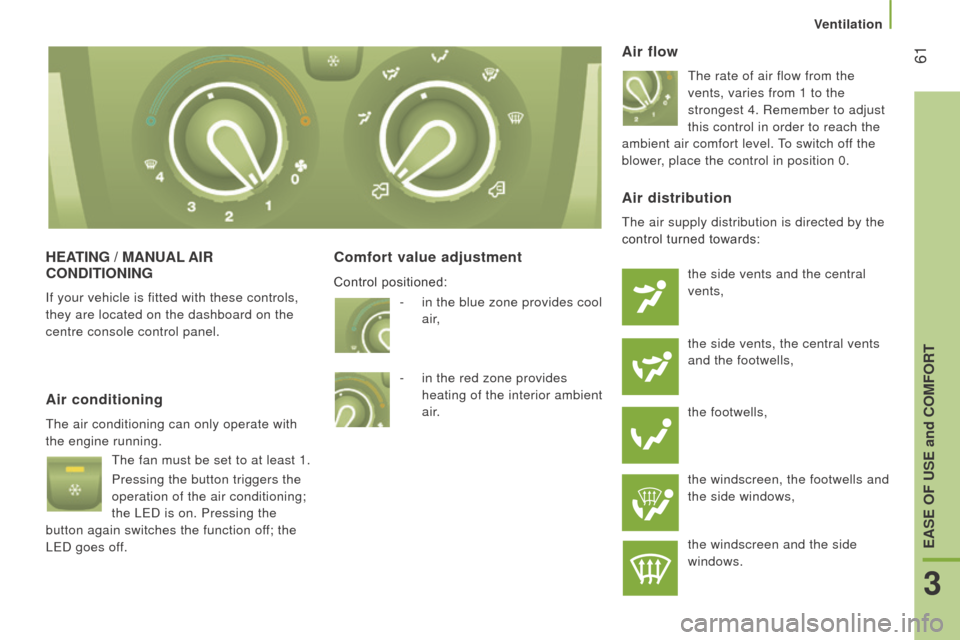
HEAtI n G / M A nu AL AI r
c O nd I t IO n I n G
if your vehicle is fitted with these controls,
they are located on the dashboard on the
centre console control panel.
comfort value adjustment Air flow
The rate of air flow from the
vents, varies from 1 to the
strongest 4.
r emember to adjust
this control in order to reach the
ambient air comfort level. To switch off the
blower, place the control in position 0.
Air conditioning
The air conditioning can only operate with
the engine running.
The fan must be set to at least 1.
Pressing the button triggers the
operation of the air conditioning;
the LED is on. Pressing the
button again switches the function off; the
LED goes off.
Air distribution
The air supply distribution is directed by the
control turned towards:
the side vents and the central
vents,
the side vents, the central vents
and the footwells,
the footwells,
the windscreen, the footwells and
the side windows,
the windscreen and the side
windows.
-
in the blue zone provides cool
air,
-
in the red zone provides
heating of the interior ambient
air.
Control positioned:
Ventilation
3
EASE OF uSE and cOMFOrt
Page 66 of 276

64
jumper_en_Chap03_Ergo-et-confort_ed01-2015
comfort value adjustment ring
The settings range between:
-
increasing the interior ambient air
temperature H
i (High) which goes up to
to a maximum setting of 32,
-
cooling the interior ambient air
temperature L
o (Low) which goes down
to a setting of 16.
Air distribution
A press illuminates the LED on the buttons
which distribute the air flow towards:
the windscreen and front side
window vents (demisting/
defrosting the windows),
the central and side vents (chest
and face),
the vents in the front and rear
areas (feet).
The combination of buttons permits
improvement of air distribution.
Air flow
Successive presses of this button
increase (+) or reduce (-) the
force of the air flow to the interior.
Intake of exterior air / r ecirculation of interior air
When the LED is on, the air
recirculates inside the passenger
compartment to prevent the entry of exterior
odours and smoke. This position should be
temporary.
When the ambient air comfort level has been
reached, pressing the button switches the
LED off and reopens the exterior air intake.
Pressing the A
ut
O
button also restores
the intake of exterior air.
r eturning to this
position permits renewal of the air in the
passenger compartment and demisting.
Pressing the A
ut
O
button again restores
the F
u
LL A ut
O
function.
rapid demisting / defrosting
Pressing this control permits
rapid clearing of the windows.
The LED is on.
The system manages the air conditioning,
the flow and intake of air, the defrosting
of the rear screen and provides optimum
distribution of the air to the windscreen and
front side windows.
i
f your vehicle is fitted with additional
heating, switch it off to ensure rapid and
effective demisting/defrosting.
AddItIOnAL r EA r VE nt ILAt IO n
The controls for this system, additional to
the standard cabin ventilation system, are
on the lower dashboard, to the left of the
steering wheel.
Air outlet
A press on this control activates
the extraction of air to the
outside; the LED comes on.
Press again to switch off.
Air inlet
A press on this control activates
the entry of air into the cabin; the
LED comes on. Press again to
switch off.
Ventilation
Page 68 of 276
66
jumper_en_Chap03_Ergo-et-confort_ed01-2015
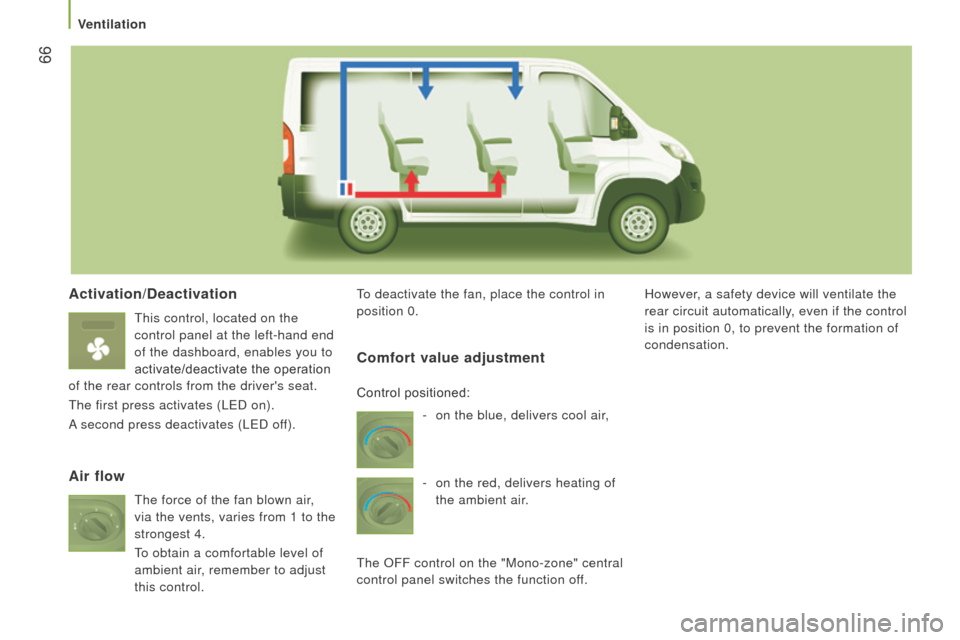
Activation/deactivation
This control, located on the
control panel at the left-hand end
of the dashboard, enables you to
activate/deactivate the operation
of the rear controls from the driver's seat.
The first press activates (LED on).
A second press deactivates (LED off). To deactivate the fan, place the control in
position 0.
However, a safety device will ventilate the
rear circuit automatically, even if the control
is in position 0, to prevent the formation of
condensation.
Air flow
c
omfort value adjustment
- on the blue, delivers cool air
,
-
on the red, delivers heating of
the ambient air.
The
o
FF control on the "Mono-zone" central
control panel switches the function off. Control positioned:
The force of the fan blown air,
via the vents, varies from 1 to the
strongest 4.
To obtain a comfortable level of
ambient air, remember to adjust
this control.
Ventilation
Page 76 of 276
74
jumper_en_Chap03_Ergo-et-confort_ed01-2015
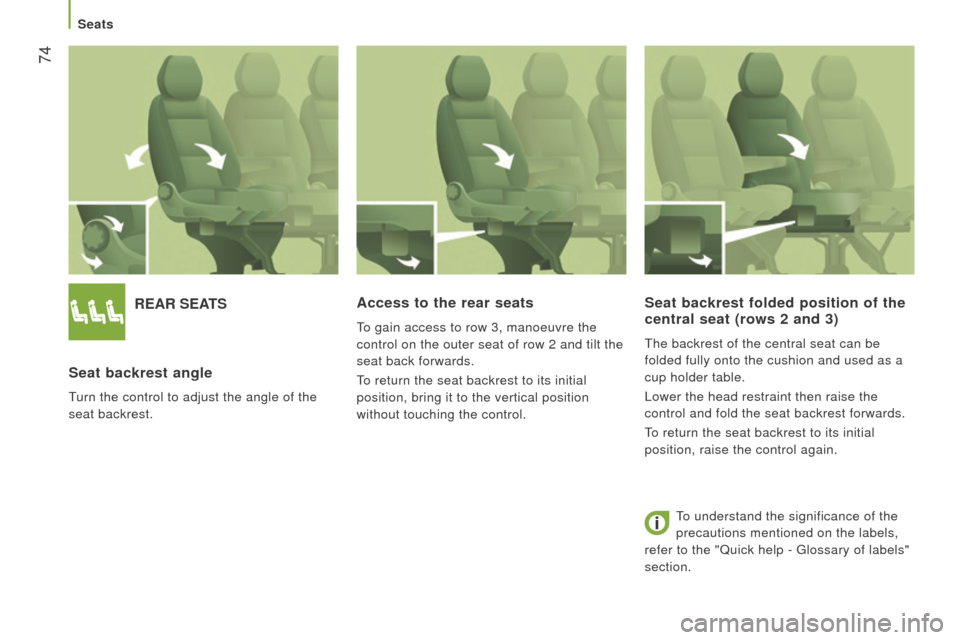
rEAr SEAtS
Seat backrest angle
Turn the control to adjust the angle of the
seat backrest.
Access to the rear seats
To gain access to row 3, manoeuvre the
control on the outer seat of row 2 and tilt the
seat back forwards.
To return the seat backrest to its initial
position, bring it to the vertical position
without touching the control.
Seat backrest folded position of the
central seat (rows 2 and 3)
The backrest of the central seat can be
folded fully onto the cushion and used as a
cup holder table.
Lower the head restraint then raise the
control and fold the seat backrest forwards.
To return the seat backrest to its initial
position, raise the control again.
To understand the significance of the
precautions mentioned on the labels,
refer to the "Quick help - Glossary of labels"
section.
Seats
Page 78 of 276

76
jumper_en_Chap03_Ergo-et-confort_ed01-2015
cABIn FIttInGS
Front seat storage
There is a fixed storage tray under the
driver's seat.
central glove box
if fitted with a lock, you can lock it using the
key .
i
t gives access to the auxiliary sockets (Jack
and USB) intended for the transfer of data to
the audio system.
i
f your vehicle is fitted with a seat with
variable damping, it does not have any
storage compartments. The space under the passenger's seat is
used to store the tool box containing the
tools required to change a wheel or bulb or
to tow the vehicle.
To take out the box, turn the control a
quarter turn to unlock it, then pull the box
forward.
When putting it back, don't forget to turn the
control a quarter turn in the other direction to
lock the box in its housing.
Practical information