2016 CHEVROLET SPARK light
[x] Cancel search: lightPage 52 of 113

Chevrolet MyLink Infotainment System (GMNA-Localizing-U.S/Canada-
9085900) - 2016 - CRC - 8/10/15
Rear Seat Infotainment 51
Press to change the source
displayed on the overhead
screen to SCREEN 1
selected source. Select
audio sources. Only one
video can be played on the
screen at a time. Audio for
both sources will continue
on the headphones. Once
pressed, all remote control
commands will correspond
to SCREEN 1.
. For dual overhead screens:
Press to select the second
row overhead screen. Once
pressed, all remote control
commands will correspond
to SCREEN 1.
6.
O(Power)
. Press to turn the video
screens on and off. 7. SCREEN 2
.For dual seatback screens:
Press to select the right
screen. Once pressed, all
remote control commands
will only pertain to
SCREEN 2.
. For single overhead
screens:
Press to change the source
displayed on the overhead
screen to SCREEN 2
selected source. Only one
video can be played on the
screen at a time. Audio for
both sources will continue
on the headphones. Once
pressed, all remote control
commands will correspond
to SCREEN 2.
. For dual overhead screens:
Press to select the optional
third row overhead screen.
Once pressed, all remote
control commands will
correspond to SCREEN 2. 8.
o(Previous/Reverse/
Decrease)
. Radio and CD: Press to go
to the previous station or
track.
. Press to go to the
previous menu.
. Press to decrease the
brightness of the RSE
screen.
9.
w(Up Arrow)
. Press to scroll up a list.
10.
r/ENTER
. Press to select the
highlighted choice in
any menu.
. Press and hold for
quick play.
11.
p(Next/Forward/Increase)
. Radio and CD: Press to go
to the next station or track.
. Press to go to the
next menu.
Page 53 of 113

Chevrolet MyLink Infotainment System (GMNA-Localizing-U.S/Canada-
9085900) - 2016 - CRC - 8/10/15
52 Rear Seat Infotainment
.Press to increase the
brightness of the RSE
screen.
12.
x(Down Arrow)
. Press to go down a list.
13.
4(Back)
. Press to go back to the
previous menu.
. Press and hold to go back
to the now playing screen.
14. MENU .Press to go to the menu of
the now playing screen.
15. RADIO .Press to scroll through the
radio sources including AM
or FM.
To use the remote control, aim it at
the overhead transmitter window
and press the buttons firmly. Direct
sunlight or very bright light could
affect how the RSE receives signals
from the remote control. Check the batteries if the remote control does
not seem to be working. See
“Battery Replacement”
following.
Objects blocking the line of sight
could also affect the function of the
remote control.
If a CD, Blu-ray/DVD, or MP3 disc is
in the CD slot, the remote controlO
button can be used to turn on the
video screen display and start the
disc. The infotainment system can
also turn on the video screen
display.
Caution
Storing the remote control in a hot
area or in direct sunlight can
damage it, and the repairs will not
be covered by the warranty.
Storage in extreme cold can
weaken the batteries. Keep the
remote control stored in a cool,
dry place. Battery Replacement
To change the remote control
batteries:
1. Insert a coin or key to pull up the rear cover on the remote
control.
2. Replace the two AAA batteries in the compartment.
3. Replace the battery cover.
Remove the batteries from the
remote control if it will not be used
for an extended period of time.
RSE Troubleshooting
No power : The ignition might not
be in ON/RUN or ACC/
ACCESSORY.
The picture does not fill the
screen. There are black borders
on the top and bottom or on both
sides, or it looks stretched out :
Press the MENU button on the
remote control to change the display
mode setting.
In auxiliary mode, the picture
moves or scrolls : Check the
auxiliary input connections at both
devices.
Page 54 of 113

Chevrolet MyLink Infotainment System (GMNA-Localizing-U.S/Canada-
9085900) - 2016 - CRC - 8/10/15
Rear Seat Infotainment 53
The remote control does not
work :Check to make sure the
remote control is programmed to the
correct screen. Make sure there is
no obstruction between the remote
control and the transmitter window
and check the batteries to make
sure they are not dead or installed
incorrectly.
There is no sound from the
headphones with the indicator
light on : If the batteries are good,
make sure the headphones are
programmed to the correct screen
and on the correct channel for the
screen being viewed.
The auxiliary source is running
but there is no picture or sound :
Check that the RSE video screen is
in the auxiliary source mode by
pressing the MEDIA button on the
remote control. Check the auxiliary
input connections at both devices. Sometimes the wireless
headphone audio cuts out or
buzzes :
Check for obstructions,
low batteries, reception range, and
interference from cell phone towers
or from cellular telephone use in the
vehicle. Check that the headphones
are on correctly using the L (Left)
and R (Right) on the headphones.
Check that the headphones are
positioned properly with the
headband across the top of
the head.
I lost the remote and/or the
headphones : See your dealer for
assistance.
The Blu-ray/DVD is playing, but
there is no picture or sound :
Check that the RSE video screen is
sourced to the Blu-ray/DVD player
by pressing the MEDIA button on
the remote control.Video Display Error Messages
The video screen may display one
of the following:
Disc Error : There are disc load or
eject problems, the disc is inserted
with the disc label wrong side up,
the disc is damaged, or the disc is
not from the correct region.
No Disc Inserted : No disc is
present.
Disc Player Error : The
temperature is outside the operating
range of the RSE system. If the
temperature is within range, see
your dealer.
Video Distortion
Video distortion can occur when
operating cellular phones, scanners,
CB radios, Global Positioning
Systems (GPS), two-way radios,
mobile faxes, or walkie talkies.
It might be necessary to turn off the
video player when operating one of
these devices in or near the vehicle.
Page 57 of 113

Chevrolet MyLink Infotainment System (GMNA-Localizing-U.S/Canada-
9085900) - 2016 - CRC - 8/10/15
56 Navigation
3D View
The 3D View is a Heading Up view
but it includes perspective. Map
items will appear larger as the
vehicle comes closer.
Heading Up View
The Heading Up View keeps the
vehicle's current heading at the top
of the view. The vehicle icon always
faces the top of the view as the map
rotates.
North Up View
The North Up View keeps north at
the top of the view. The vehicle icon
is placed in the center of the view
and rotates to indicate the heading
for the vehicle.
Audio Information On/Off
Touch to turn the audio information
view on or off from the main
map view.
The audio status screen contains
the following elements:
.Station Frequency
. Artist Information
. Song Information .r/jort/uStation and
Channel Controls
Touch the
t/uStation controls to
go to the next or previous strong
signal station or digital channel.
When the audio status pane
displays Artist and Song
Information, touch the
t/u
controls to go to the next or
previous track based on the current
media mode.
Day/Night Mode
Touch to access the Day/Night
Mode menu.
The options are:
. Day Mode: Brightens the map
background. .
Night Mode: Darkens the map
background.
. Automatic: Adjusts the screen
background automatically
depending on the exterior
lighting conditions.
Traffic (If Equipped)
Touch to browse the traffic in the
area as well as adjust the traffic
settings. Where traffic information is
available, it is displayed on the map.
Where live traffic flow data is
available, it is displayed as a solid
line adjacent to the road. The road
is displayed in colors to show the
flow rate as:
. Black –Stopped or Closed
. Red –Poor
. Yellow –Slow
. Green –Normal
Page 65 of 113

Chevrolet MyLink Infotainment System (GMNA-Localizing-U.S/Canada-
9085900) - 2016 - CRC - 8/10/15
64 Navigation
field. If the entire text field has been
deleted, this screen button becomes
an Undo button. Touching Undo will
restore the deleted text.
Exit :Touch to return to the
previous Map view.
Sym : Touch to show the symbol
keyboard.
Space : Touch to enter a space
between characters or the words of
a name.
R(Up Arrow) : Touch to display
the Interaction Selector.
Special Characters
As the characters are typed on the
keyboard, a pop-up of the letter
touched displays above the key that
was touched.
Continue to touch and hold, and any
additional special characters
associated with that letter are
displayed around the current letter.
To select one of the special
characters, slide a finger left or right
to adjust the highlight of the special
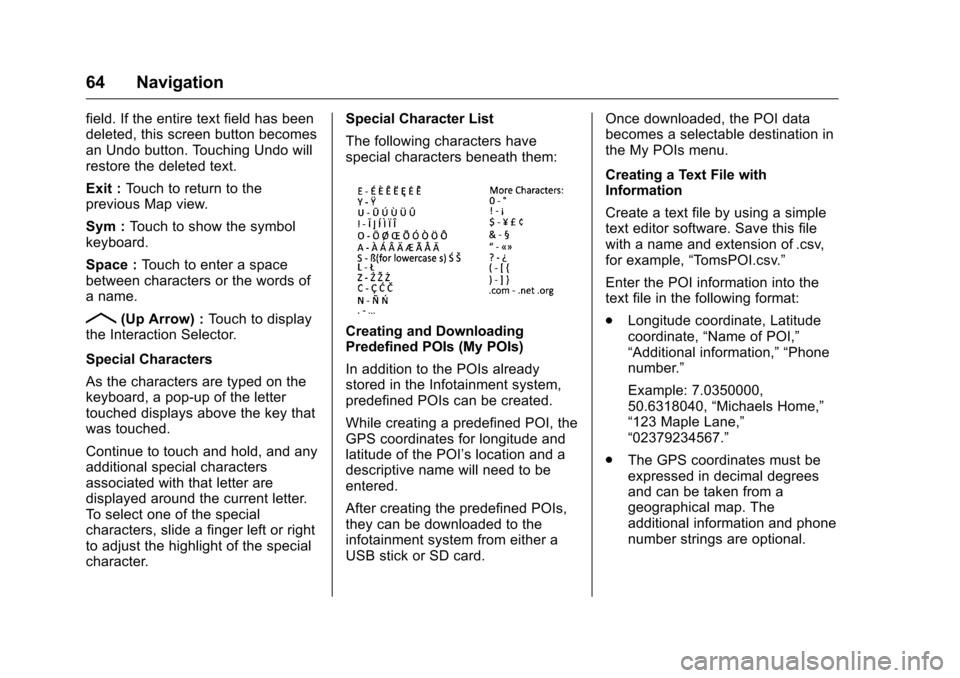
character. Special Character List
The following characters have
special characters beneath them:Creating and Downloading
Predefined POIs (My POIs)
In addition to the POIs already
stored in the Infotainment system,
predefined POIs can be created.
While creating a predefined POI, the
GPS coordinates for longitude and
latitude of the POI’s location and a
descriptive name will need to be
entered.
After creating the predefined POIs,
they can be downloaded to the
infotainment system from either a
USB stick or SD card.
Once downloaded, the POI data
becomes a selectable destination in
the My POIs menu.
Creating a Text File with
Information
Create a text file by using a simple
text editor software. Save this file
with a name and extension of .csv,
for example,
“TomsPOI.csv.”
Enter the POI information into the
text file in the following format:
. Longitude coordinate, Latitude
coordinate, “Name of POI,”
“Additional information,” “Phone
number.”
Example: 7.0350000,
50.6318040, “Michaels Home,”
“123 Maple Lane,”
“02379234567.”
. The GPS coordinates must be
expressed in decimal degrees
and can be taken from a
geographical map. The
additional information and phone
number strings are optional.
Page 70 of 113

Chevrolet MyLink Infotainment System (GMNA-Localizing-U.S/Canada-
9085900) - 2016 - CRC - 8/10/15
Navigation 69
touched, the turn list is exited, and
the display returns to the main
map view.
Avoid Areas
Touch the Avoid Areas screen
button to select the highway name
that is to be avoided. The system
shows a pop-up asking how many
miles or if the entire road should be
avoided.
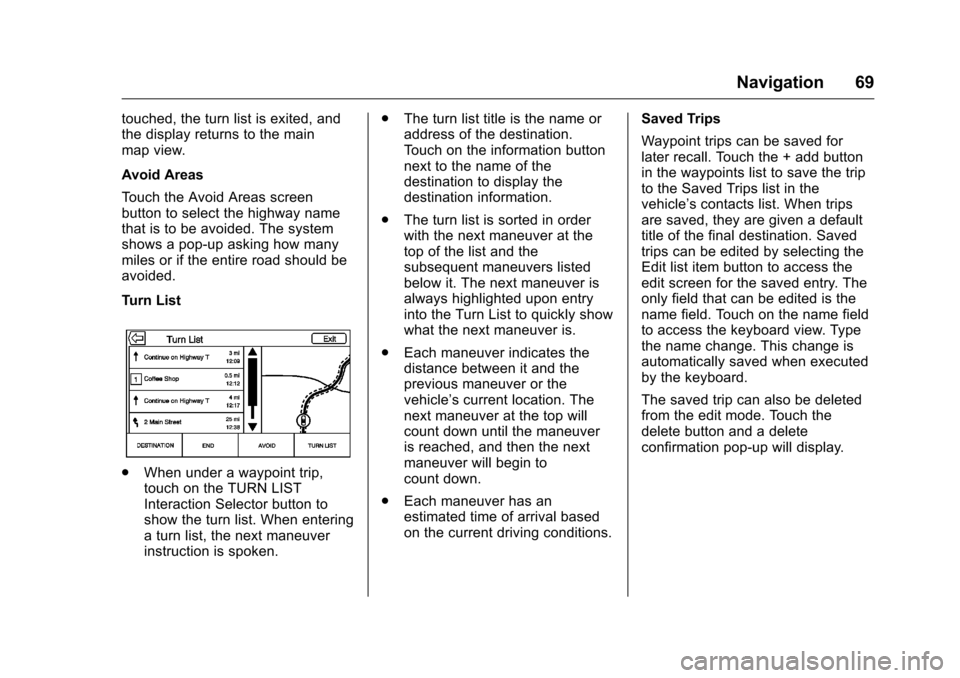
Turn List
.When under a waypoint trip,
touch on the TURN LIST
Interaction Selector button to
show the turn list. When entering
a turn list, the next maneuver
instruction is spoken. .
The turn list title is the name or
address of the destination.
Touch on the information button
next to the name of the
destination to display the
destination information.
. The turn list is sorted in order
with the next maneuver at the
top of the list and the
subsequent maneuvers listed
below it. The next maneuver is
always highlighted upon entry
into the Turn List to quickly show
what the next maneuver is.
. Each maneuver indicates the
distance between it and the
previous maneuver or the
vehicle’s current location. The
next maneuver at the top will
count down until the maneuver
is reached, and then the next
maneuver will begin to
count down.
. Each maneuver has an
estimated time of arrival based
on the current driving conditions. Saved Trips
Waypoint trips can be saved for
later recall. Touch the + add button
in the waypoints list to save the trip
to the Saved Trips list in the
vehicle’s contacts list. When trips
are saved, they are given a default
title of the final destination. Saved
trips can be edited by selecting the
Edit list item button to access the
edit screen for the saved entry. The
only field that can be edited is the
name field. Touch on the name field
to access the keyboard view. Type
the name change. This change is
automatically saved when executed
by the keyboard.
The saved trip can also be deleted
from the edit mode. Touch the
delete button and a delete
confirmation pop-up will display.
Page 77 of 113

Chevrolet MyLink Infotainment System (GMNA-Localizing-U.S/Canada-
9085900) - 2016 - CRC - 8/10/15
76 Navigation
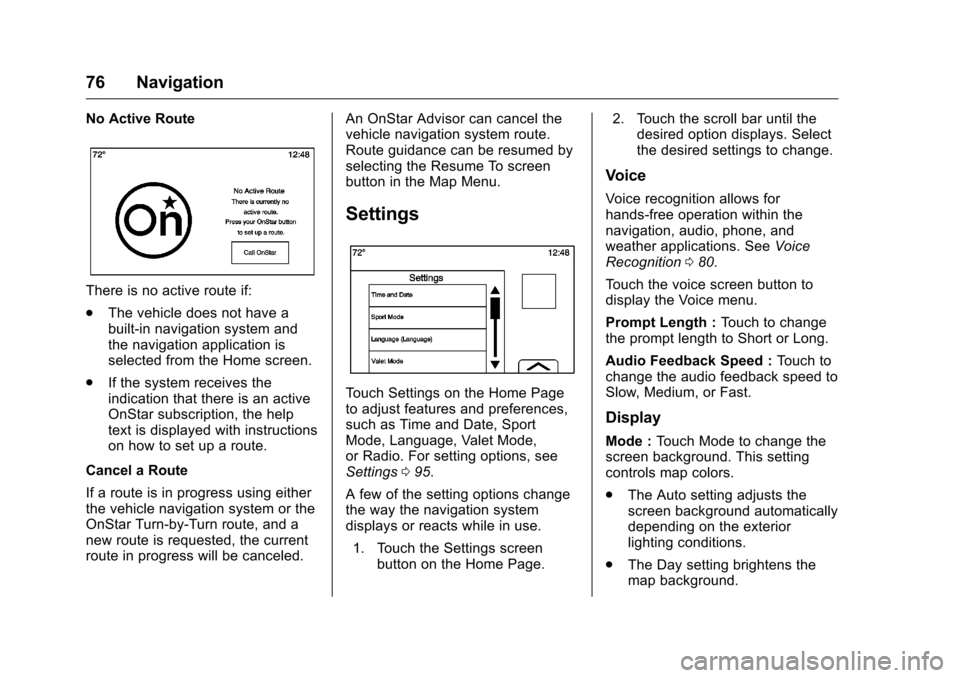
No Active Route
There is no active route if:
.The vehicle does not have a
built-in navigation system and
the navigation application is
selected from the Home screen.
. If the system receives the
indication that there is an active
OnStar subscription, the help
text is displayed with instructions
on how to set up a route.
Cancel a Route
If a route is in progress using either
the vehicle navigation system or the
OnStar Turn-by-Turn route, and a
new route is requested, the current
route in progress will be canceled. An OnStar Advisor can cancel the
vehicle navigation system route.
Route guidance can be resumed by
selecting the Resume To screen
button in the Map Menu.
Settings
Touch Settings on the Home Page
to adjust features and preferences,
such as Time and Date, Sport
Mode, Language, Valet Mode,
or Radio. For setting options, see
Settings
095.
A few of the setting options change
the way the navigation system
displays or reacts while in use. 1. Touch the Settings screen button on the Home Page. 2. Touch the scroll bar until the
desired option displays. Select
the desired settings to change.
Voice
Voice recognition allows for
hands-free operation within the
navigation, audio, phone, and
weather applications. See Voice
Recognition 080.
Touch the voice screen button to
display the Voice menu.
Prompt Length : Touch to change
the prompt length to Short or Long.
Audio Feedback Speed : Touch to
change the audio feedback speed to
Slow, Medium, or Fast.
Display
Mode : Touch Mode to change the
screen background. This setting
controls map colors.
. The Auto setting adjusts the
screen background automatically
depending on the exterior
lighting conditions.
. The Day setting brightens the
map background.
Page 96 of 113

Chevrolet MyLink Infotainment System (GMNA-Localizing-U.S/Canada-
9085900) - 2016 - CRC - 8/10/15
Settings 95
Settings
The Settings menu allows
adjustment of different vehicle and
radio features. The menu may
contain the following:
Time and Date
Touch + or−to increase or
decrease hours, minutes, and AM or
PM. Press 12Hr or 24Hr for 12 or
24 hour clock. Press + or −to
increase or decrease month, day,
or year. See “Clock”in the owner
manual.
Language
This will set the display language in
the radio, instrument panel, and
voice recognition. Press Language
and select the appropriate
language. Press
[Back to go back
to the previous menu.
Valet Mode (If Equipped)
This will lock the infotainment
system and steering wheel controls.
It may also limit top speed, power,
and access to vehicle storage
locations (if equipped). To enable valet mode:
1. Enter a four-digit code on the keypad.
2. Touch Enter to go to the confirmation screen.
3. Re-enter the four-digit code.
Touch LOCK or UNLOCK to lock or
unlock the system. Touch
[Back to
go back to the previous menu.
Radio
Touch to display the Radio Menu
and the following may display:
. Manage Favorites: Touch to
highlight a favorite to edit. Touch
Rename to rename the favorite
or Delete to delete it. Touch and
hold the station to drag it to a
new location. Touch Done to go
back to the previous menu.
. Number of Favorites Shown:
Touch to set the number of
favorites to display. Select Auto,
5, 10, 15, 20, 25, 30, 35, 40, 45,
50, 55, or 60. Auto will adjust the number of favorite locations that
can be seen. Touch
[Back to
go back to the previous menu.
. Auto Volume (If Equipped): This
feature adjusts the volume
based on the vehicle speed. See
AM-FM Radio 017.
. Bose AudioPilot noise
compensation technology (If
Equipped): This feature adjusts
the volume based on the noise
in the vehicle and speed. See
AM-FM Radio 017.
. Maximum Startup Volume: This
feature sets the maximum
startup volume. If the vehicle is
started and the volume is
greater than this level, the
volume is adjusted to this level.
To set the maximum startup
volume, touch + or −to increase
or decrease. Touch
[Back to go
back to the previous menu.
. Audio Cue Volume (If Equipped):
This feature adjusts the startup
and shutdown sounds. To adjust
the volume, touch + or −to
increase or decrease. This