2016 BMW M2 display
[x] Cancel search: displayPage 86 of 220

6.Adjust the settings.7.Confirm.
The entered date is stored.
Automatic Service Request
Data regarding the service status or legally
mandated vehicle inspections are automati‐
cally transmitted to your dealer’s service cen‐
ter before a service due date.
You can check when your dealer’s service cen‐
ter was notified.
On the Control Display:
1."Vehicle info"2."Vehicle status"3.Open "Options".4."Last Service Request"
Gear shift indicator
The conceptThe system recommends the most fuel effi‐
cient gear for the current driving situation.
General information
The gear shift indicator is active in the sequen‐
tial mode of the M double clutch transmission
and for the manual transmission.
Suggestions to shift gear up or down are dis‐
played in the instrument cluster.
On vehicles without a gear shift indicator, the
engaged gear is displayed.
Manual transmission: displaying
SymbolDescriptionFuel efficient gear is set.Shift up to fuel efficient gear.SymbolDescriptionShift down to fuel efficient gear.Shift into neutral.
M double-clutch transmission:
displaying
ExampleDescriptionFuel efficient gear is set.Shift into fuel efficient gear.
Speed limit detection
The concept
Speed limit detection
Speed limit detection shows the current maxi‐
mum permitted speed in the instrument clus‐
ter. The camera in the area of the interior mir‐
ror detects traffic signs at the edge of the road
as well as variable overhead sign posts. Traffic
signs with extra symbols for wet road condi‐
tions, etc. are also detected and compared
with the vehicle's onboard data, such as for the
rain sensor, and will be displayed depending
on the situation. The system takes into ac‐
count the information stored in the navigation
system and also displays speed limits present
on routes without signs.
Information WARNING
The system does not release from the
personal responsibility to correctly assess visi‐
bility and traffic situation. There is risk of an ac‐
Seite 86ControlsDisplays86
Online Edition for Part no. 01 40 2 970 518 - II/16
Page 87 of 220

cident. Adjust the driving style to the traffic
conditions. Watch traffic closely and actively
intervene in the respective situations.◀
Overview
Camera
The camera is installed near the interior mirror.
Keep the windshield in the area behind the in‐
terior mirror clean and clear.
Switching on/off On the Control Display:
1."Settings"2."Instrument cluster"3."Speed limit information"
If speed limit detection is switched on, it can
be displayed on the CID (central information
display) in the instrument cluster via the on‐
board computer.
Display
The following is displayed in the instrument
cluster:
Speed limit detection Current speed limit.
Speed limit detection not availa‐
ble.
System limits
The system may not be fully functional and
may provide incorrect information in the fol‐
lowing situations:▷In heavy fog, rain or snowfall.▷When signs are fully or partially concealed
by objects, stickers or paint.▷When driving very close to the vehicle in
front of you.▷When driving toward bright lights or strong
reflections.▷When the windshield behind the interior
mirror is fogged over, dirty or covered by a
sticker, etc.▷In the event of incorrect detection by the
camera.▷If the speed limits stored in the navigation
system are incorrect.▷In areas not covered by the navigation sys‐
tem.▷When roads differ from the navigation,
such as due to changes in road routing.▷When passing buses or trucks with a
speed sticker.▷If the traffic signs are non-conforming.▷During calibration of the camera immedi‐
ately after vehicle delivery.▷When signs are detected valid for a parallel
road.Seite 87DisplaysControls87
Online Edition for Part no. 01 40 2 970 518 - II/16
Page 88 of 220

Selection lists in the
instrument cluster
The concept Depending on your vehicle's optional features,
the following can be displayed or operated us‐
ing the buttons and the thumbwheel on the
steering wheel and the display in the instru‐
ment cluster:▷Current audio source.▷Redial phone feature.▷Turn on voice activation system.
It also displays programs of the Driving Dy‐
namics Control.
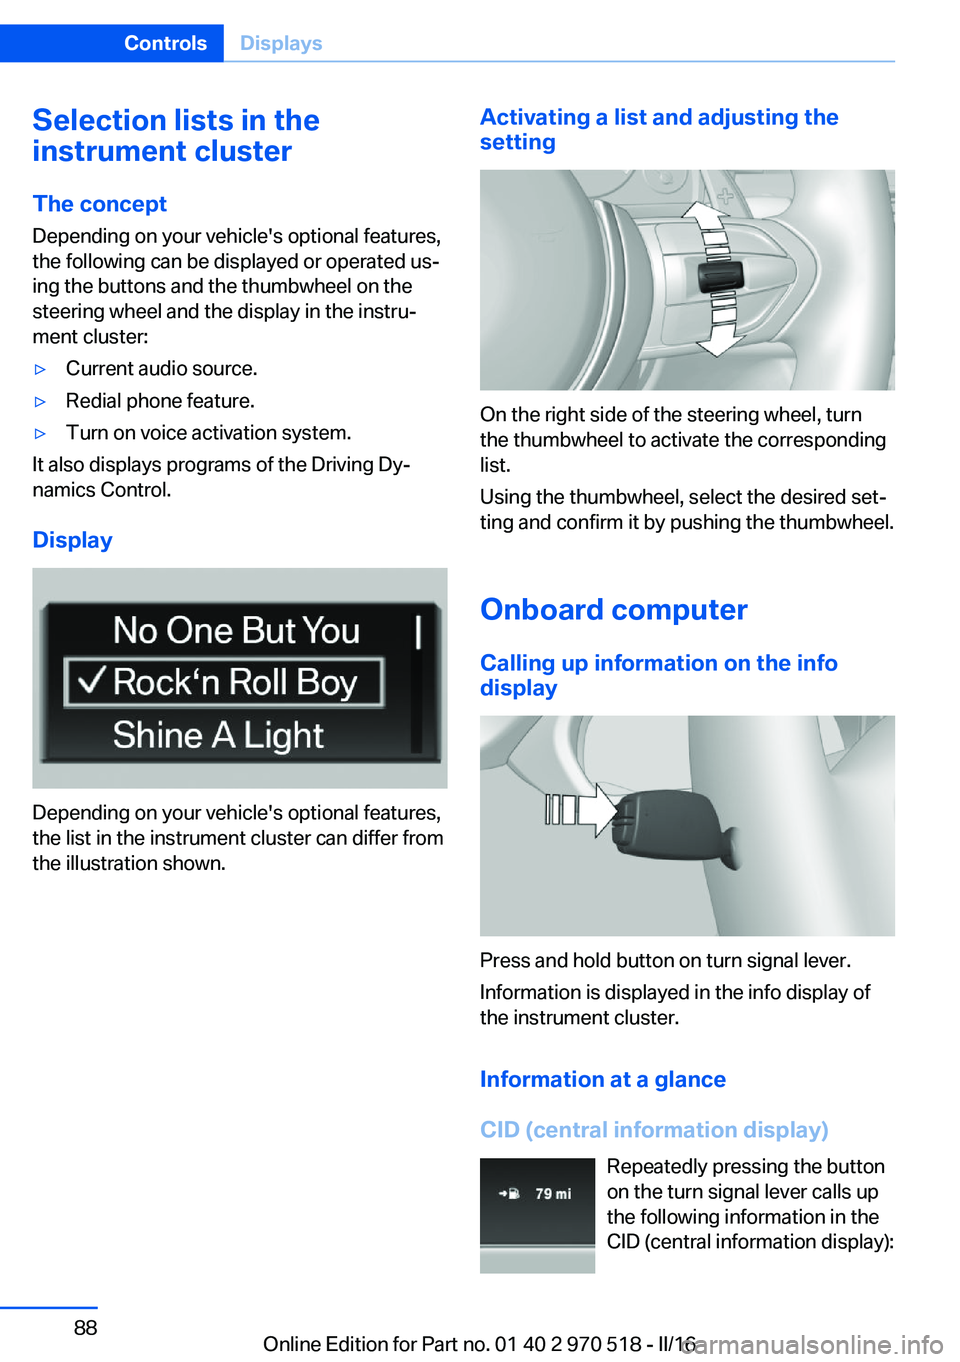
Display
Depending on your vehicle's optional features,
the list in the instrument cluster can differ from
the illustration shown.
Activating a list and adjusting the
setting
On the right side of the steering wheel, turn
the thumbwheel to activate the corresponding
list.
Using the thumbwheel, select the desired set‐
ting and confirm it by pushing the thumbwheel.
Onboard computer
Calling up information on the info
display
Press and hold button on turn signal lever.
Information is displayed in the info display of
the instrument cluster.
Information at a glance
CID (central information display) Repeatedly pressing the button
on the turn signal lever calls up
the following information in the
CID (central information display):
Seite 88ControlsDisplays88
Online Edition for Part no. 01 40 2 970 518 - II/16
Page 89 of 220

▷Range.▷Average consumption, fuel.▷Average consumption, fuel.▷Average speed.▷Date.▷Engine temperature display.▷Speed limit detection.▷Time of arrival.
When destination guidance is activated in
the navigation system.▷Distance to destination.
When destination guidance is activated in
the navigation system.▷Arrow view of navigation system.
When destination guidance is activated in
the navigation system.
Selecting information
Depending on the vehicle equipment version,
you can select what information from the on‐
board computer is to be displayed on the info
display of the instrument cluster.
On the Control Display:
1."Settings"2."Instrument cluster"3.Select the desired information.
Settings are stored for the profile currently
used.
Information in detail
Range
Displays the estimated cruising range available
with the remaining fuel.
It is calculated based on your driving style over
the last 20 miles/30 km.
Average fuel consumption
The average fuel consumption is calculated for
the period while the engine is running.
The average fuel consumption is calculated for
the distance traveled since the last reset by the
onboard computer.
Average speed
Periods in which the vehicle is parked with the
engine manually stopped are not included in
the calculation of the average speed.
Resetting average values
Press and hold button on turn signal lever.
Engine temperature display Displays the current engine temperature,
based on a combination of coolant and engine
oil temperature. As soon as the optimum oper‐
ating temperature has been attained, the indi‐
cator is in the center position.
If the engine oil or coolant, thus the engine, be‐
come too hot, a Check Control message is dis‐
played.
Check the coolant level, refer to page 182.
Distance to destination
The distance remaining to the destination is
displayed if a destination is entered in the navi‐
gation system before the trip is started.
The distance to the destination is adopted au‐
tomatically.
Seite 89DisplaysControls89
Online Edition for Part no. 01 40 2 970 518 - II/16
Page 90 of 220

Time of arrivalThe estimated time of arrival is
displayed if a destination is en‐
tered in the navigation system
before the trip is started.
The time must be correctly set. Speed limit detection
Further information, see chapter Speed limit
detection.
Trip onboard computer
The vehicle features two types of onboard
computers.▷"Onboard info": the values can be reset as
often as necessary.▷"Trip computer": the values provide an
overview of the current trip.
Resetting the trip onboard computer
On the Control Display:
1."Vehicle info"2."Trip computer"3."Reset": all values are reset.
"Automatically reset": all values are reset
approx. 4 hours after the vehicle came to a
standstill.
Display on the Control Display
Display the onboard computer or trip onboard
computer on the Control Display.
On the Control Display:
1."Vehicle info"2."Onboard info" or "Trip computer"Resetting the fuel consumption and
speed
On the Control Display:1."Vehicle info"2."Onboard info"3."Consumpt." or "Speed"4."Yes"
Sport displays
The concept
On the Control Display, the current values for
performance and torque can be displayed if
the vehicle is appropriately equipped.
Displaying sport displays on the
Control Display
1."Vehicle info"2."Sport displays"
Speed warning
The concept Displays a speed, when reached, should cause
a warning to be issued.
The warning is repeated if the vehicle speed
drops below the set speed once by at least
3 mph/5 km/h.
Displaying, setting or changing the
speed warning
On the Control Display:
1."Settings"2."Speed"3."Warning at:"4.Turn the Controller until the desired speed
is displayed.5.Press the Controller.
Speed warning is stored.
Seite 90ControlsDisplays90
Online Edition for Part no. 01 40 2 970 518 - II/16
Page 91 of 220

Activating/deactivating the speed
warning
On the Control Display:1."Settings"2."Speed"3."Warning"4.Press the Controller.
Setting your current speed as the
speed warning
On the Control Display:
1."Settings"2."Speed"3."Select current speed"4.Press the Controller.
The current vehicle speed is stored as the
speed warning.
Settings on the Control
Display
Time
Setting the time zone
1."Settings"2."Time/Date"3."Time zone:"4.Select the desired time zone.
The time zone is stored.
Setting the time
1."Settings"2."Time/Date"3."Time:"4.Turn the Controller until the desired hours
are displayed.5.Press the Controller.6.Turn the Controller until the desired mi‐
nutes are displayed.7.Press the Controller.
The time is stored.
Setting the time format
1."Settings"2."Time/Date"3."Format:"4.Select the desired format.
The time format is stored.
Automatic time setting Depending on your vehicle's optional features,
the time, date and, if needed, the time zone are
updated automatically.
1."Settings"2."Time/Date"3."Auto time set"
Date
Setting the date
1."Settings"2."Time/Date"3."Date:"4.Turn the Controller until the desired day is
displayed.5.Press the Controller.6.Make the necessary settings for the month
and year.
The date is stored.
Setting the date format
1."Settings"2."Time/Date"3."Format:"4.Select the desired format.
The date format is stored.
Seite 91DisplaysControls91
Online Edition for Part no. 01 40 2 970 518 - II/16
Page 92 of 220

Language
Setting the language
To set the language on the Control Display:1."Settings"2."Language/Units"3."Language:"4.Select the desired language.
Settings are stored for the profile currently
used.
Setting the voice dialog
Voice dialog for the voice activation system,
refer to page 28.
Units of measurement
Setting the units of measurement To set the units for fuel consumption, route/
distance and temperature:
1."Settings"2."Language/Units"3.Select the desired menu item.4.Select the desired unit.
Settings are stored for the profile currently
used.
Brightness.
Setting the brightness To set the brightness of the Control Display:
1."Settings"2."Control display"3."Brightness"4.Turn the Controller until the desired bright‐
ness is set.5.Press the Controller.
Settings are stored for the profile currently
used.
Depending on the light conditions, the bright‐
ness settings may not be clearly visible.
Activating/deactivating display of the
current vehicle position
If GPS geolocation has been activated, the cur‐
rent vehicle position can be displayed in the
BMW ConnectedDrive app or in the Connec‐
tedDrive customer portal.1."Settings"2."GPS tracking"3."GPS tracking"Seite 92ControlsDisplays92
Online Edition for Part no. 01 40 2 970 518 - II/16
Page 94 of 220

Switching on
With the ignition switched off, press the lever
either up or down past the resistance point for
approx. 2 seconds.
Switching off Briefly press the lever to the resistance point in
the opposite direction.
Welcome lights and
headlight courtesy delay
feature
Welcome lights
General information Depending on the equipment, when switching
off the vehicle, switch position
or .
Depending on the ambient brightness, individ‐
ual light functions may be switched on briefly,
when the vehicle is unlocked.
Activating/deactivating
On the Control Display:
1."Settings"2."Lighting"3."Welcome lights"
Settings are stored for the profile currently
used.
Headlight courtesy delay feature
General information
The low beams stay lit for a short while if the
headlight flasher is switched on after the radio-
ready state is switched off.
Setting the duration On the Control Display:1."Settings"2."Lighting"3."Pathway lighting:"4.Set length of time.
Settings are stored for the profile currently
used.
Automatic headlamp control
The concept The low beams are switched on and off auto‐
matically depending on the ambient bright‐
ness, for example in tunnels, in twilight or if
there is precipitation.
General information
A blue sky with the sun low on the horizon can
cause the lights to be switched on.
When emerging from a tunnel during the day,
the low beams are not switched off immedi‐
ately but instead only after approx. 2 minutes.
Activating Position of switch:
The indicator lamp in the instrument cluster is
illuminated, when the low beams are switched
on.
System limits
The automatic headlamp control cannot serve
as a substitute for your personal judgment of
lighting conditions.
Seite 94ControlsLights94
Online Edition for Part no. 01 40 2 970 518 - II/16