Page 29 of 363

28
uuInterface Settings uClock Adjustment
System Setup
Clock Adjustment
H SETTINGS buttonuSystem Settings uClock
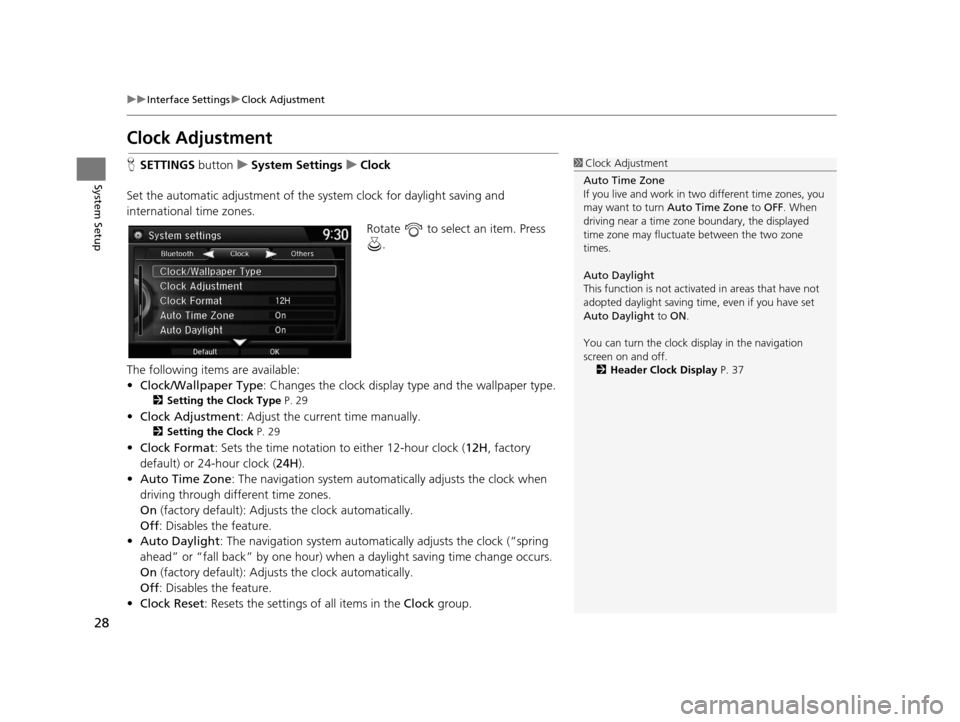
Set the automatic adjustment of the sy stem clock for daylight saving and
international time zones.
Rotate to select an item. Press .
The following items are available:
• Clock/Wallpaper Type: Changes the clock display type and the wallpaper type.
2 Setting the Clock Type P. 29
•Clock Adjustment : Adjust the current time manually.
2Setting the Clock P. 29
•Clock Format : Sets the time notation to either 12-hour clock ( 12H, factory
default) or 24-hour clock ( 24H).
• Auto Time Zone : The navigation system automa tically adjusts the clock when
driving through different time zones.
On (factory default): Adjust s the clock automatically.
Off : Disables the feature.
• Auto Daylight : The navigation system automati cally adjusts the clock (“spring
ahead” or “fall back” by one hour) when a daylight saving time change occurs.
On (factory default): Adjust s the clock automatically.
Off : Disables the feature.
• Clock Reset : Resets the settings of all items in the Clock group.
1Clock Adjustment
Auto Time Zone
If you live and work in tw o different time zones, you
may want to turn Auto Time Zone to OFF. When
driving near a time zone boundary, the displayed
time zone may fluctuat e between the two zone
times.
Auto Daylight
This function is not activated in areas that have not
adopted daylight saving time , even if you have set
Auto Daylight to ON.
You can turn the clock di splay in the navigation
screen on and off.
2 Header Clock Display P. 37
16 ACURA RDX NAVI-31TX48300.book 28 ページ 2015年3月6日 金曜日 午後1時26分
Page 37 of 363
36
uuInterface Settings uBackground Color
System Setup
Background Color
H SETTINGS buttonuSystem Settings uOthers uBackground Color
Changes the background color of the navigation screen and the On Demand Multi-
Use Display
TM. Rotate to select a desired color.
Press .
16 ACURA RDX NAVI-31TX48300.book 36 ページ 2015年3月6日 金曜日 午後1時26分
Page 38 of 363
37
uuInterface Settings uHeader Clock Display
System Setup
Header Clock Display
H SETTINGS button uSystem Settings uOthers uHeader Clock Display
Selects whether the clock display comes on. Rotate to select an option. Press .
The following options are available:
• On (factory default): The system displa ys the clock in the navigation screen.
• Off : Disables the feature.
16 ACURA RDX NAVI-31TX48300.book 37 ページ 2015年3月6日 金曜日 午後1時26分
Page 39 of 363
38
System Setup
Personal Information
HSETTINGS buttonuNavi Settings uPersonal Info
Use the personal information menu to select and set your address books, home
address, and PINs. You can also delete unwanted destinations from the list of
previously routed destinations. Rotate to select an item. Press .
The following items are available:
• Address Book : Stores new addresses or edits your address book.
2Address Book P. 39
•Edit Go Home : Sets or edits your home address.
2Home Address P. 46
•PIN Number : Sets or changes your PIN.
2PIN Numbers P. 47
•Previous Destination : Deletes the destination history.
2Previous Destination P. 48
•Category History: Deletes the place categories you recently used.
2 Category History P. 49
•Download POI : Edits and deletes the Imported POI categories.
2Download POI P. 50
1Personal Information
Personal information cannot be backed up or moved
to another navigation system.
16 ACURA RDX NAVI-31TX48300.book 38 ページ 2015年3月6日 金曜日 午後1時26分
Page 48 of 363

47
uuPersonal Information uPIN Numbers
System Setup
PIN Numbers
H SETTINGS button uNavi Settings uPersonal Info uPIN Number
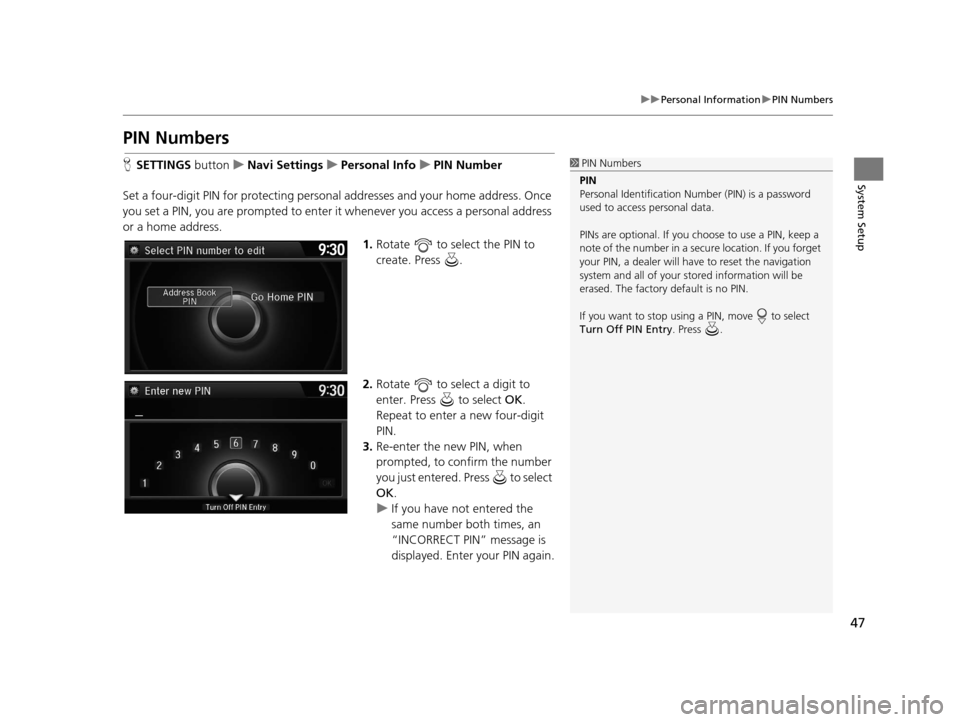
Set a four-digit PIN for protecting personal addresses and your home address. Once
you set a PIN, you are prompted to enter it whenever you access a personal address
or a home address.
1.Rotate to select the PIN to
create. Press .
2. Rotate to select a digit to
enter. Press to select OK.
Repeat to enter a new four-digit
PIN.
3. Re-enter the new PIN, when
prompted, to confirm the number
you just entered. Press to select
OK .
u If you have not entered the
same number both times, an
“INCORRECT PIN” message is
displayed. Enter your PIN again.1PIN Numbers
PIN
Personal Identification Nu mber (PIN) is a password
used to access personal data.
PINs are optional. If you choose to use a PIN, keep a
note of the number in a secure location. If you forget
your PIN, a dealer will ha ve to reset the navigation
system and all of your st ored information will be
erased. The factory default is no PIN.
If you want to stop using a PIN, move to select
Turn Off PIN Entry . Press .
16 ACURA RDX NAVI-31TX48300.book 47 ページ 2015年3月6日 金曜日 午後1時26分
Page 49 of 363
48
uuPersonal Information uPrevious Destination
System Setup
Previous Destination
H SETTINGS buttonuNavi Settings uPersonal Info uPrevious Destination
The navigation system maintain s a list of your previously routed destinations as a
shortcut for entering the same destination in the future. You can delete some or all
of your previous destinations from the list.
1.Rotate to select the
destination to delete. Press .
u Repeat the procedure as
necessary.
u Items to be deleted are
indicated with a trash icon.
2. Move and rotate to select
OK to delete the selected
destinations.1 Previous Destination
Up to 50 destinations can be stored.
To cancel the selection of a previous destination,
rotate to highlight the destination again. Press to de-select it.
PLACE A
PLACE B
PLACE C
PLACE D
PLACE E
PLACE F
Trash icon
16 ACURA RDX NAVI-31TX48300.book 48 ページ 2015年3月6日 金曜日 午後1時26分
Page 50 of 363
49
uuPersonal Information uCategory History
System Setup
Category History
H SETTINGS button uNavi Settings uPersonal Info uCategory History
The navigation system maintains a list of your recently used place categories as a
shortcut for selecting the same categories in the future. You can delete some or all
of your recently used categories from the list.
1.Rotate to select the category
to delete. Press .
u Repeat the procedure as
necessary.
u Items to be deleted are
indicated with a trash icon.
2. Move and rotate to select
OK to delete the selected
categories.1 Category History
Up to 50 categories can be stored.
To cancel the selection of a category, rotate to
highlight the category again. Press to de-select it.
Trash icon
16 ACURA RDX NAVI-31TX48300.book 49 ページ 2015年3月6日 金曜日 午後1時26分
Page 51 of 363
50
uuPersonal Information uDownload POI
System Setup
Download POI
Import custom Points of Interest (POI) into the navigation system and set the POI as
a destination. You can also add, edit, and delete POIs.
H MENU button (on map) uMore Search Methods uDownload POI
1. Connect a USB fl ash drive with
stored POI data to the USB
connector.
2. Move and rotate to select
Import from USB . Press .
■Importing POI Categories1
Importing POI Categories
For more information about connecting a USB flash
drive. 2 Connecting a USB Flash Drive P. 241
POI data in csv and kml formats can be imported.
You can download POI data from various POI
websites.
If you select From AcuraLink , you can download POI
data from the AcuraLink ® server.
2 AcuraLink ® P. 300
16 ACURA RDX NAVI-31TX48300.book 50 ページ 2015年3月6日 金曜日 午後1時26分