Page 171 of 363
170
uuChanging Your Destination uEntering a New Destination
Navigation
Entering a New Destination
H MENU button (when en route) uDestination
Enter a new destination using the Destinat ion Menu screen even when you are en
route.
1.Rotate to select a method to
enter a new destination.
2 Entering a Destination P. 116
uAfter entering a new
destination, the address is
displayed on the Calculate
Route screen.
2. Rotate to select Set as
Destination . Press .
3. Move to select Clear Current
Route . Press .
u The route is automatically
recalculated and displayed on
the map screen.
u Rotate to edit the order to
set the location as a new
waypoint. Press .
1Entering a New Destination
“Display Destination ”, “Display Navigation ”
16 ACURA RDX NAVI-31TX48300.book 170 ページ 2015年3月6日 金曜日 午後1時26分
Page 172 of 363

171
Navigation
Resuming Your Trip
Stop your vehicle en route (e.g., to rest, stop for gas, etc.), and then continue on
your route.
If you did not complete your route, the Continue Trip screen is displayed when you
restart your vehicle.
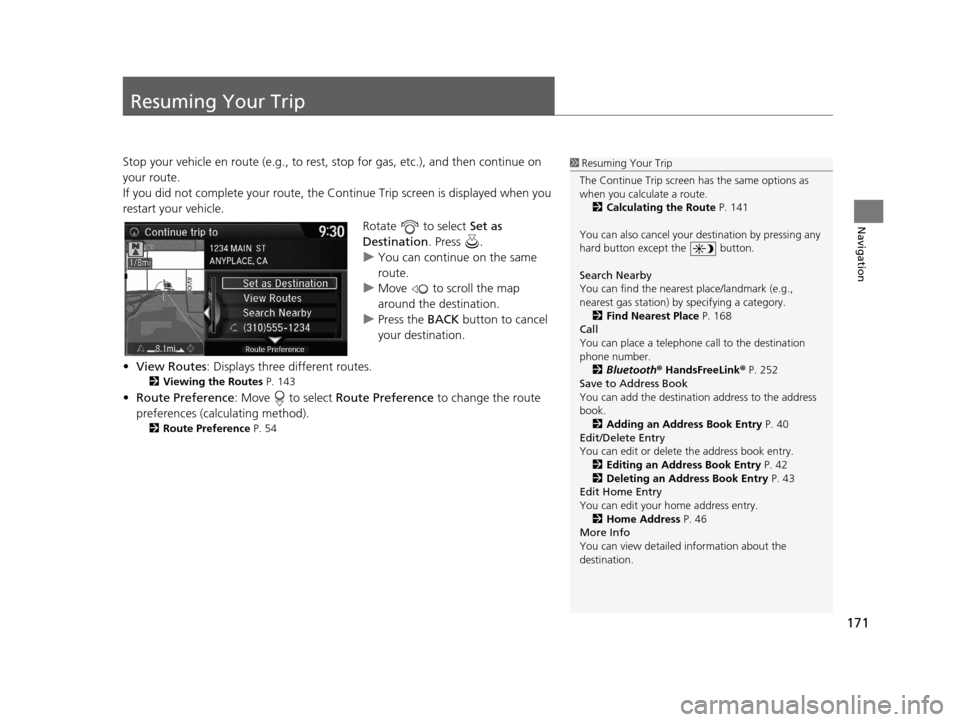
Rotate to select Set as
Destination . Press .
u You can continue on the same
route.
u Move to scroll the map
around the destination.
u Press the BACK button to cancel
your destination.
• View Routes : Displays three different routes.
2Viewing the Routes P. 143
•Route Preference : Move to select Route Preference to change the route
preferences (calculating method).
2 Route Preference P. 54
1Resuming Your Trip
The Continue Trip screen has the same options as
when you calculate a route. 2 Calculating the Route P. 141
You can also cancel your de stination by pressing any
hard button except the button.
Search Nearby
You can find the nearest place/landmark (e.g.,
nearest gas station) by specifying a category.
2 Find Nearest Place P. 168
Call
You can place a telephone call to the destination
phone number.
2 Bluetooth® HandsFreeLink ® P. 252
Save to Address Book
You can add the destinati on address to the address
book. 2 Adding an Address Book Entry P. 40
Edit/Delete Entry
You can edit or delete the address book entry.
2 Editing an Address Book Entry P. 42
2 Deleting an Address Book Entry P. 43
Edit Home Entry
You can edit your home address entry.
2 Home Address P. 46
More Info
You can view detailed information about the
destination.
16 ACURA RDX NAVI-31TX48300.book 171 ページ 2015年3月6日 金曜日 午後1時26分
Page 185 of 363
184
Audio
Playing FM/AM Radio
Selecting FM/AM Mode
1.Press the MENU button. (in AUDIO mode)
2. Rotate to select Change Source. Press .
3. Rotate to select the frequency band (FM, AM). Press .
u The band and frequency are displayed on the navigation screen.
1. Select Audio Source.
2. Select the frequency band (FM, AM) icon.
u The band and frequency are displayed on the On Demand Multi-Use Display
TM.
1Selecting FM/AM Mode
“Display audio ”
You can control the AM/FM radio using voice
commands. 2 Radio Commands P. 352
The ST indicator appears on the display indicating
stereo FM broadcasts.
Stereo reproduction in AM is not available.
The radio can receive the complete AM and FM
bands:
AM band: 530 to 1710 kHz
FM band: 87.7 to 107.9 MHz
You can store 6 AM stations and 12 FM stations into
the preset memory.Interface Dial
On Demand Multi-Use DisplayTM
16 ACURA RDX NAVI-31TX48300.book 184 ページ 2015年3月6日 金曜日 午後1時26分
Page 186 of 363
185
uuPlaying FM/AM Radio uAudio Screen Control
Continued
Audio
Audio Screen Control
Control the audio system through the navigation screen and On Demand Multi-Use
DisplayTM.
Rotate to select a station from
the list. Press .
uRotate and select Refresh to
update the station list at any time.
u Press the MENU button to display
the menu items.
2 Audio Menu P. 188
Interface Dial
Frequency band
16 ACURA RDX NAVI-31TX48300.book 185 ページ 2015年3月6日 金曜日 午後1時26分
Page 190 of 363

189
uuPlaying FM/AM Radio uAudio Menu
Audio
• HD Subchannel*: Displays the subchannel list when an HD RadioTM station is
selected.
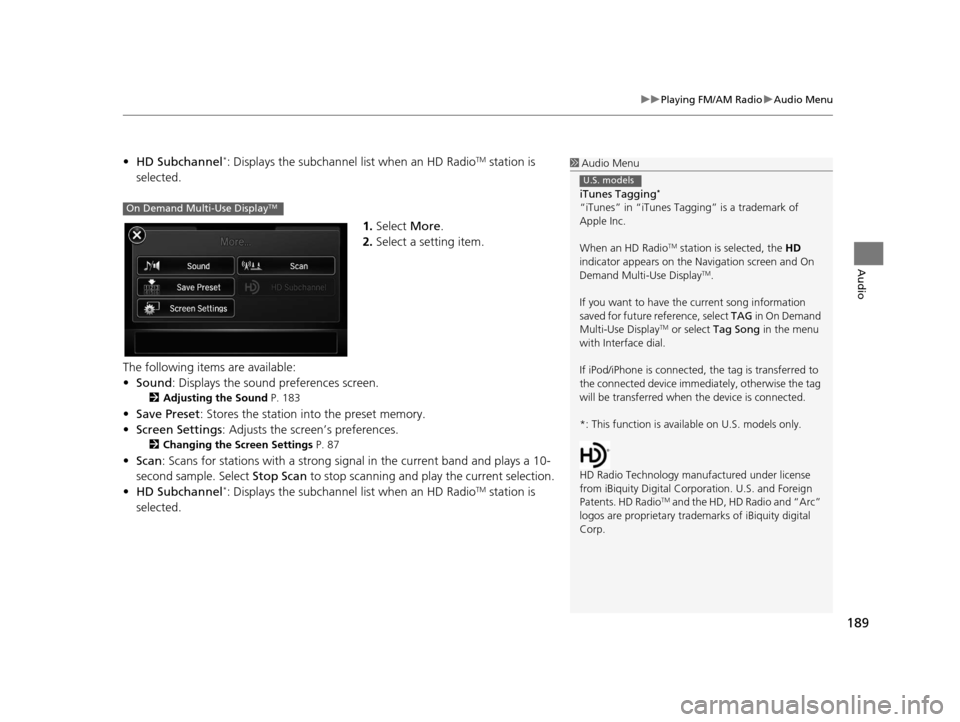
1.Select More.
2. Select a setting item.
The following items are available:
• Sound : Displays the sound preferences screen.
2Adjusting the Sound P. 183
•Save Preset : Stores the station into the preset memory.
• Screen Settings : Adjusts the screen’s preferences.
2Changing the Screen Settings P. 87
•Scan : Scans for stations with a strong signal in the current band and plays a 10-
second sample. Select Stop Scan to stop scanning and play the current selection.
• HD Subchannel
*: Displays the subchannel list when an HD RadioTM station is
selected.
1 Audio Menu
iTunes Tagging
*
“iTunes” in “iTunes Ta gging” is a trademark of
Apple Inc.
When an HD Radio
TM station is selected, the HD
indicator appears on the Navigation screen and On
Demand Multi-Use Display
TM.
If you want to have the current song information
saved for future reference, select TAG i n O n D e m a n d
Multi-Use Display
TM or select Tag Song in the menu
with Interface dial.
If iPod/iPhone is connected, the tag is transferred to
the connected device immedi ately, otherwise the tag
will be transferred when the device is connected.
*: This function is availa ble on U.S. models only.
HD Radio Technology manufactured under license
from iBiquity Digi tal Corporation. U.S. and Foreign
Patents. HD Radio
TM and the HD, HD Radio and “Arc”
logos are propr ietary trademarks of iBiquity digital
Corp.
U.S. models
On Demand Multi-Use DisplayTM
16 ACURA RDX NAVI-31TX48300.book 189 ページ 2015年3月6日 金曜日 午後1時26分
Page 191 of 363

190
Audio
Playing SiriusXM® Radio
Selecting SiriusXM® Mode
1. Press the MENU button. (in AUDIO mode)
2. Rotate to select Change Source. Press .
3. Rotate to select SXM. Press .
u The category, channel list, and presets are displayed on the navigation screen.
1. Select Audio Source.
2. Select the SiriusXM icon.
u The category and channel are displayed on the On Demand Multi-Use
display
TM.
1Playing SiriusXM ® Radio
You can control the SiriusXM ® radio using voice
commands.
2 Radio Commands P. 352
In the channel mode, all available channels are
selectable. In the categor y mode, you can select a
channel within a ca tegory (Jazz, Rock, Classical, etc.).
There may be instances when SiriusXM ® Radio does
not broadcast all the data fi elds (artist name, title).
This does not indicate a problem with your audio
system.
SiriusXM ® Radio channels load in ascending order,
which can take about a minute. Once they have
loaded, you can scroll up or down to make your
selections.Interface Dial
On Demand Multi-Use DisplayTM
16 ACURA RDX NAVI-31TX48300.book 190 ページ 2015年3月6日 金曜日 午後1時26分
Page 192 of 363
191
uuPlaying SiriusXM ® Radio uAudio Screen Control
Continued
Audio
Audio Screen Control
Control the audio system through the navigation screen and On Demand Multi-Use
DisplayTM.
1.Rotate to select a category.
Press .
u Move if you want to select
from the current channel list or
presets.
2. Rotate to select a channel.
Press .
u Press the MENU button to
display the menu items.
2 Audio Menu P. 200
Interface Dial
16 ACURA RDX NAVI-31TX48300.book 191 ページ 2015年3月6日 金曜日 午後1時26分
Page 196 of 363
195
uuPlaying SiriusXM ® Radio uAudio Screen Control
Continued
Audio
■ Replay status display
Display the replay status on the navigation screen when you listen to the playback.
Interface Dial
Shows how much time the replayed segment
is behind the real-time broadcast
Stored length in
the memory Replayed segment
16 ACURA RDX NAVI-31TX48300.book 195 ページ 2015年3月6日 金曜日 午後1時26分