Page 65 of 118

PERIODIC MAINTENANCE AND ADJUSTMENT
6-1
6
EAU17245
Periodic inspection, adjustment, and
lubrication will keep your vehicle in the
safest and most efficient condition
possible. Safety is an obligation of the
vehicle owner/operator. The most im-
portant points of vehicle inspection,
adjustment, and lubrication are ex-
plained on the following pages.
The intervals given in the periodic
maintenance charts should be simply
considered as a general guide under
normal riding conditions. However, de-
pending on the weather, terrain, geo-
graphical location, and individual use,
the maintenance intervals may need to
be shortened.
WARNING
EWA10322
Failure to properly maintain the vehi-
cle or performing maintenance ac-
tivities incorrectly may increase
your risk of injury or death during
service or while usin g the vehicle. If
you are not familiar with vehicle ser-
vice, have a Yamaha d ealer perform
service.
WARNING
EWA15123
Turn off the en gine when performin g
maintenance unless otherwise
specified .
A runnin g en gine has movin g
parts that can catch on b ody
parts or clothin g an d electrical
parts that can cause shocks or
fires.
Runnin g the eng ine while ser-
vicin g can lead to eye injury,
b urns, fire, or car bon monoxi de
poisonin g – possi bly lea din g to
d eath. See pag e 1-2 for more in-
formation a bout car bon monox-
i d e.
WARNING
EWA15461
Brake discs, calipers, drums, an d
linin gs can b ecome very hot during
use. To avoi d possi ble burns, let
b rake components cool before
touching them.
EAU17303
Emission controls not only function to
ensure cleaner air, but are also vital to
proper engine operation and maximum
performance. In the following periodic
maintenance charts, the services relat-
ed to emissions control are grouped
separately. These services require
specialized data, knowledge, and
equipment. Maintenance, replace-
ment, or repair of the emission control
devices and systems may be per-
formed by any repair establishment or
individual that is certified (if applicable).
Yamaha dealers are trained and
equipped to perform these particular
services.
U2BSE1E0.book Page 1 Thursday, July 31, 2014 4:31 PM
Page 66 of 118
PERIODIC MAINTENANCE AND ADJUSTMENT
6-2
6
EAU49563
Owner’s tool kitThe owner’s tool kit is located behind
cowling A. (See page 6-8.)
To access the owner’s tool kit, remove
cowling A with the hexagon wrench, lo-
cated on the bottom of the rider seat.
(See page 3-32.)The service information included in this
manual and the tools provided in the
owner’s tool kit are intended to assist
you in the performance of preventive
maintenance and minor repairs. How-
ever, additional tools such as a torque
wrench may be necessary to perform
certain maintenance work correctly.
TIPIf you do not have the tools or experi-
ence required for a particular job, have
a Yamaha dealer perform it for you.
1. Owner’s tool kit
1. Hexagon wrench
1
1
U2BSE1E0.book Page 2 Thursday, July 31, 2014 4:31 PM
Page 67 of 118

PERIODIC MAINTENANCE AND ADJUSTMENT
6-3
6
EAU46862
TIPThe annual checks must be performed every year, except if a kilometer- based maintenance, or for the UK, a
milea ge- base d maintenance, is performe d instea d.
From 50000 km (30000 mi), repeat the maintenance intervals starting from 10000 km (6000 mi).
Items marked with an asterisk should be performed by a Yamaha dealer as they require special tools, data and tech-
nical skills.
EAU46911
Perio dic maintenance chart for the emission control systemNO. ITEM CHECK OR MAINTENANCE JOB ODOMETER READING
ANNUAL
CHECK
1000 km
(600 mi) 10000 km
(6000 mi) 20000 km
(12000 mi) 30000 km
(18000 mi) 40000 km
(24000 mi)
1 *Fuel line • Check fuel hoses for cracks or
damage. √√√√√
2 *Spark plu gs • Check condition.
• Clean and regap.
√√
•Replace. √√
3 *Valves • Check valve clearance.
•Adjust.
Every 40000 km (24000 mi)
4 *Fuel injection sys-
tem • Adjust synchronization.
√√√√√
5 *Muffler an
d ex-
haust pipe • Check the screw clamp(s) for
looseness. √√√√√
U2BSE1E0.book Page 3 Thursday, July 31, 2014 4:31 PM
Page 68 of 118
 10000 km
(6000 mi) 2000")
PERIODIC MAINTENANCE AND ADJUSTMENT
6-4
6
EAU1770K
General maintenance and lu brication chartNO. ITEM CHECK OR MAINTENANCE JOB ODOMETER READING
ANNUAL
CHECK
1000 km
(600 mi) 10000 km
(6000 mi) 20000 km
(12000 mi) 30000 km
(18000 mi) 40000 km
(24000 mi)
1 *Air filter element • Replace. √
2 *Clutch • Check operation, fluid level and
vehicle for fluid leakage. √√√√√
3 *Front brake • Check operation, fluid level and
vehicle for fluid leakage. √√√√√√
• Replace brake pads. Whenever worn to the limit
4 *Rear brake • Check operation, fluid level and
vehicle for fluid leakage. √√√√√√
• Replace brake pads. Whenever worn to the limit
5 *Brake hoses • Check for cracks or damage.
• Check for correct routing and
clamping. √√√√√
• Replace. Every 4 years
6 *Brake flui d • Replace. Every 2 years
7 *Wheels • Check rim runout and spokes for
damage.
• Tighten all spokes. At the initial 1000 km (600 mi) and every 5000 km (3000 mi) thereafter.
8 *Tires • Check tread depth and for dam-
age.
• Replace if necessary.
• Check air pressure.
• Correct if necessary. √√√√√
9 *Wheel bearin gs • Check bearings for looseness or
damage. √√√√
U2BSE1E0.book Page 4 Thursday, July 31, 2014 4:31 PM
Page 69 of 118

11 *Steerin g")
PERIODIC MAINTENANCE AND ADJUSTMENT
6-5
6
10*Swin garm • Check operation and for exces-
sive play. √√√√
• Lubricate with lithium-soap- based grease. Every 50000 km (30000 mi)
11 *Steerin g b earin gs • Check bearing play and steering
for roughness. √√√√√
• Lubricate with lithium-soap- based grease. Every 50000 km (30000 mi)
12 *Chassis fasteners • Make sure that all nuts, bolts and
screws are properly tightened. √√√√√
13 Brake lever pivot
shaft • Lubricate with silicone grease.
√√√√√
14 Brake ped
al pivot
shaft • Lubricate with lithium-soap-
based grease. √√√√√
15 Clutch lever pivot
shaft
• Lubricate with silicone grease.
√√√√√
16 Shift pe
dal pivot
shaft • Lubricate with lithium-soap-
based grease. √√√√√
17 Si destan d • Check operation.
• Lubricate with lithium-soap-
based grease. √√√√√
18 *Sidestan d switch • Check operation. √√√√√√
19 *Front fork • Check operation and for oil leak-
age. √√√√
20 *Shock a
bsor ber as-
sem bly • Check operation and shock ab-
sorber for oil leakage. √√√√
NO. ITEM CHECK OR MAINTENANCE JOB
ODOMETER READING
ANNUAL
CHECK
1000 km
(600 mi) 10000 km
(6000 mi) 20000 k
m
(12000 mi) 30000 km
(18000 mi) 40000 km
(24000 mi)
U2BSE1E0.book Page 5 Thursday, July 31, 2014 4:31 PM
Page 70 of 118

PERIODIC MAINTENANCE AND ADJUSTMENT
6-6
6
21*Rear suspension re-
lay arm an
d con-
nectin g arm
pivotin g points • Check operation.
√√√√
22 En gine oil • Change.
• Check oil level and vehicle for oil
leakage. √√√√√√
23 En
gine oil filter car-
tri dge • Replace.
√√√
24 *Coolin g system • Check coolant level and vehicle
for coolant leakage. √√√√√
• Change coolant. Every 3 years
25 Final gear oil • Check oil level and vehicle for oil
leakage. √√ √
• Change. √√√
26 *Front an
d rear
b rake switches • Check operation.
√√√√√√
27 Movin
g parts an d
cab les • Lubricate.
√√√√√
28 *Throttle grip • Check operation.
• Check throttle grip free play, and
adjust if necessary.
• Lubricate cable and grip housing. √√√√√
29 *Li
ghts, si gnals an d
switches • Check operation.
• Adjust headlight beam.
√√√√√√
NO. ITEM CHECK OR MAINTENANCE JOB
ODOMETER READING
ANNUAL
CHECK
1000 km
(600 mi) 10000 km
(6000 mi) 20000 km
(12000 mi) 30000 km
(18000 mi) 40000 km
(
24000 mi)
U2BSE1E0.book Page 6 Thursday, July 31, 2014 4:31 PM
Page 71 of 118
PERIODIC MAINTENANCE AND ADJUSTMENT
6-7
6
EAU36773
TIPAir filter
• This model’s air filter is equipped with a disposable oil-coated paper element, which must not be cleaned with com- pressed air to avoid damaging it.
• The air filter element needs to be replaced more frequently when riding in unusually wet or dusty areas.
Hydraulic brake and clutch service
• Regularly check and, if necessary, correct the brake fluid and clutch fluid levels.
• Every two years replace the internal components of the brake master cylinders and calipers as well as clutch master and release cylinders, and change the brake and clutch fluids.
• Replace the brake and clutch hoses every four years and if cracked or damaged.
U2BSE1E0.book Page 7 Thursday, July 31, 2014 4:31 PM
Page 72 of 118
PERIODIC MAINTENANCE AND ADJUSTMENT
6-8
6
EAU18782
Removing an d installin g cowl-
in gsThe cowlings shown need to be re-
moved to perform some of the mainte-
nance jobs described in this chapter.
Refer to this section each time a cowl-
ing needs to be removed and installed.
EAU55960
Cowlin g A
To remove the cowlingRemove the quick fastener screws,
and then pull the cowling off as shown. To install the cowling
1. Fit the projections on the cowling
into the matching holes in cowling
B.
1. Cowling A
2. Cowling B
1
2
1. Cowling C
1
1. Cowling A
2. Quick fastener screw
1. Projection
2. Matching hole
3. Cowling B2
2
1
12
3
U2BSE1E0.book Page 8 Thursday, July 31, 2014 4:31 PM
 1
1 2
2 3
3 4
4 5
5 6
6 7
7 8
8 9
9 10
10 11
11 12
12 13
13 14
14 15
15 16
16 17
17 18
18 19
19 20
20 21
21 22
22 23
23 24
24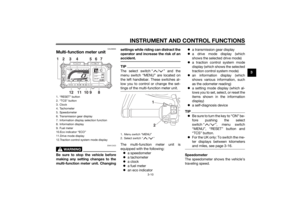 25
25 26
26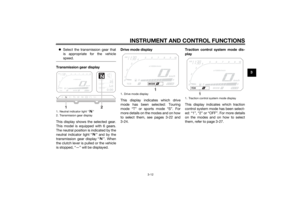 27
27 28
28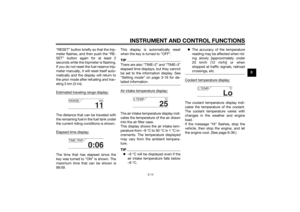 29
29 30
30 31
31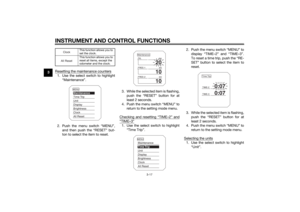 32
32 33
33 34
34 35
35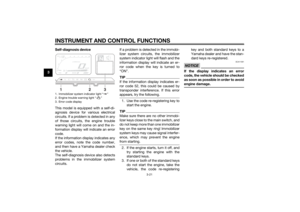 36
36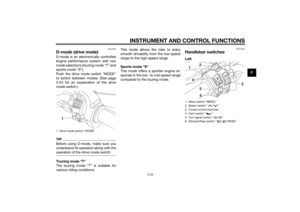 37
37 38
38 39
39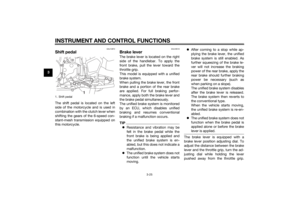 40
40 41
41 42
42 43
43 44
44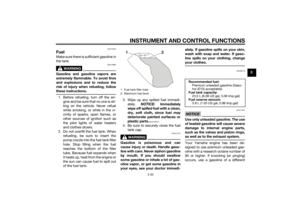 45
45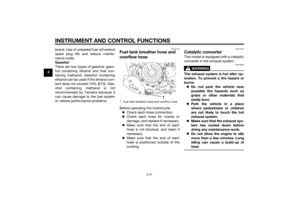 46
46 47
47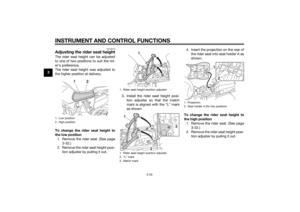 48
48 49
49 50
50 51
51 52
52 53
53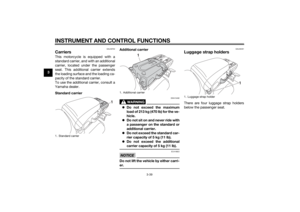 54
54 55
55 56
56 57
57 58
58 59
59 60
60 61
61 62
62 63
63 64
64 65
65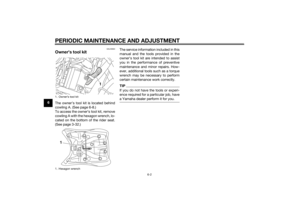 66
66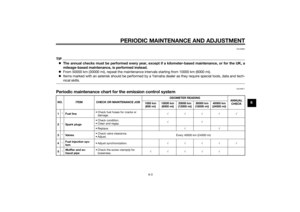 67
67 68
68 69
69 70
70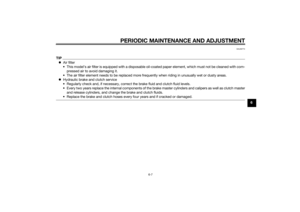 71
71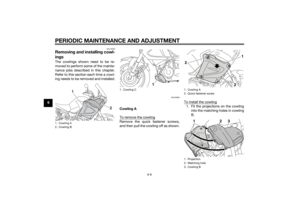 72
72 73
73 74
74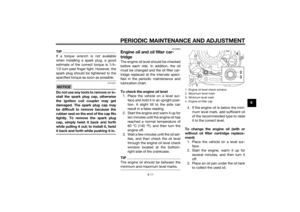 75
75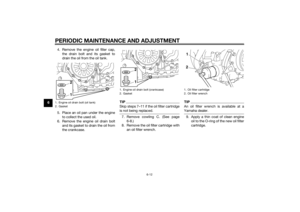 76
76 77
77 78
78 79
79 80
80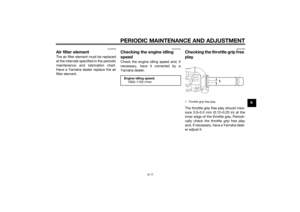 81
81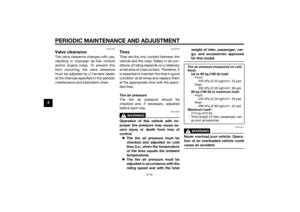 82
82 83
83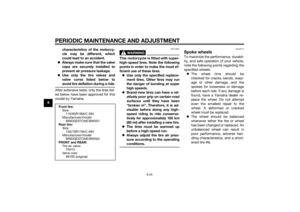 84
84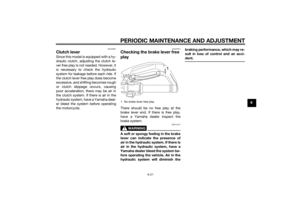 85
85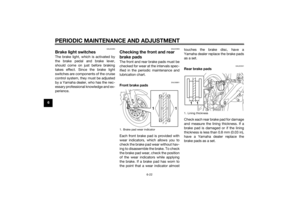 86
86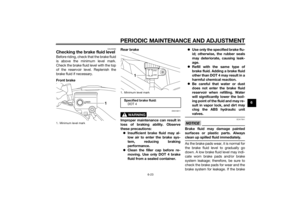 87
87 88
88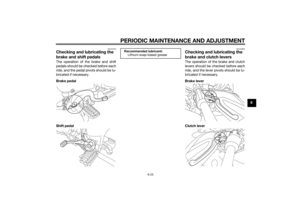 89
89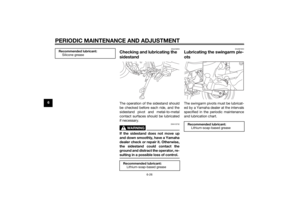 90
90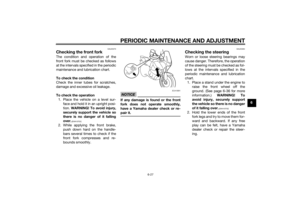 91
91 92
92 93
93 94
94 95
95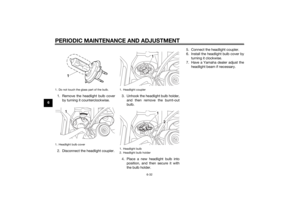 96
96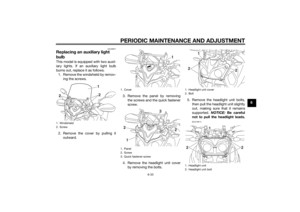 97
97 98
98 99
99 100
100 101
101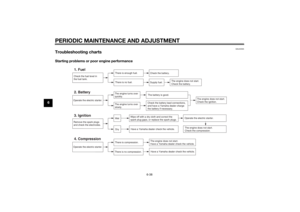 102
102 103
103 104
104 105
105 106
106 107
107 108
108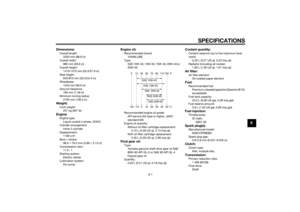 109
109 110
110 111
111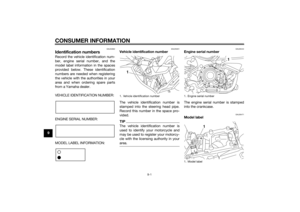 112
112 113
113 114
114 115
115 116
116 117
117
To access the owner’s tool kit, remove
cowling A with the hex")

