Page 119 of 590

When driving2
119
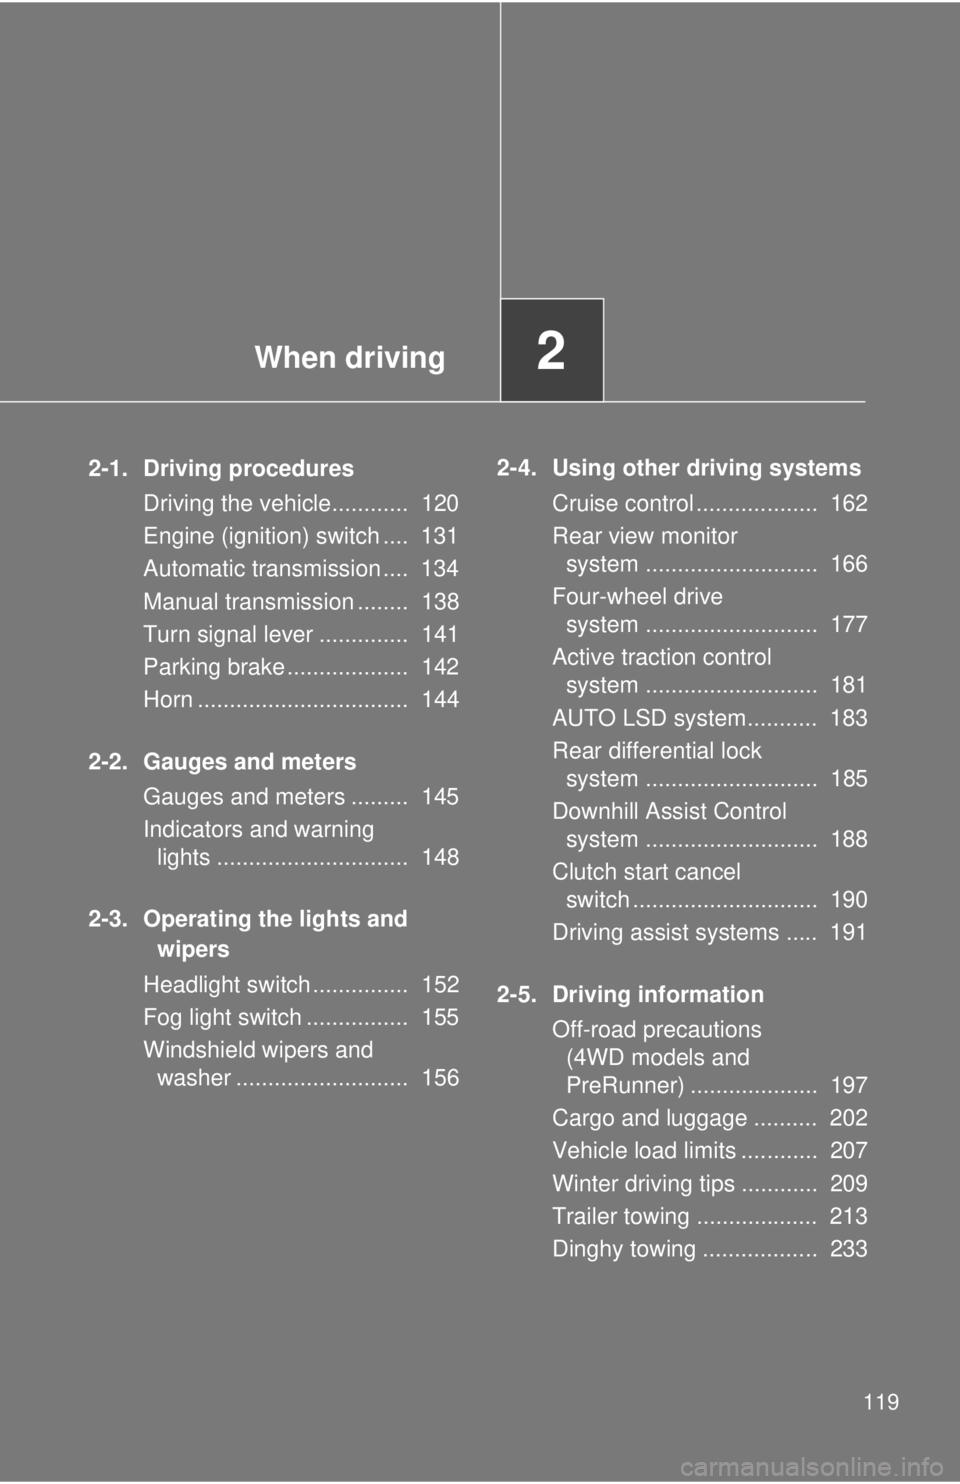
2-1. Driving proceduresDriving the vehicle............ 120
Engine (ignition) switch .... 131
Automatic transmission .... 134
Manual transmission ........ 138
Turn signal lever .............. 141
Parking brake ................... 142
Horn ................................. 144
2-2. Gauges and meters Gauges and meters ......... 145
Indicators and warning lights .............................. 148
2-3. Operating the lights and wipers
Headlight switch ............... 152
Fog light switch ................ 155
Windshield wipers and washer ........................... 156 2-4. Using other driving systems
Cruise control ................... 162
Rear view monitor system ........................... 166
Four-wheel drive system ........................... 177
Active traction control system ........................... 181
AUTO LSD system........... 183
Rear differential lock system ........................... 185
Downhill Assist Control system ........................... 188
Clutch start cancel switch ............................. 190
Driving assist systems ..... 191
2-5. Driving information Off-road precautions (4WD models and
PreRunner) .................... 197
Cargo and luggage .......... 202
Vehicle load limits ............ 207
Winter driving tips ............ 209
Trailer towing ................... 213
Dinghy towing .................. 233
Page 141 of 590
141
2-1. Driving procedures
2
When driving
Tur n signal lever
■Turn signals can be operated when
The engine switch is in the ON position.
■ If the indicators flash faster than usual
Check that a light bulb in the front or rear turn signal lights has not burned
out.
Right turn
Left turn
Move and hold the lever
partway to signal a lane
change.
The right hand signal will flash
until you release the lever.
Move and hold the lever
partway to signal a lane
change.
The left hand signal will flash
until you release the lever.
Page 146 of 590
146 2-2. Gauges and meters
Odometer and trip meter display buttonPressing this button switches between odometer and trip meter dis-
plays.
Odometer
Trip meter A
*
Trip meter B*
*
: Pushing and holding the button will reset the trip meter.
Instrument panel light control
The brightness of the instrument panel lights can be adjusted.
Brighter
Darker
Odometer/trip meter
Odometer:
Displays the total distance the vehicle has been driven.
Trip meter:
Displays the distance the vehicle has been driven since the meter was
last reset. Trip meters A and B can be used to record and display differ-
ent distances independently.
Page 148 of 590
148
2-2. Gauges and meters
Indicators and warning lights
The indicator and warning lights on the instrument cluster and cen-
ter panel inform the driver of the status of the vehicle’s various sys-
tems.
Instrument cluster
Center panel
Page 150 of 590

150 2-2. Gauges and meters
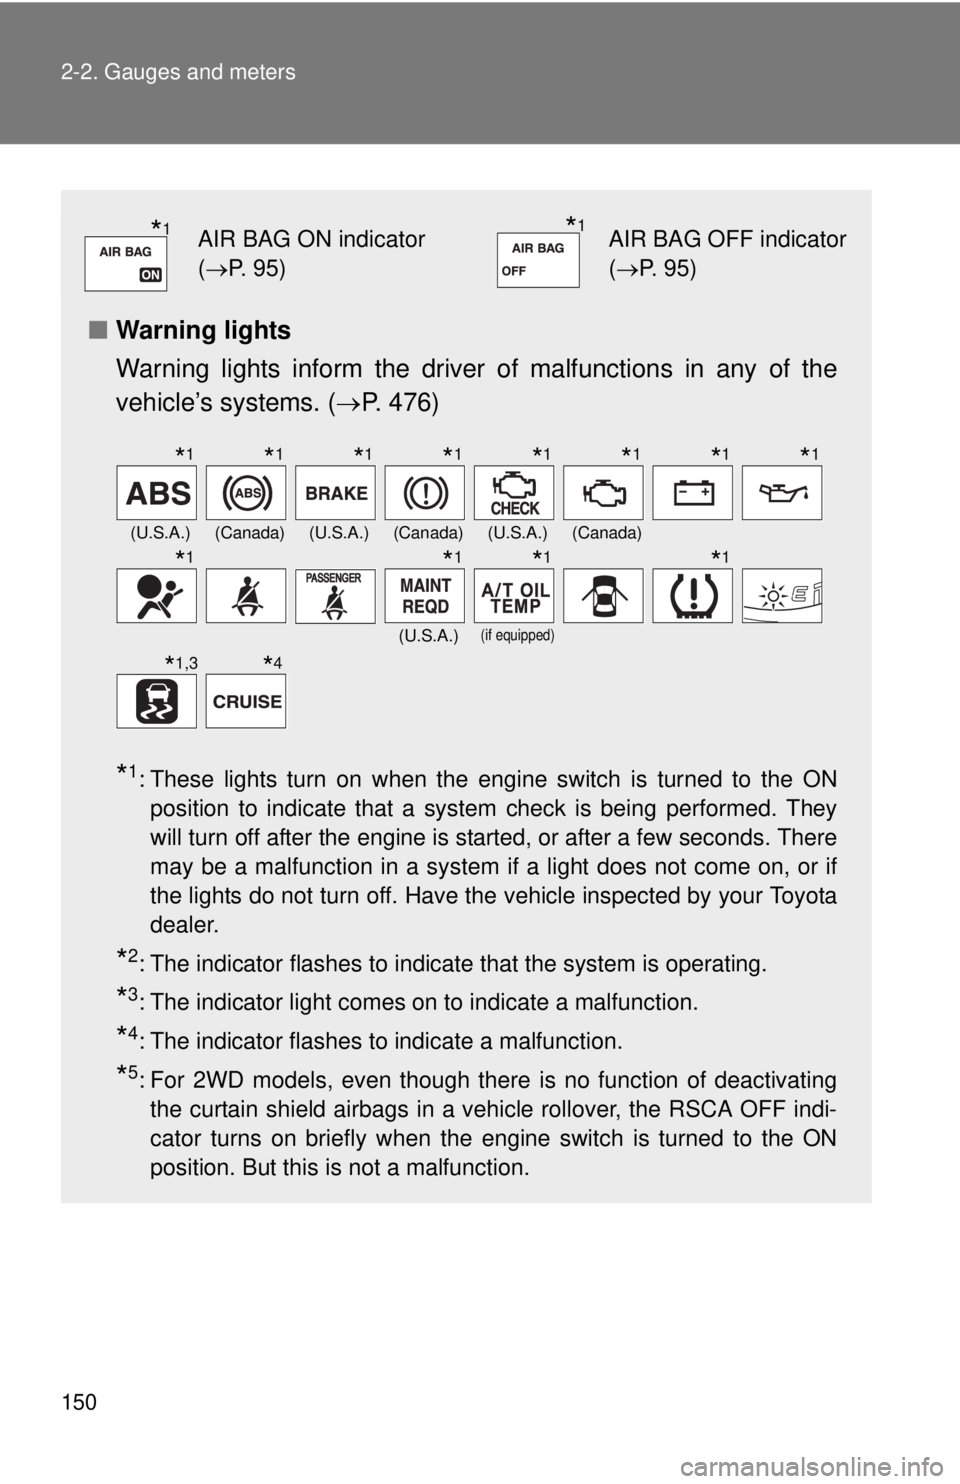
■Warning lights
Warning lights inform the driver of malfunctions in any of the
vehicle’s systems. ( P. 476)
*1: These lights turn on when the engine switch is turned to the ON
position to indicate that a system check is being performed. They
will turn off after the engine is started, or after a few seconds. There
may be a malfunction in a system if a light does not come on, or if
the lights do not turn off. Have the vehicle inspected by your Toyota
dealer.
*2: The indicator flashes to indicate that the system is operating.
*3: The indicator light comes on to indicate a malfunction.
*4: The indicator flashes to indicate a malfunction.
*5: For 2WD models, even though there is no function of deactivatingthe curtain shield airbags in a vehicle rollover, the RSCA OFF indi-
cator turns on briefly when the engine switch is turned to the ON
position. But this is not a malfunction.
*1AIR BAG ON indicator
(P. 95)*1AIR BAG OFF indicator
(P. 95)
(U.S.A.)(Canada)(U.S.A.)(Canada)(U.S.A.)(Canada)
(U.S.A.)
(if equipped)
*1*1*1*1*1*1*1*1
*1*1*1*1
*1,3*4
Page 152 of 590
152
2-3. Operating the lights and wipers
Headlight switch
The headlights can be operated manually.
Turning the end of the lever turns on the lights as follows:Ty p e A The daytime running
lights turn on.
The side marker,
parking, tail, license
plate, daytime run-
ning lights and instru-
ment panel lights turn
on.
The headlights and
all lights listed above
(except daytime run-
ning lights) turn on.
The daytime running
lights turn off.
U.S.A.
Page 153 of 590
153
2-3. Operating the lights and wipers
2
When driving
Turning on the high beam headlights
With the headlights on, push
the lever forward to turn on the
high beams.
Pull the lever back to the center
position to turn the high beams
off.
Pull the lever toward you to
turn on the high beams.
Release the lever to turn them off.
You can flash the high beams
with the headlights on or off.
Ty p e B The daytime running
lights turn on.
The side marker,
parking, tail, license
plate, daytime run-
ning lights and instru-
ment panel lights turn
on.
The headlights and
all lights listed above
(except daytime run-
ning lights) turn on.
Canada
Page 154 of 590
154 2-3. Operating the lights and wipers
■Daytime running light system
●To make your vehicle more visible to other drivers, the front turn signal
lights turn on automatically whenever the engine is started and the park-
ing brake is released. Daytime running lights are not designed for use at
night.
Type A: Daytime running lights can be turned off by operating the switch.
● Compared to turning on the headlights, the daytime running light system
offers greater durability and consumes less electricity, so it can help
improve fuel economy.
■ Automatic light off system
Opening the driver’s door with the engine switch in the ACC or LOCK posi-
tion will turn the headlights and tail lights off.
To turn the lights on again, turn the engine switch to the ON position, or turn
the headlight switch off once and then back to the or position.
NOTICE
■To prevent battery discharge
Do not leave the lights on longer than necessary when the engine is not run-
ning.